Actions and Resources
This tutorial will teach you how to use actions and manage your resources in System Initiative.
To follow along, you should:
Finish the Getting Started tutorial, to have basic knowledge of System Initiative.
An AWS account that allows you to create free-tier resources, such as EC2 instances.
You should have your System Initiative workspace open in another window.
Create a Change Set
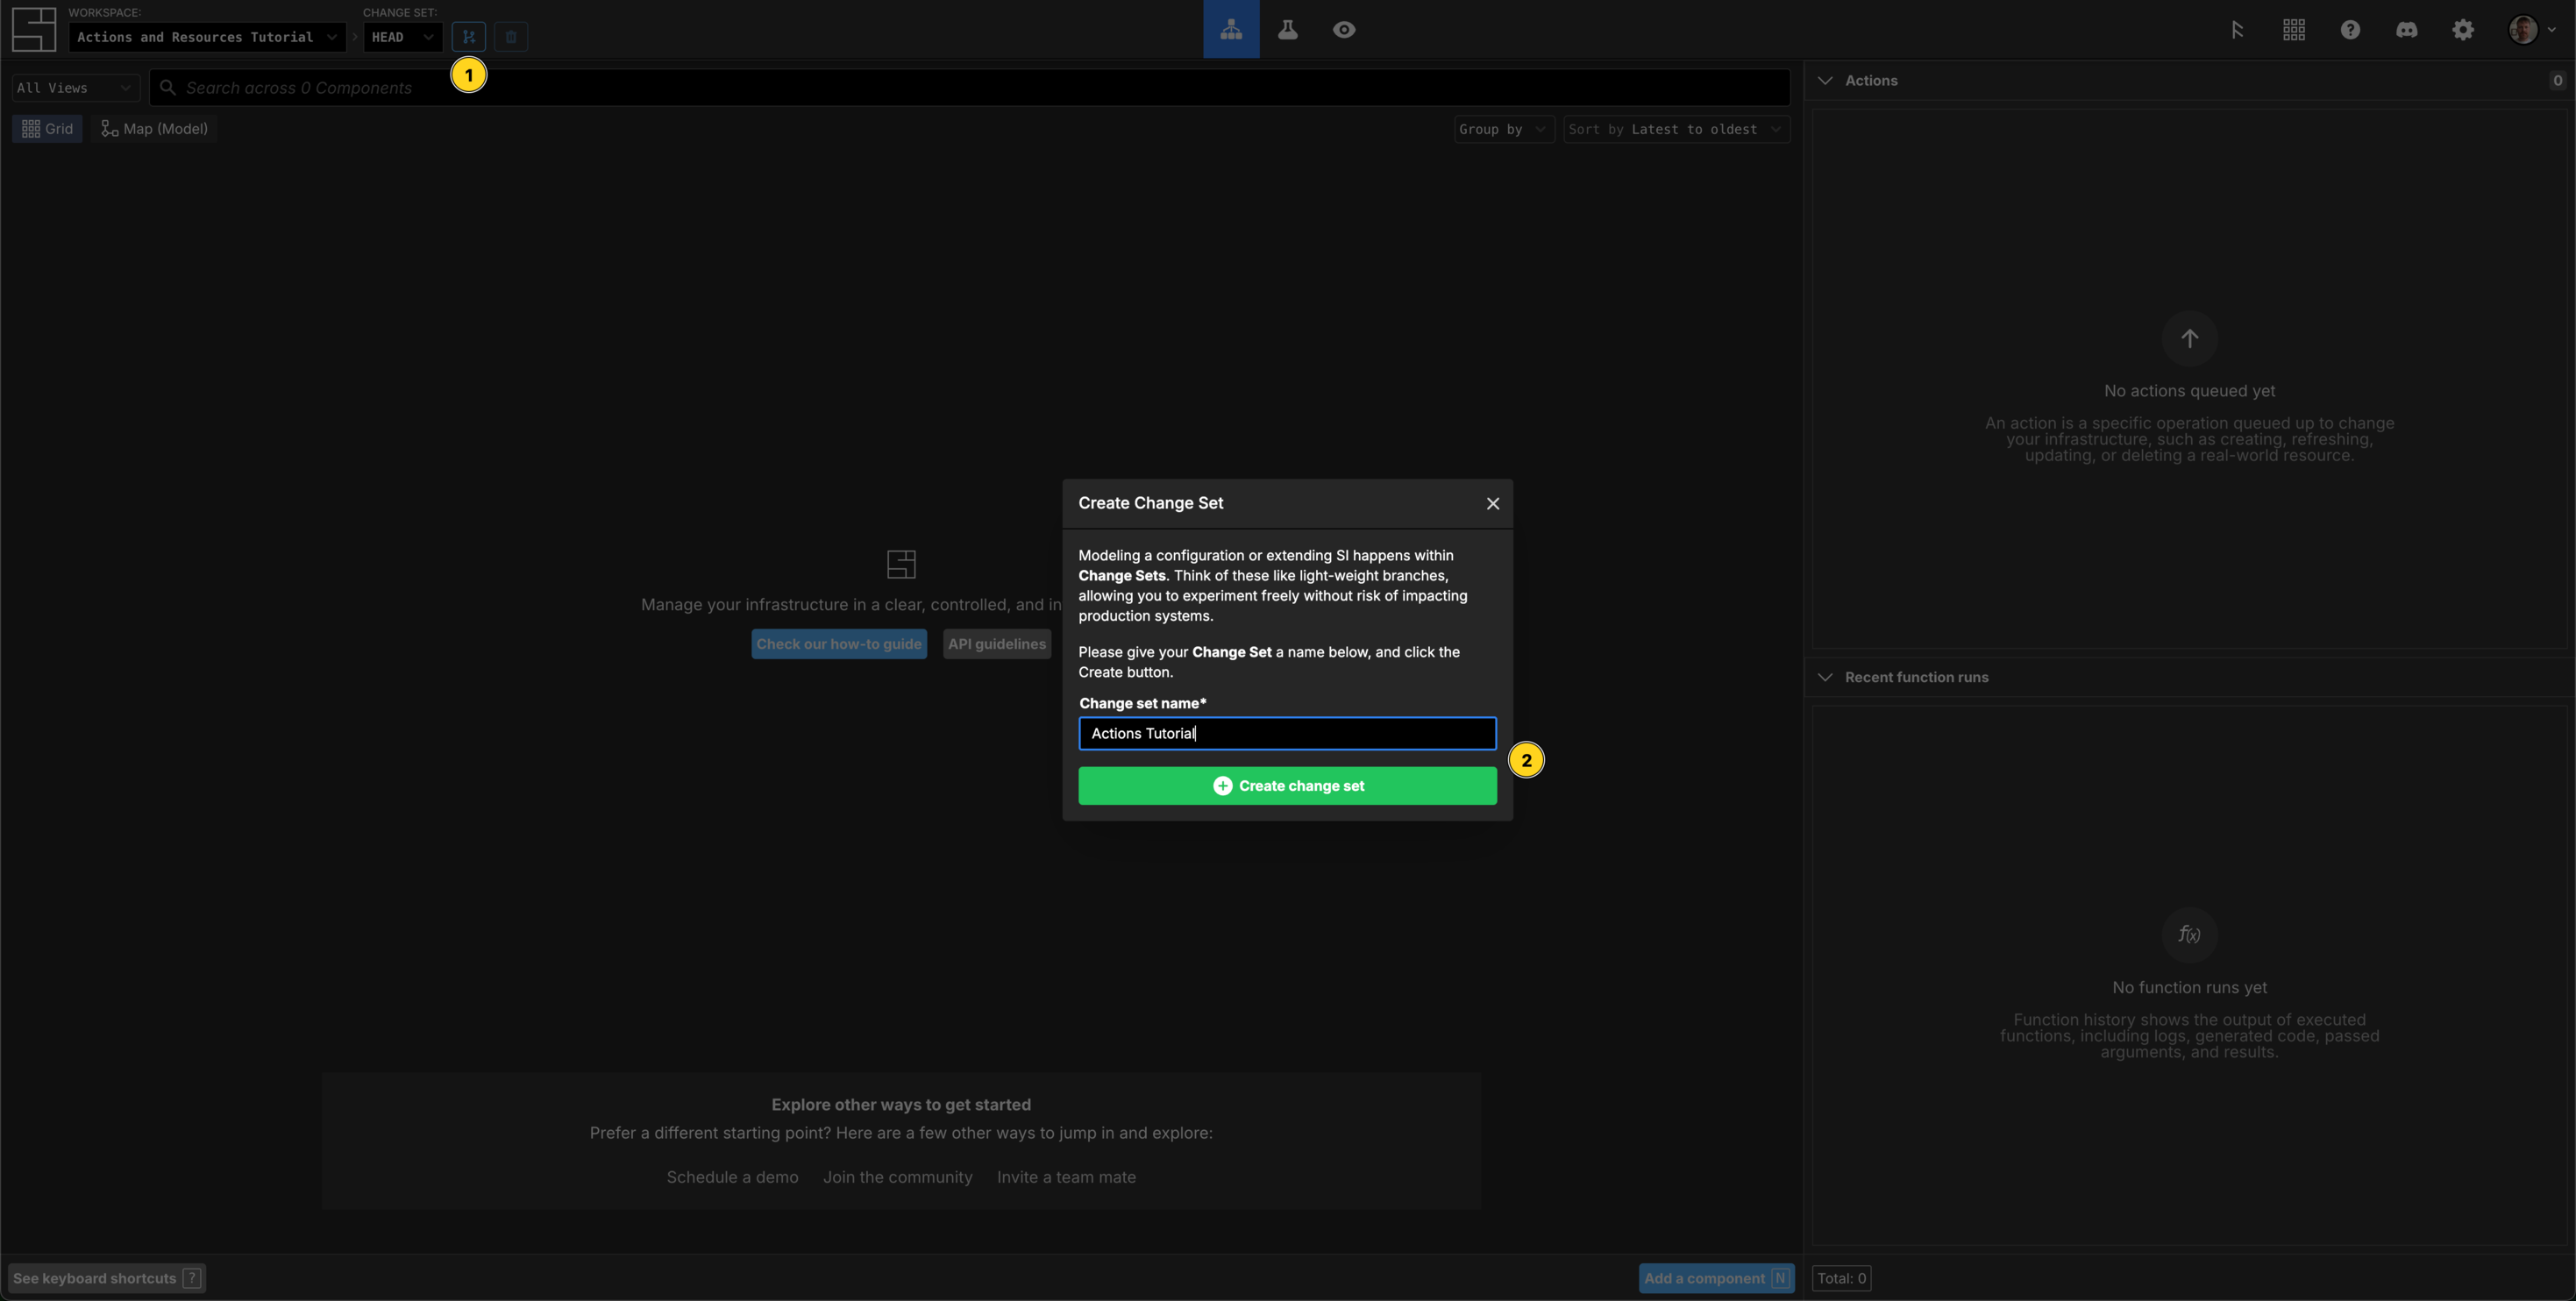
Click the create Change Set button.
Name your new Change Set Actions Tutorial, and click the Create Change Set button.
Add an AWS Credential Component and set its properties

If you have completed the Getting Started tutorial, you may have an AWS Credential already present that you can use. If so, move on to the next section.
Press N or Click the Add a component button, then in the search bar type AWS Credential, select the Component and press Enter.
Name your Component Actions, then Name your Secret something relevant, for example the AWS Account name apps-dev.
Fill in your AWS accounts Access Key Id and Secret Access Key. Refer to the AWS documentation if you do not know what they are.
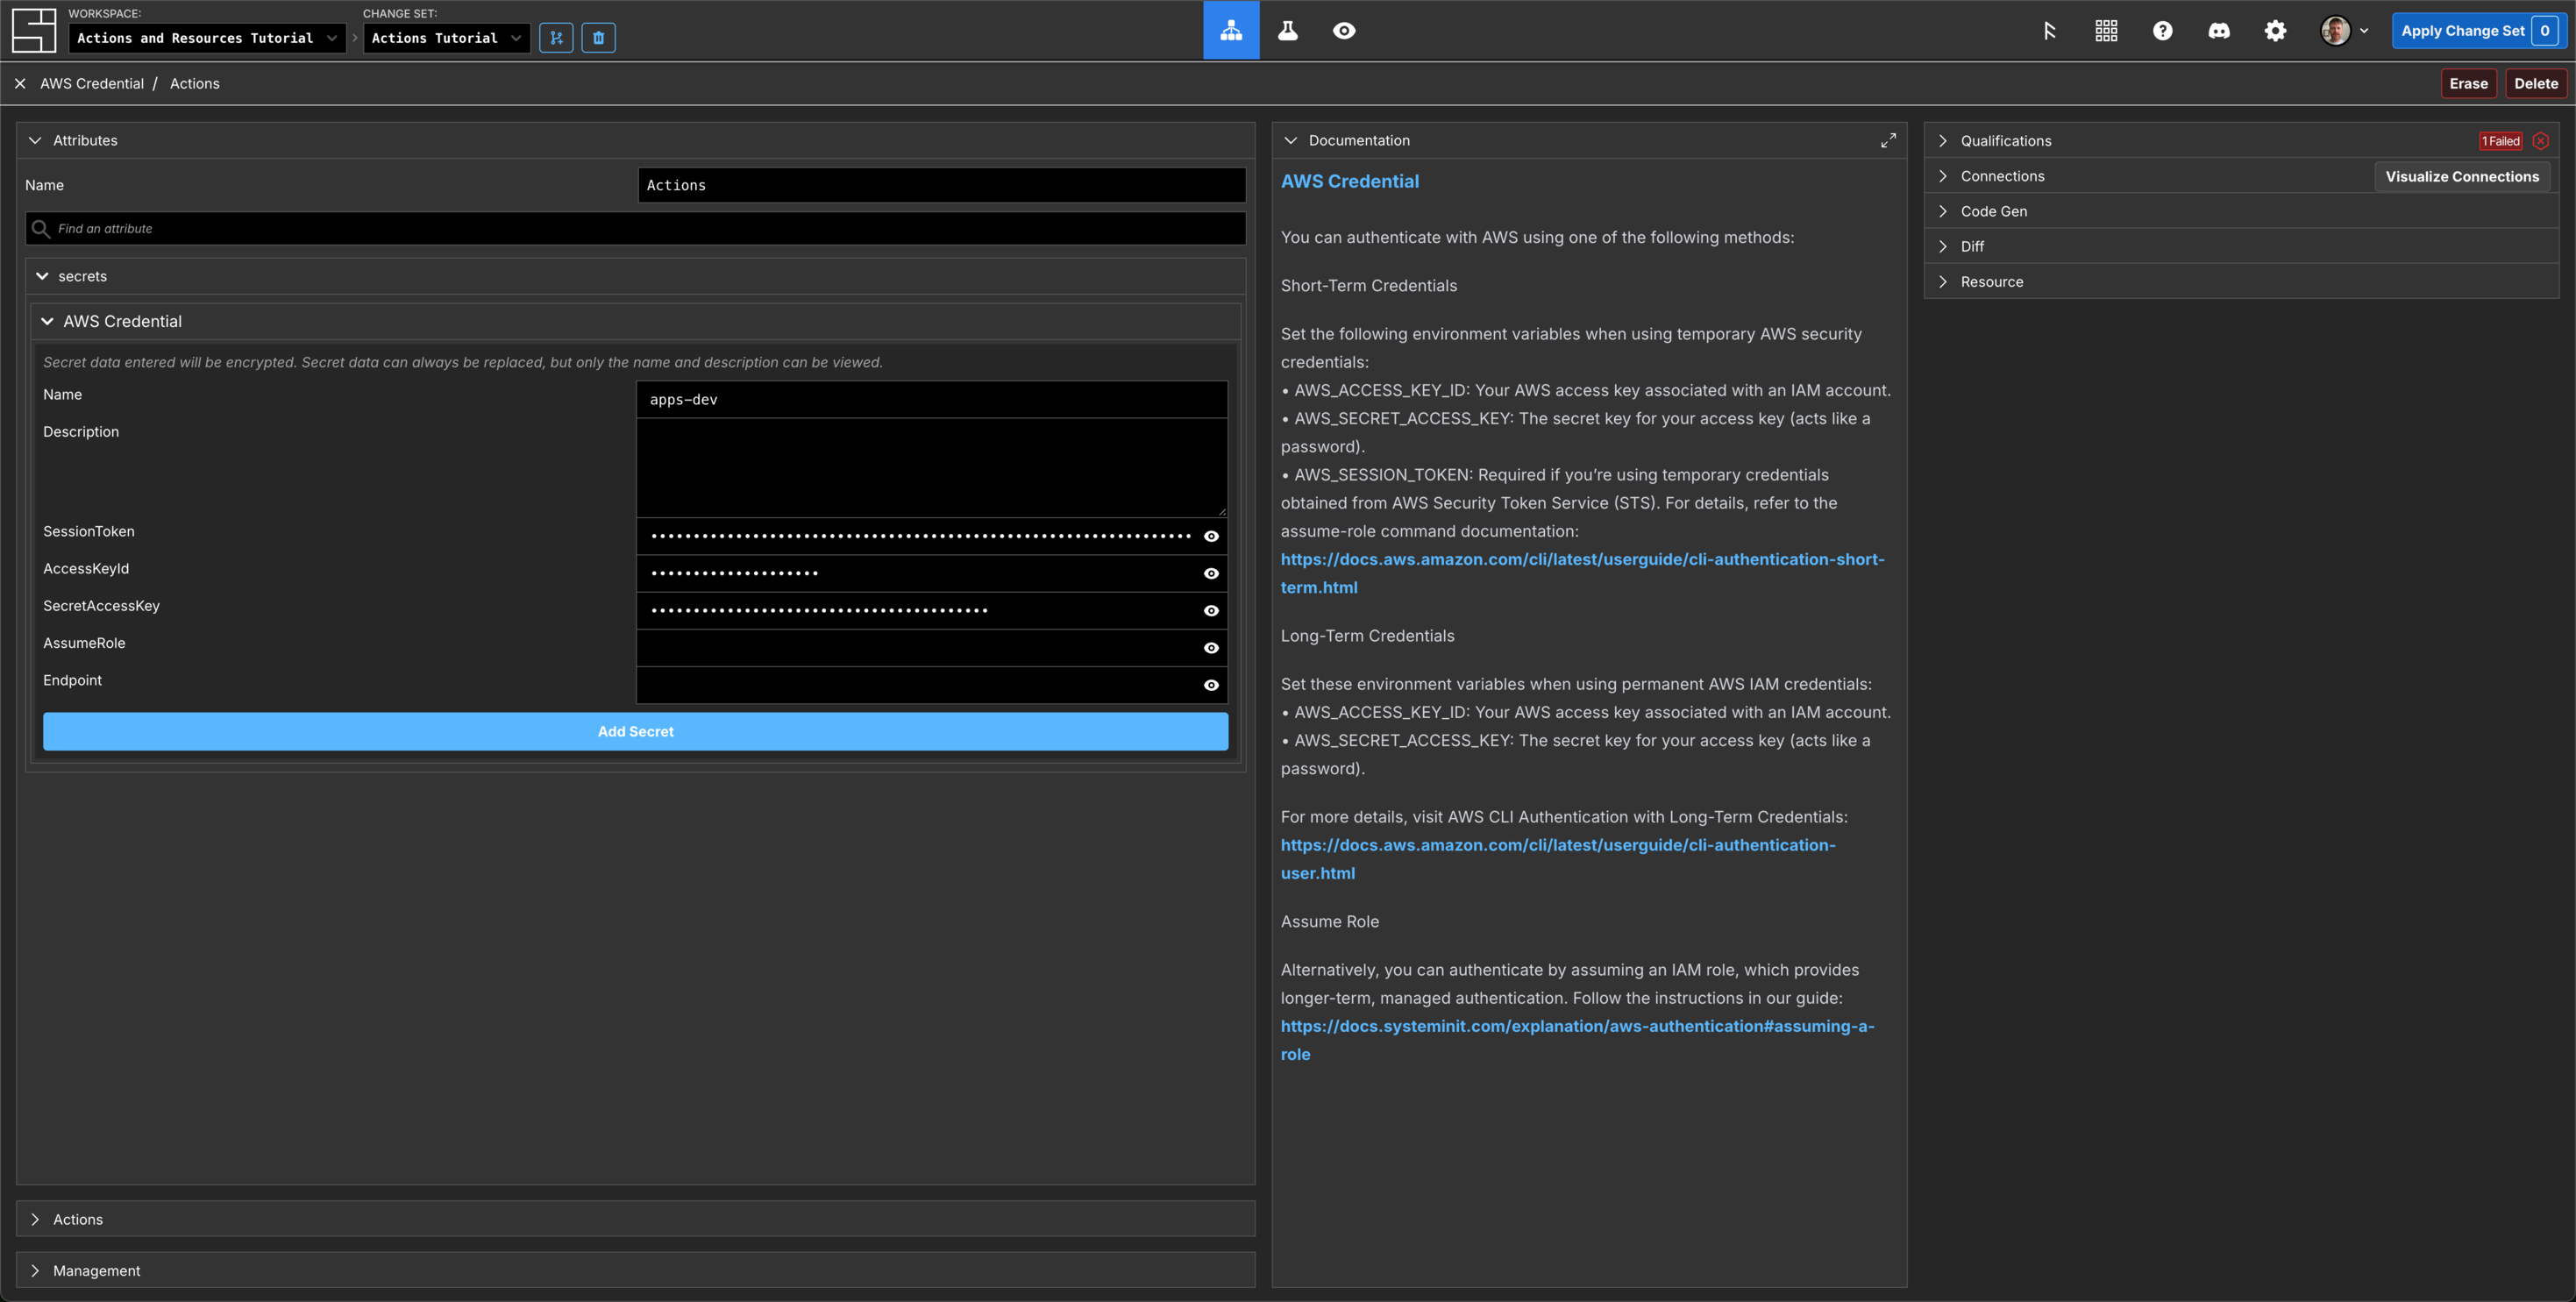
Click Add Secret to securely encrypt and save your Credentials. Press Esc to return to the Grid.
Add an AWS Region Component and set its properties
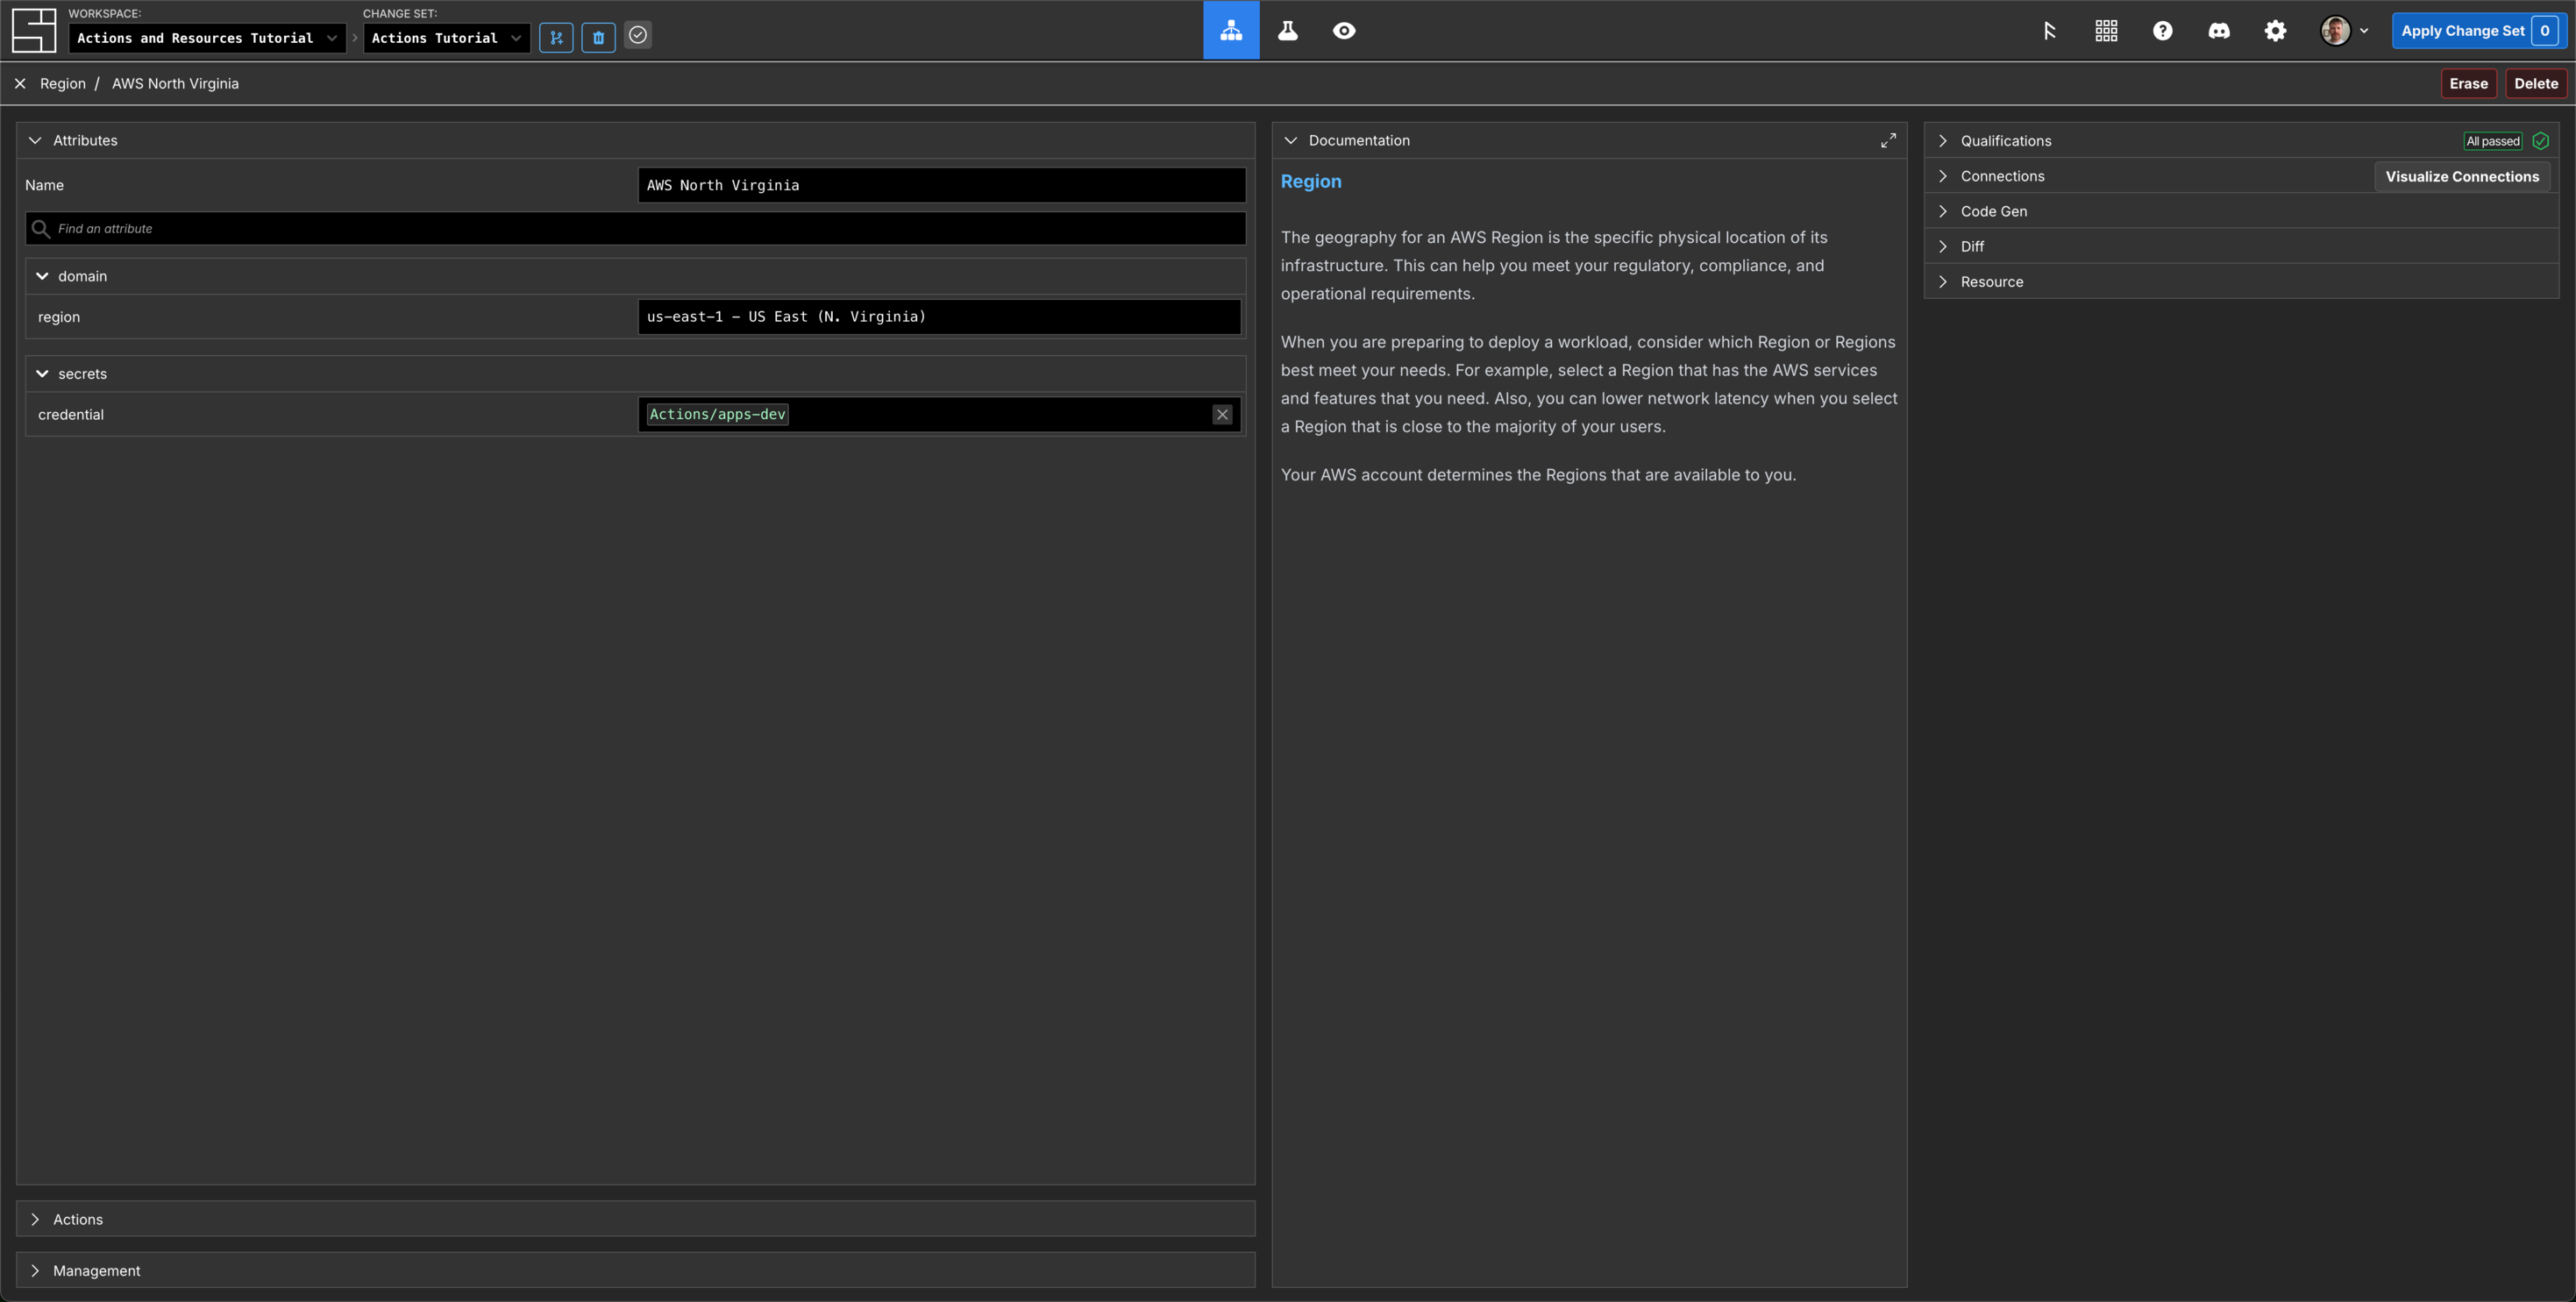
Click Add a component (or press N), then search for Region in the AWS category, select this and then press Enter.
Name your region AWS North Virginia.
Set the region property to us-east-1.
Click the credential property field and select AWS Credential apps-dev. Press Esc to return to the Grid.
Add a VPC Component and set its properties
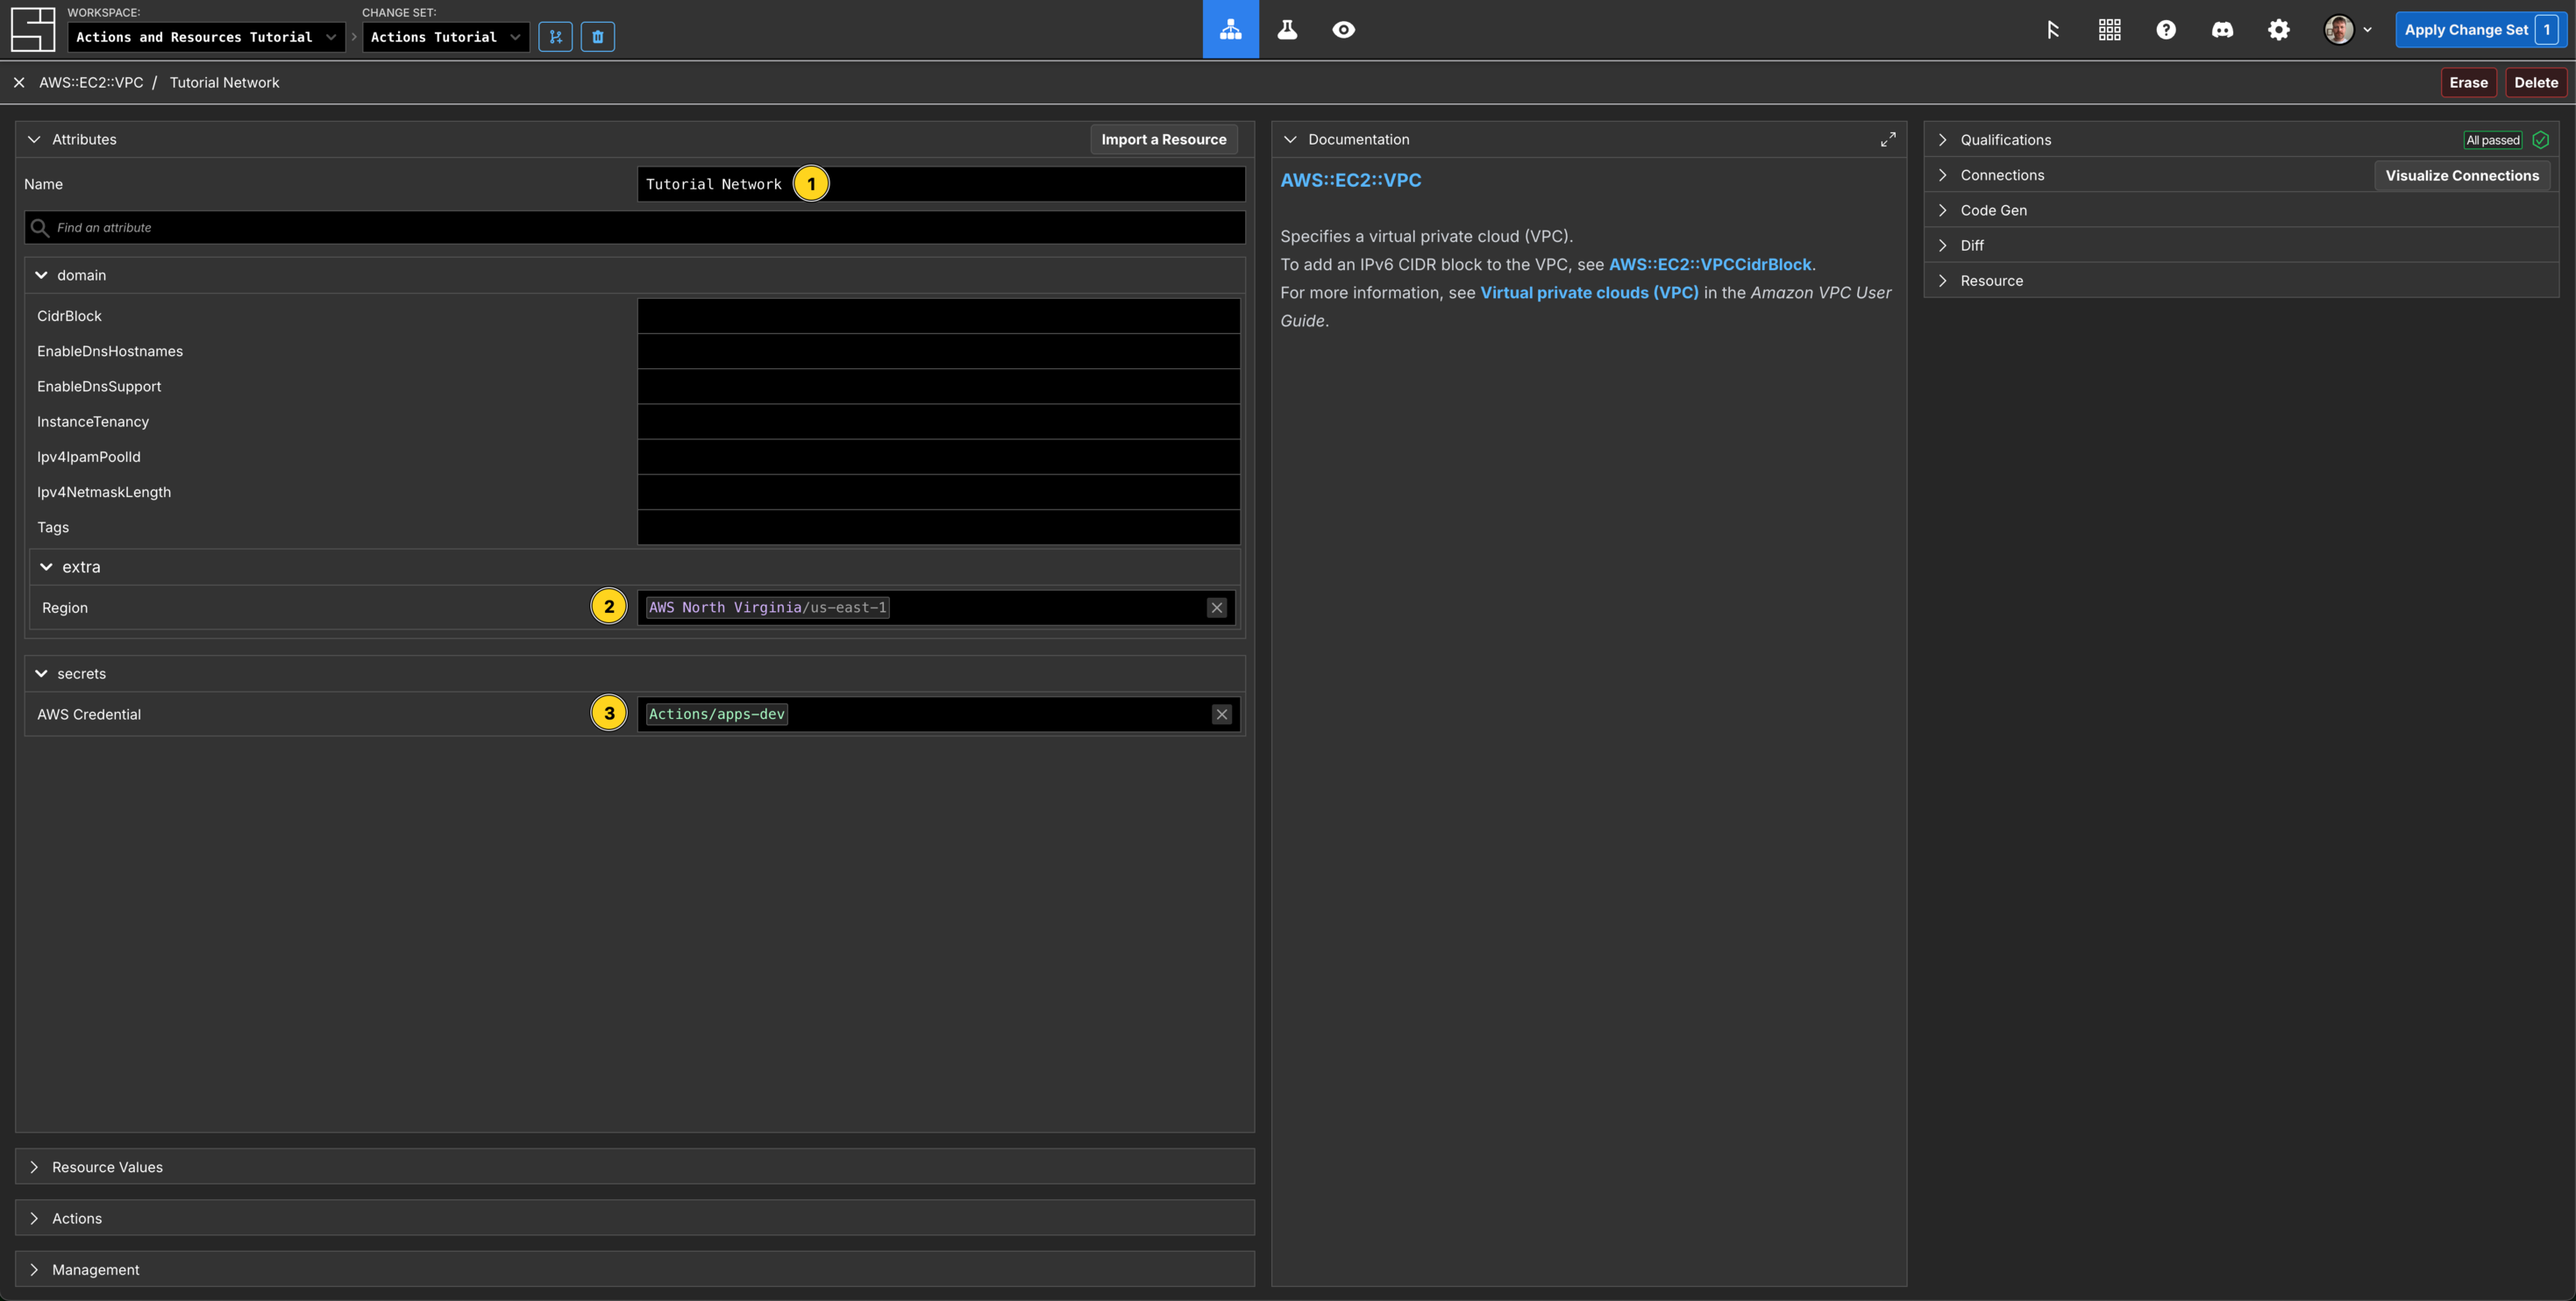
Click Add a component (or press N), then search for AWS::EC2::VPC in the AWS category, select this and then press Enter.
Name your VPC Tutorial Network.
Set your created region and AWS Credential properties.
Investigate the Actions tab for the VPC
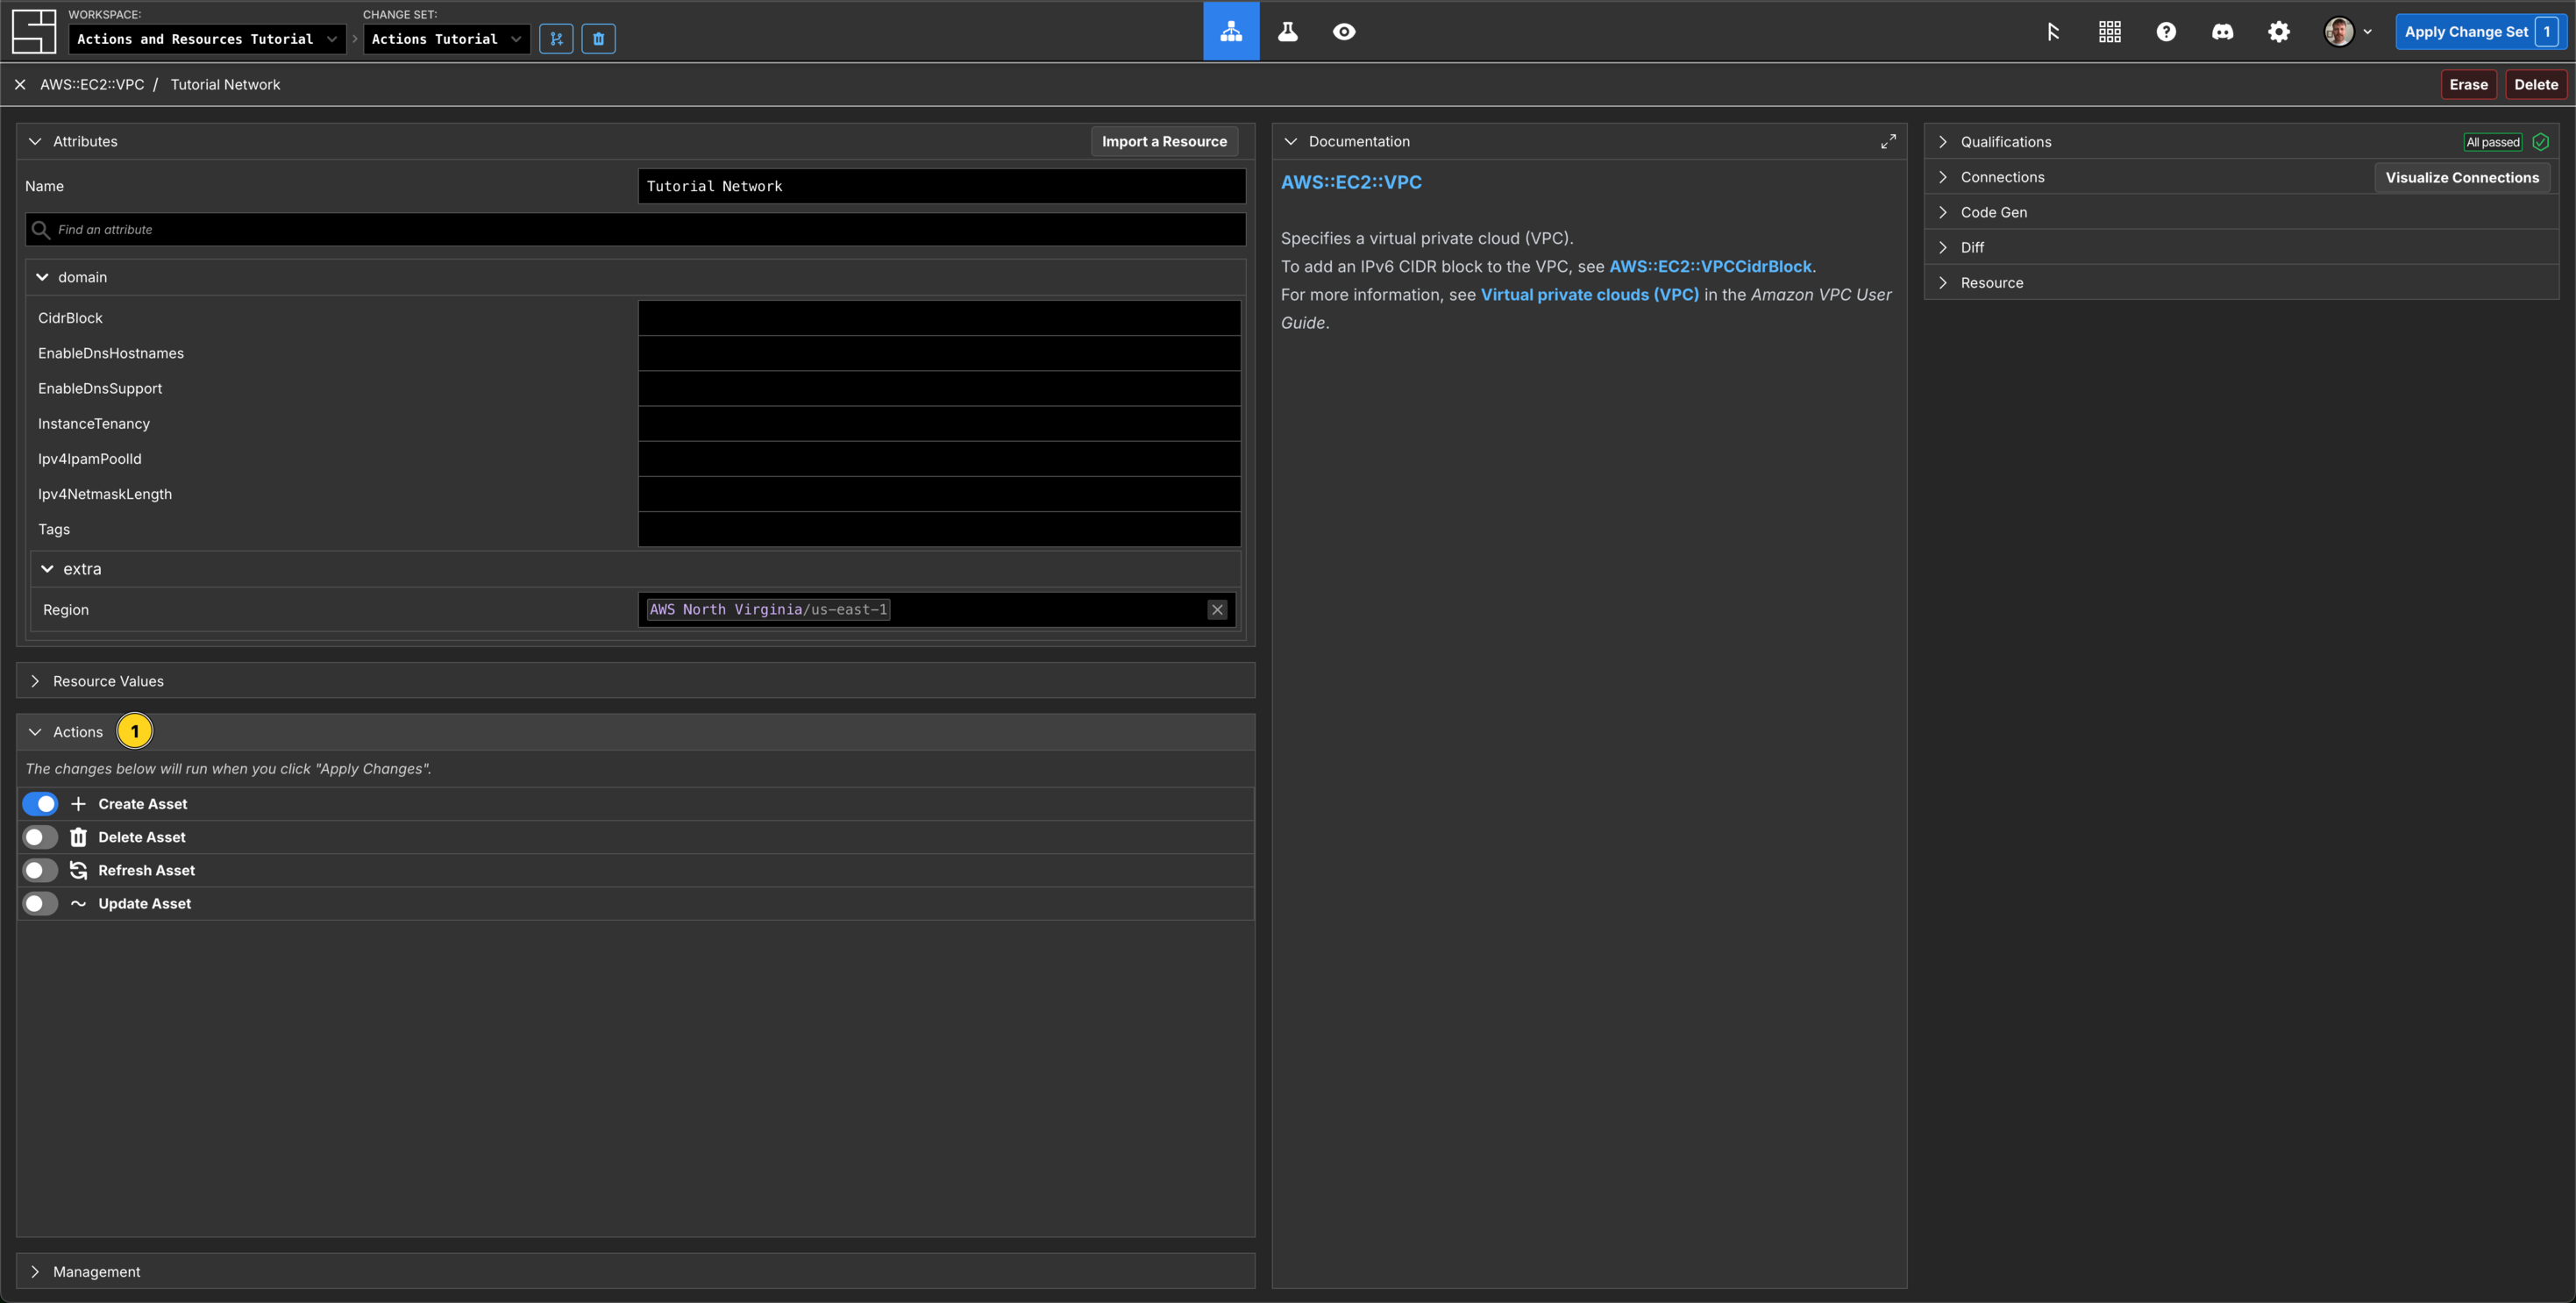
Click the Actions tab on the left hand side underneath the Attributes panel. You will see a list of all the available Actions for the VPC.
The Tutorial Network Component was created in this Change Set - so System Initiative has automatically enqueued the Create VPC action for you.
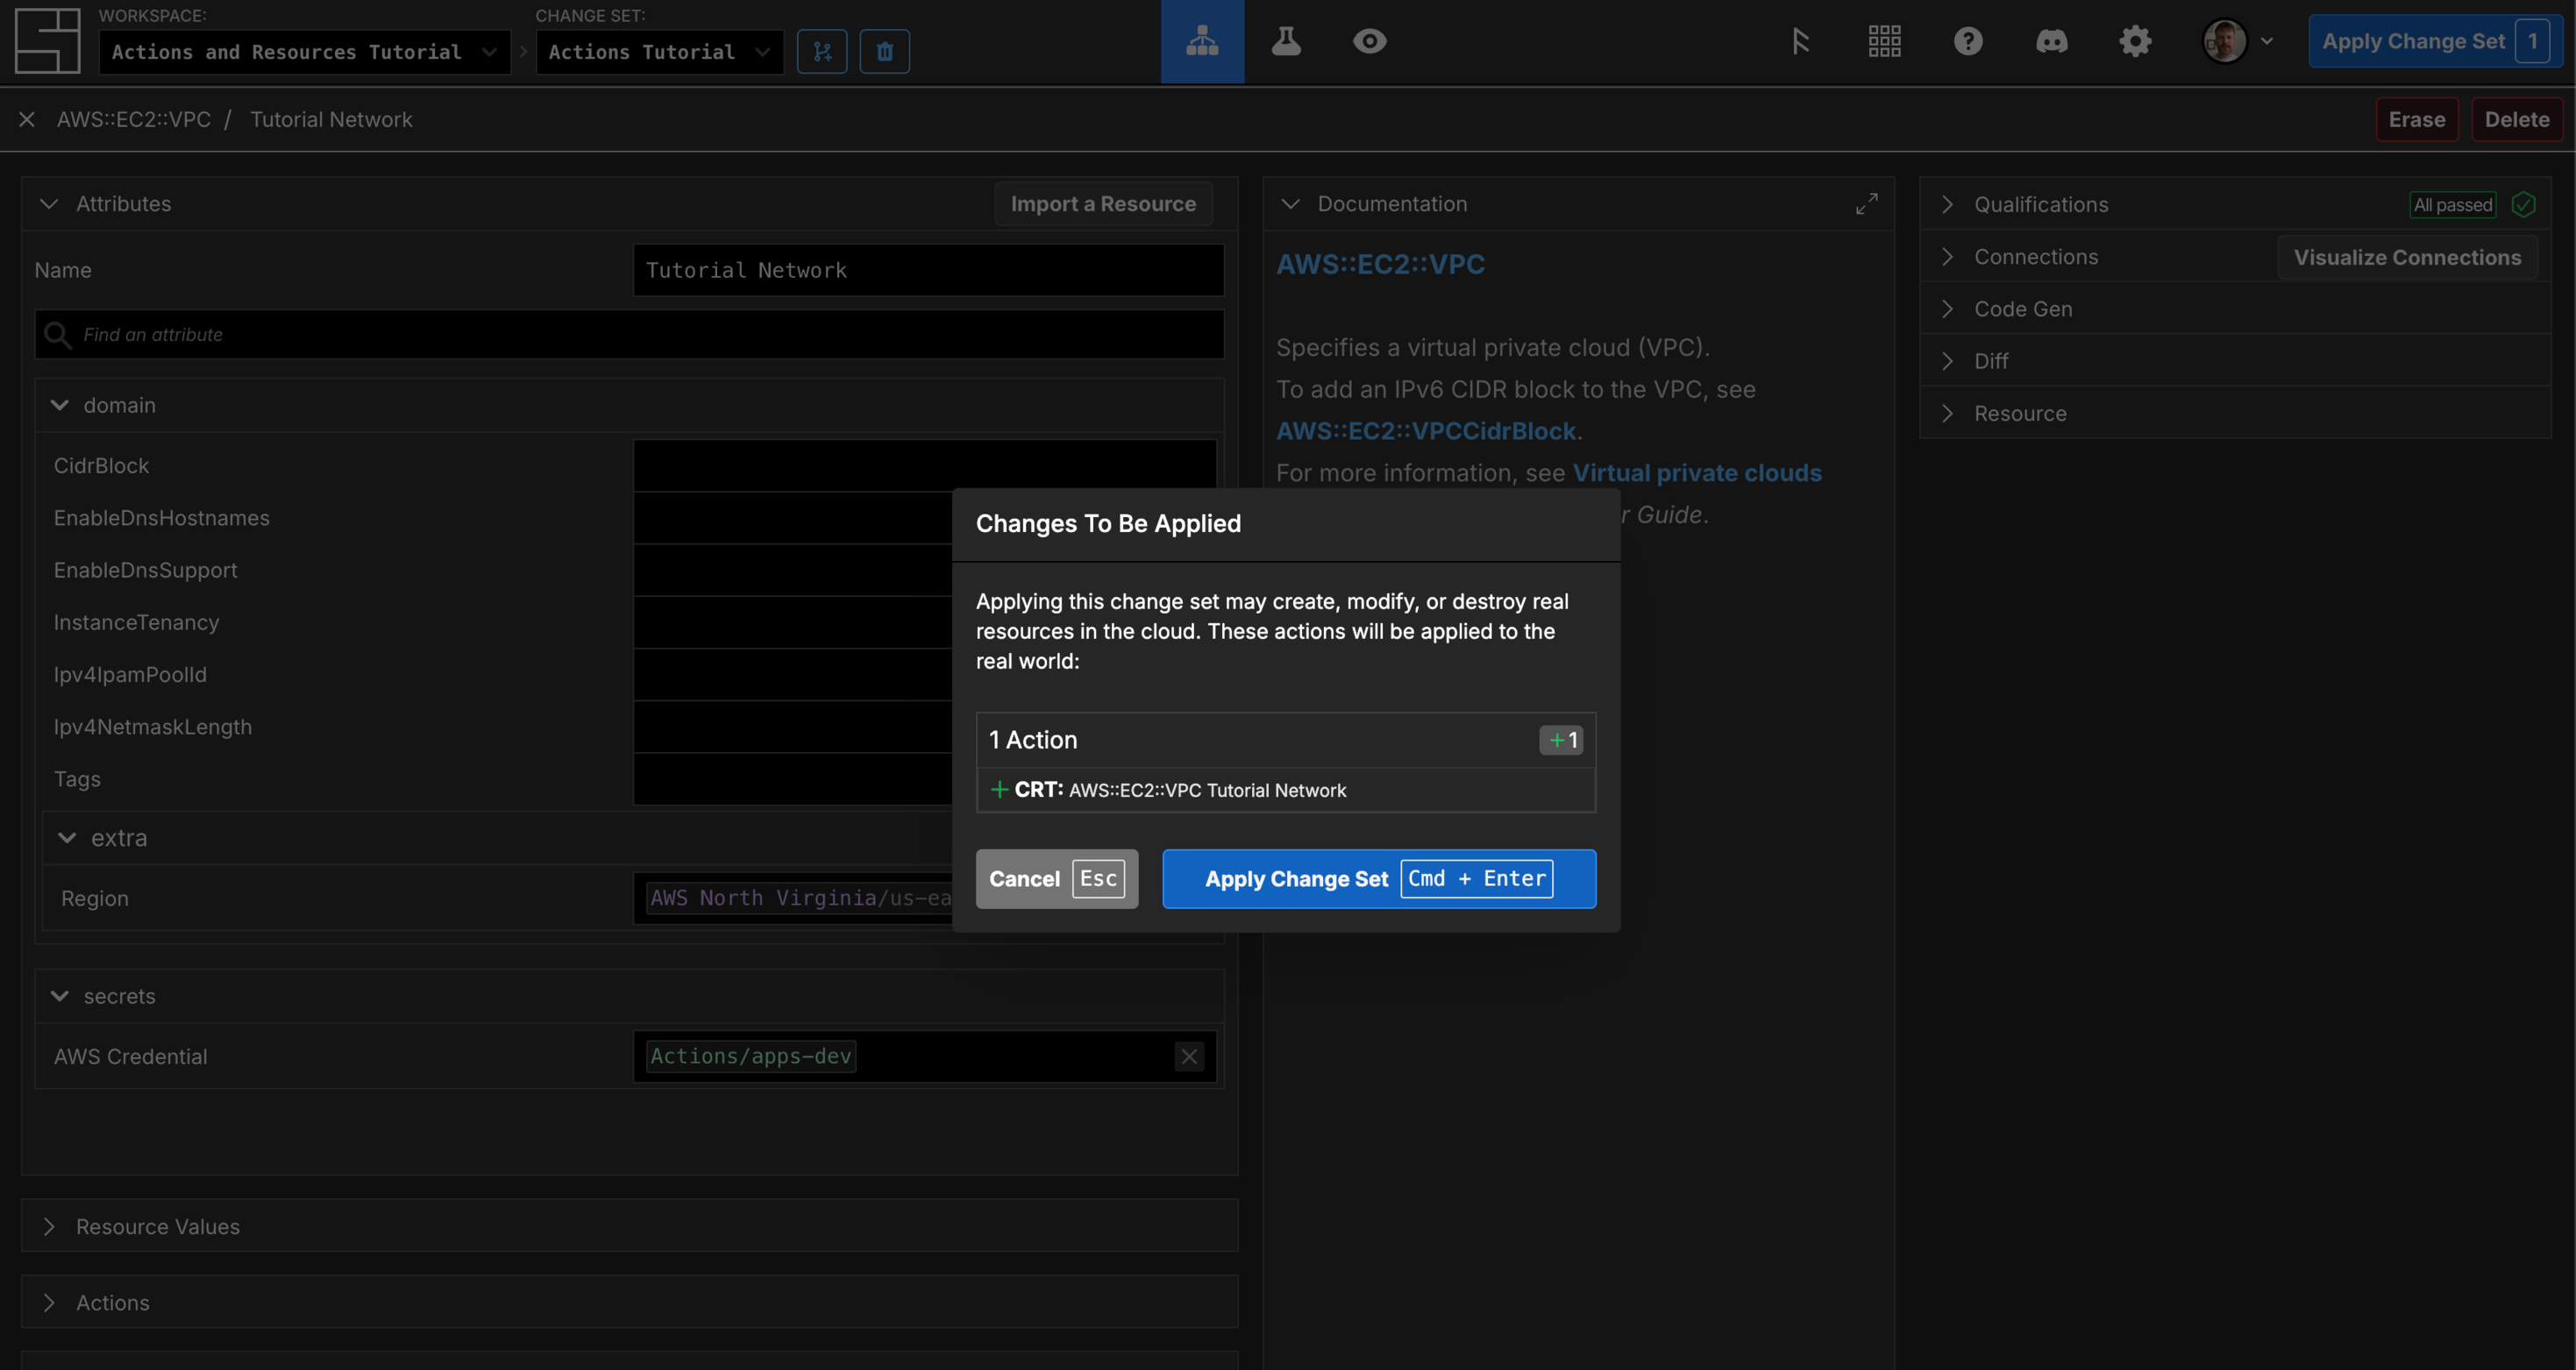
Apply the Change Set
Press the Esc key or click on Close in the top left of the Component.

Notice on the right side in the Actions panel that there is a create action for the Tutorial Network VPC. All of the Actions enqueued for a Change Set will be shown here.
Click Apply Change Set.
A modal will appear confirming you want to take these Actions. Click the Apply Changes button to proceed.
Observe the failed creation of the VPC
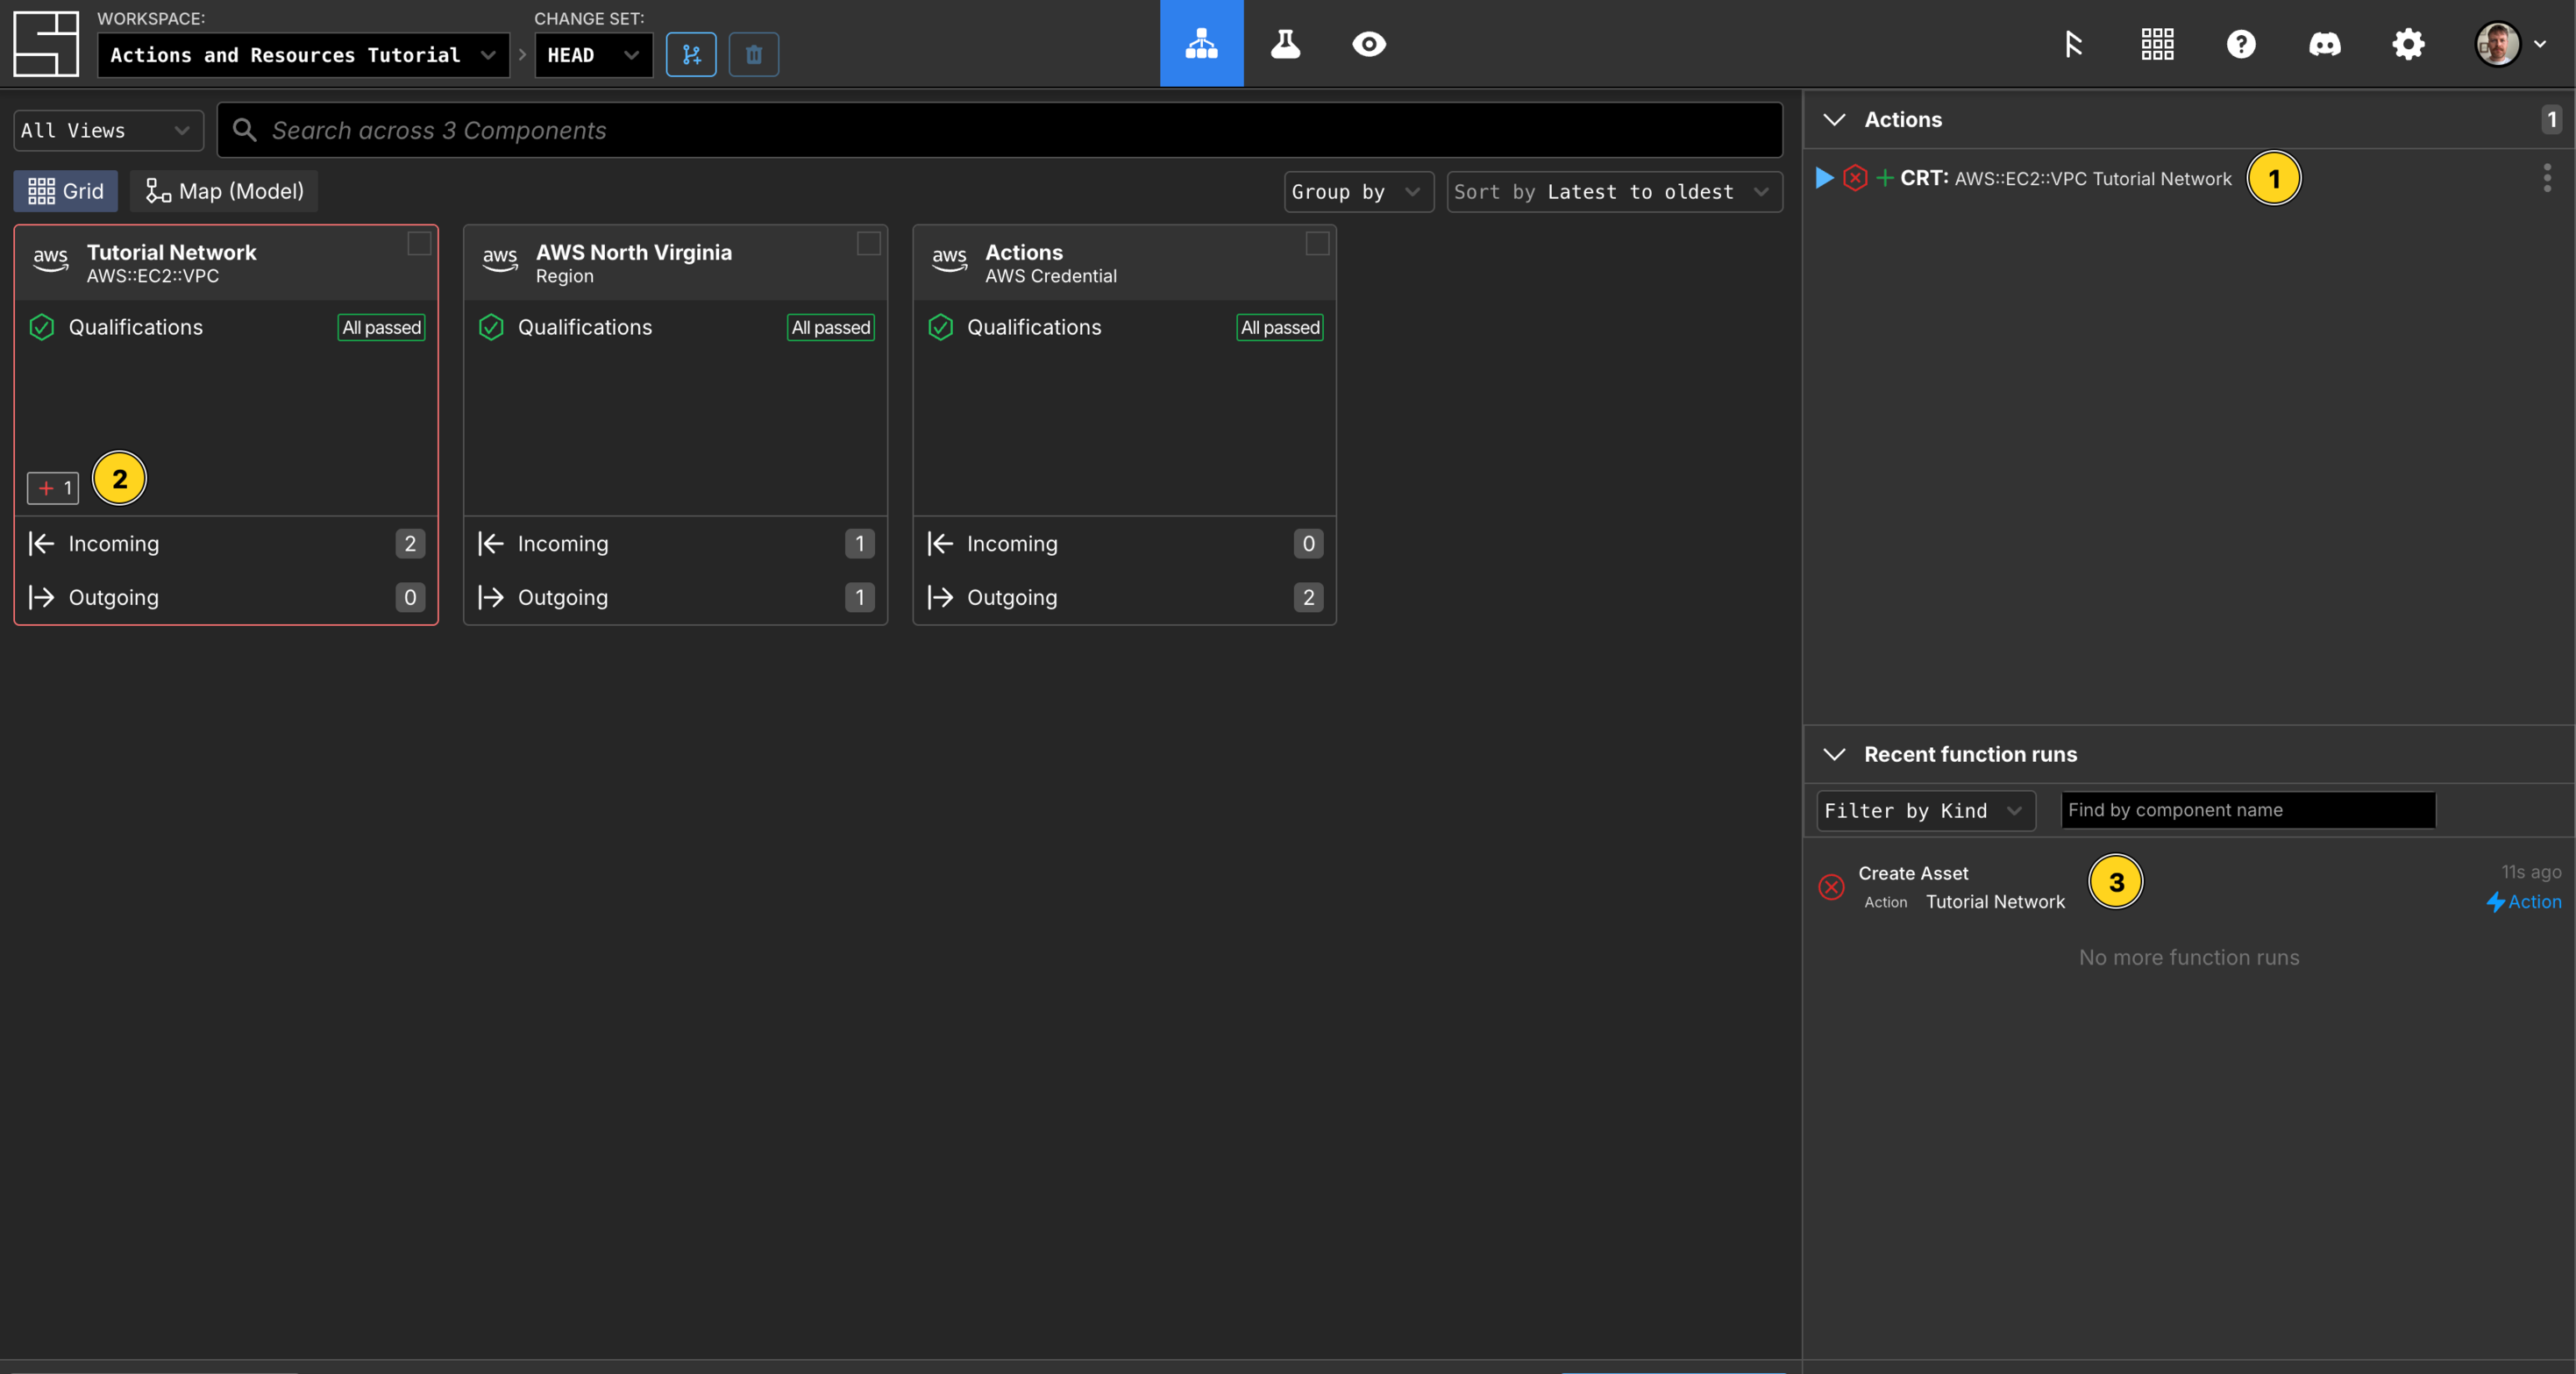
The AWS::EC2::VPC Component on the grid will be outlined in red to depict the failure of the Create Action. The Actions panel will show that there is 1 Action, CRT: AWS::EC2::VPC Tutorial Network currently waiting to run, the red hexagon shows you that it has failed. There is also an entry in Recent Function Runs that shows you that the Create function failed to run.
In the Actions panel, Click on the failed action to view the logs.
The logs show:
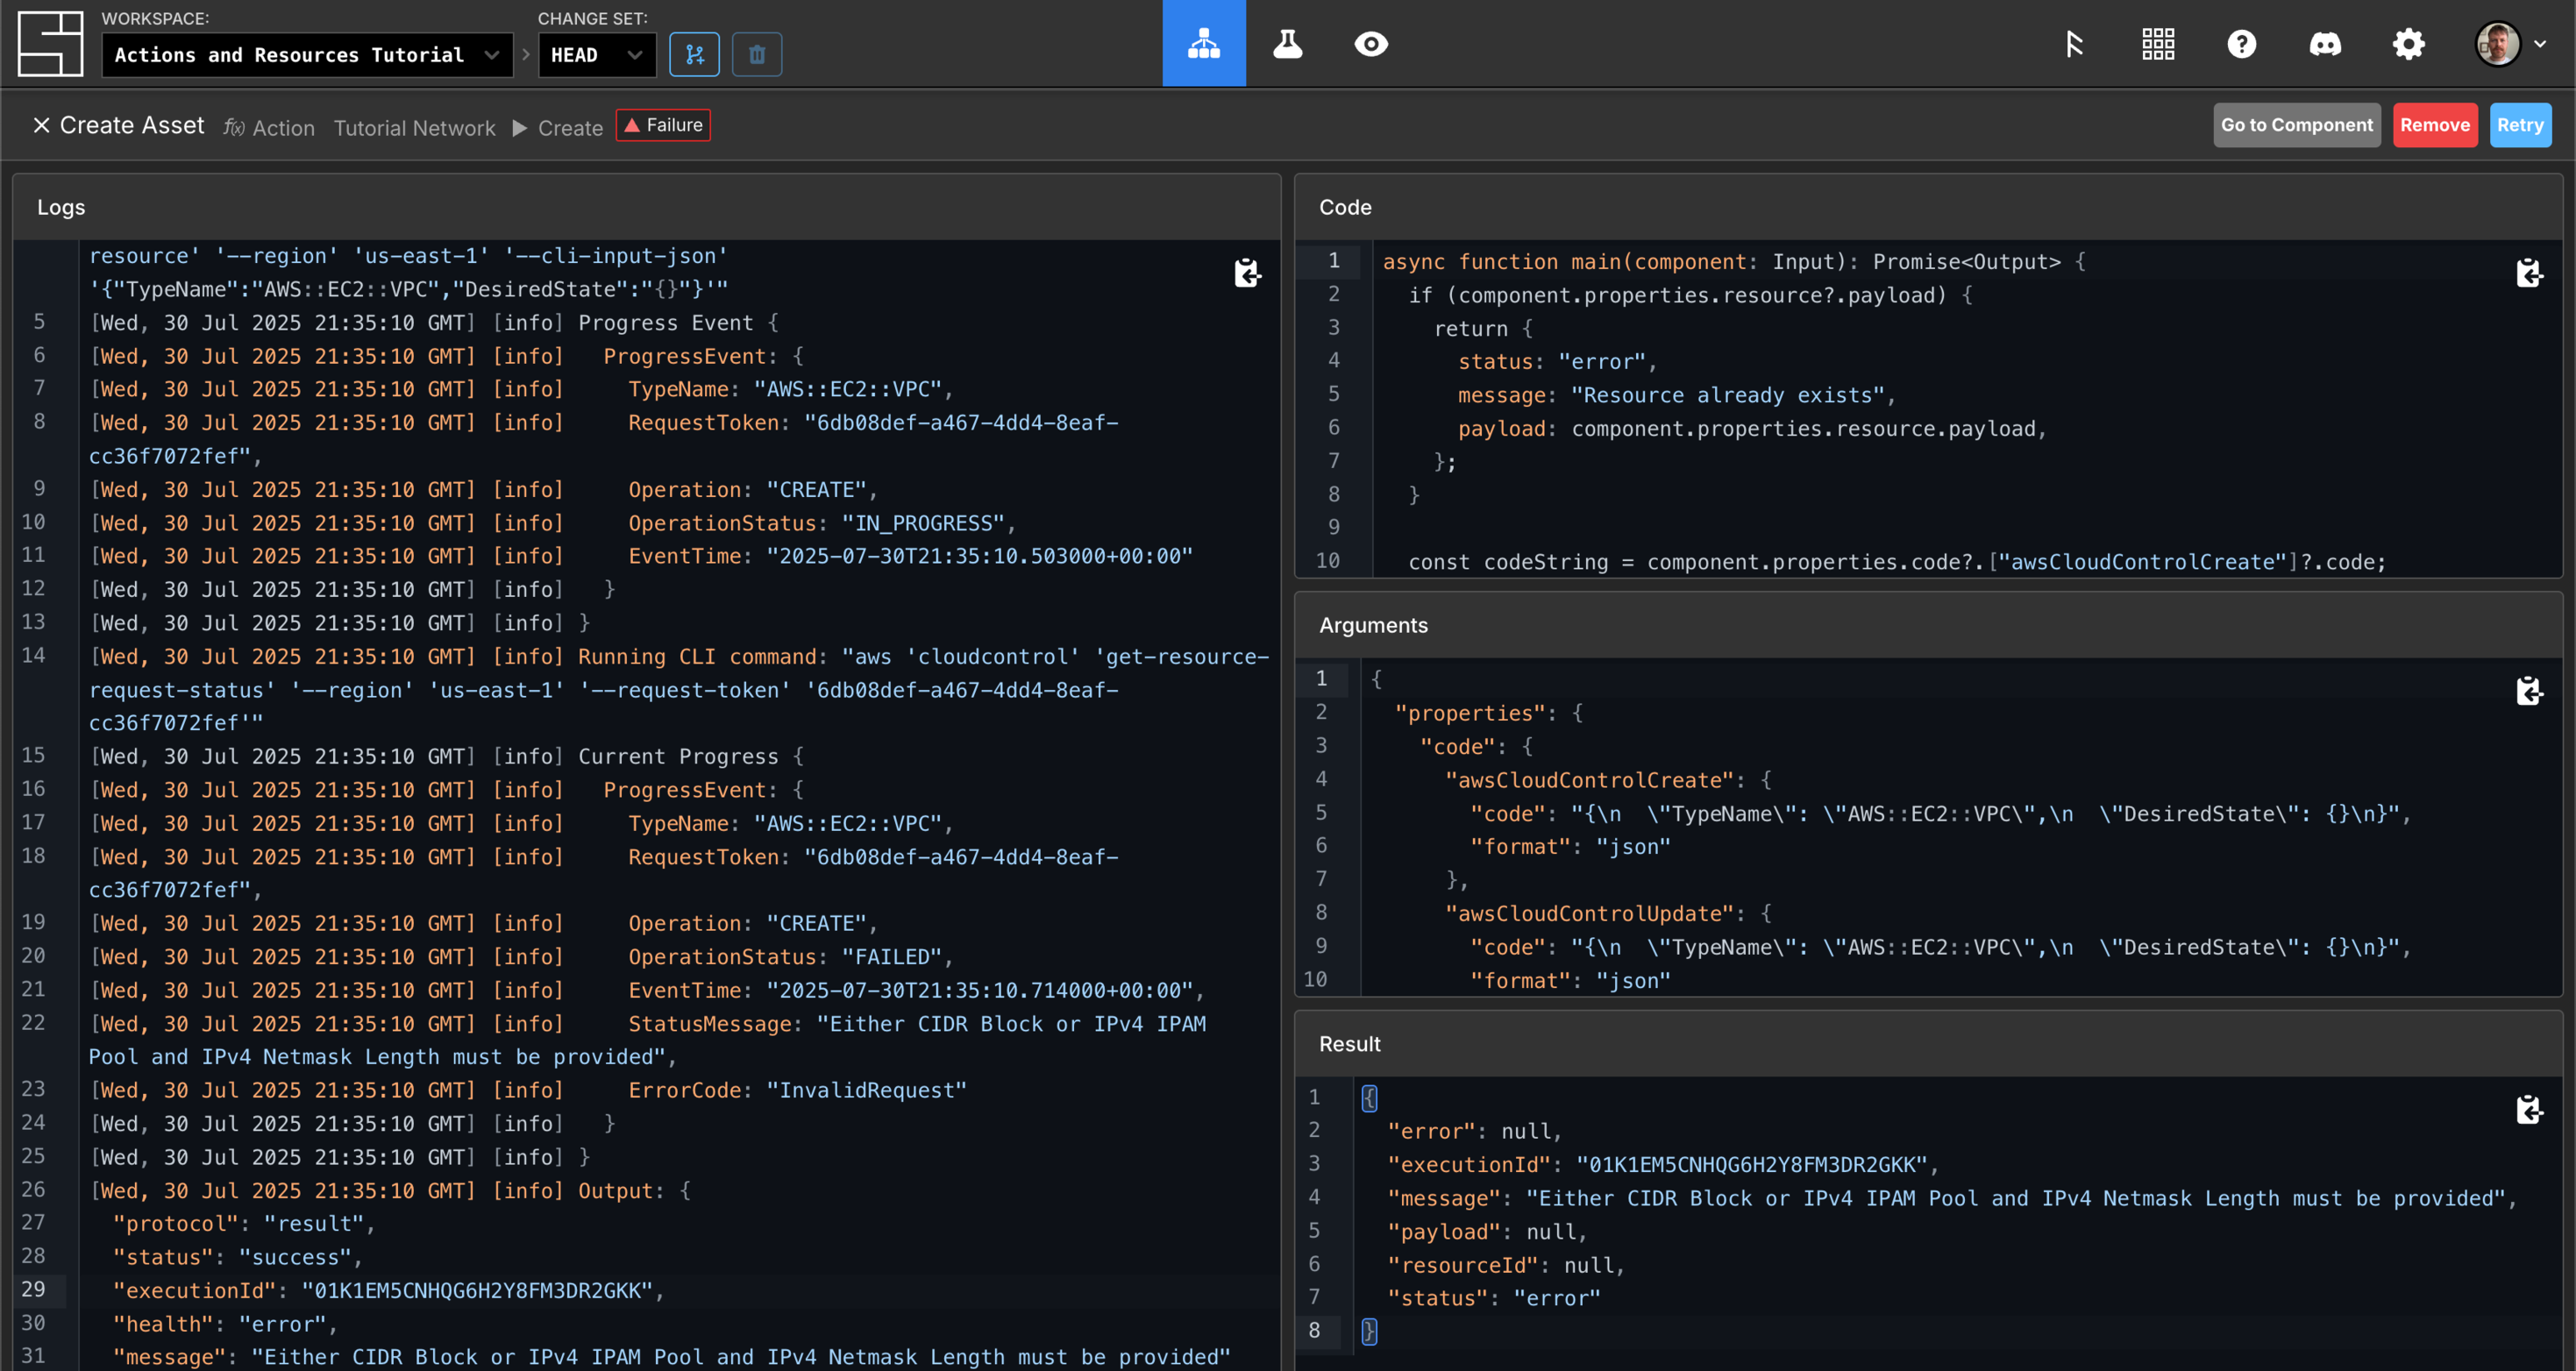
The information we need specifically here is:
Running CLI command: "aws 'cloudcontrol' 'get-resource-request-status' '--region' 'us-east-1' '--request-token' '6db08def-a467-4dd4-8eaf-cc36f7072fef'"
Current Progress {
    ProgressEvent: {
        TypeName: "AWS::EC2::VPC",
        RequestToken: "6db08def-a467-4dd4-8eaf-cc36f7072fef",
        Operation: "CREATE",
        OperationStatus: "FAILED",
        EventTime: "2025-07-30T21:35:10.714000+00:00",
        StatusMessage: "Either CIDR Block or IPv4 IPAM Pool and IPv4 Netmask Length must be provided",
        ErrorCode: "InvalidRequest"
    }
}
Output: {
  "protocol": "result",
  "status": "success",
  "executionId": "01K1EM5CNHQG6H2Y8FM3DR2GKK",
  "health": "error",
  "message": "Either CIDR Block or IPv4 IPAM Pool and IPv4 Netmask Length must be provided"
}
We can see that the cause of the failure is that AWS has rejected your request to create the VPC, due to missing a cidrBlock or ipv4IpamPoolId.
Check the arguments
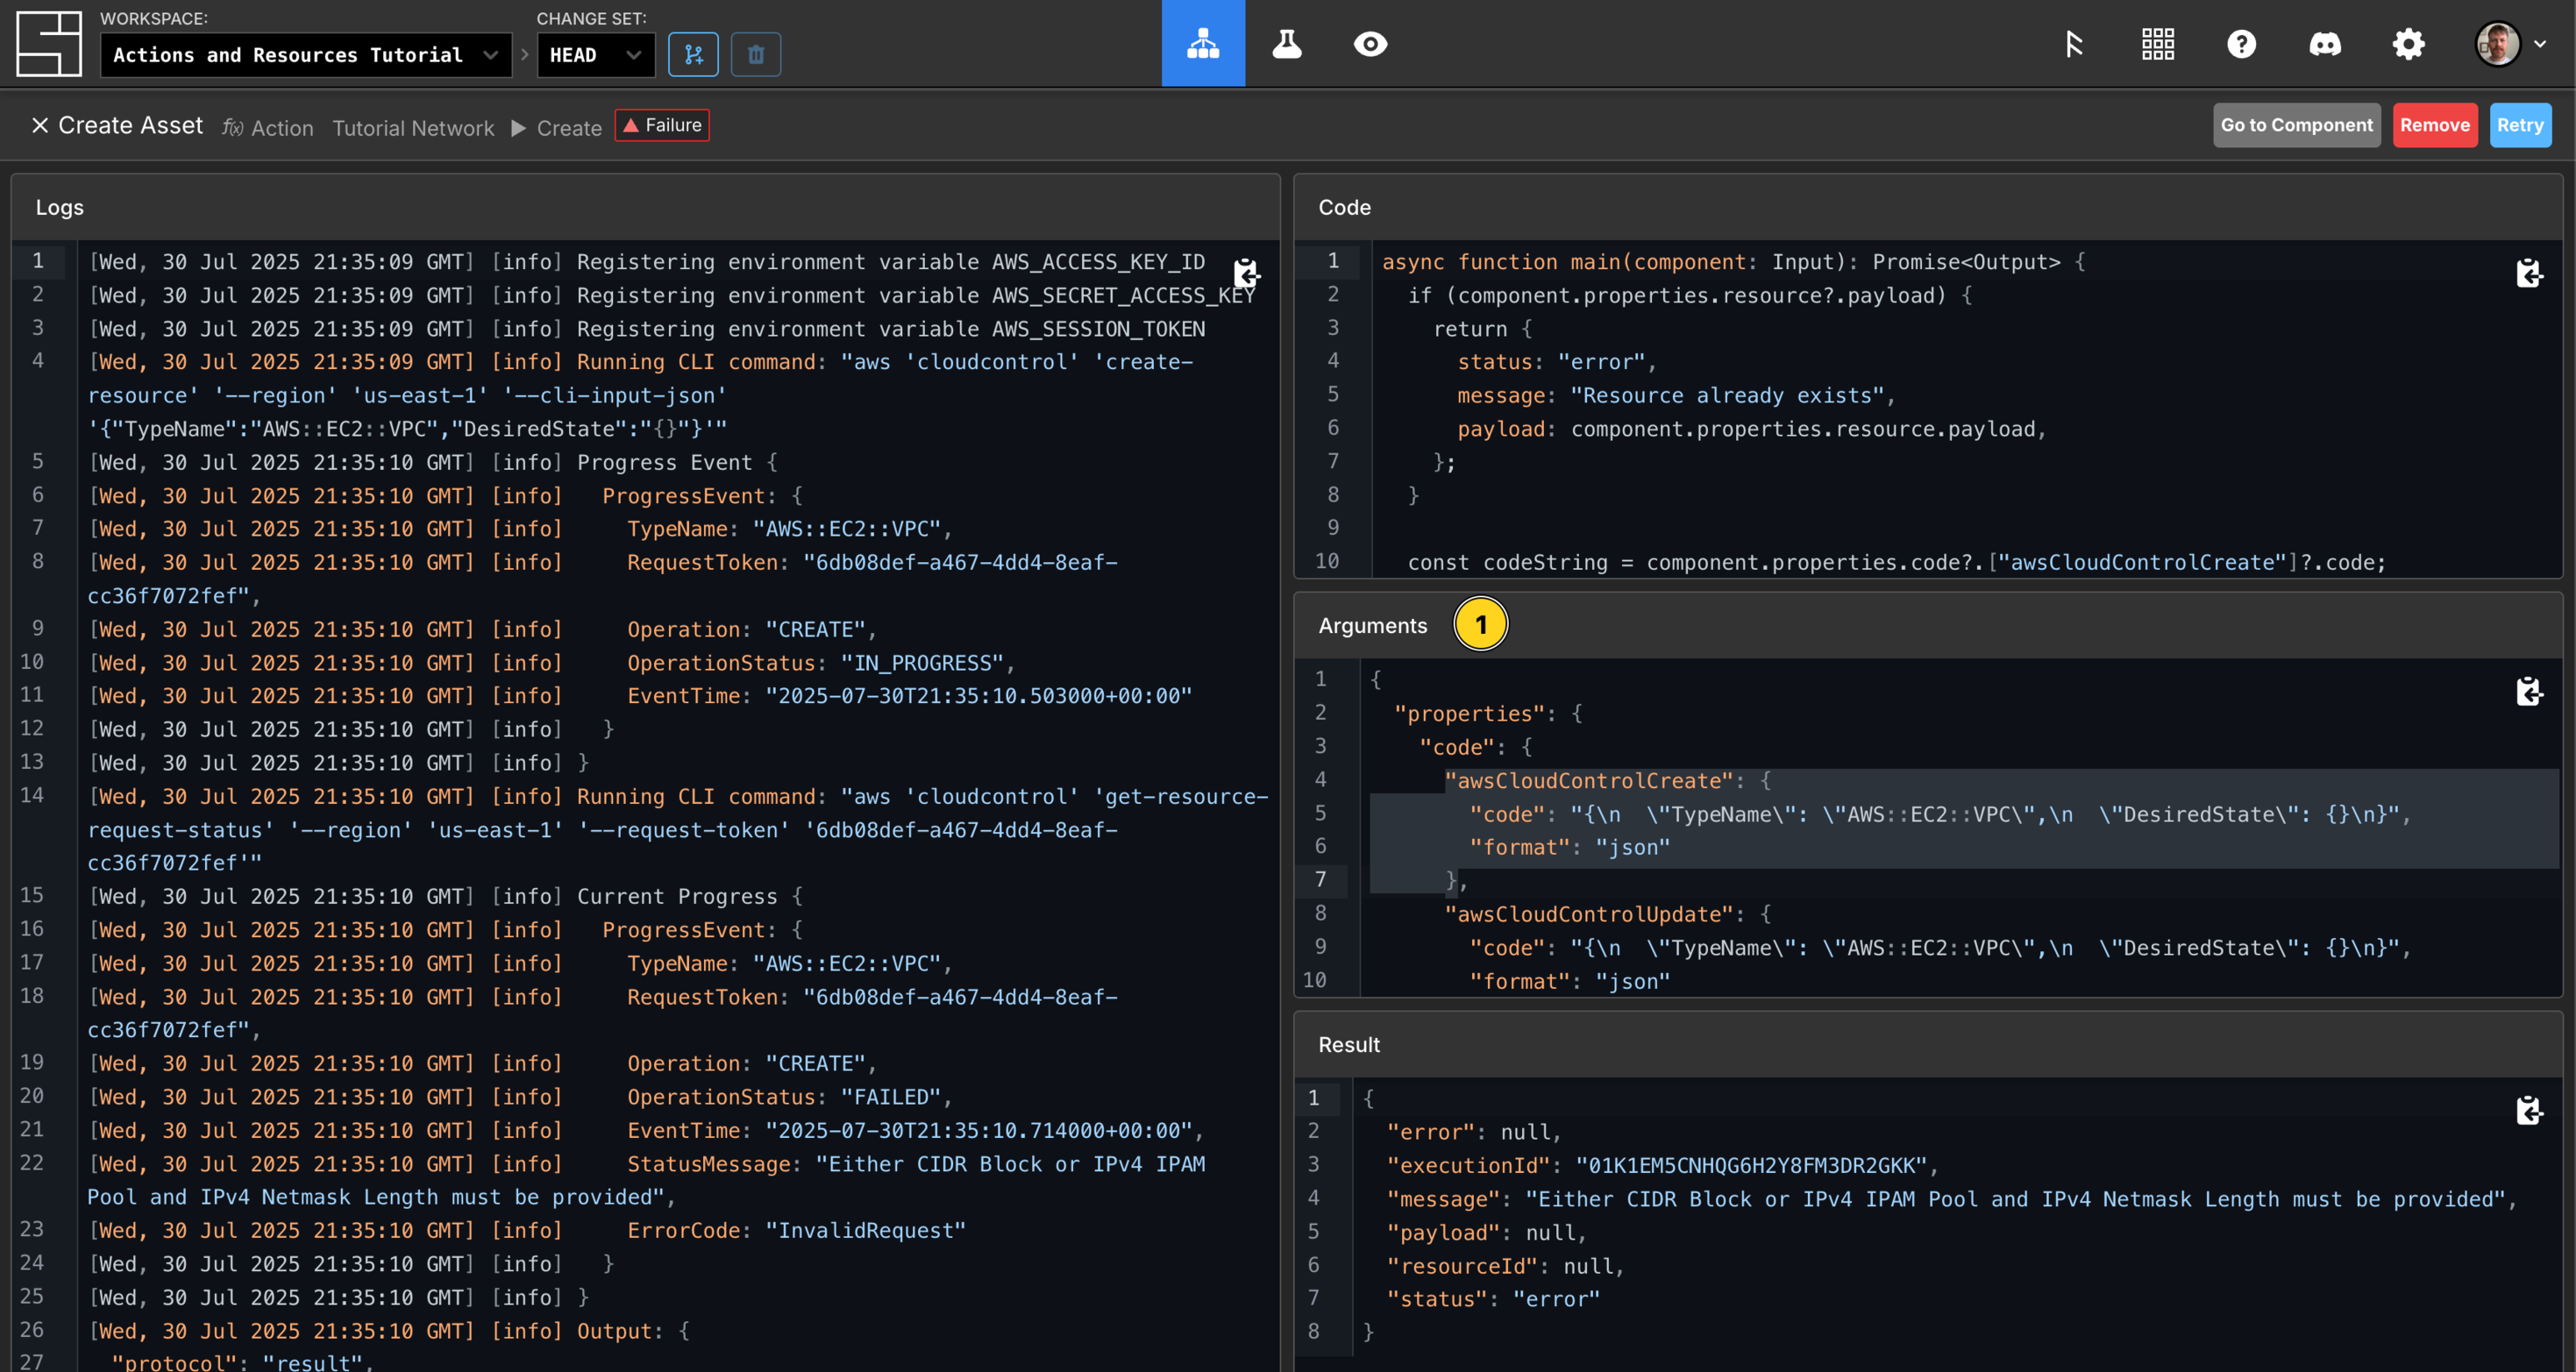
You can check the arguments sent to the Action in the Arguments section of the Function output screen. This will show you the exact data sent to the underlying action function. In this example you can see that no values were sent in the Create Action.
Check the executed code
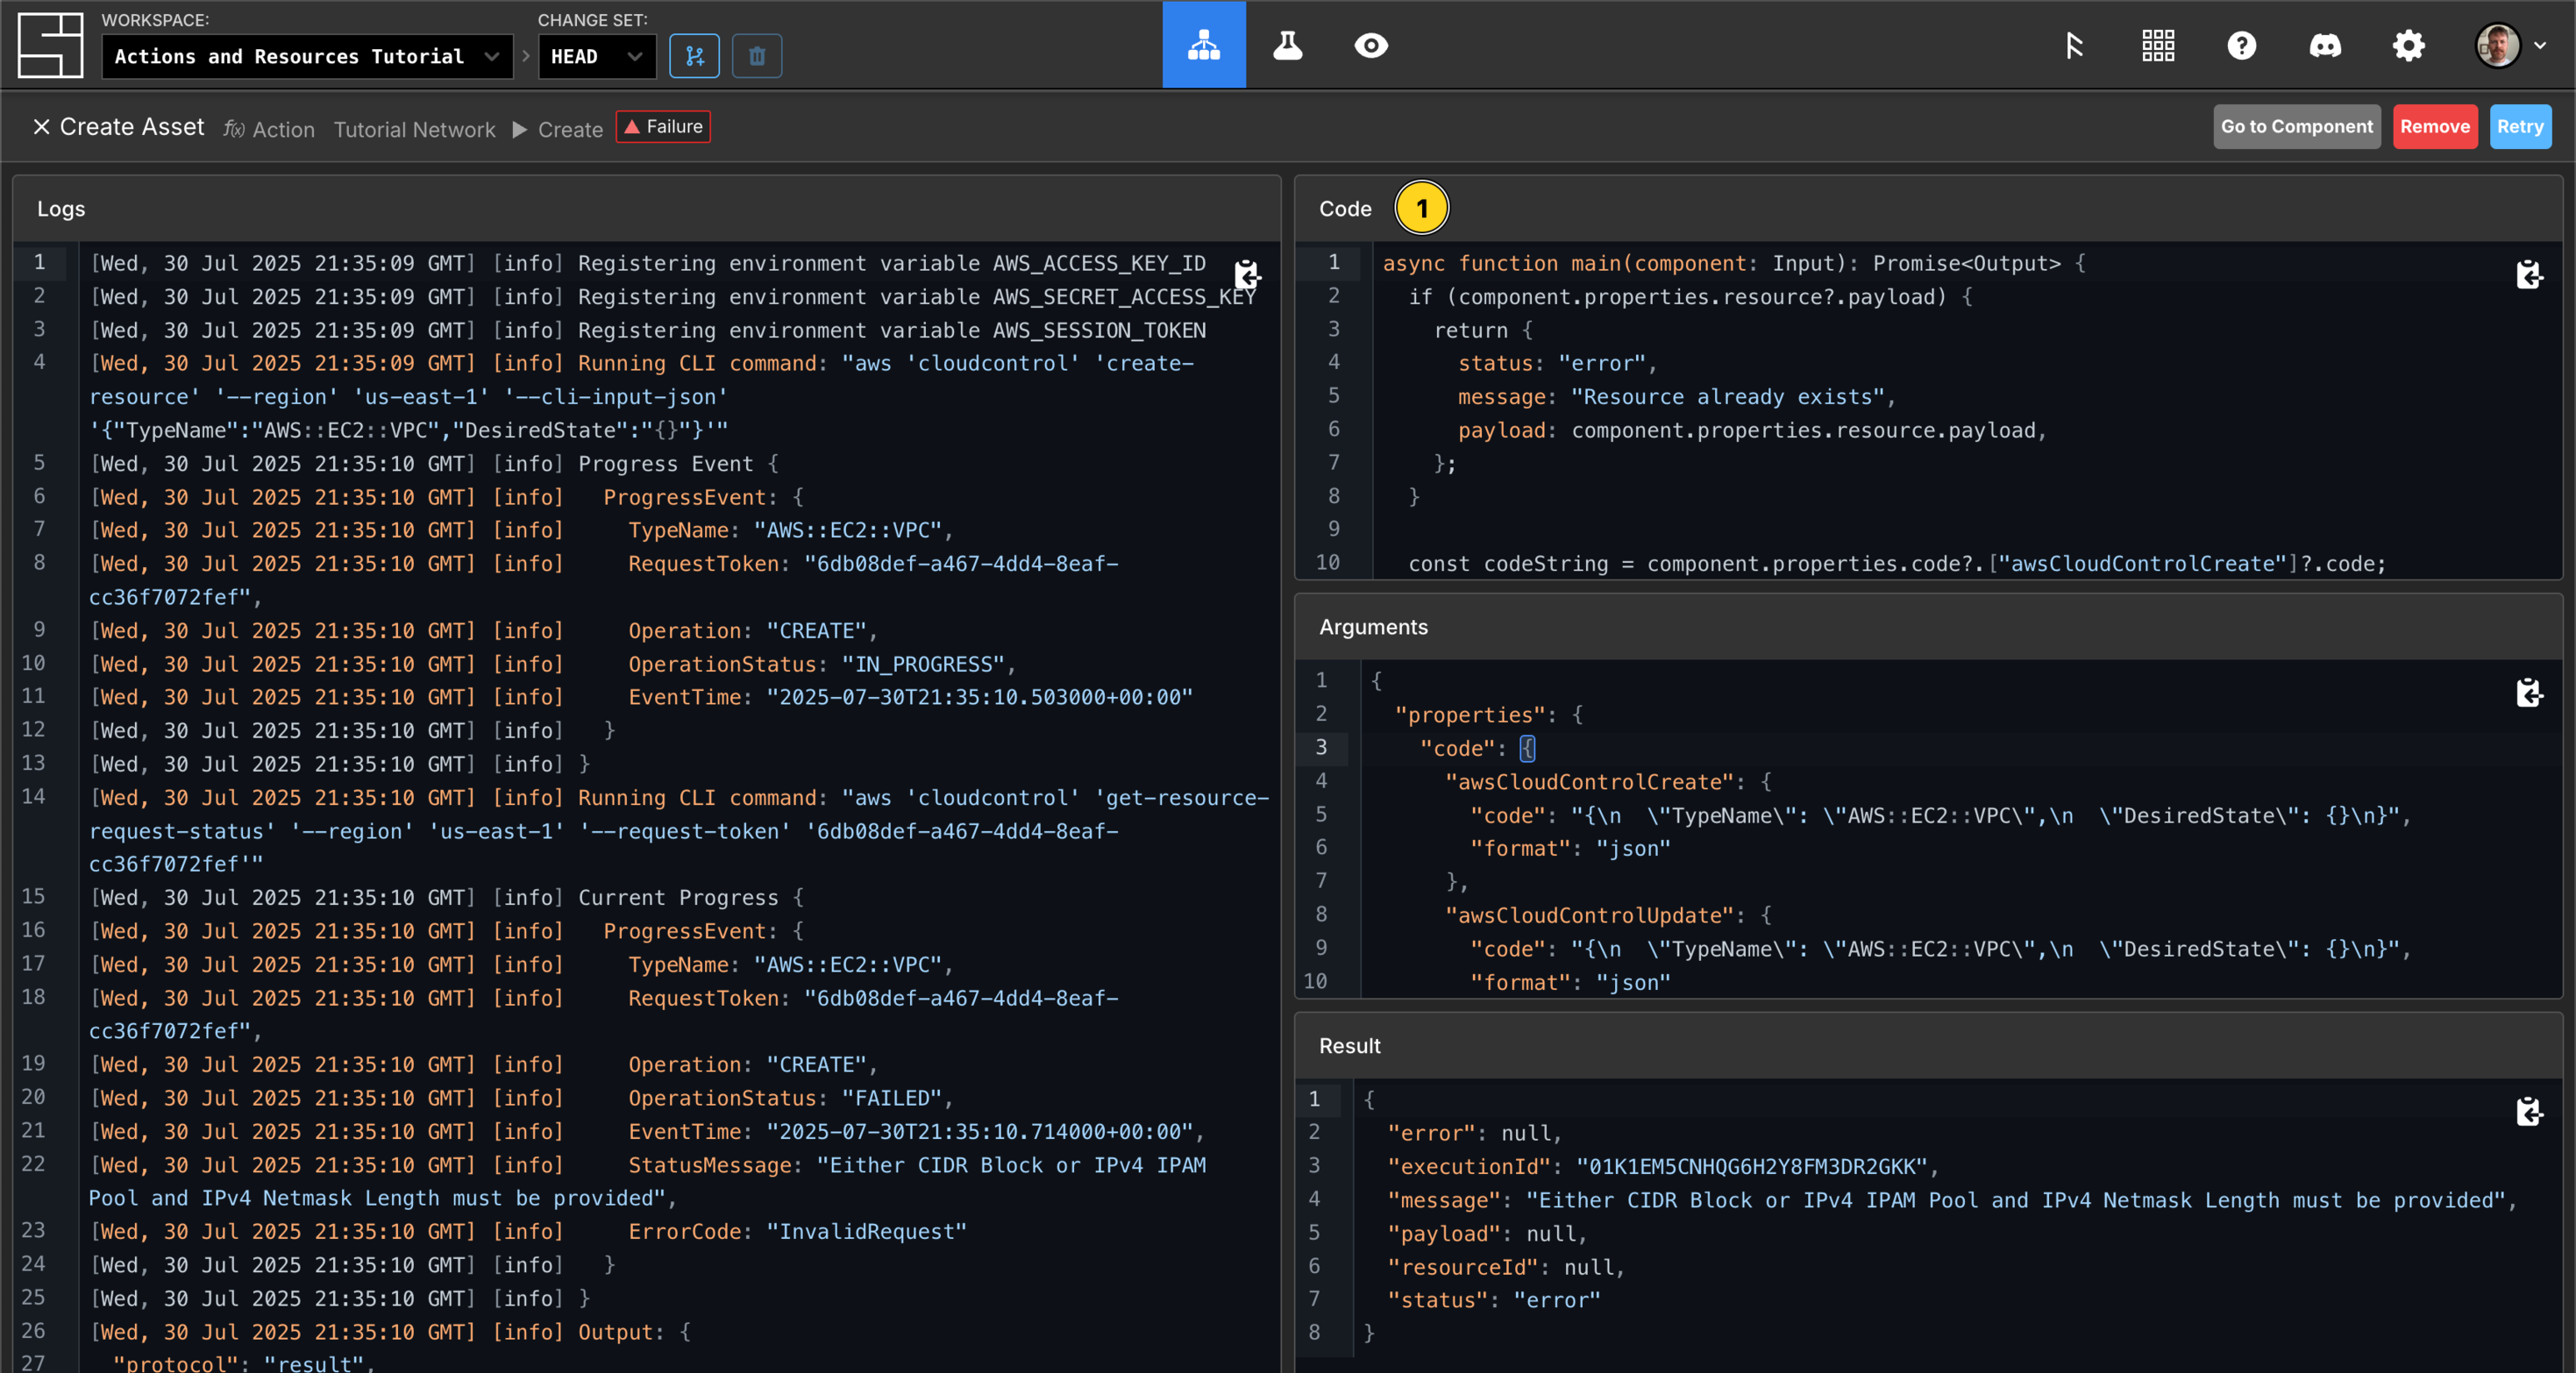
View the Code section of the Function output screen. This shows you the precise code that was executed when this action was run.
Check the result
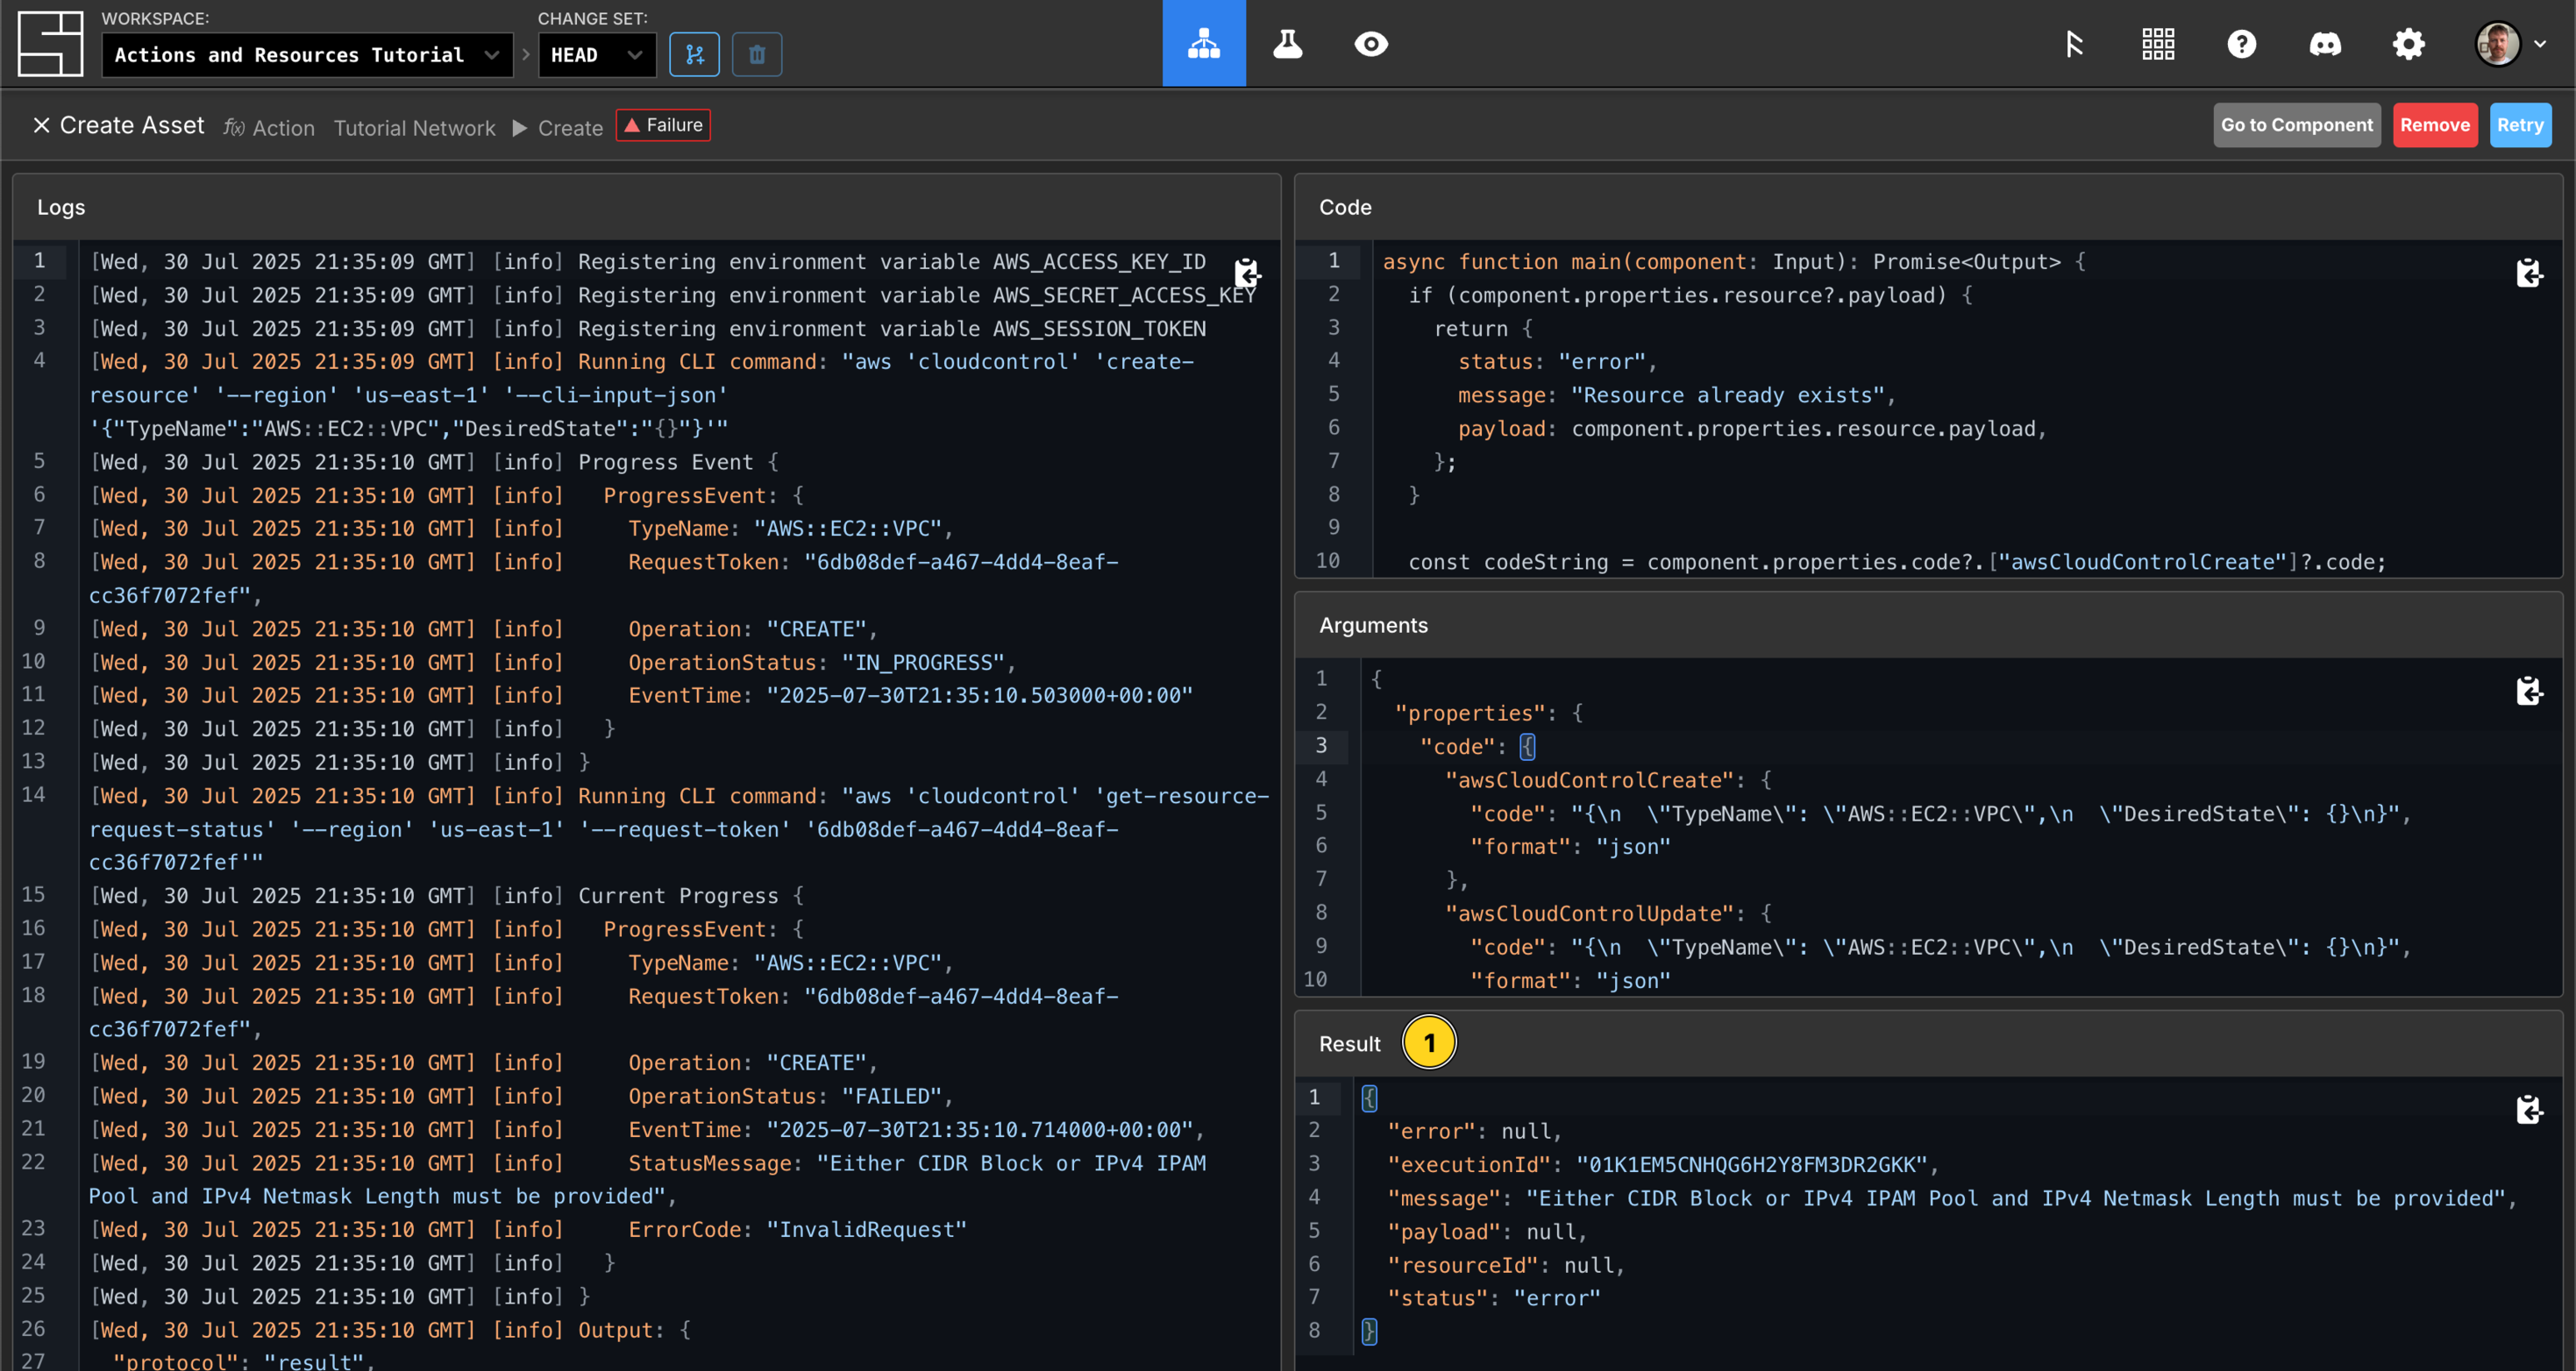
View the Result section of the Function output screen. This shows you the returned result of the function.
Close the panel by clicking the X or by pressing the Esc key.
Create another Change Set
To finish creating your VPC, you need to add a valid CidrBlock. To do that, you need to create a new Change Set.
Click the Create Change Set button.
Name your Change Set Fix VPC.
Click Create Change Set.
Add the CidrBlock property to your VPC
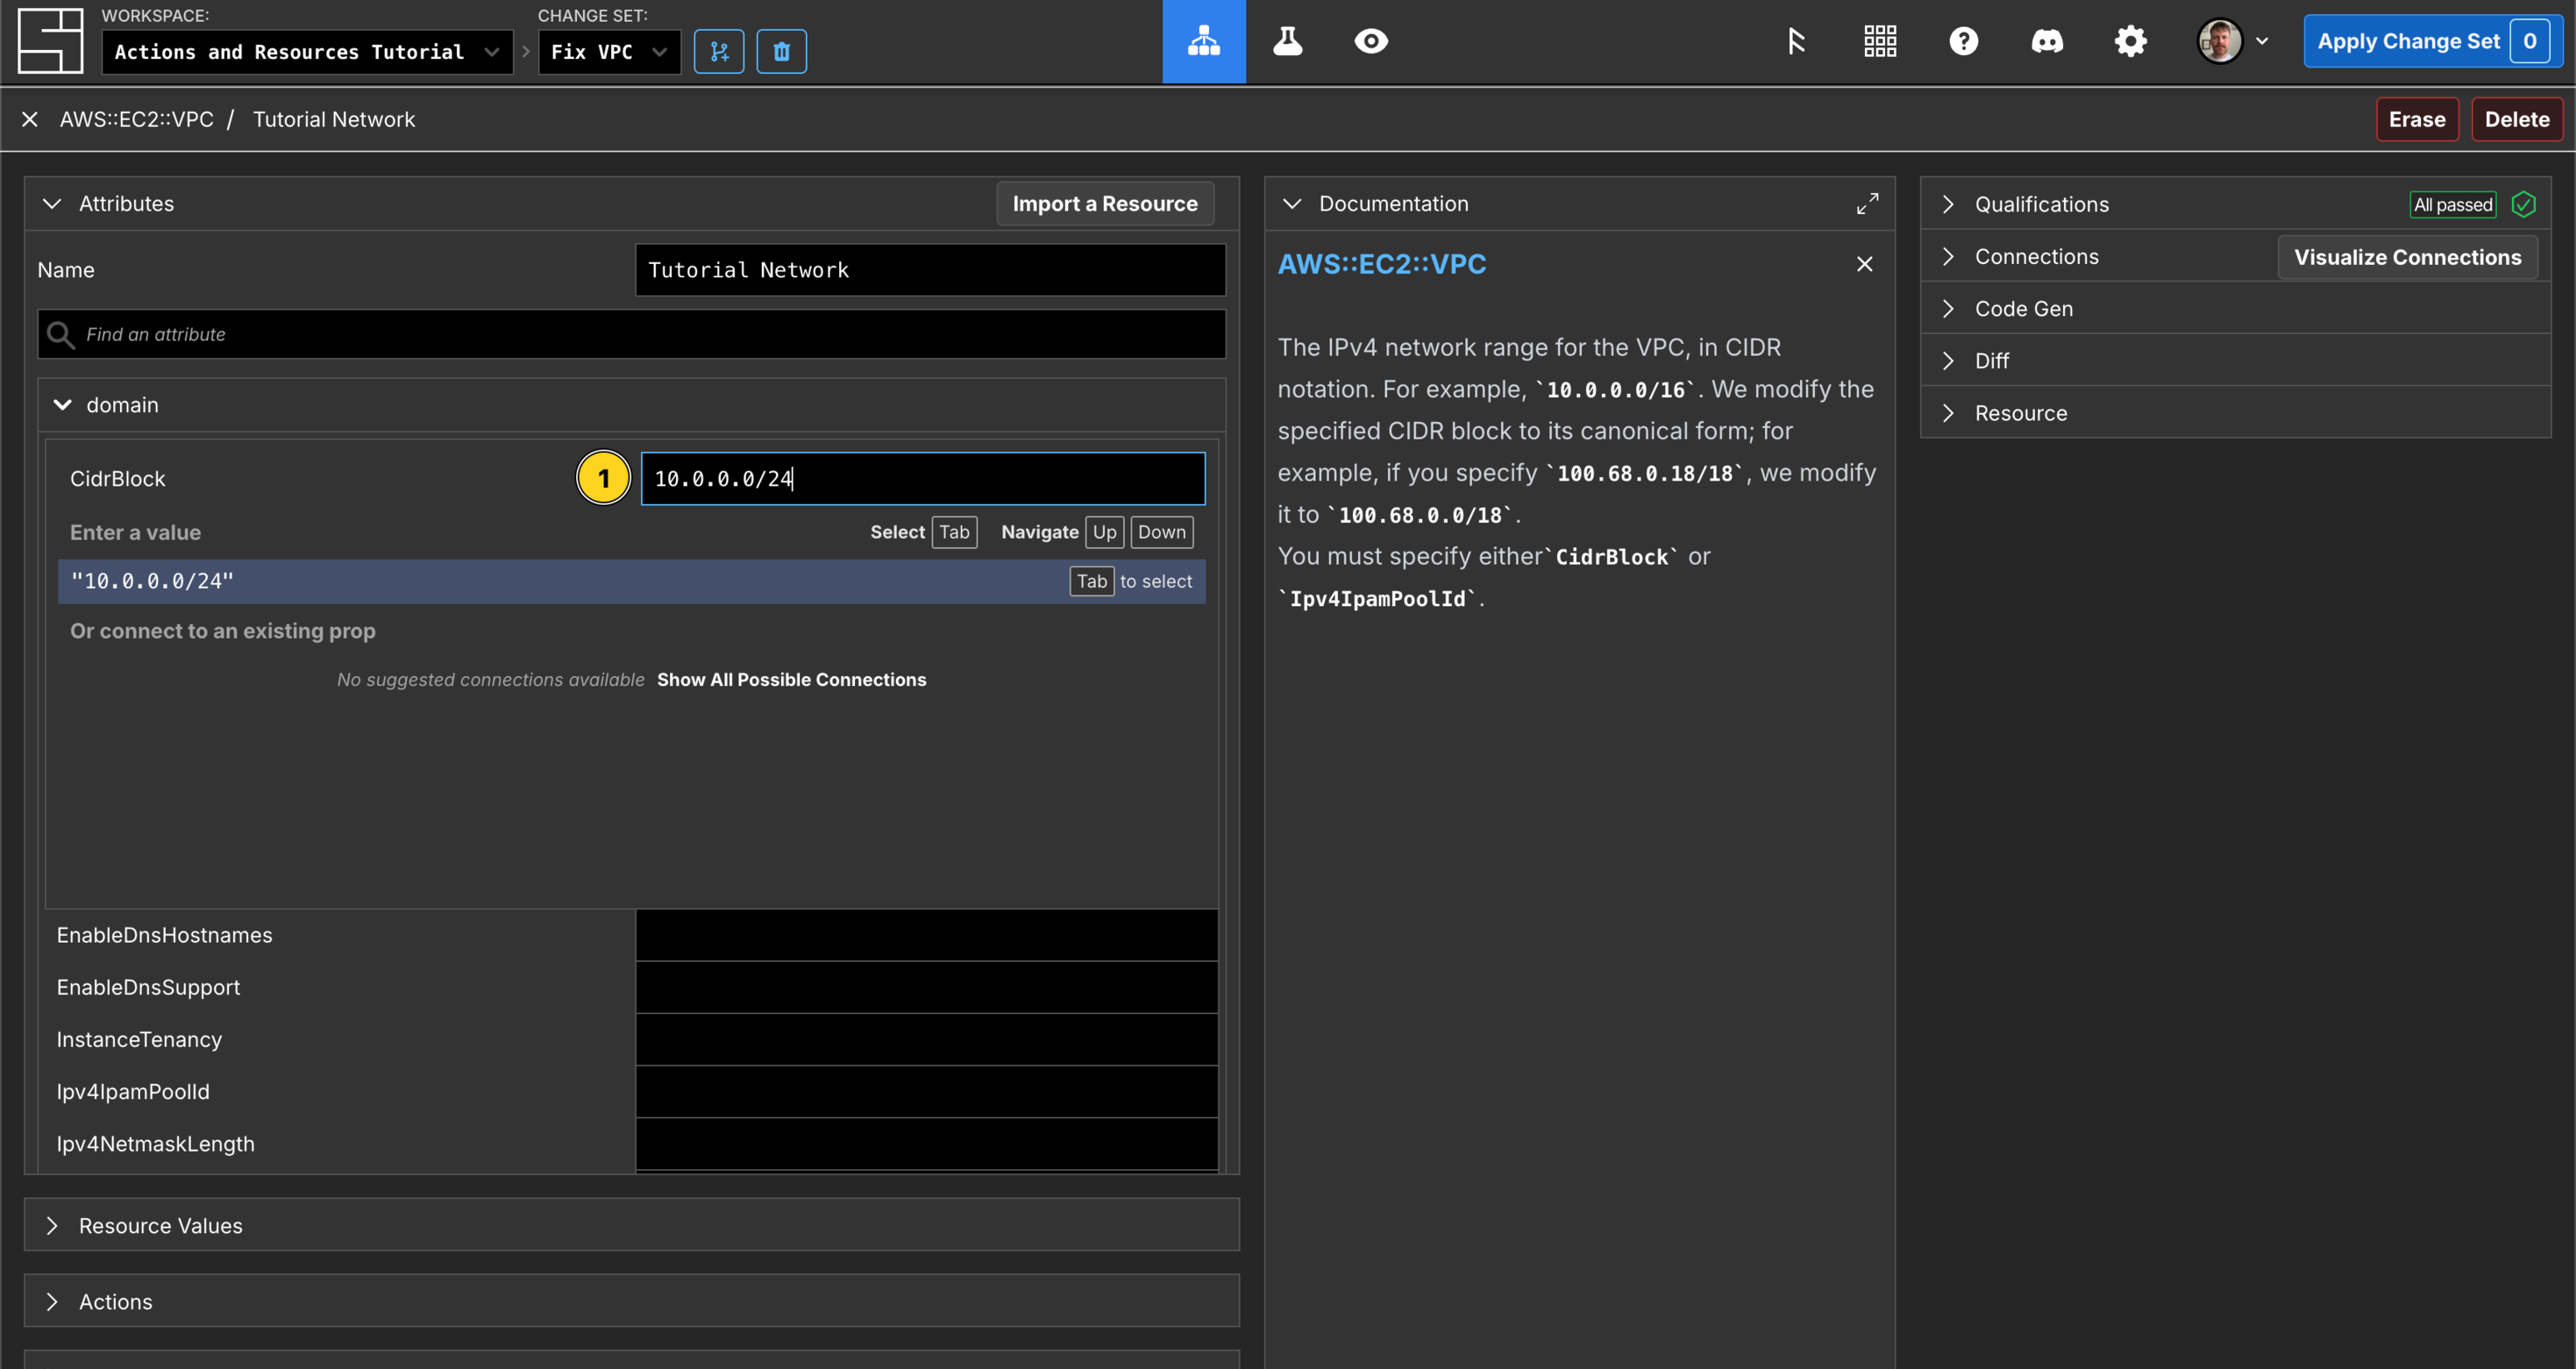
On the Gird, click into the Tutorial Network VPC Component.
Set the CidrBlock property to 10.0.0.0/24.
Apply the Change Set
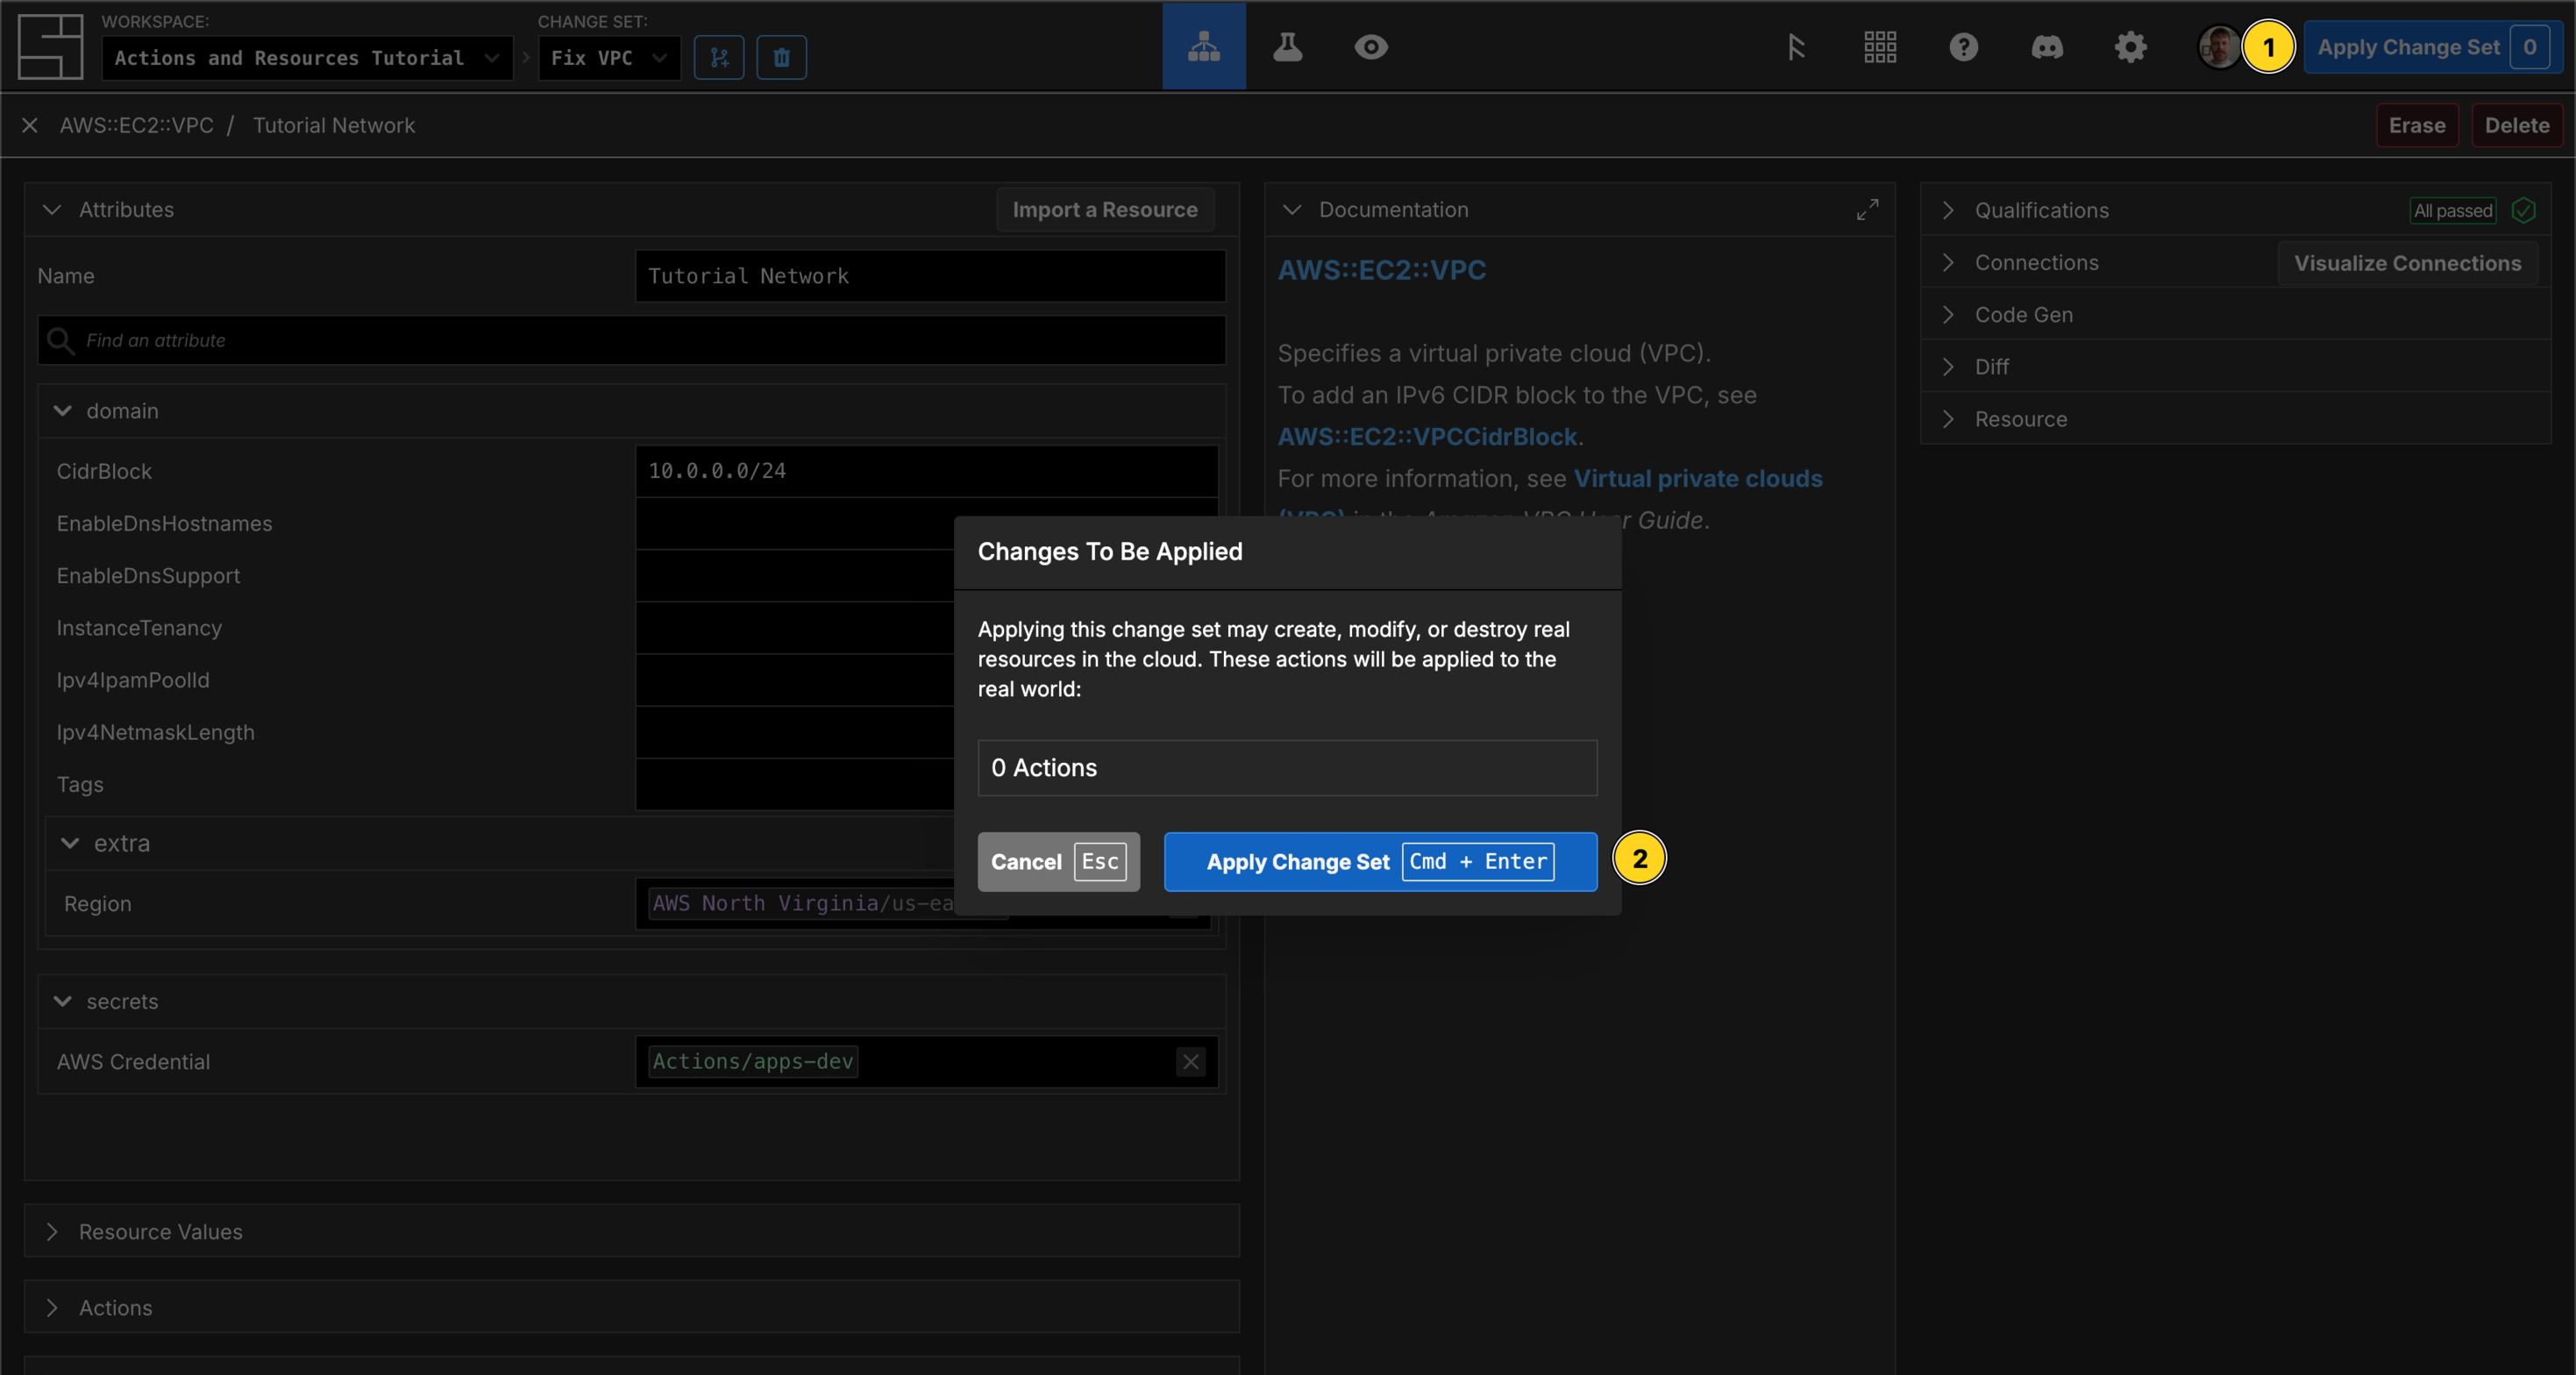
From the Component details screen, click Apply Change Set.
Your create action is still enqueued, so this Change Set shows no proposed Actions.
Click Apply Change Set.
Try to create the VPC again
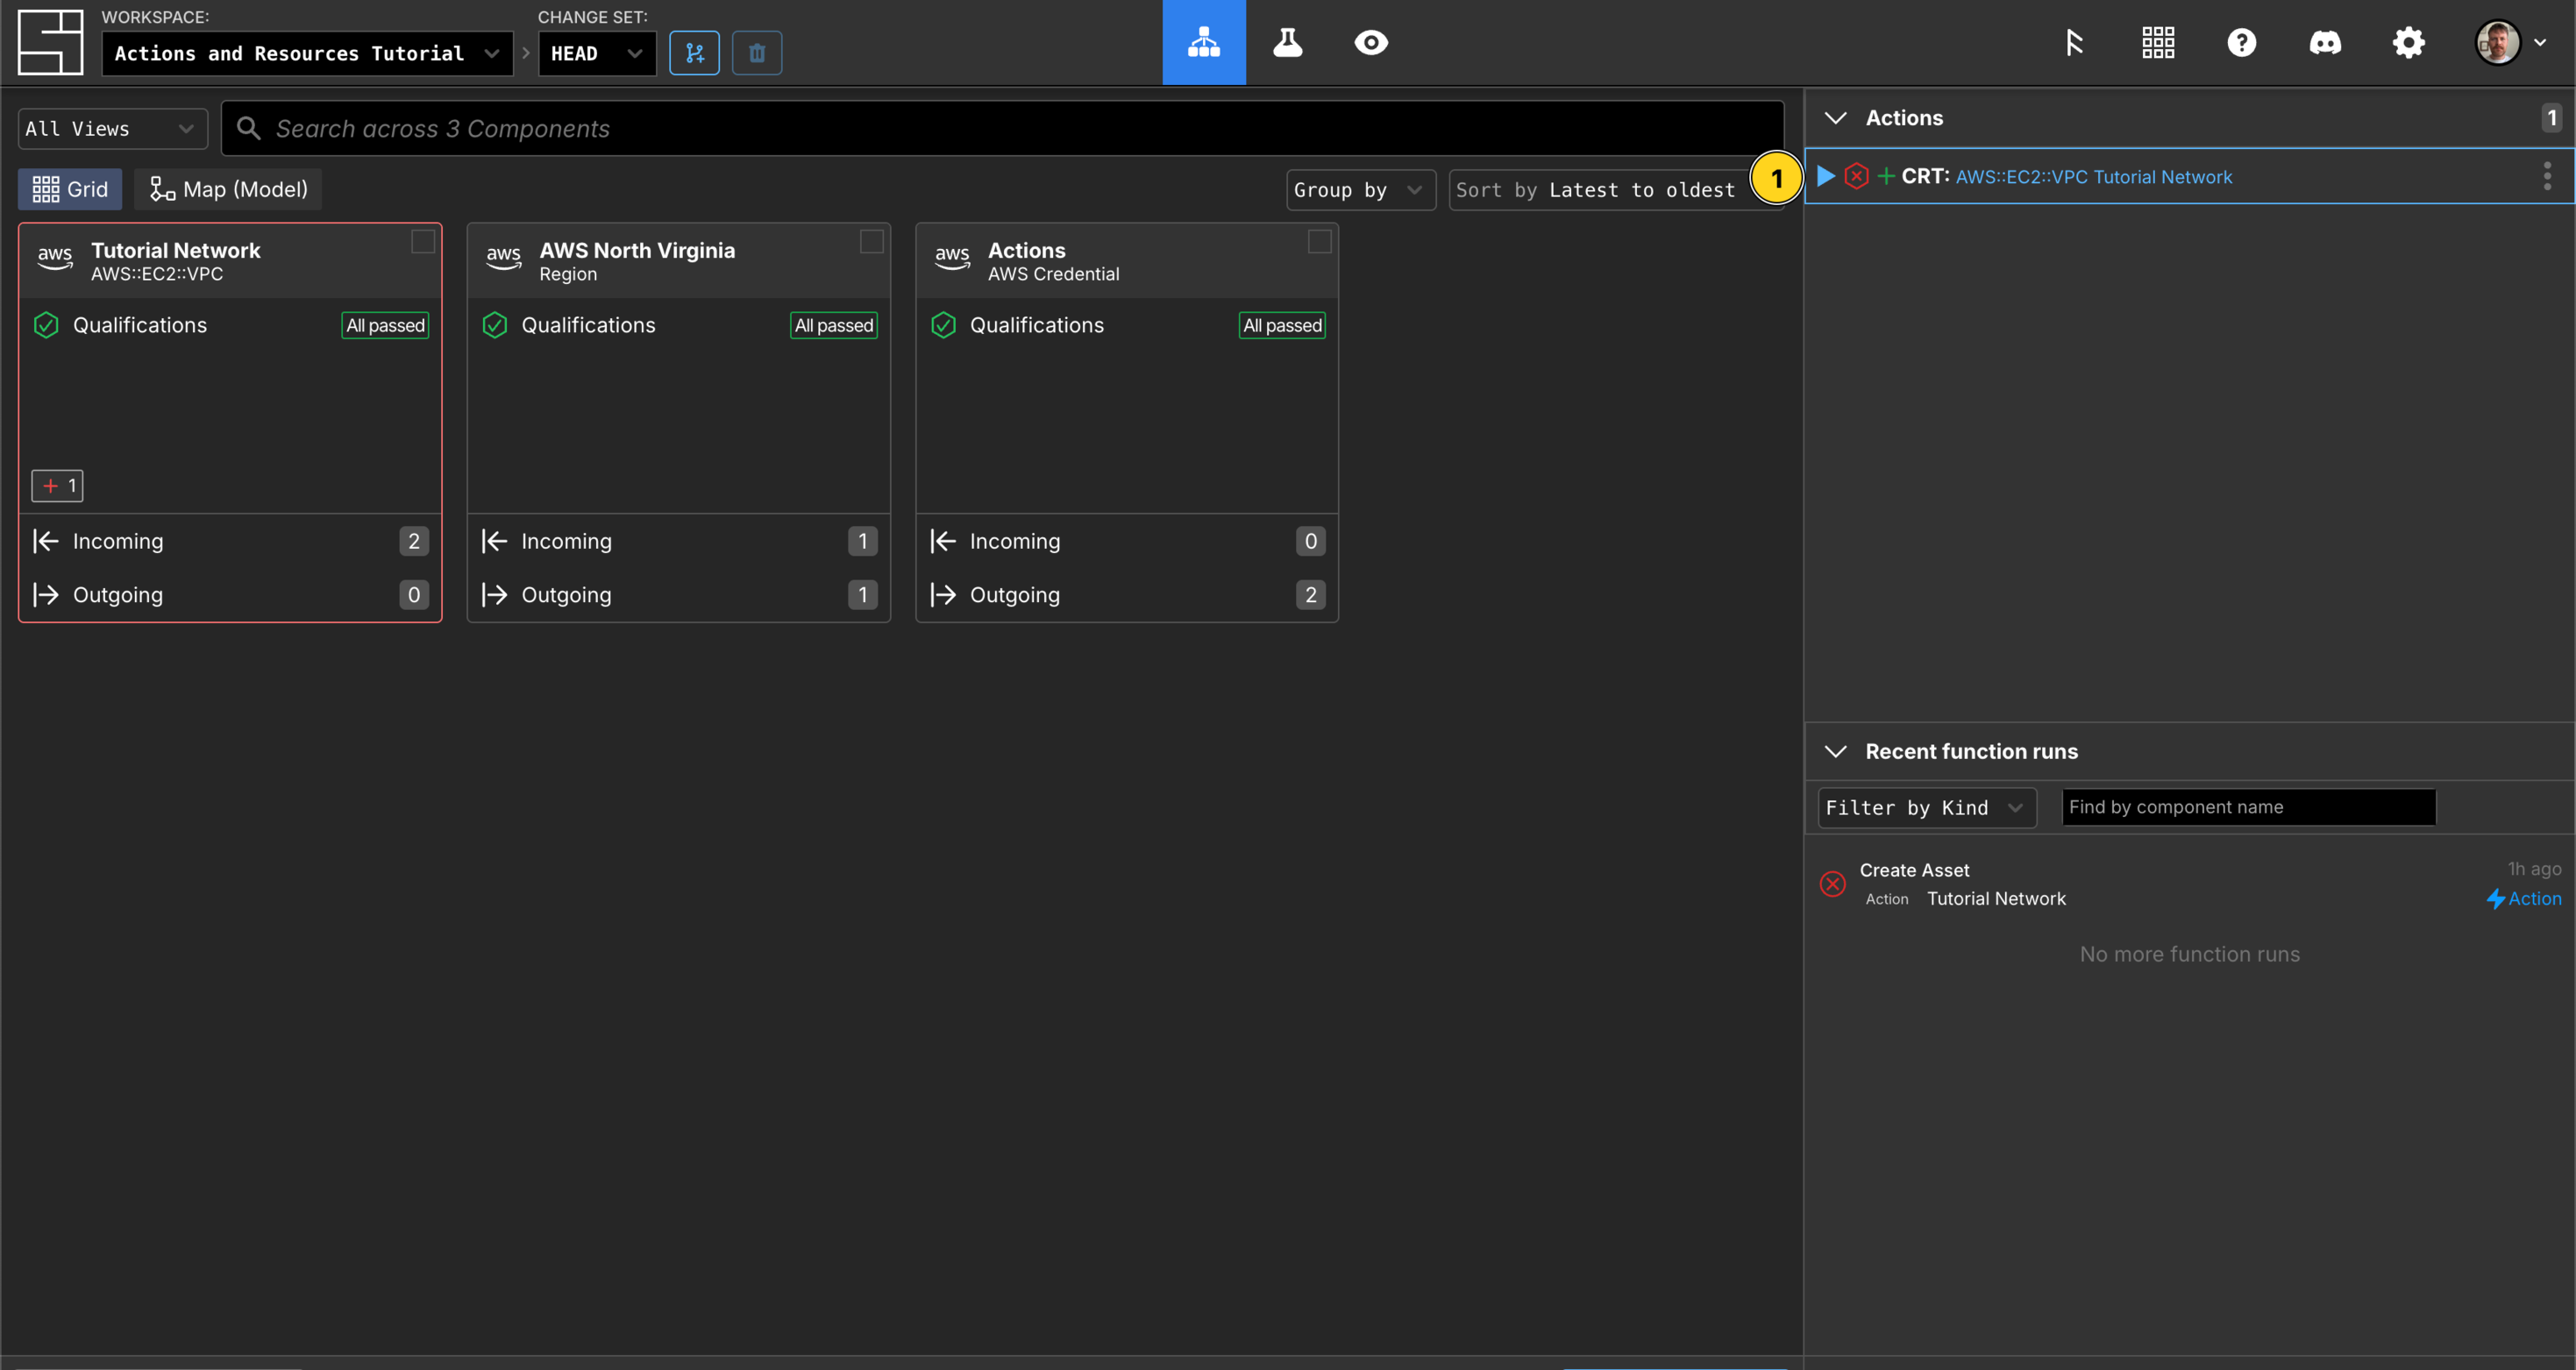
Try creating your VPC again by clicking the Play button.
You'll see the action execute and succeed!
TIP
System Initiative records your intent to take an action, and it remains present on HEAD until it succeeds or is intentionally removed from the list.
Checking the successful create action result
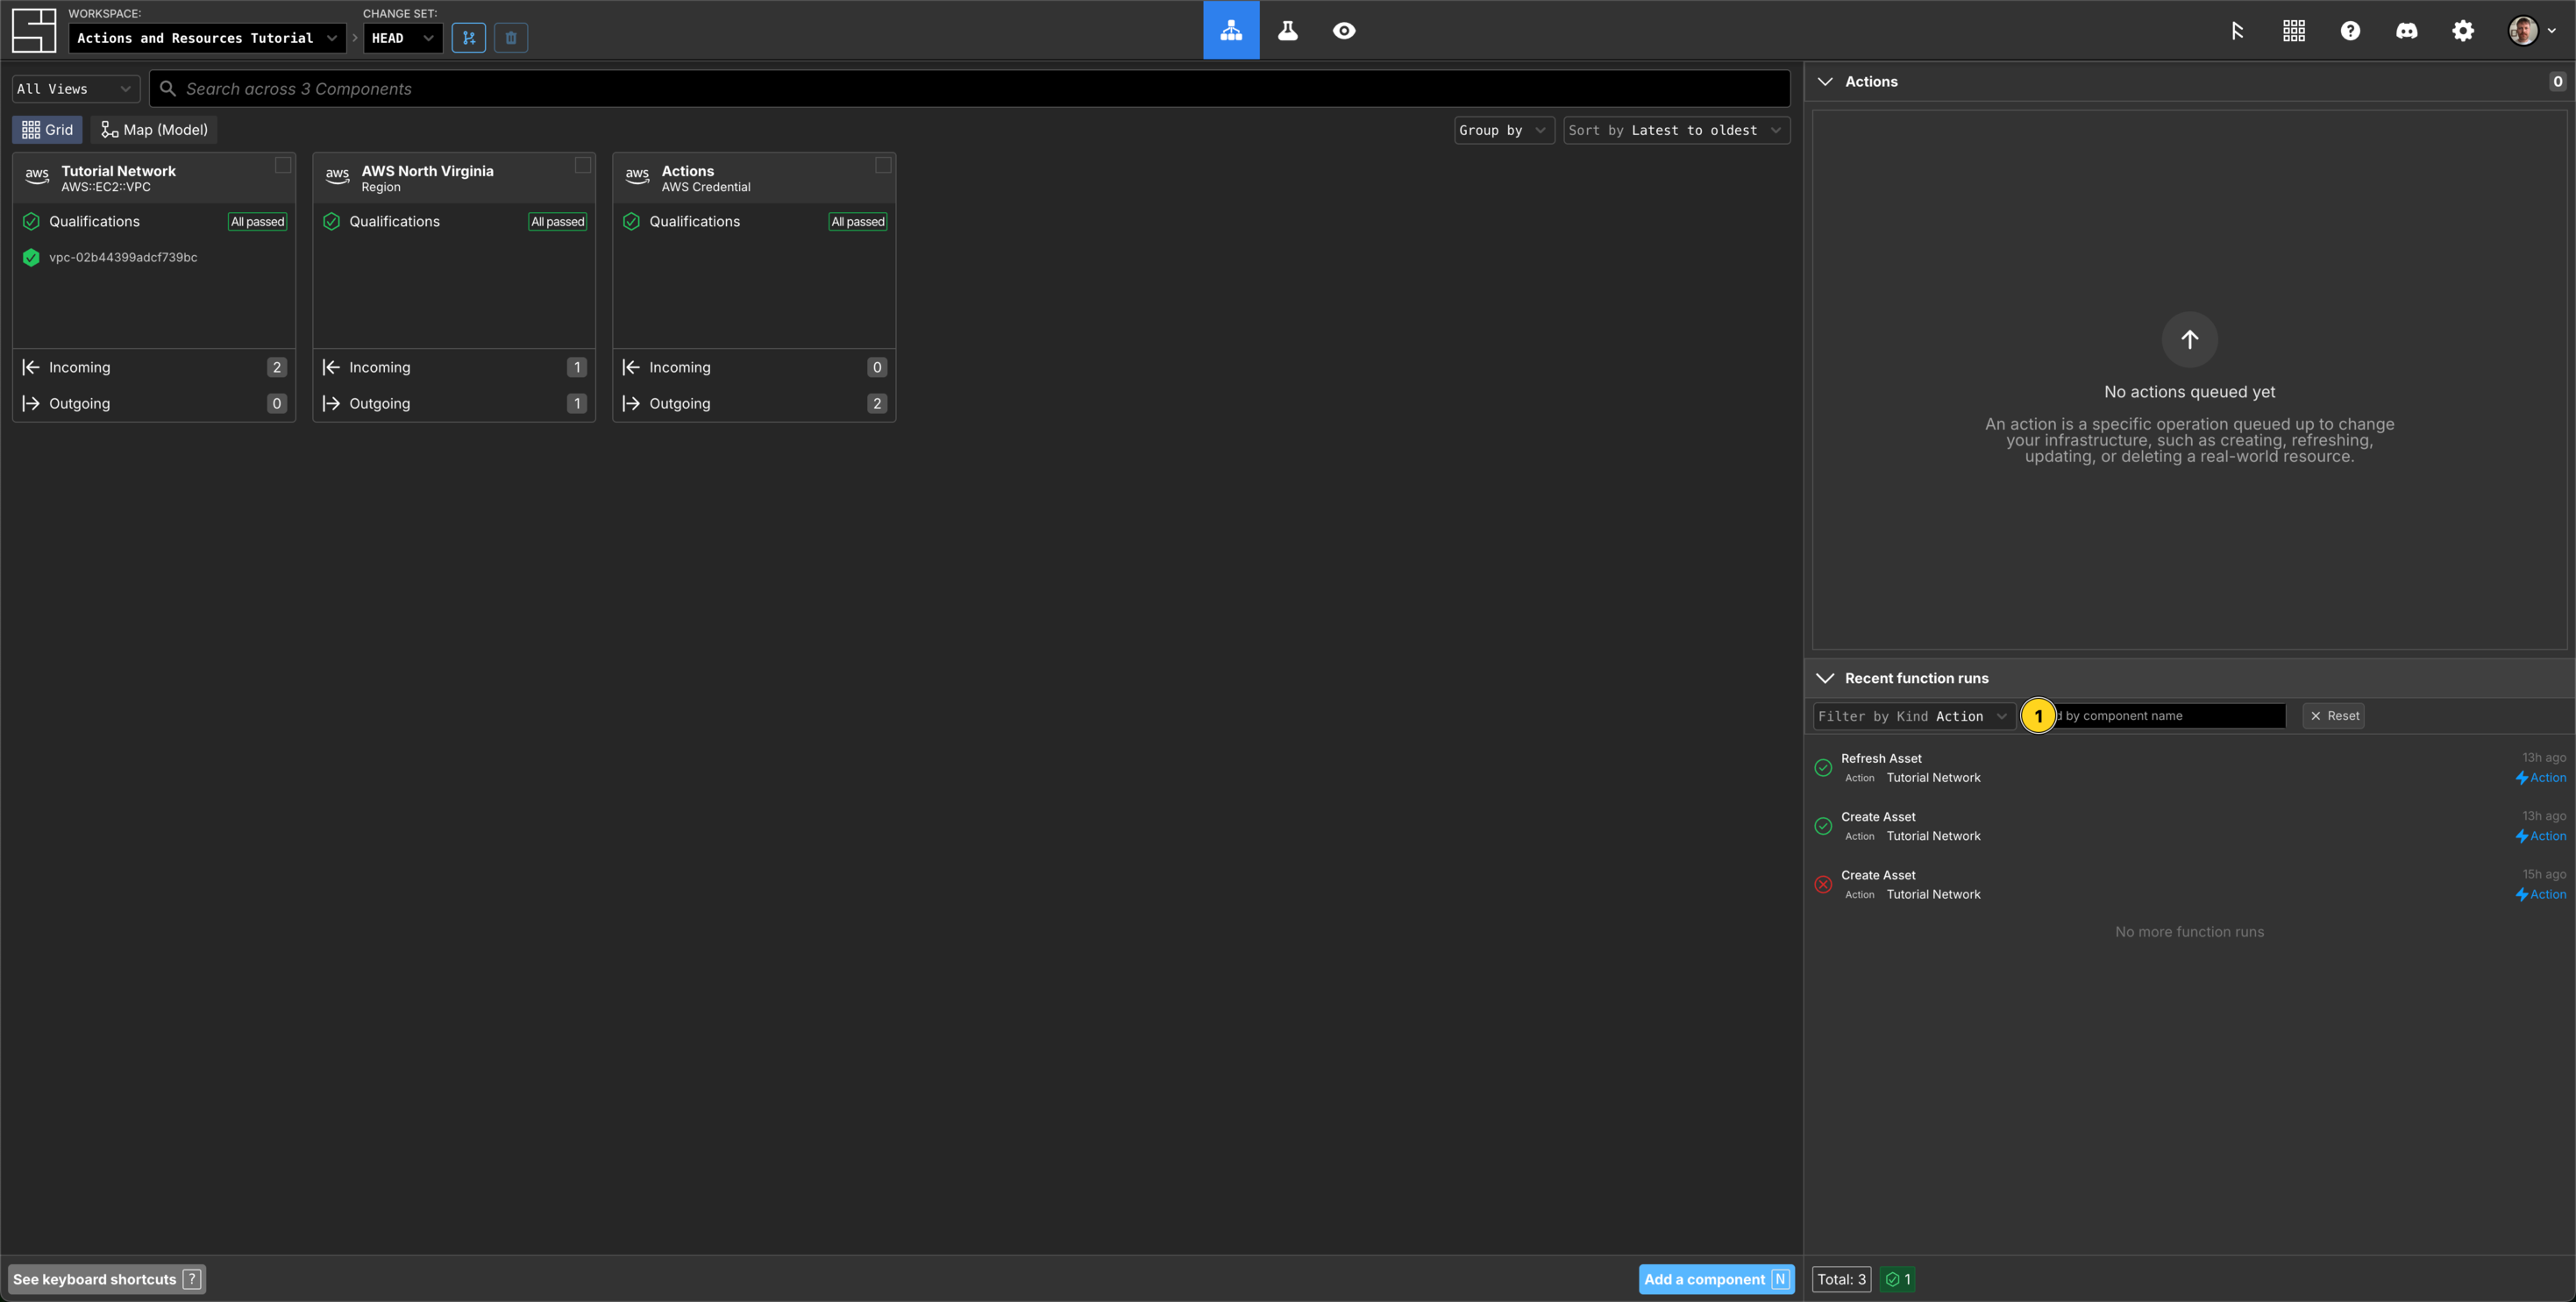
In the lower right hand panel named Recent Function runs Filter by Kind Action and view the initial failed Create Action, the successful Create Action and the following successful Refresh Action.
Click your successful create action to view the action details.
View the Result section.
You will see output similar to this:
{
  "error": null,
  "executionId": "01K1ETG6QME7YBWH8A0XQZVX6G",
  "message": null,
  "payload": null,
  "resourceId": "vpc-02b44399adcf739bc",
  "status": "ok"
}
Your Action result contains the information System Initiative will then use to populate the resource via a Refresh Action, using for example the resourceId which runs automatically after a successful Create.
Note that the payload/State field is currently set to null.
A Refreshed Tutorial Network VPC Resource
Return to the Grid, and filter your Recent function runs by Action, then click the successul Refresh Action.
In the Result section you will see something like the following:
{
  "error": null,
  "executionId": "01K1ETGTYHAEXRJY7XMXHKDT4R",
  "message": null,
  "payload": {
    "CidrBlock": "10.0.0.0/24",
    "CidrBlockAssociations": [
      "vpc-cidr-assoc-0538bd0a59c91179c"
    ],
    "DefaultNetworkAcl": "acl-07d867dd4a7900e1b",
    "DefaultSecurityGroup": "sg-094ab226efdf848b5",
    "EnableDnsHostnames": false,
    "EnableDnsSupport": true,
    "InstanceTenancy": "default",
    "Ipv6CidrBlocks": [],
    "Tags": [],
    "VpcId": "vpc-02b44399adcf739bc"
  },
  "resourceId": null,
  "status": "ok"
}
You can see the details of your resource in the payload above. These properties are also available to view in the VPC Component too:
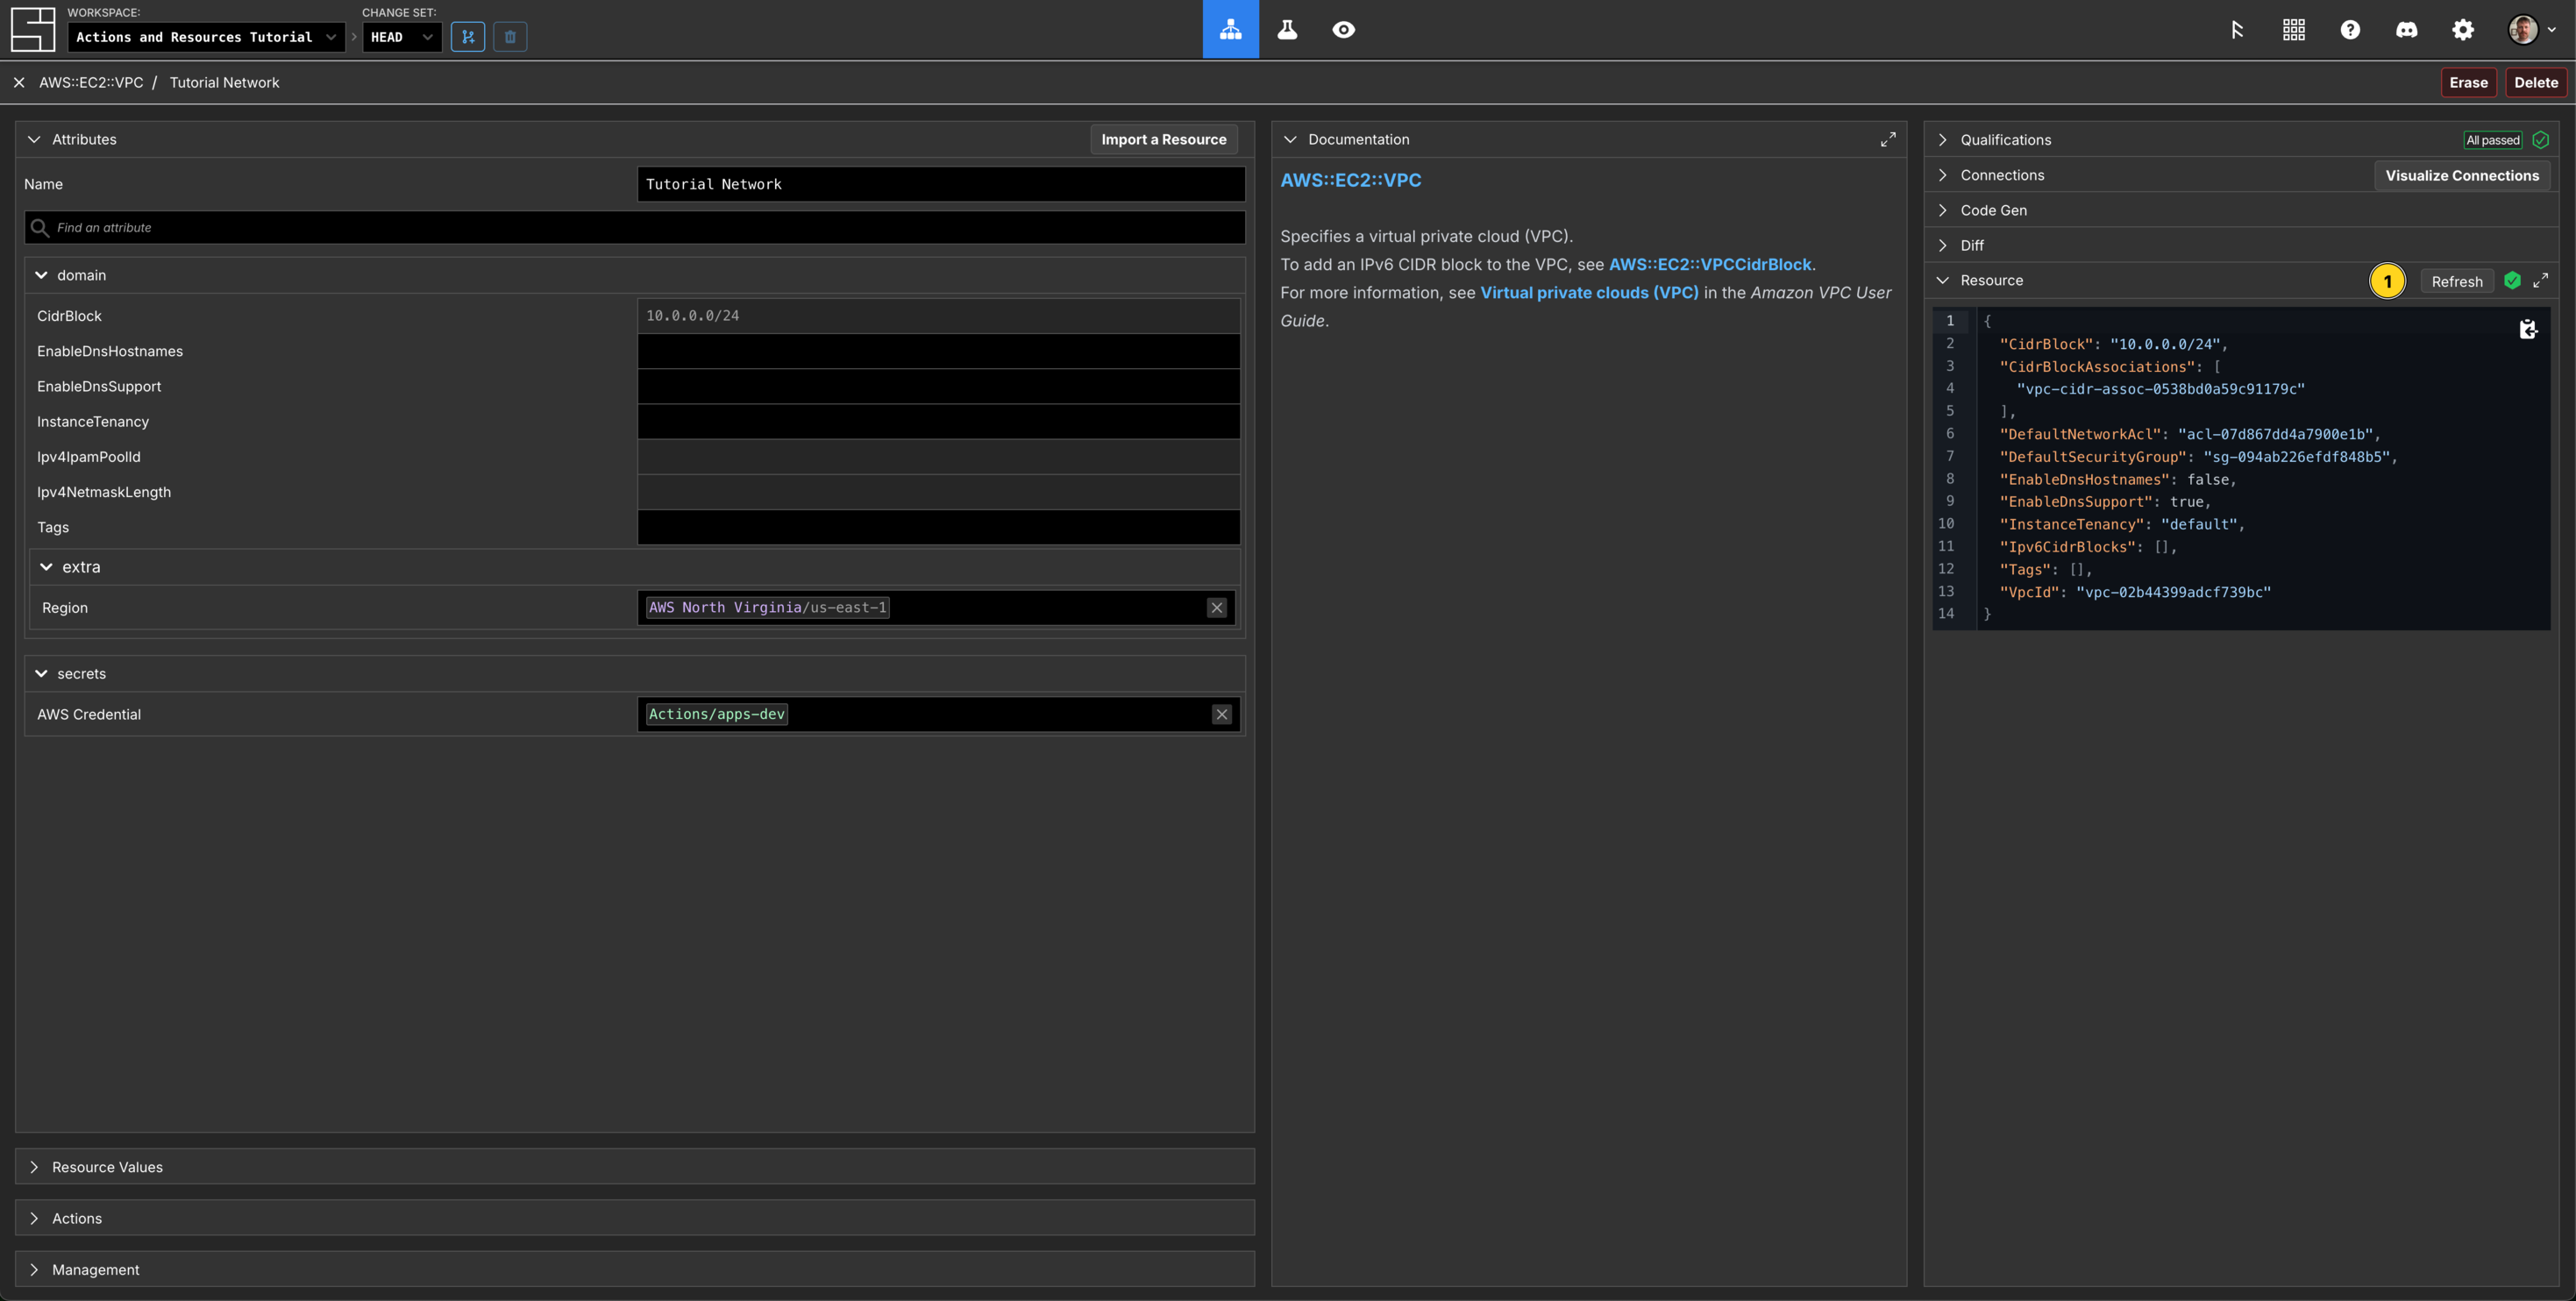
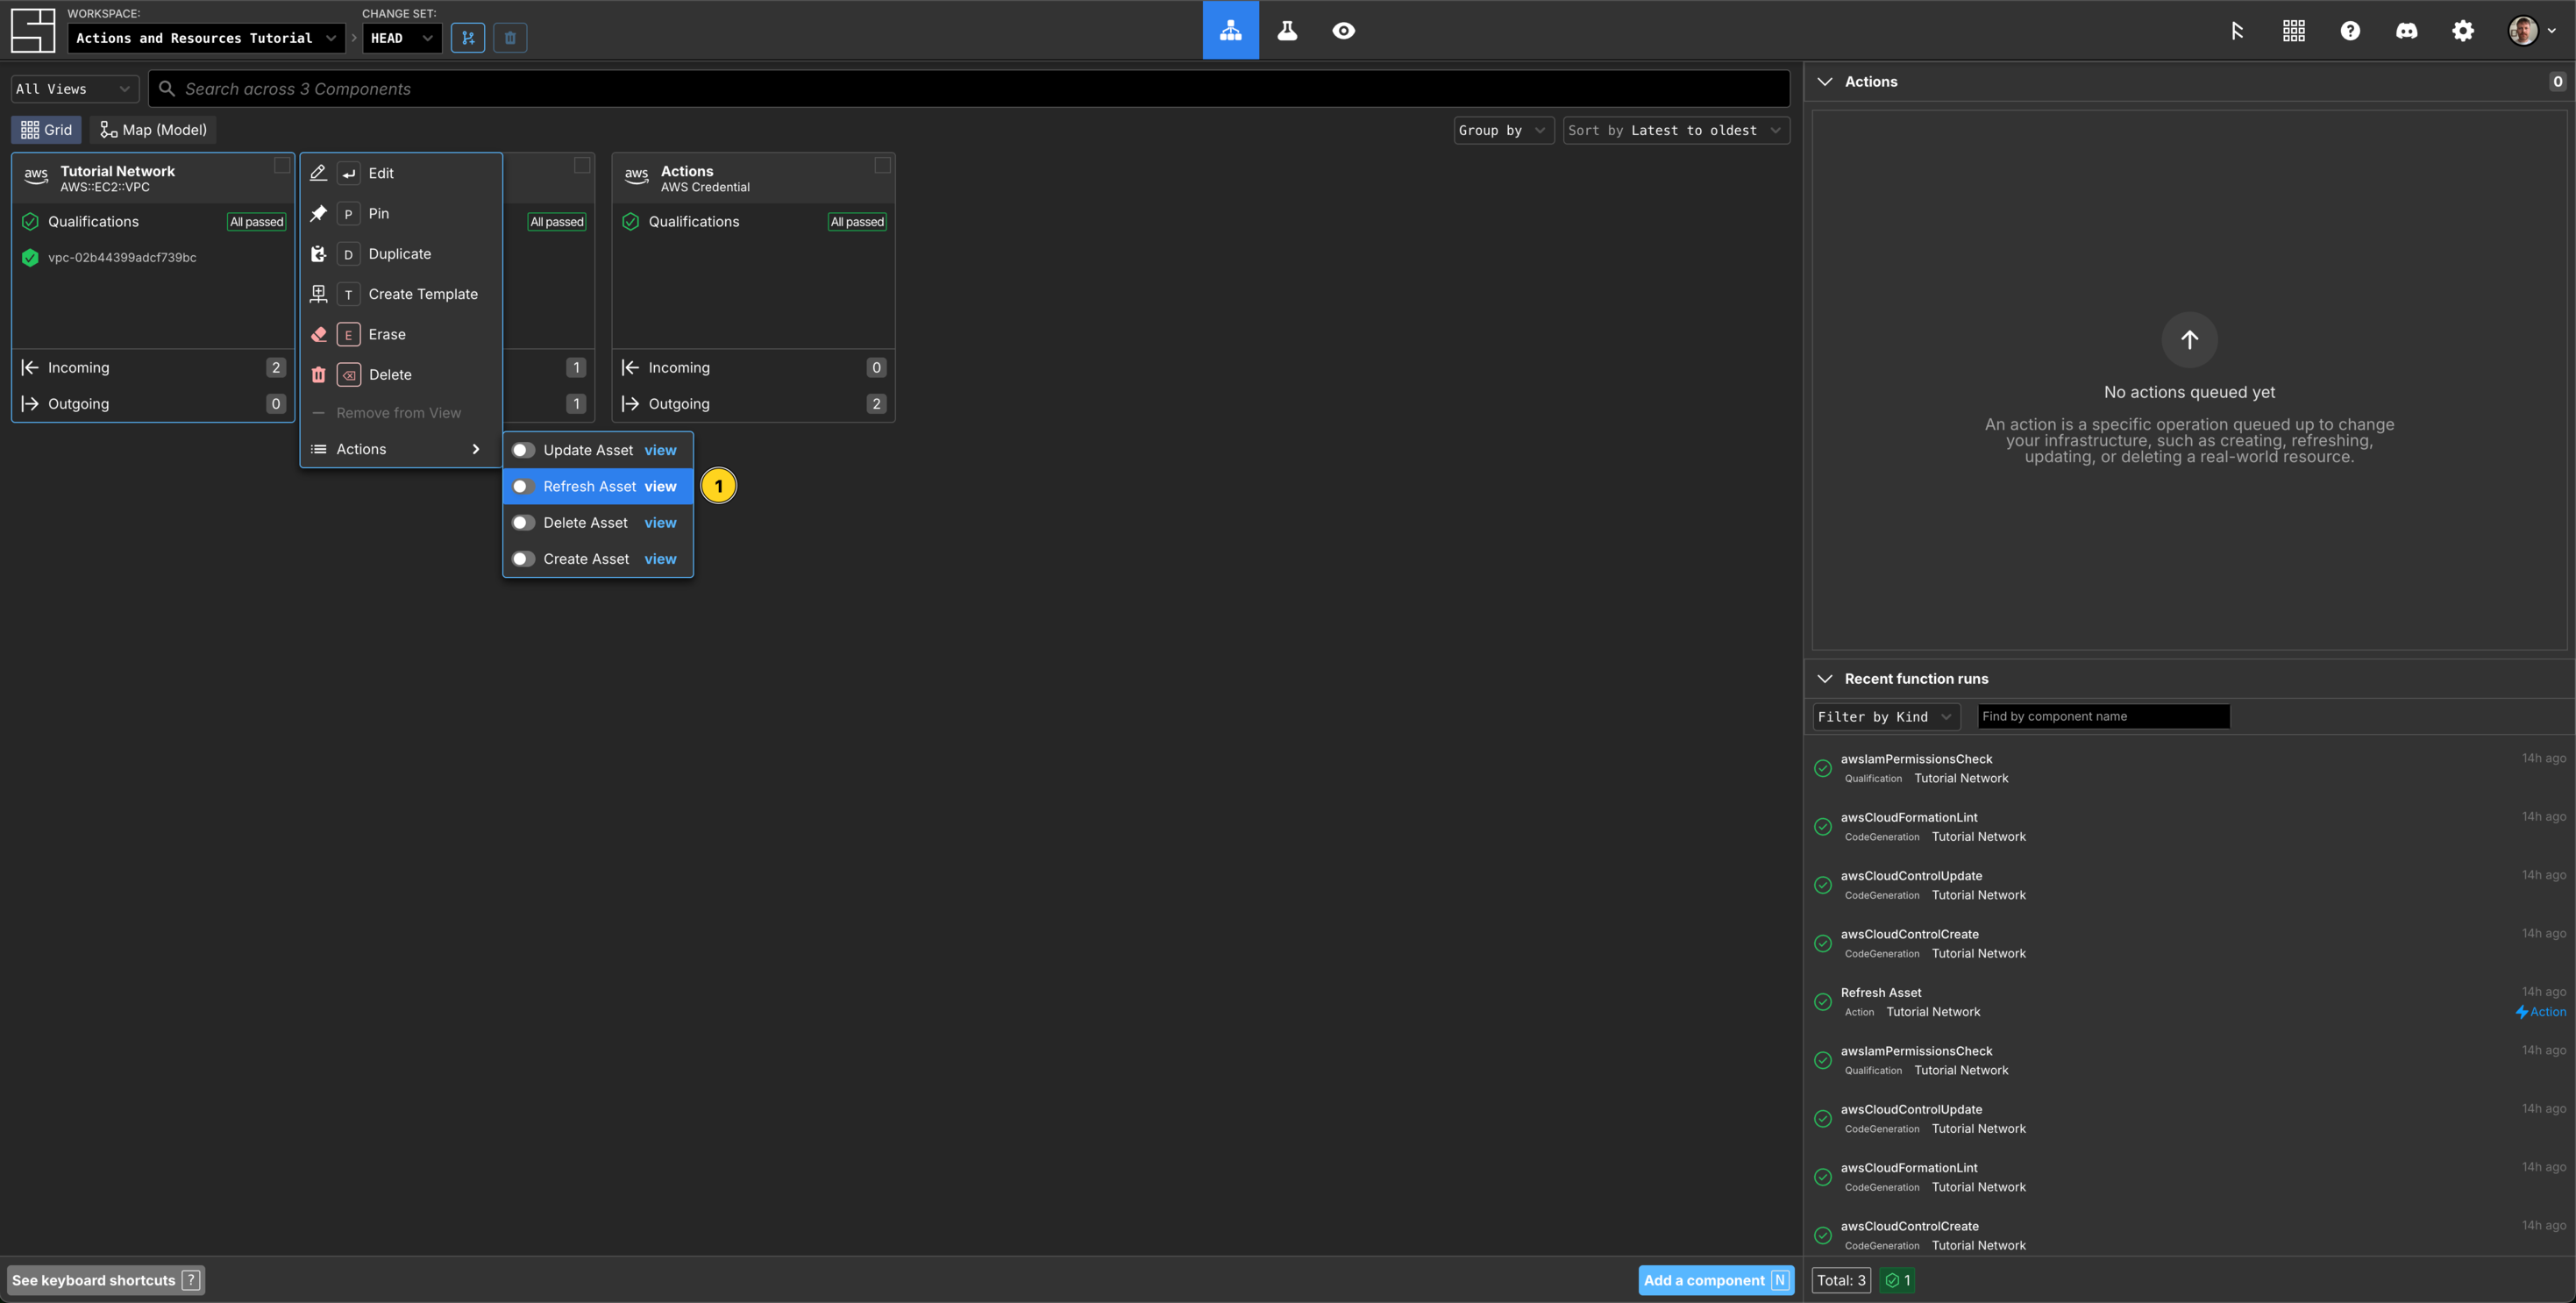
You can click the Refresh Resource button, on the Resource section, to ensure you have the most up to date resource data.
TIP
You can also refresh the resource data from the Grid. Right click the Component, hover over Actions and then click Refresh Asset.
Create a new Change Set
Now we will update some properties of our VPC.
Click the Create Change Set button.
Name your Change Set Update VPC.
Click Create Change Set.
Update the properties of the Tutorial Network VPC

Select the Tutorial Network AWS::EC2::VPC on the Grid.
Set the EnableDnsHostnames property to true.
Set the EnableDnsSupport property to true.
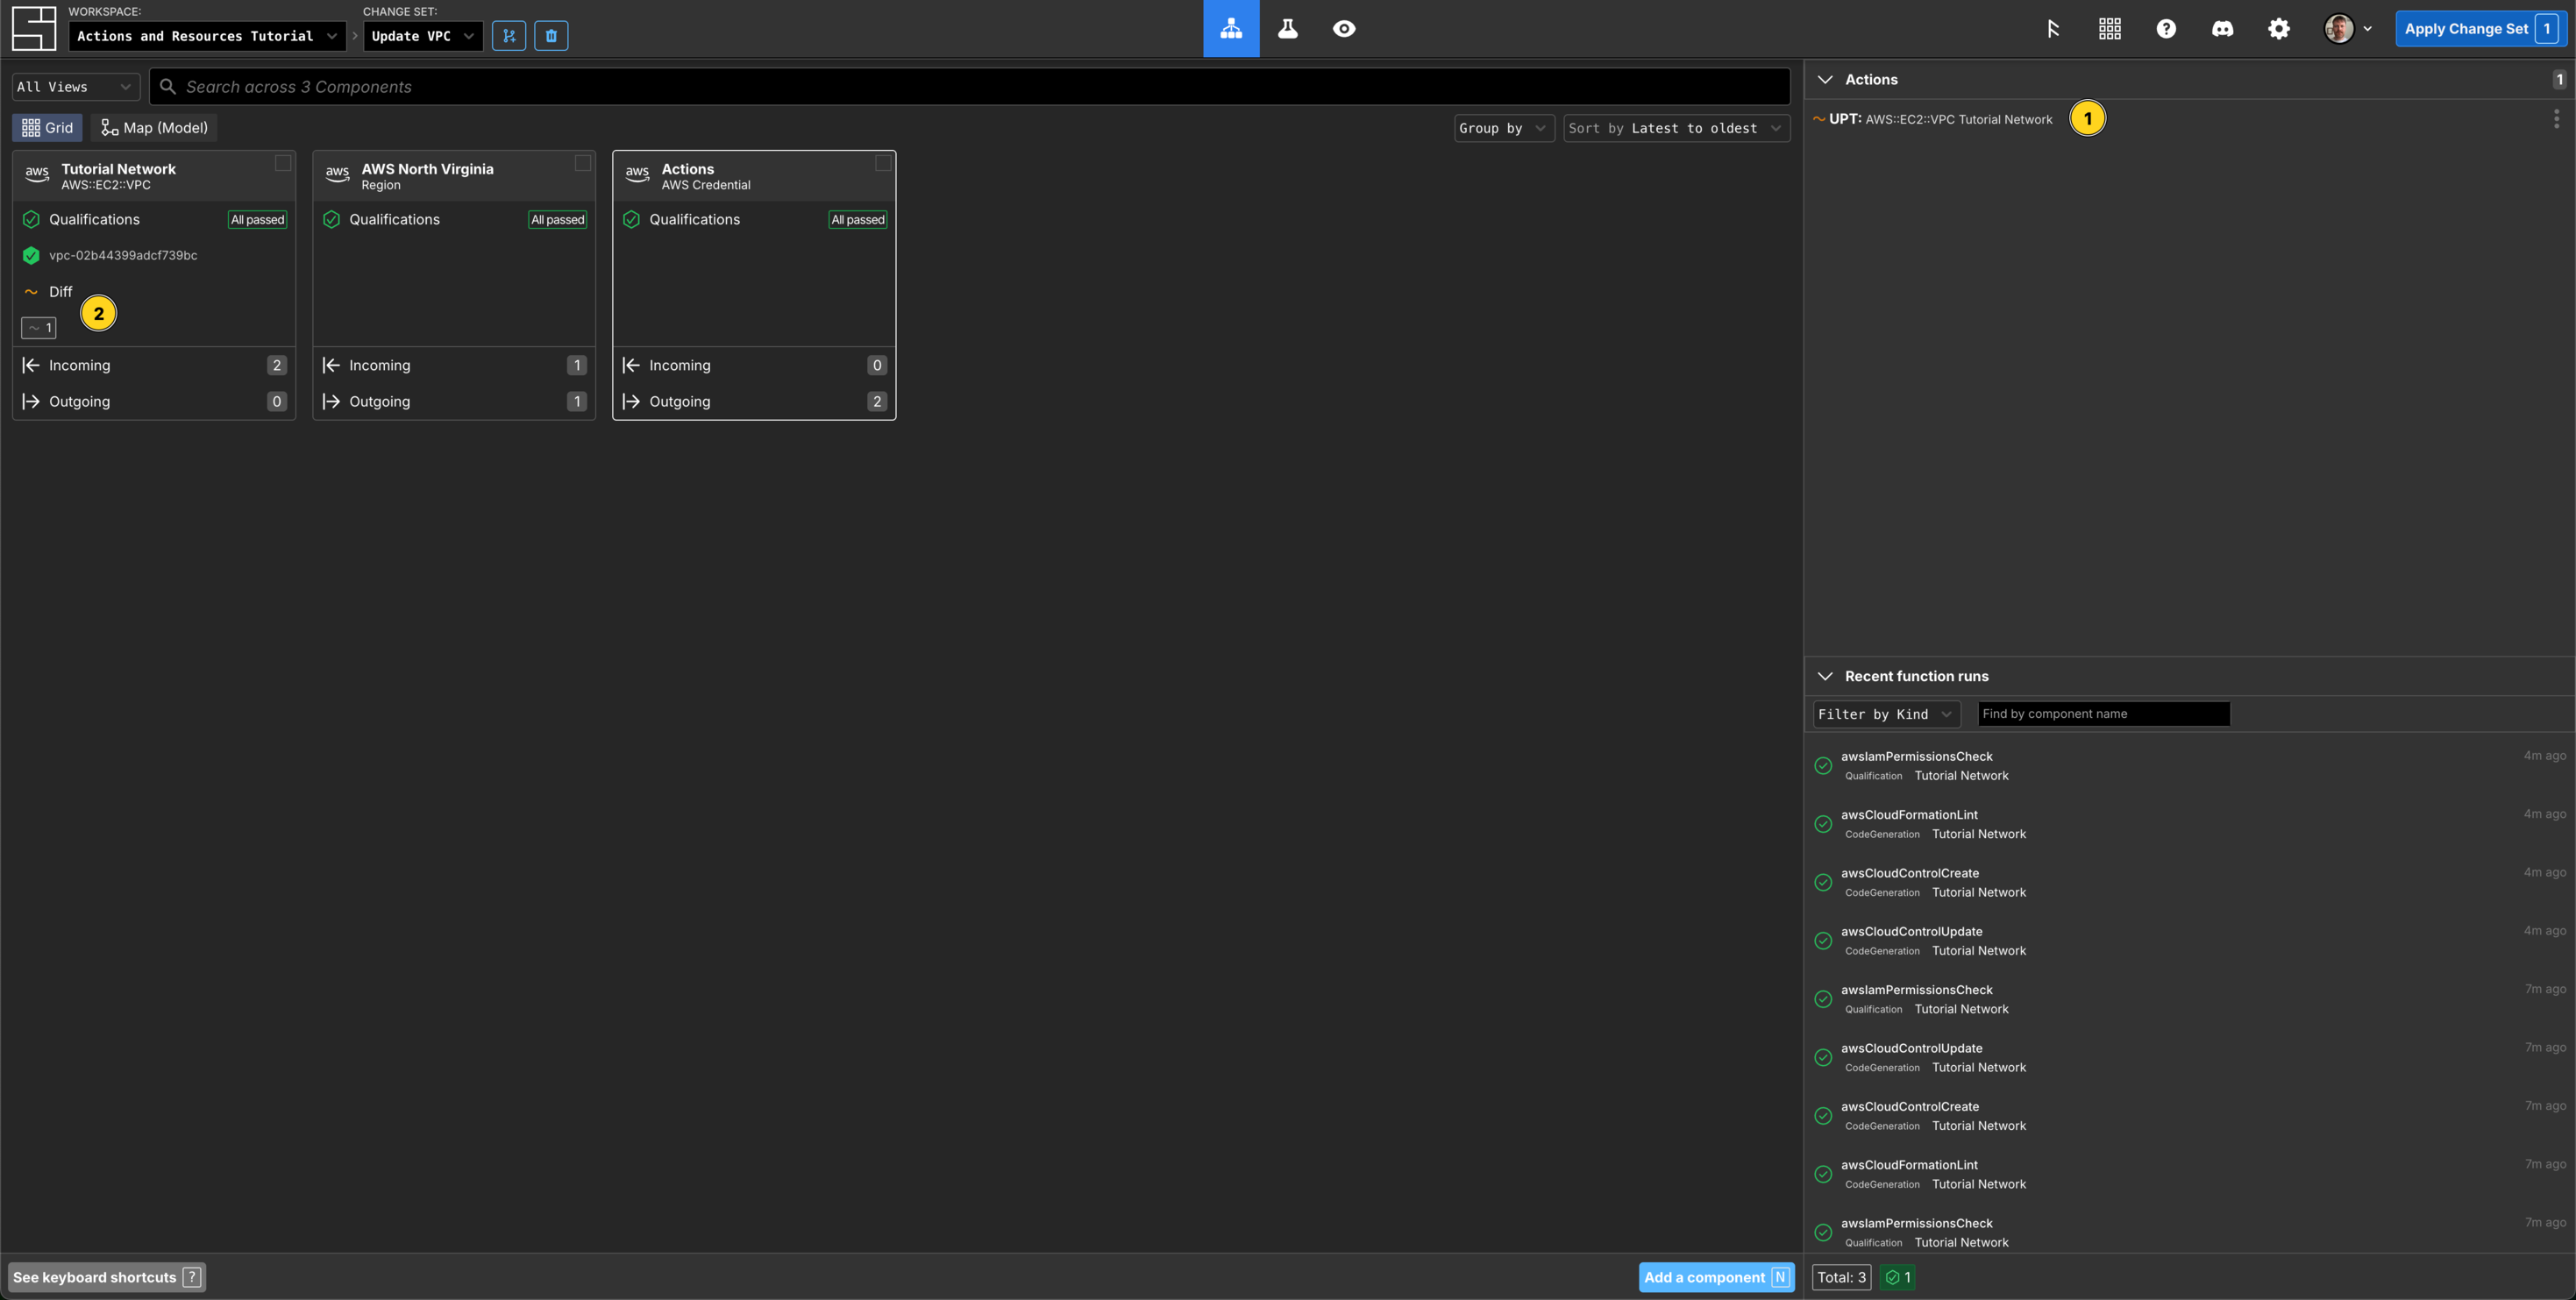
Editing a property on a Component with an existing Resource will automatically enqueue an Update Action, you can view this from within the Component via the Actions panel, or on the Grid via Actions. On the below screenshot, you can also see a ~Diff icon on the VPC Component.
Add a Subnet and set its properties
Click Add a component or press N and search for Subnet, select AWS::EC2::Subnet and hit Enter.
Name your Subnet Tutorial Network Subnet.
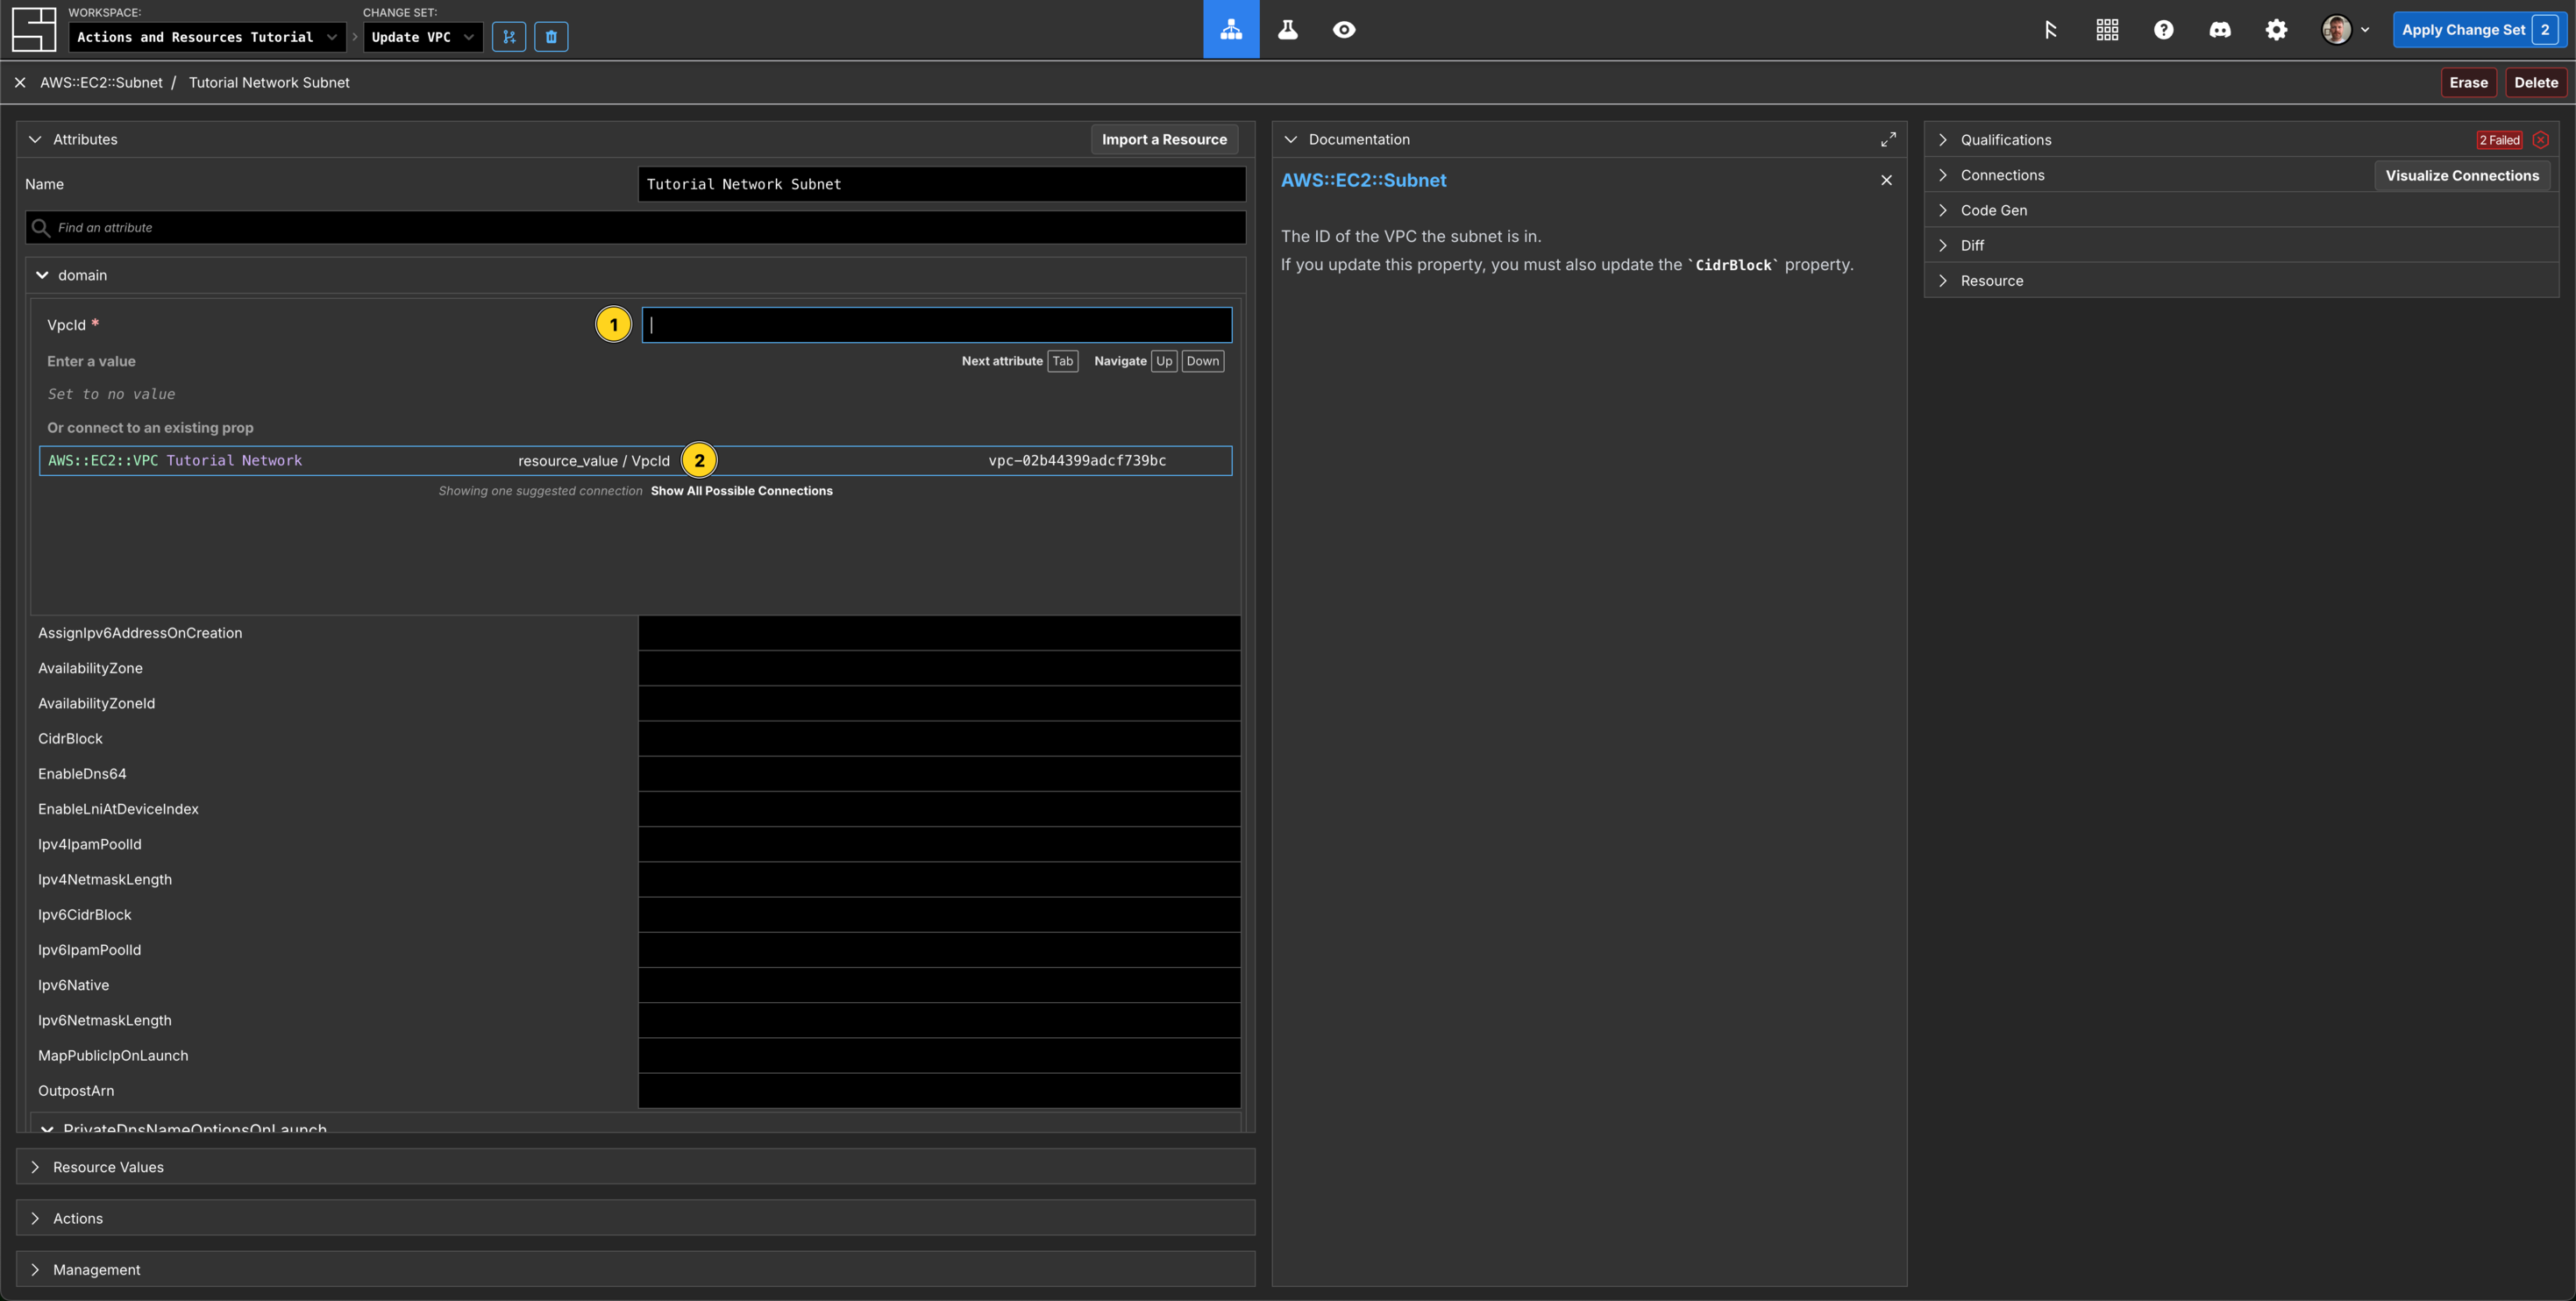
In VpcId, subscribe to the VpcId property of the Tutorial Network Component.
Set the AvailabilityZone property to us-east-1a.
Set the CidrBlock property to 10.0.0.0/26.
Set your region and aws credential properties.
Click the X or press Esc to return to the Grid.
Observe the enqueued Actions
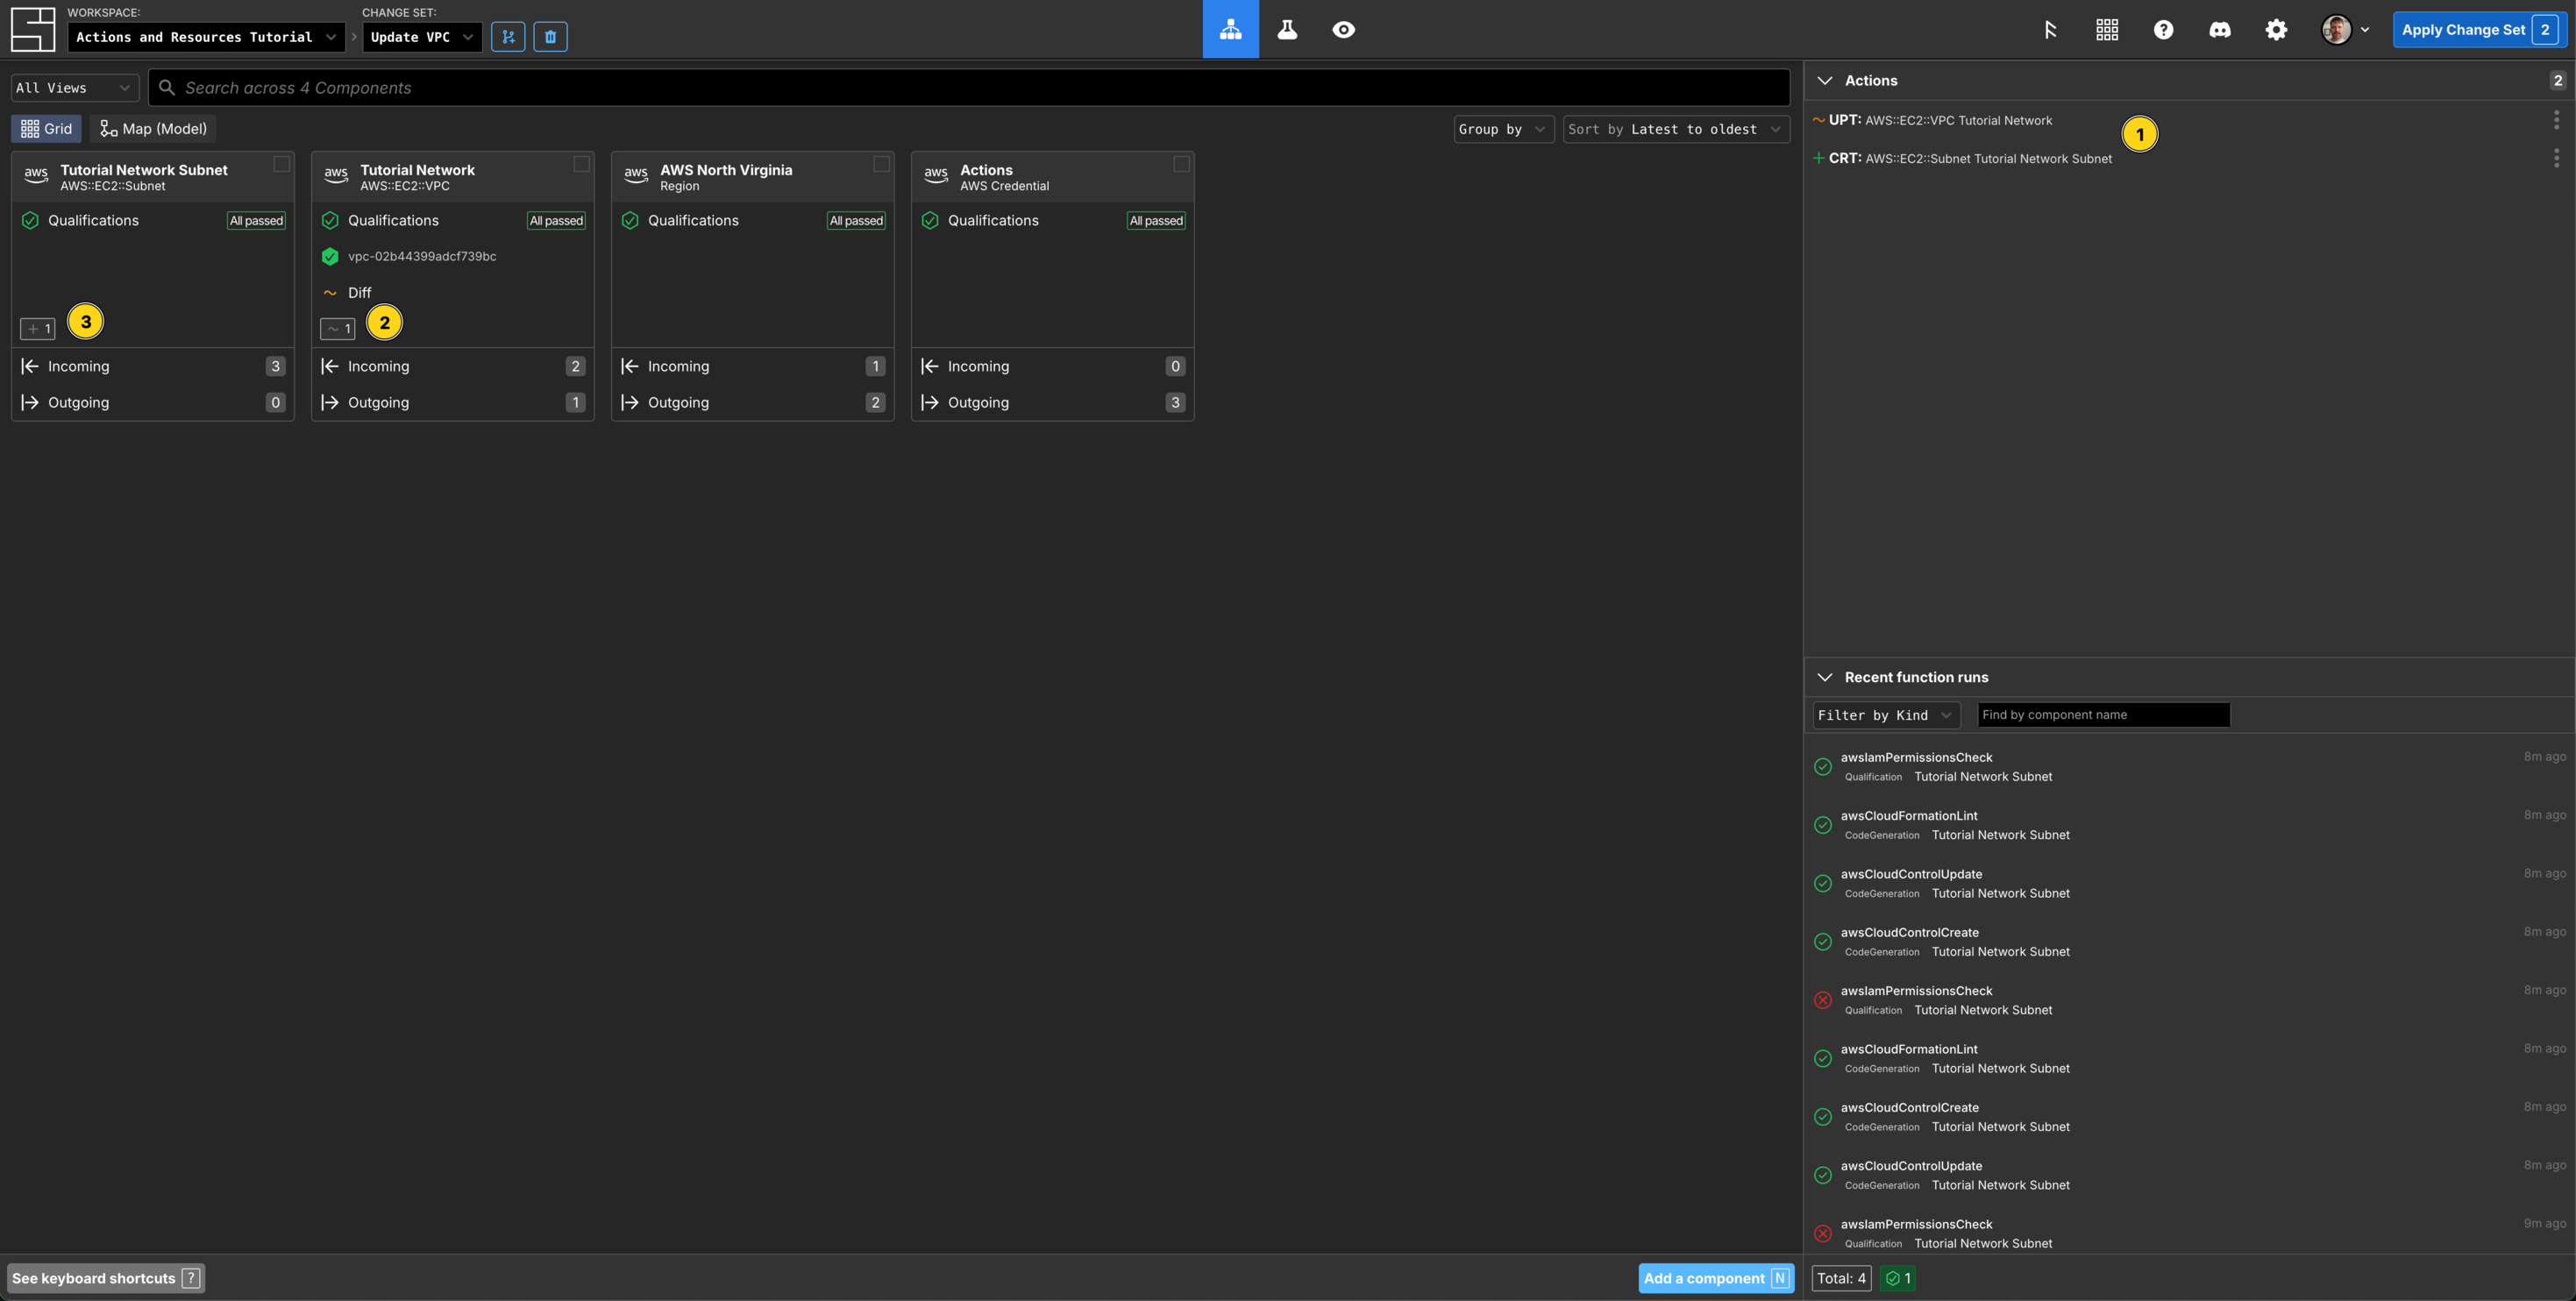
You will have 2 Actions enqueued for this Change Set - one to update the attributes of the VPC, and a create action for your new Subnet.
You can also see the two pending Update and Create Actions on the VPC and Subnet Component tiles.
When you apply the Change Set, the action to update the attributes will run first. If it succeeds, then the action to create your Subnet will run.
Apply the Change Set
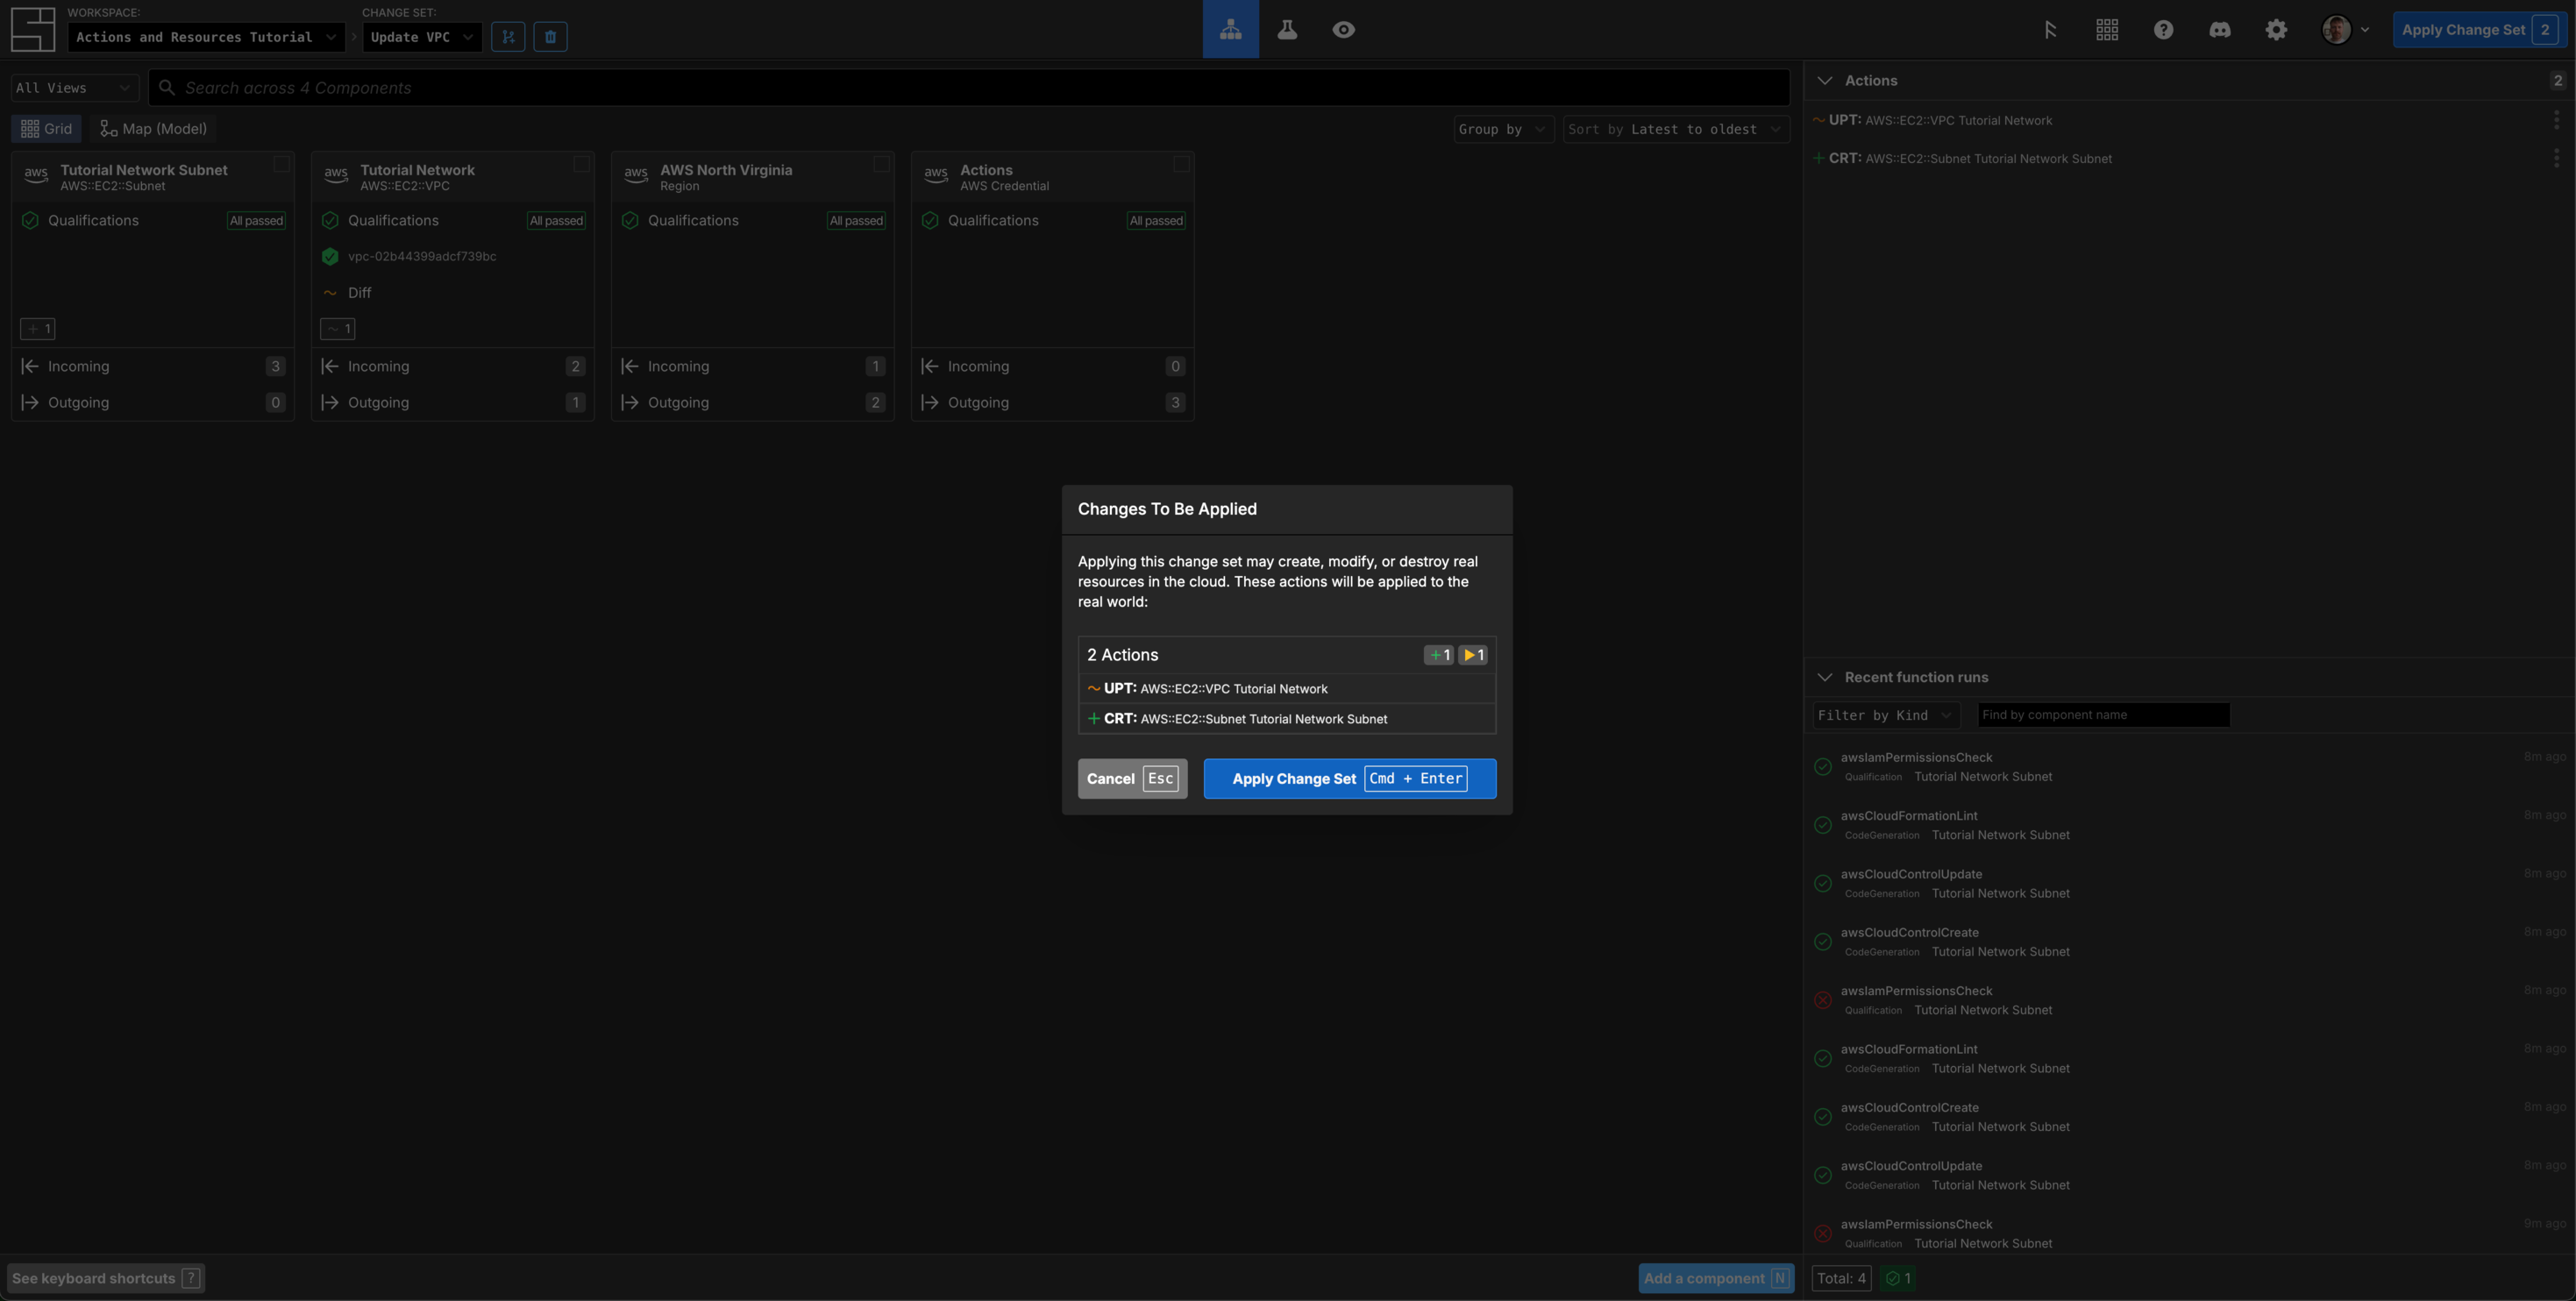
Click the Apply Change Set button in the Header.
Confirm that you want to apply this Change Set by clicking Apply Change Set (or Cmd/Ctrl + Enter) in the modal.
Observe the action order
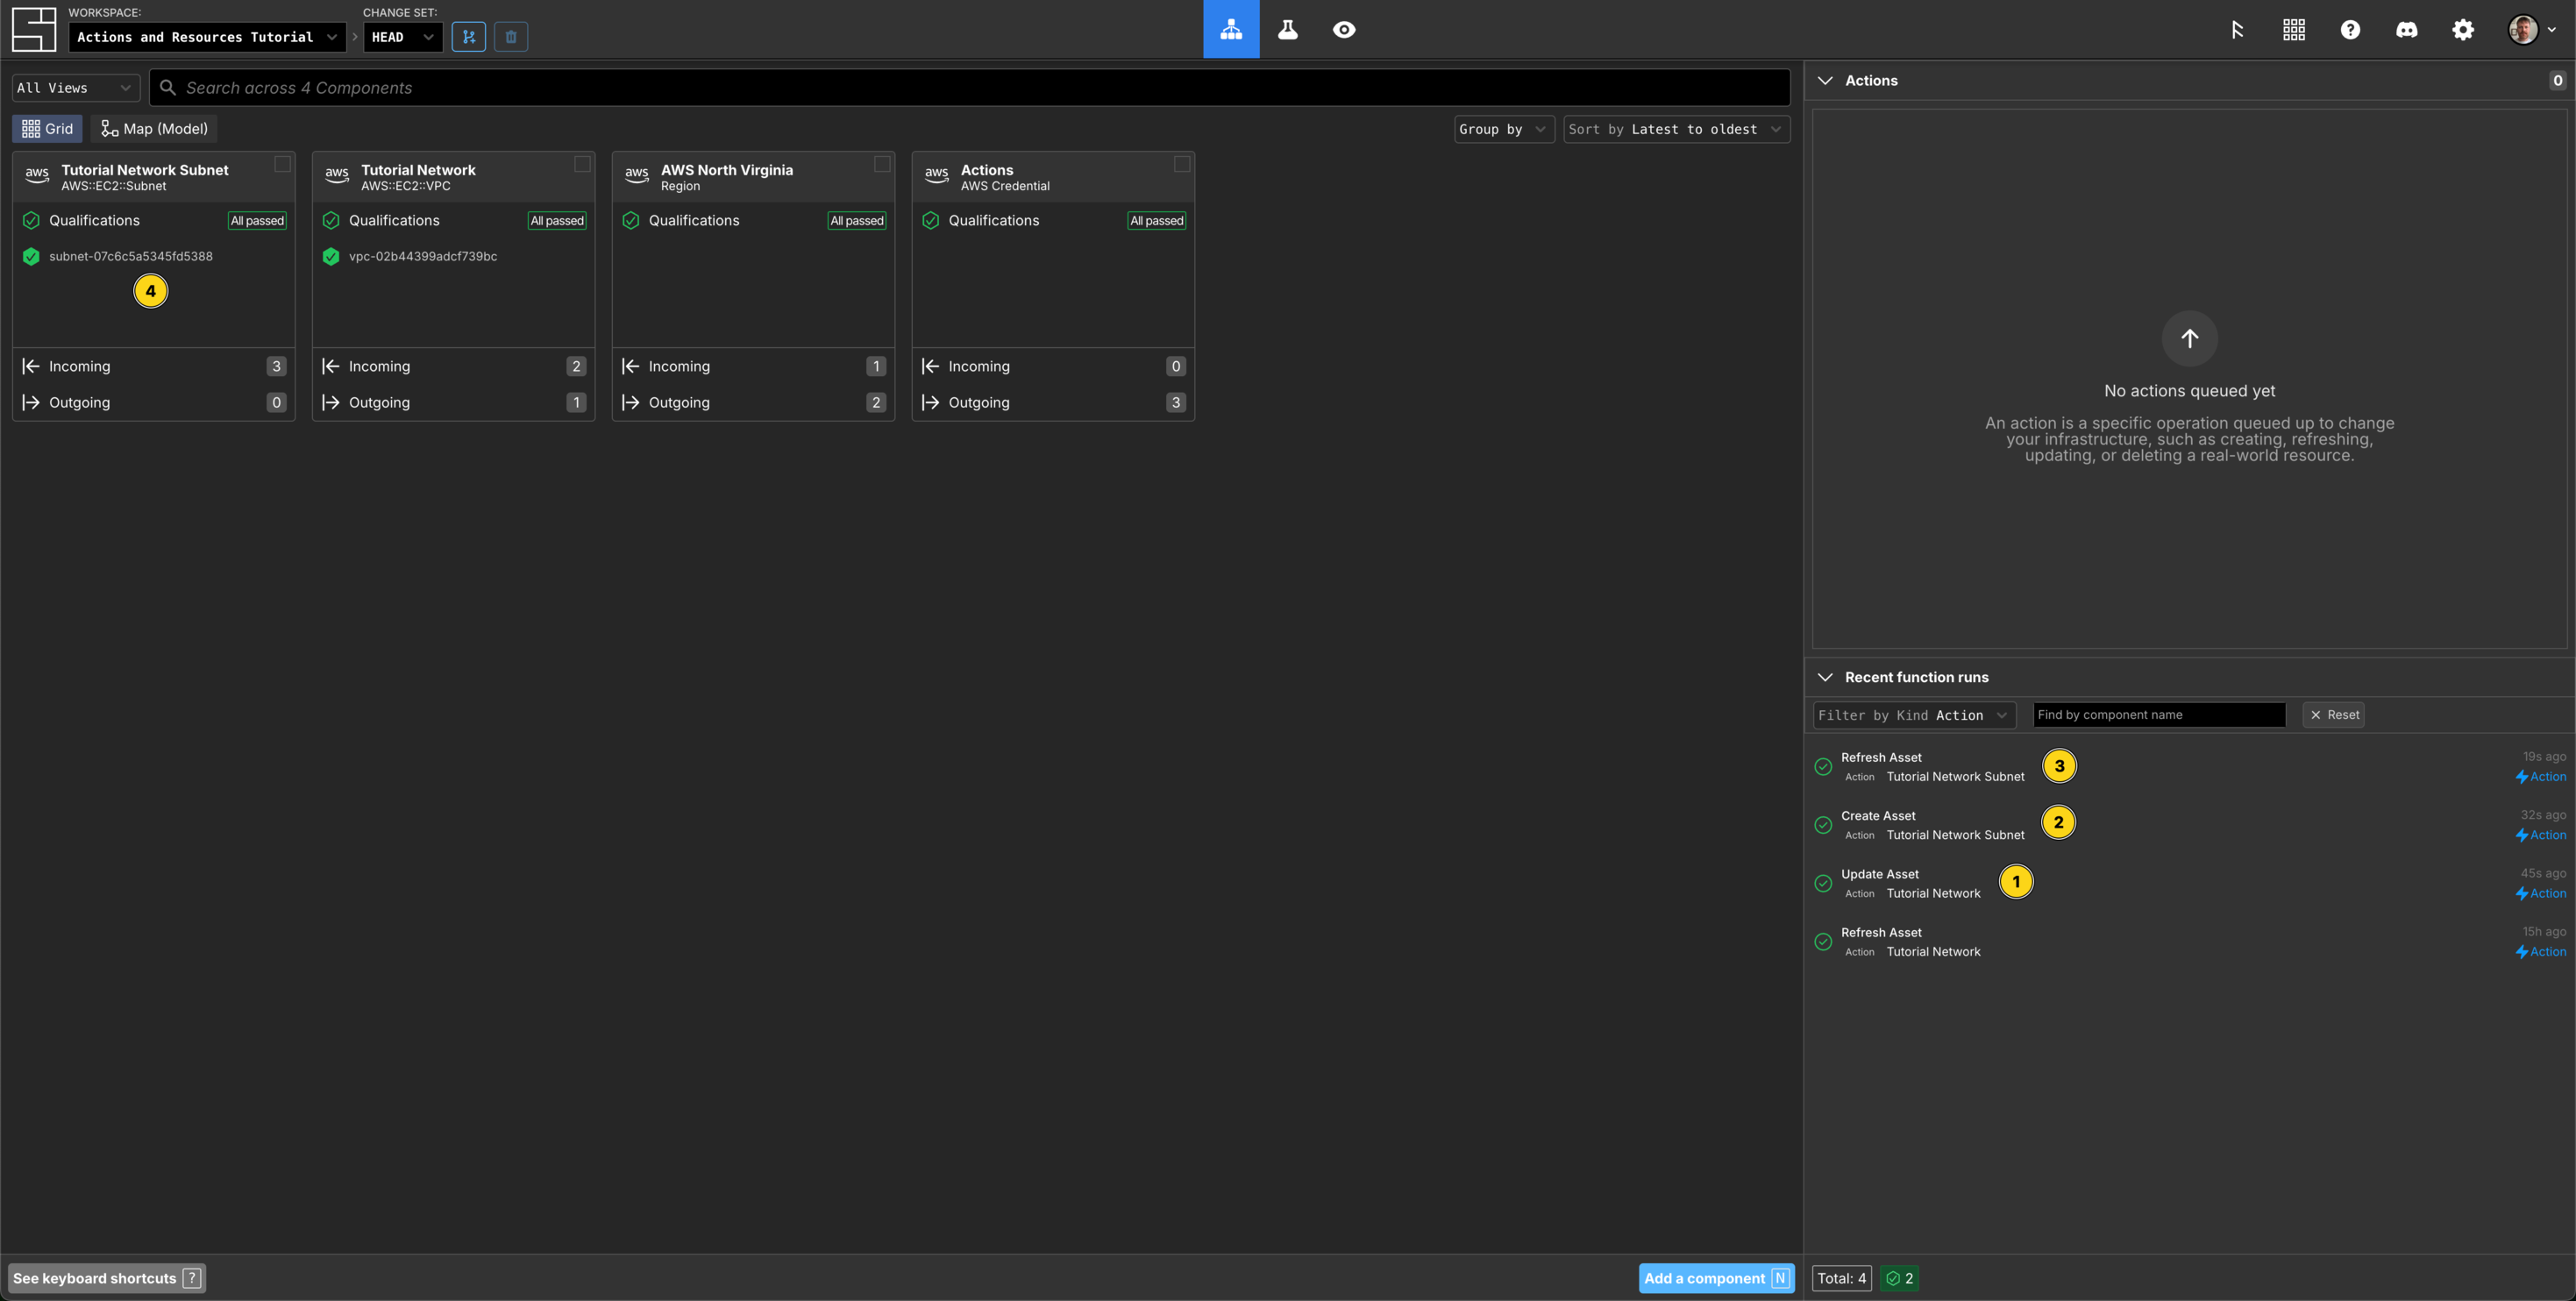
You will see the Action to update the Tutorial Network VPC finish, followed by the Create Action of your Tutorial VPC Subnet, then finally the Refresh Action. You can now view the Subnets ResourceID and verification of its creation on the Component tile.
TIP
The order of Actions is automatically determined based on their configuration relationships.
Clean Up
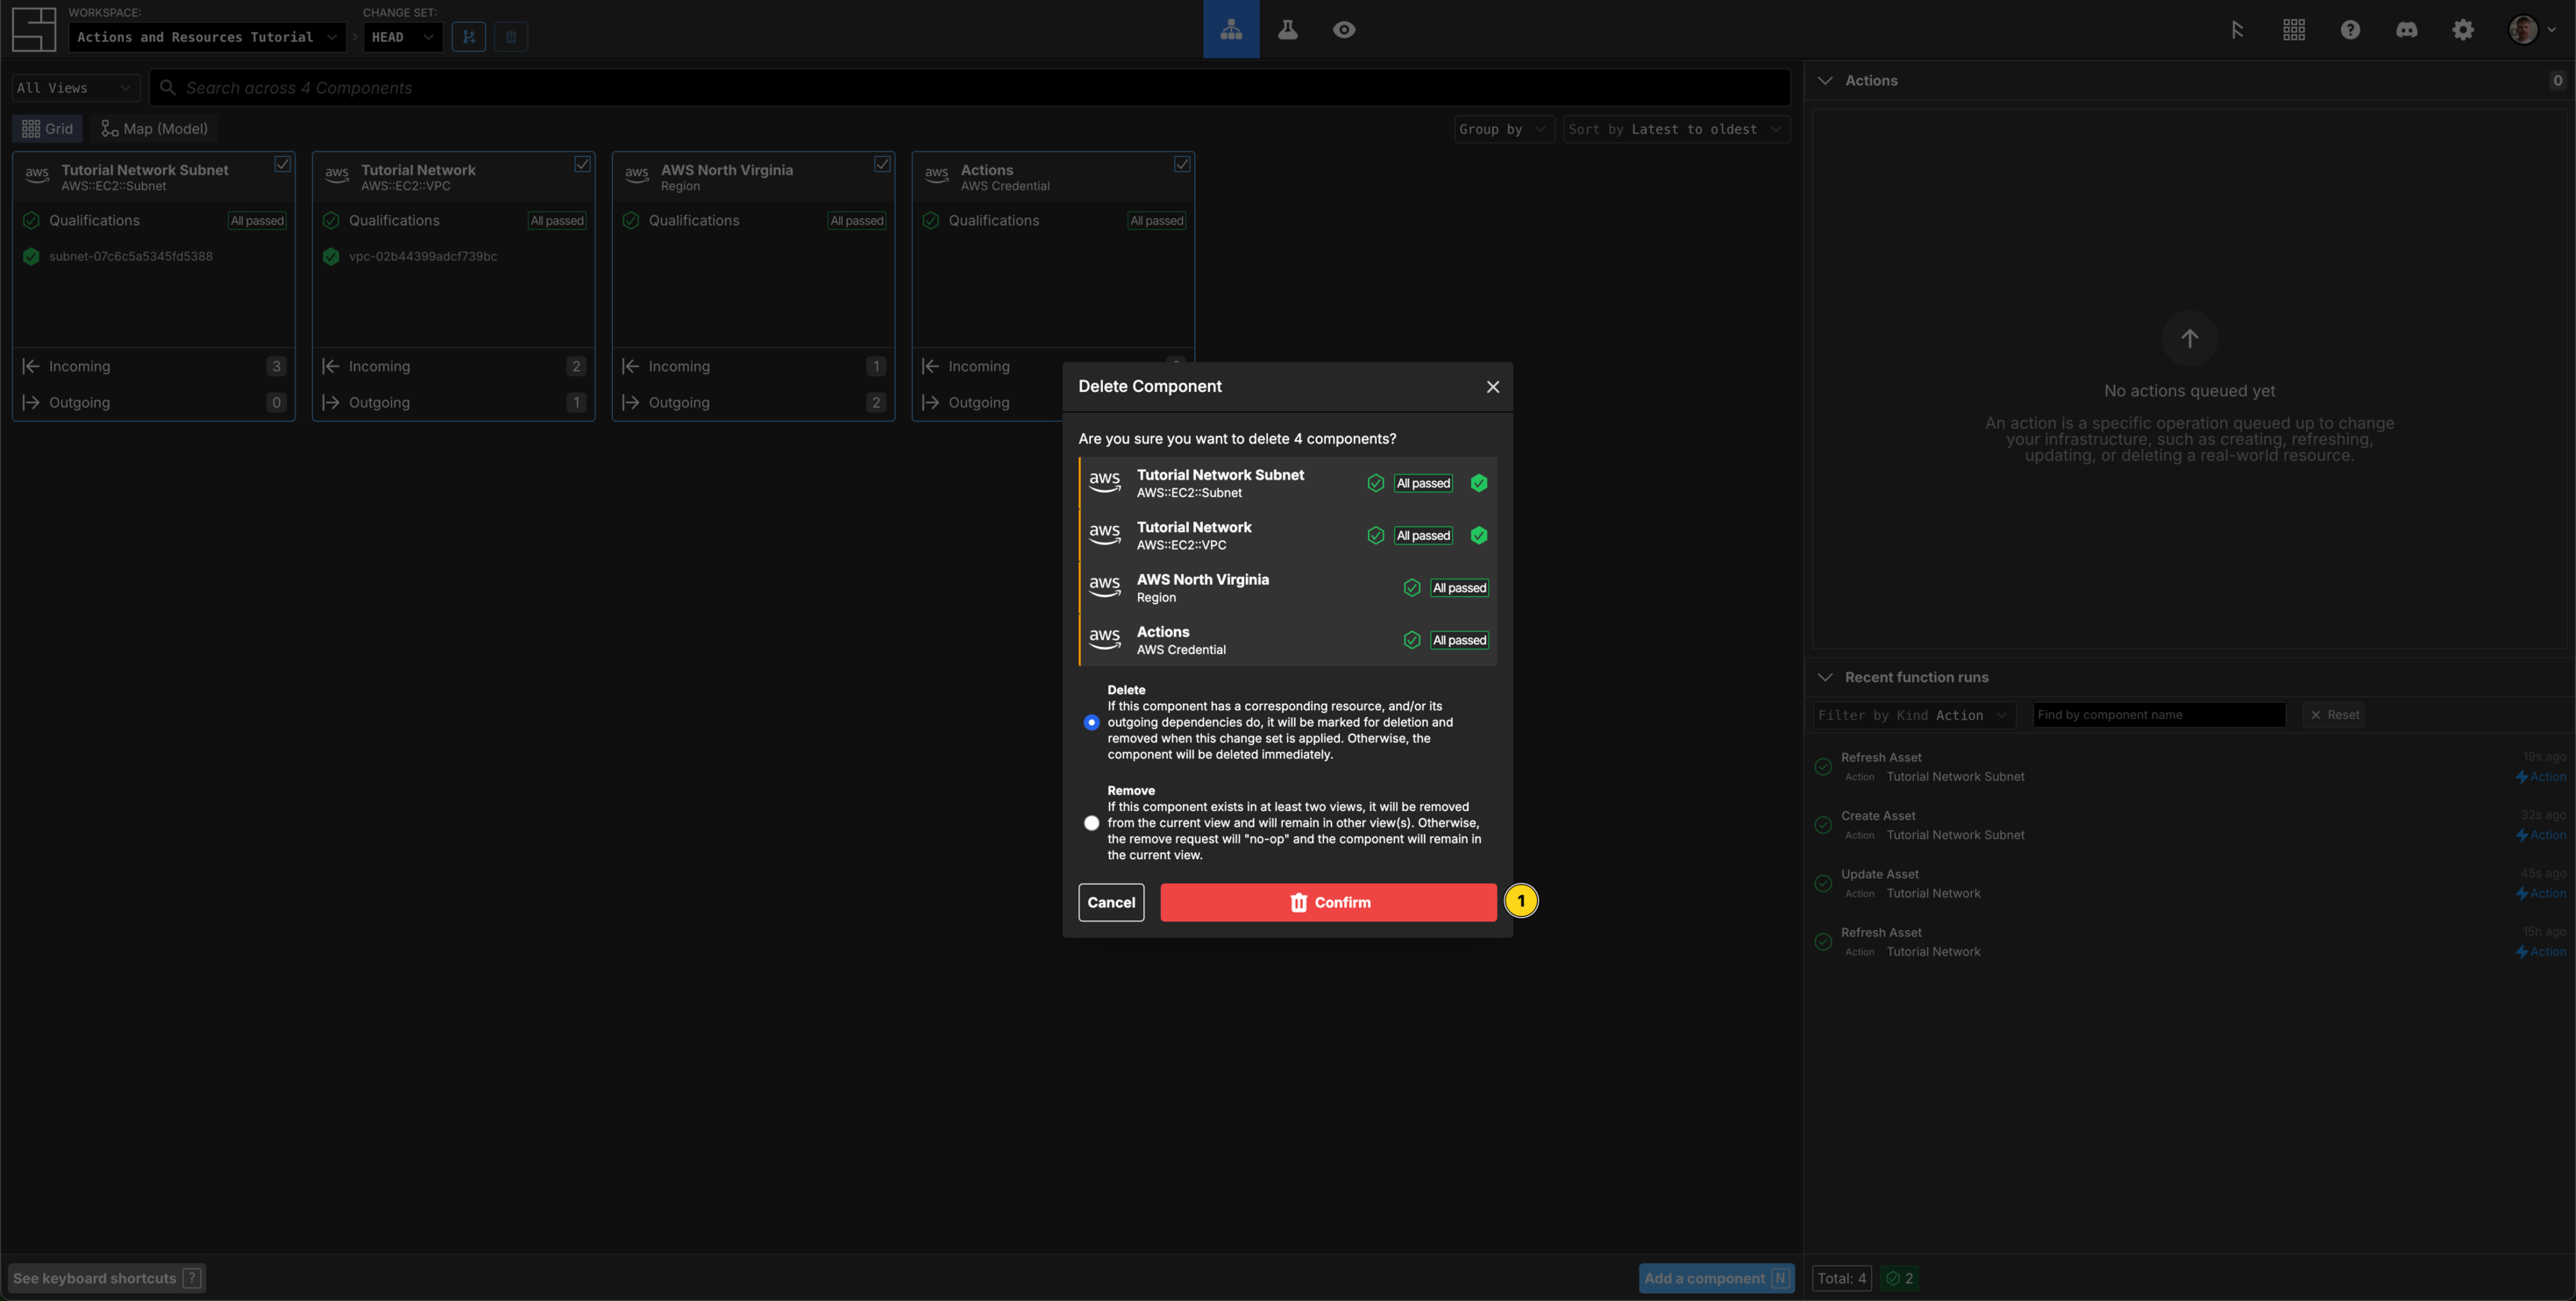
Press Cmd/Ctrl + A to Select all Components on the Grid, then the Delete key via your keyboard or click the option in the Context Menu.
Click to Confirm that you want to delete the resources you created.
Click the Apply Change Set button in the Header.
Click the Apply Change Set button in the modal to confirm the Action.
Congratulations
In this tutorial you learned:
- How to use the Actions panel in a Component to enable/disable an action in a Change Set
- Enqueued Actions can be seen in the Actions panel
- Enqueued Actions are persisent across change-sets until they succeed
- Grid Components display pending actions
- Actions are executed in order according to their configuration relationships
- Failed Actions can be debugged by looking at their arguments, function code, results, and logs
- Past action executions can be viewed from the Recent function runs panel
- Resource updates are enqueued automatically when making changes to existing resources
- Actions set a Components resource value through their return value
- Resources can be refreshed as needed, to ensure an accurate view of the system