Creating Components
This tutorial will teach you how to create new Components.
To follow along, you should:
Finish the Getting Started tutorial, to have basic knowledge of System Initiative.
You should have your System Initiative workspace open in another window.
This tutorial shows you how to create Components and add functions to them. It's focus is on introducing you to the user interface and various high level concepts. For deeper details on writing specific function types, see the reference guides.
While creating Components and writing functions does require you to write
TypeScript, don't worry if you aren't familiar with the language. System Initiative functions tend to be quite short and easy to reason with. You'll pick it up.
Create a Change Set
Click the Create Change Set button.
Name your new Change Set Creating Components
Click the Create Change Set button.
Switch to the Customize Screen
Click the Beaker icon to switch to the Customize screen.
Create a new Hello World Component
Click the New Asset button (represented by a + icon) in the Assets pallete in the left side panel.
Name your Asset Hello World.
Click Create Asset.
Make sure the Hello World is selected in the Assets sub-panel of the left side of the screen.
Assets are anything you might need to use in System Initiative - today,
they are synonymous with Components.
Set the Hello World meta-data
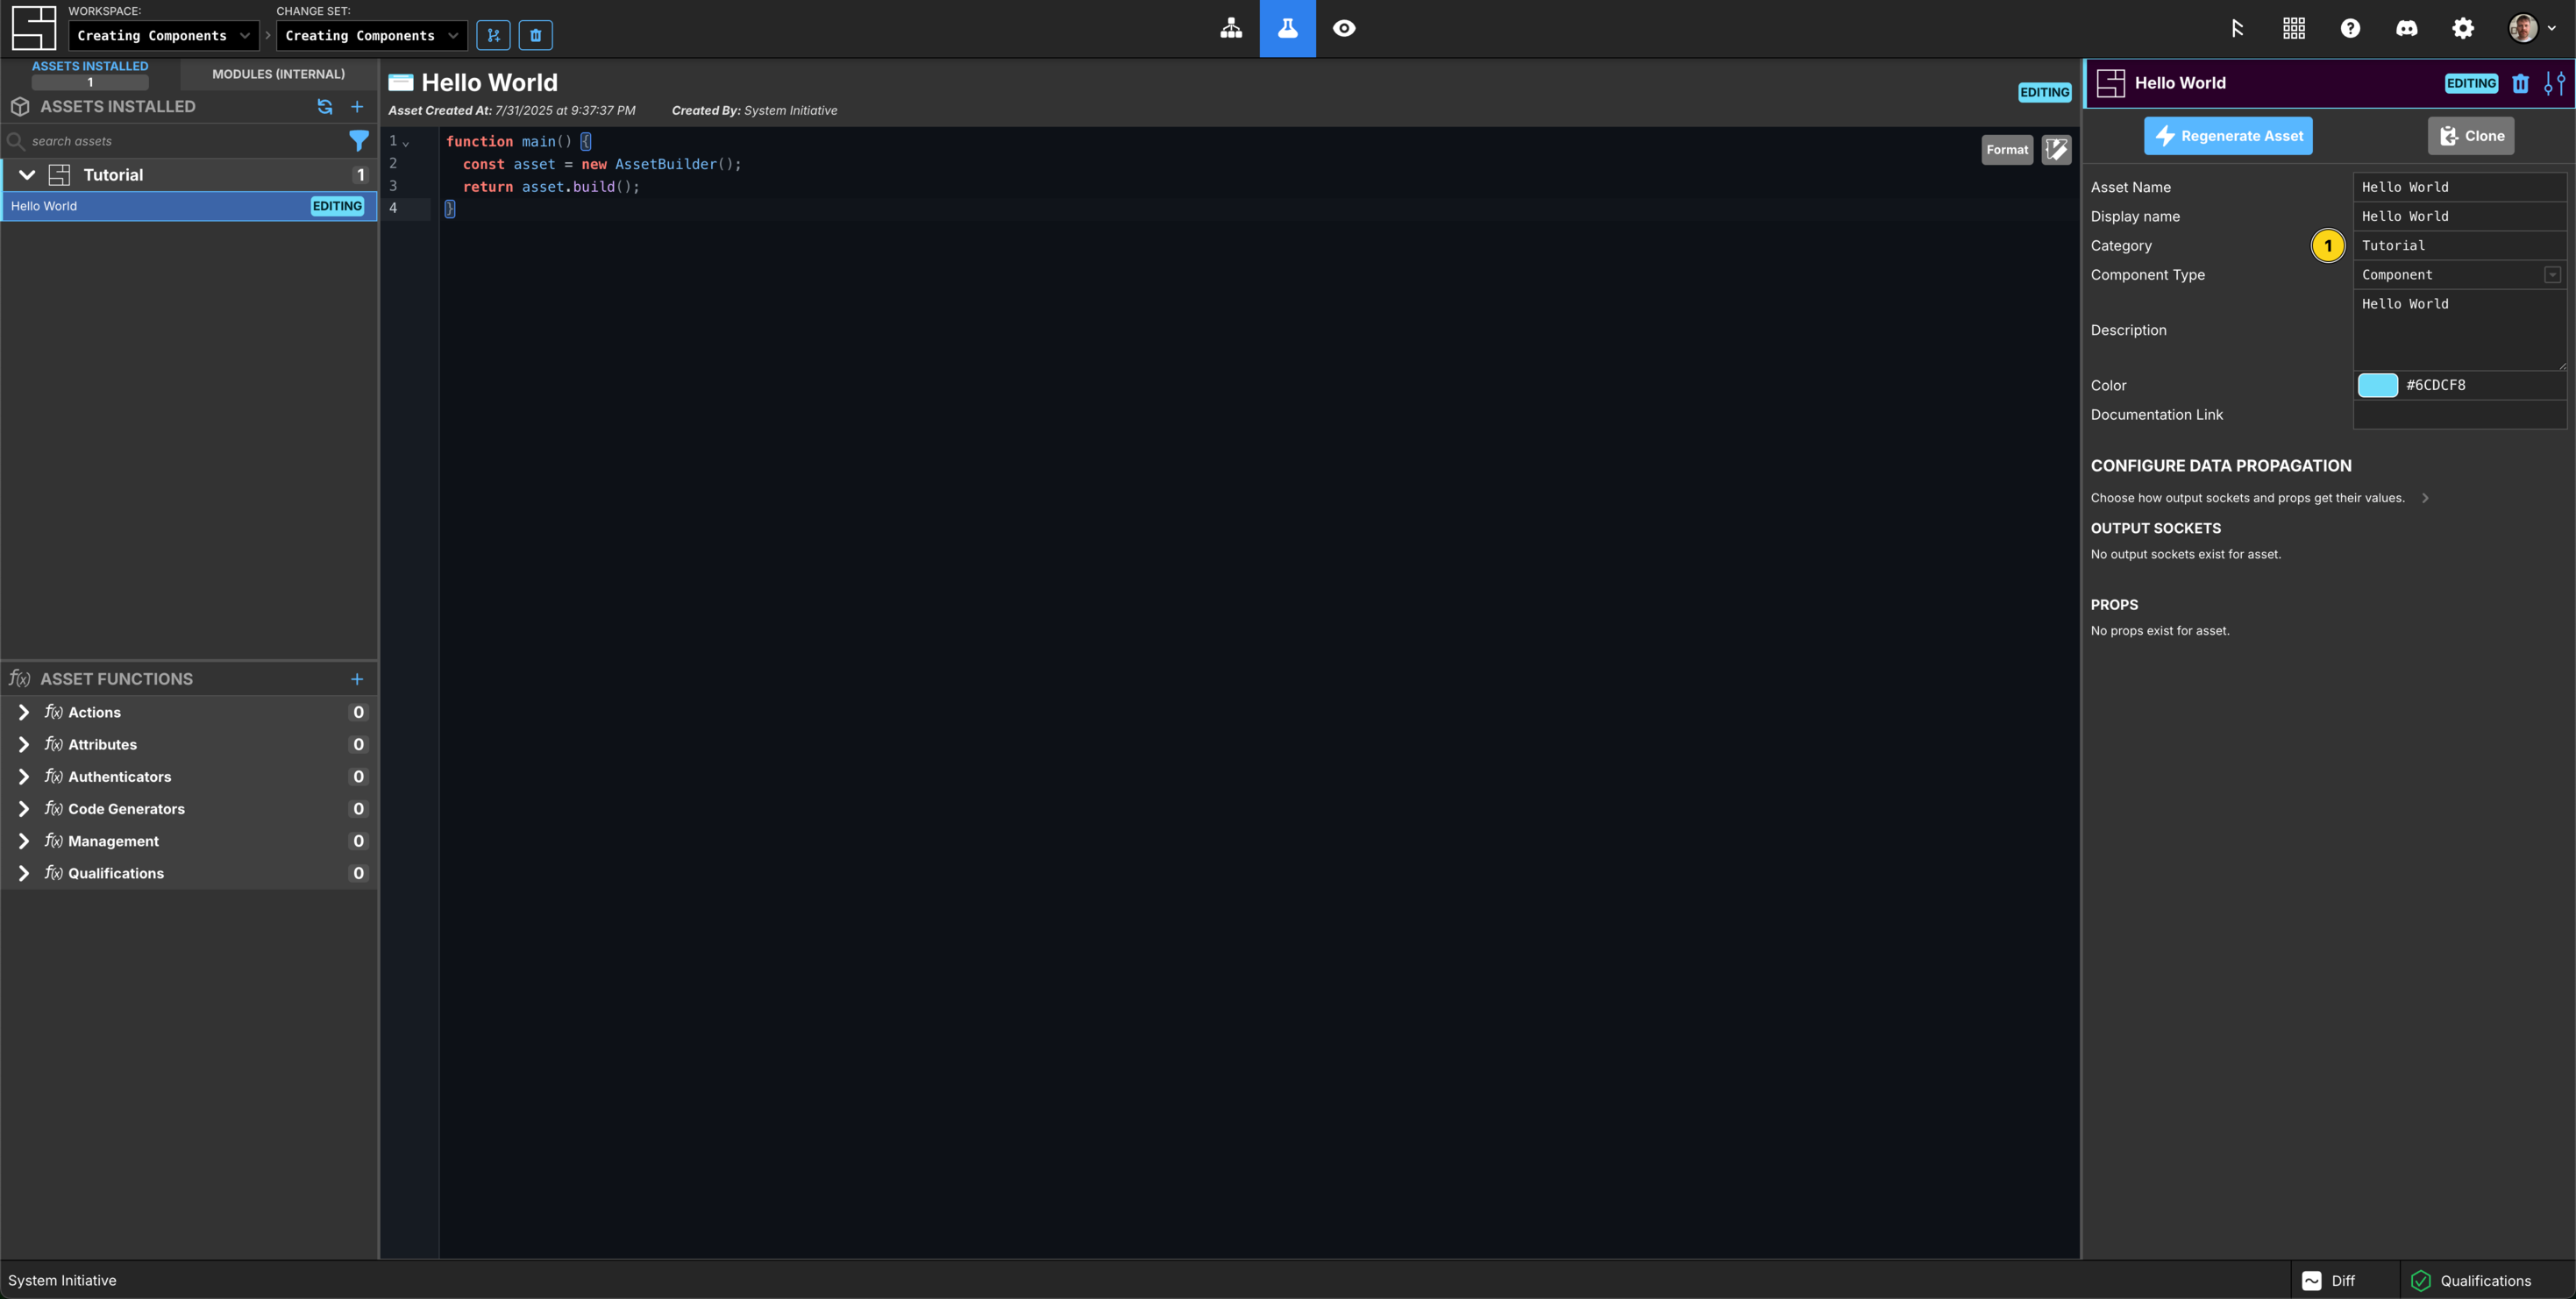
Set the Category to Tutorial.
Set the Component Type to Component.
Set the Description to Hello World.
Set the color to #6cdcf8.
Add properties to the Hello World Schema
In the center of the screen is a text editor showing the empty Schema of your Hello World Component.
The code will look like this when you are finished:
function main() {
  const asset = new AssetBuilder();

  const helloProp = new PropBuilder()
    .setName("Hello")
    .setKind("string")
    .setValidationFormat(Joi.string().regex(/^world$/))
    .build();
  asset.addProp(helloProp);

  const tagsProp = new PropBuilder()
    .setName("Tags")
    .setKind("array")
    .setEntry(
      new PropBuilder()
        .setKind("object")
        .setName("TagEntry")
        .addChild(new PropBuilder().setKind("string").setName("Key").build())
        .addChild(new PropBuilder().setKind("string").setName("Value").build())
        .build(),
    )
    .build();
  asset.addProp(tagsProp);

  return asset.build();
}
This will create a Component with two properties:
- Hello: a string that must be all lowercase
- Tags: an array of Key/Value objects
Here is how you would write it yourself, step by step.
1. Schema function
You define your Components schema by writing a TypeScript function named main(). The function begins by creating a new AssetBuilder(), stored in a variable named asset.
This builder pattern is a recurring one in Schema definition. You will
create new Builder objects, then call functions to configure them, and finally call .build() to output the final definition.
2. The Hello property
Next you will add the Hello property in a variable named helloProp. Start by typing const helloProp = new - you'll see an auto-complete pop-up with a snippet named New Prop Snippet. Press Enter, and the code to create a new string property will be added.
The new prop definition starts with a new PropBuilder(), on which you will call functions on to configure your property.
setNamesets the properties name as it will appear in the Component attributes panel; in this case,KeyName.setKindspecifies the datatype for this property; in this case,string.setWidgetcontrols how this property is rendered in the attributes panel; for this property, as atextbox. You can delete this line, as it is also the default.setValidationFormatadds a validation that ensures the value of Hello isworld.
Hovering over a function will show you its definition. This can be very
helpful for reminding yourself of the available options!
Finish your property definition by calling .build().
Add the Hello property to the asset by calling asset.addProp(helloProp);.
3. The Tags property
Use the New Prop Snippet to generate another property, this time in a variable named tagsProp.
Set the name to Tags.
Set the kind of the property to array.
Arrays have their entries defined by properties as well, using the setEntry() method. The array will contain an object with two properties, Key and Value - these are specified with the addChild() method on the objects PropBuilder.
Finish your property definition by calling .build().
There is a format button in the top right of the editor! Use it to
auto-format your function as you go.
4. Return the compiled Asset
With all your properties added to the Schema, you can now return the compiled asset definition with return asset.build().
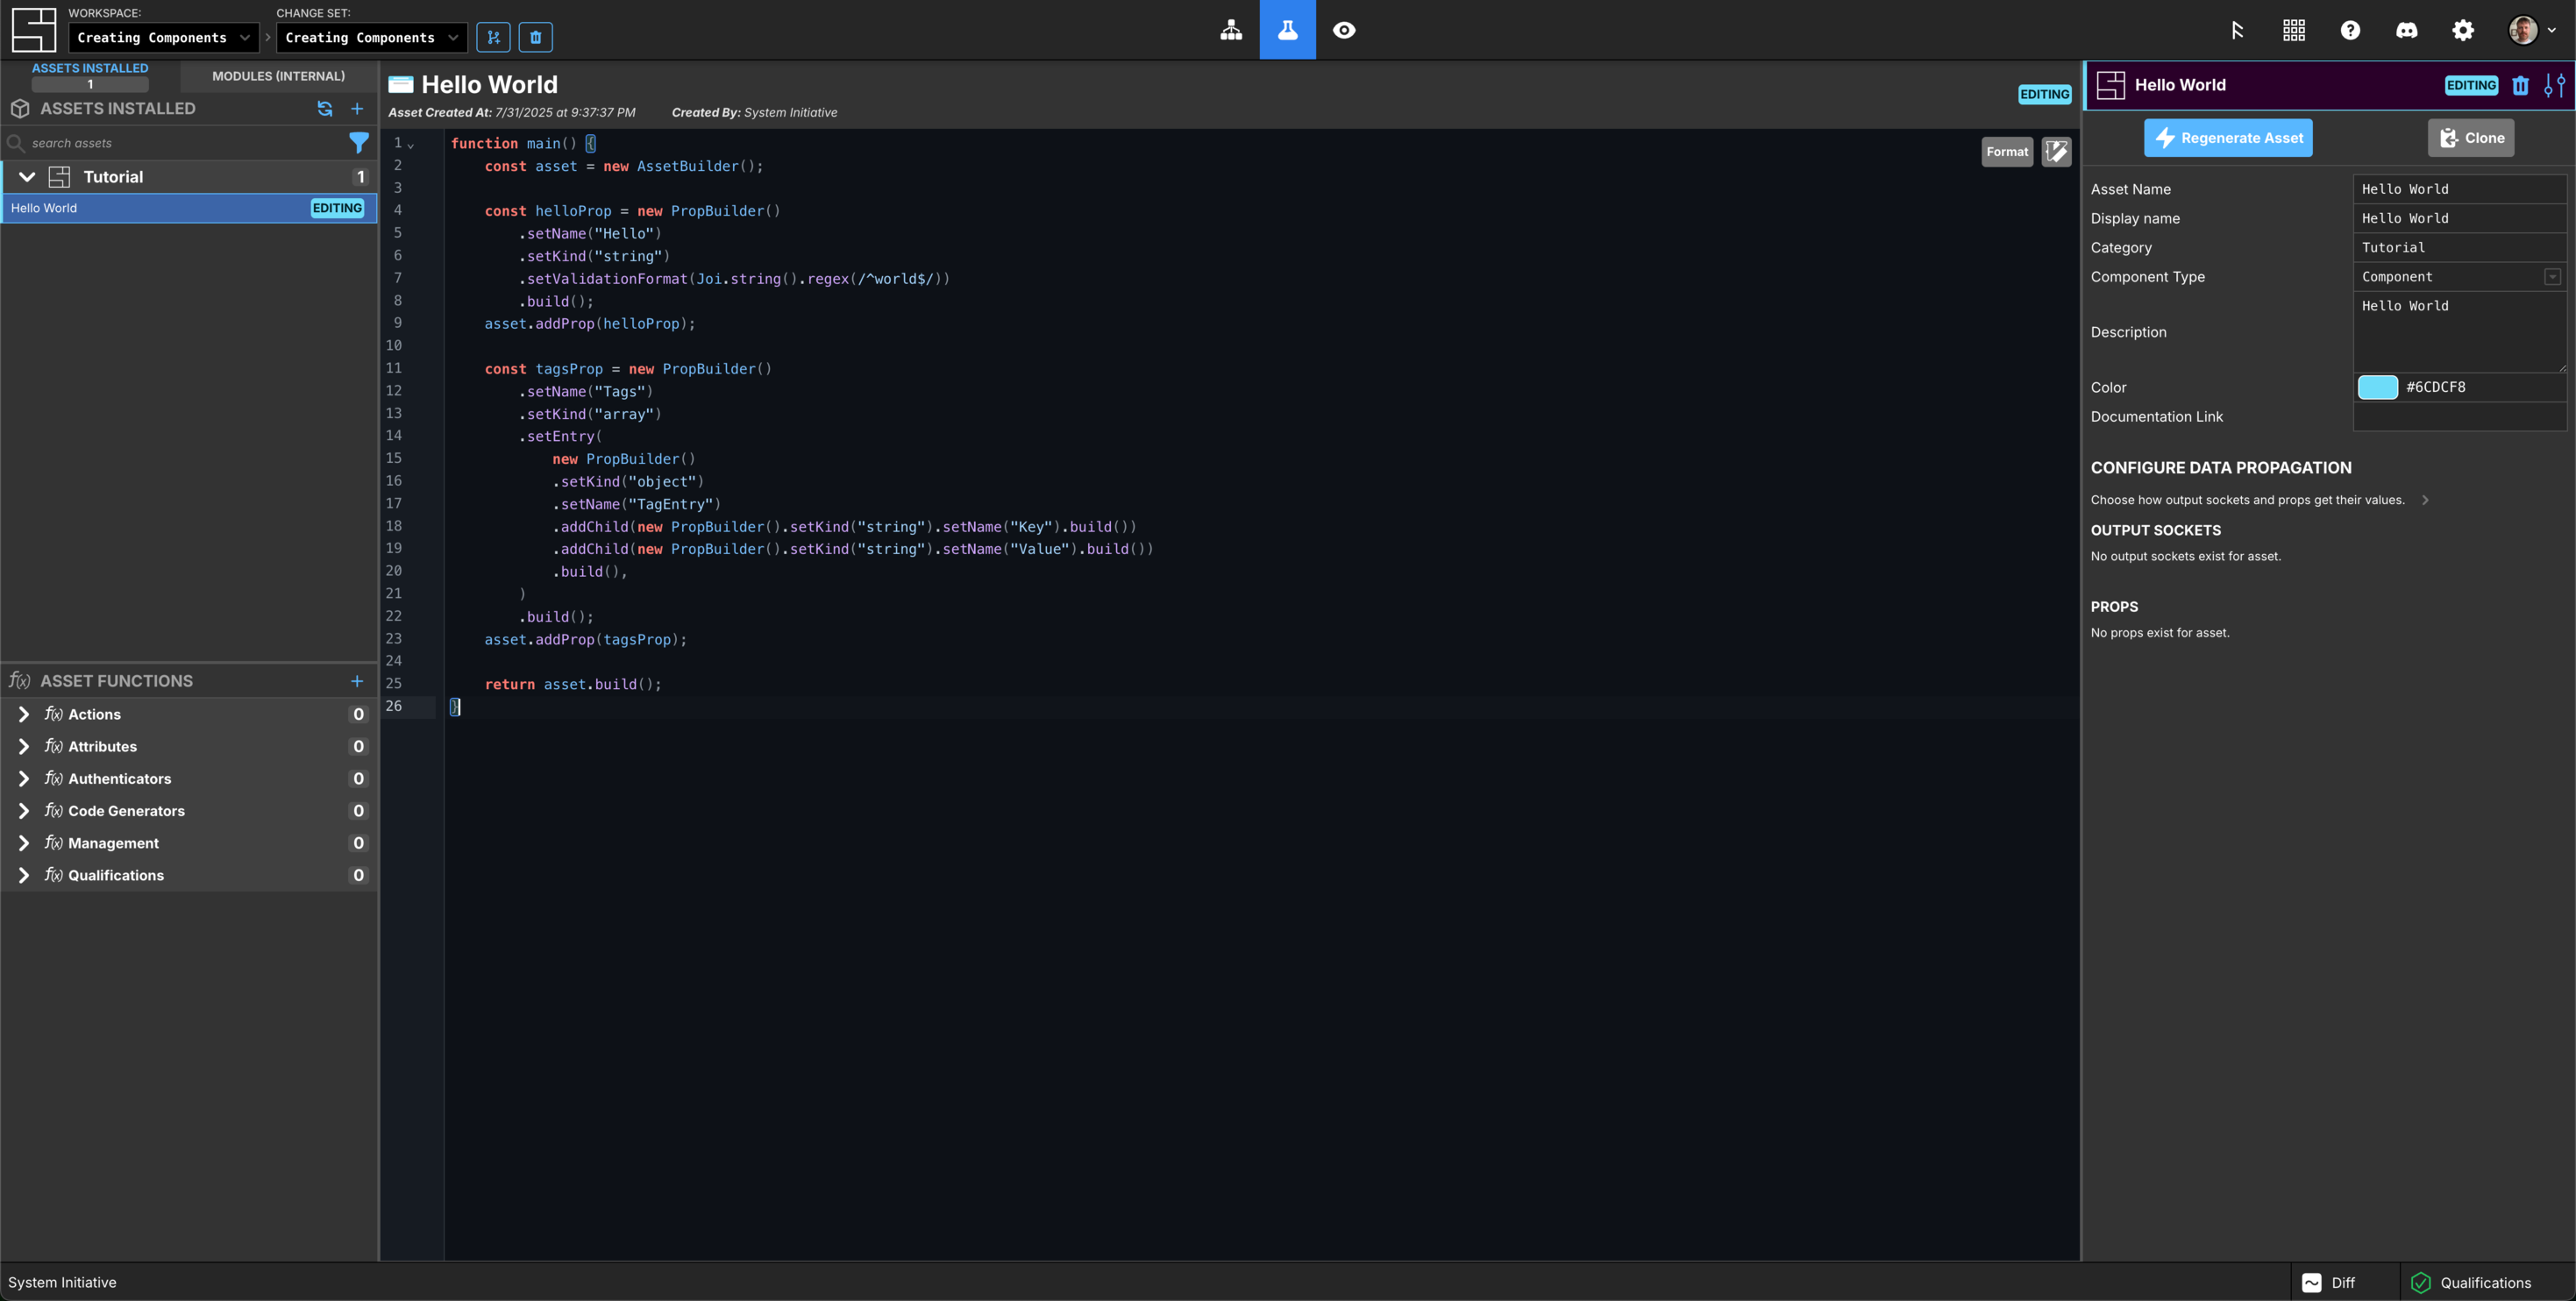
By now, your schema should look like this:
Regenerate the Asset
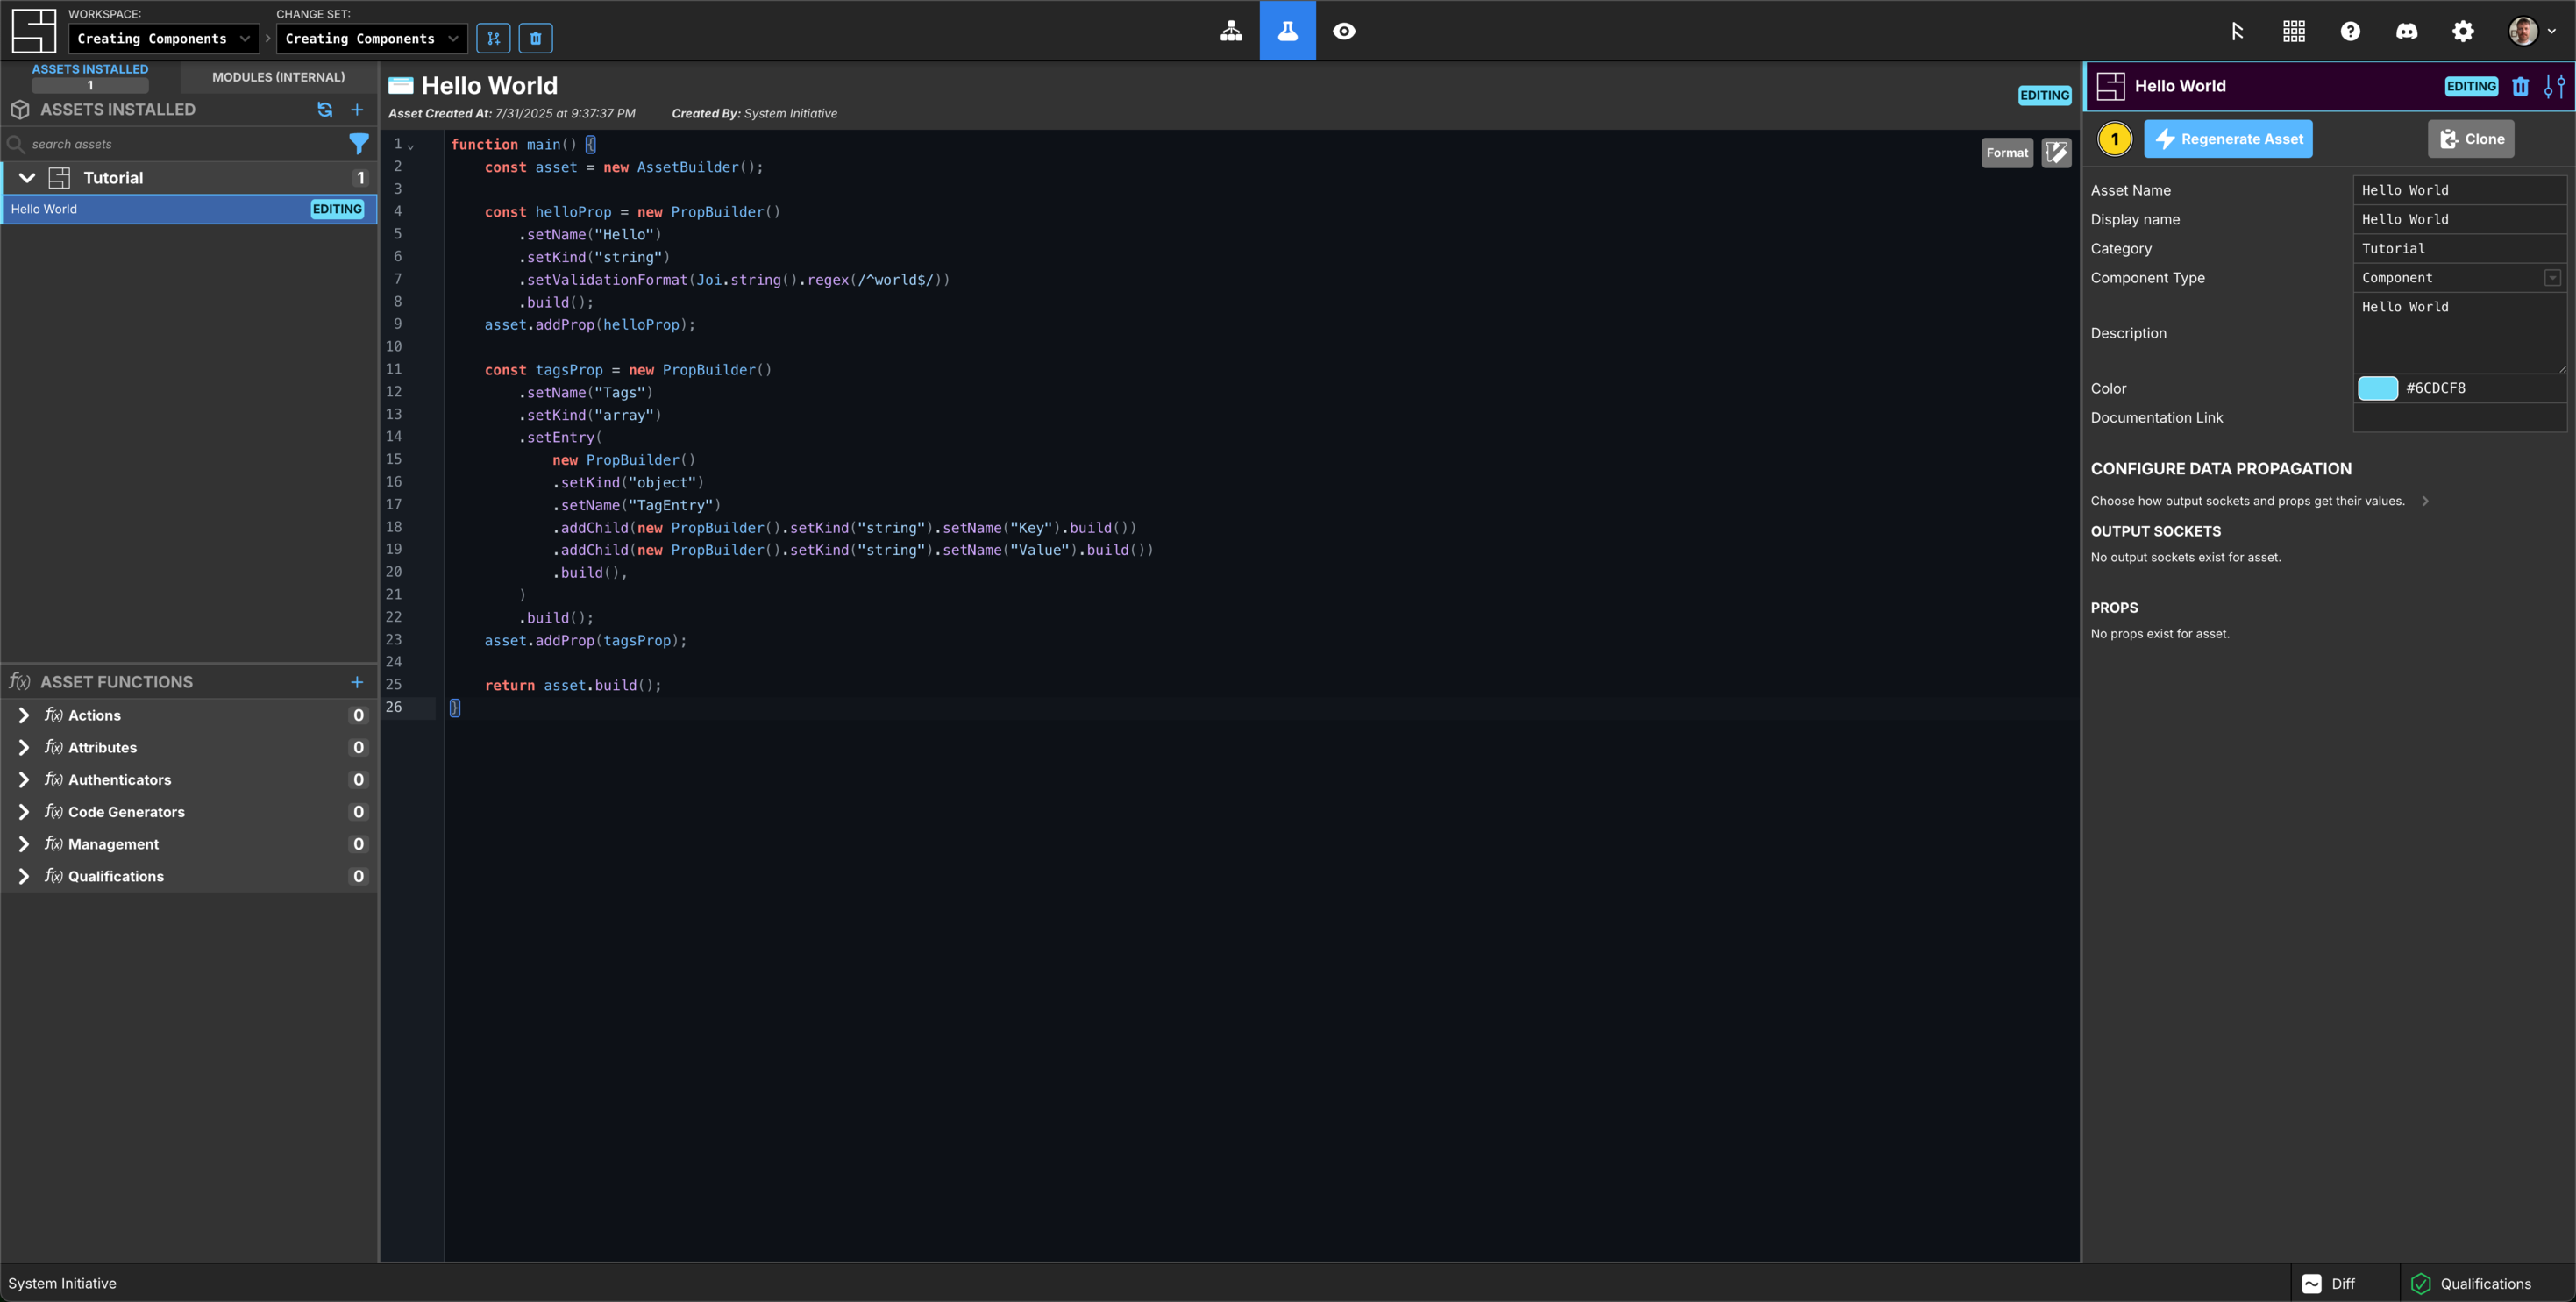
Click the Regenerate Asset button in the right-side panel.
This will execute your Schema definition function and update System Initiative with the new Schema.
Check your new Component
Click the Grid icon to switch to the Grid.
Press N or click Add a component to bring up the Component search, type Hello World, select and Enter to add your new Component.
Name your Hello World Component First Component.
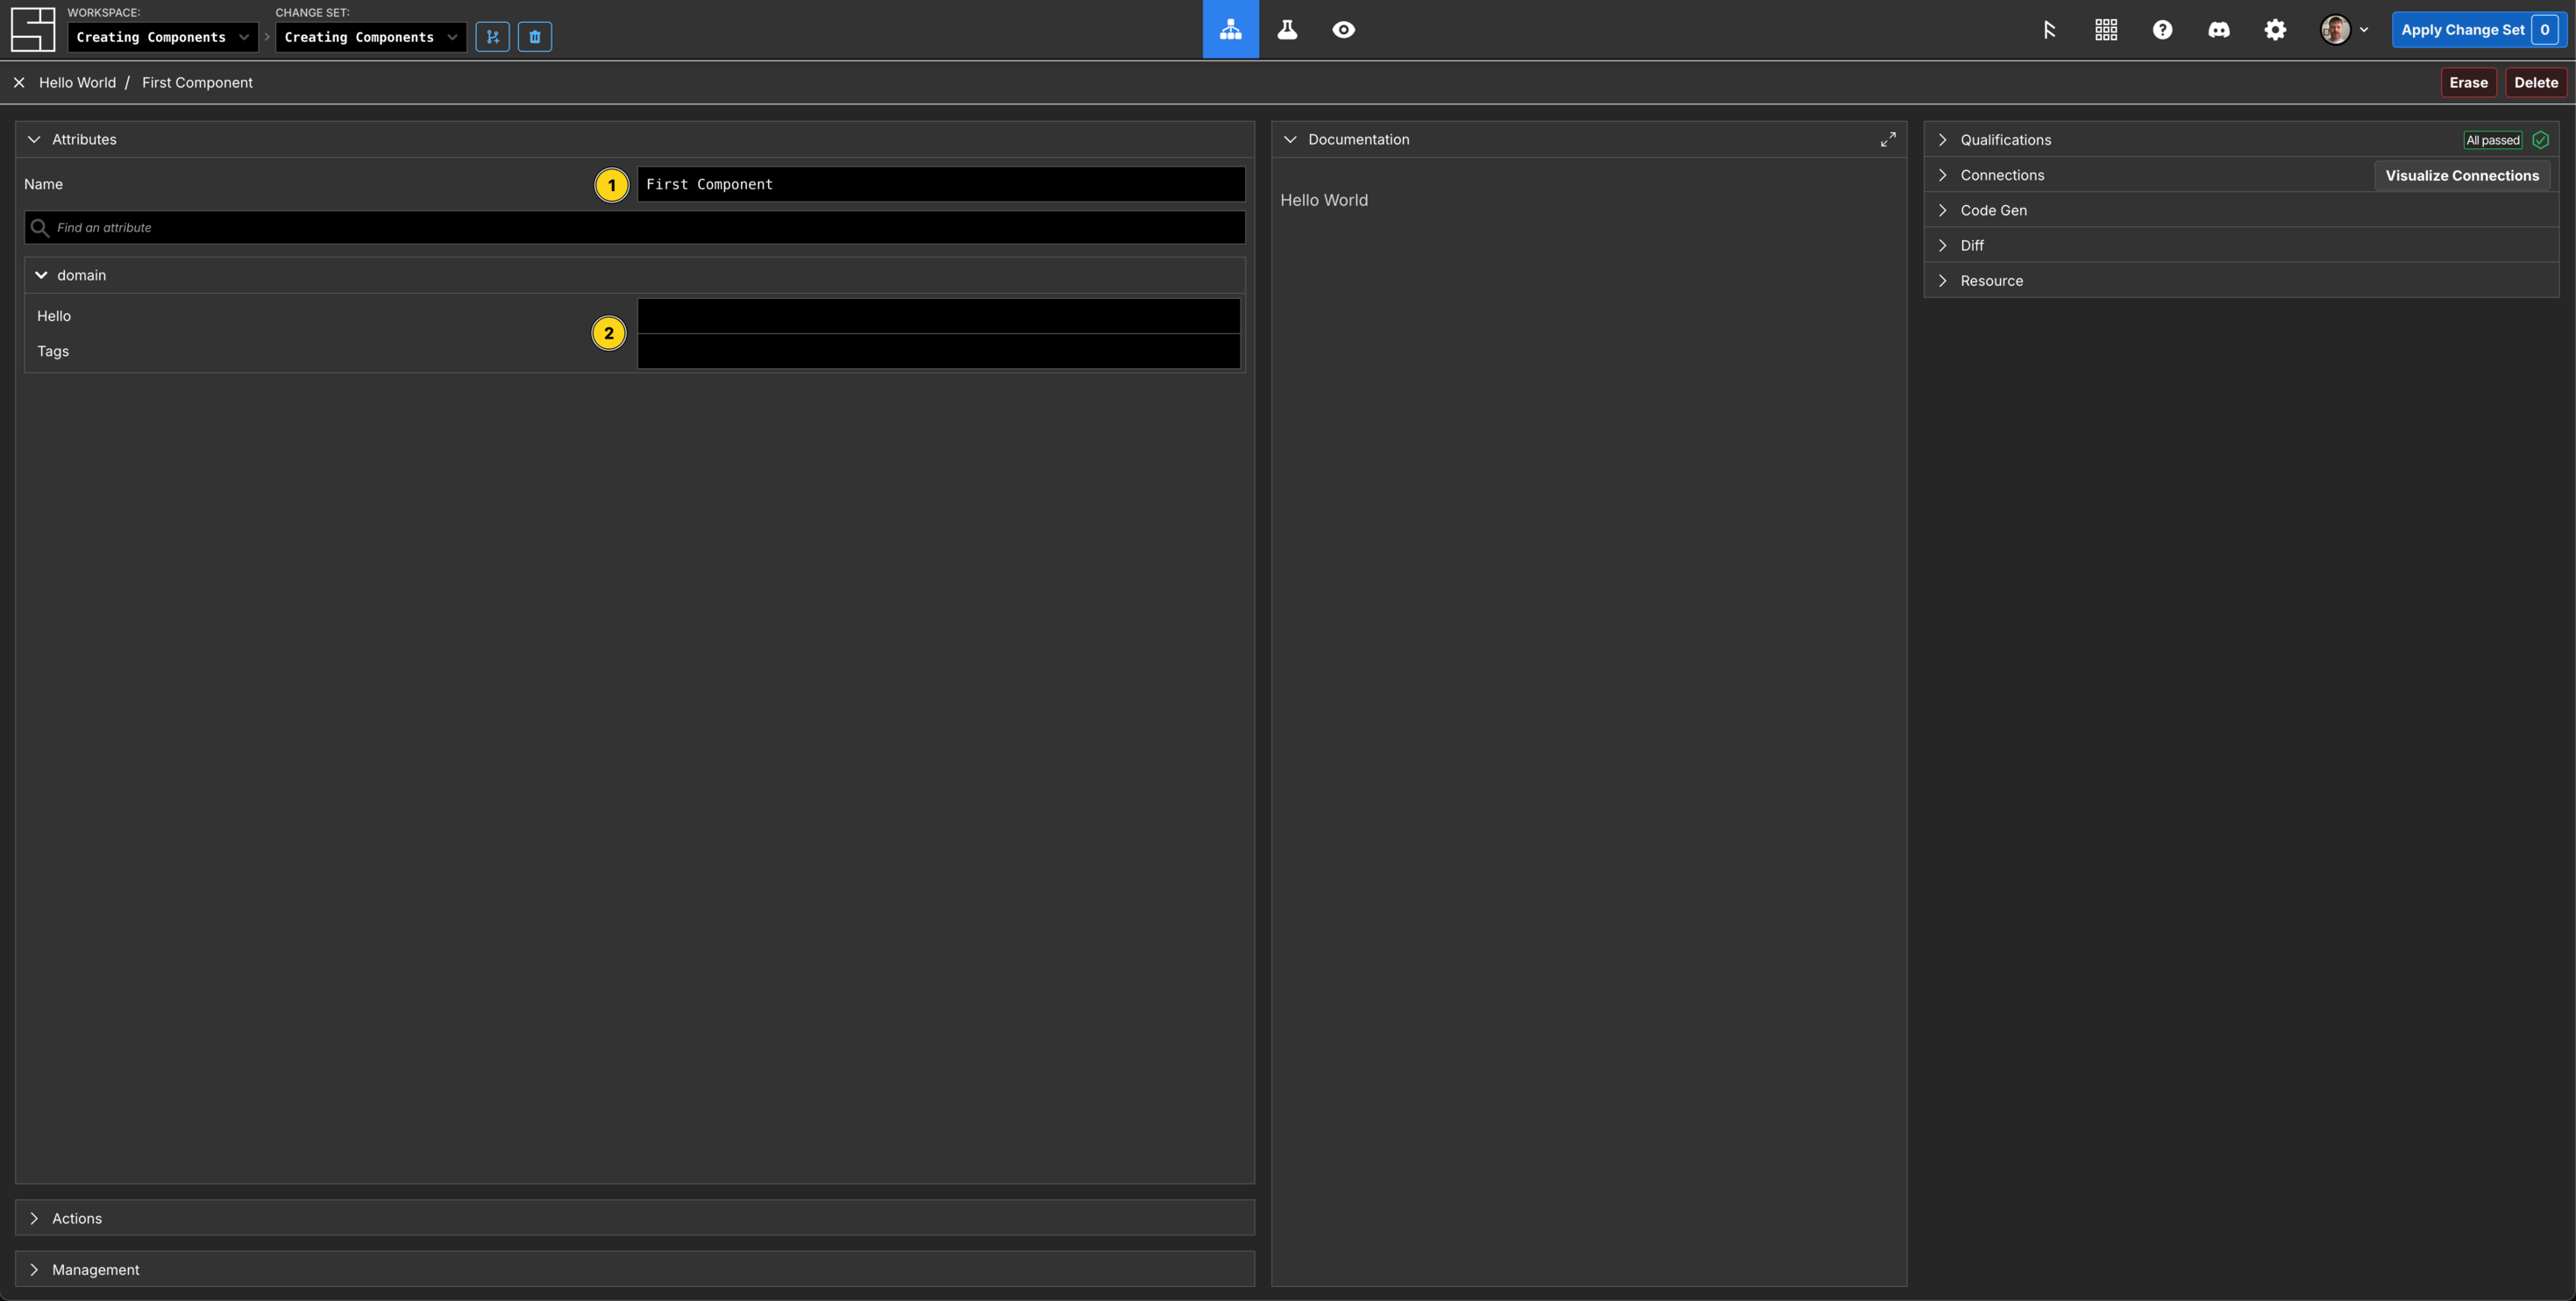
You will see that you have the following properties:
- Hello, an empty string field that accepts only lowercase letters
- Tags, an array of Key/Value objects
Add a Qualification function
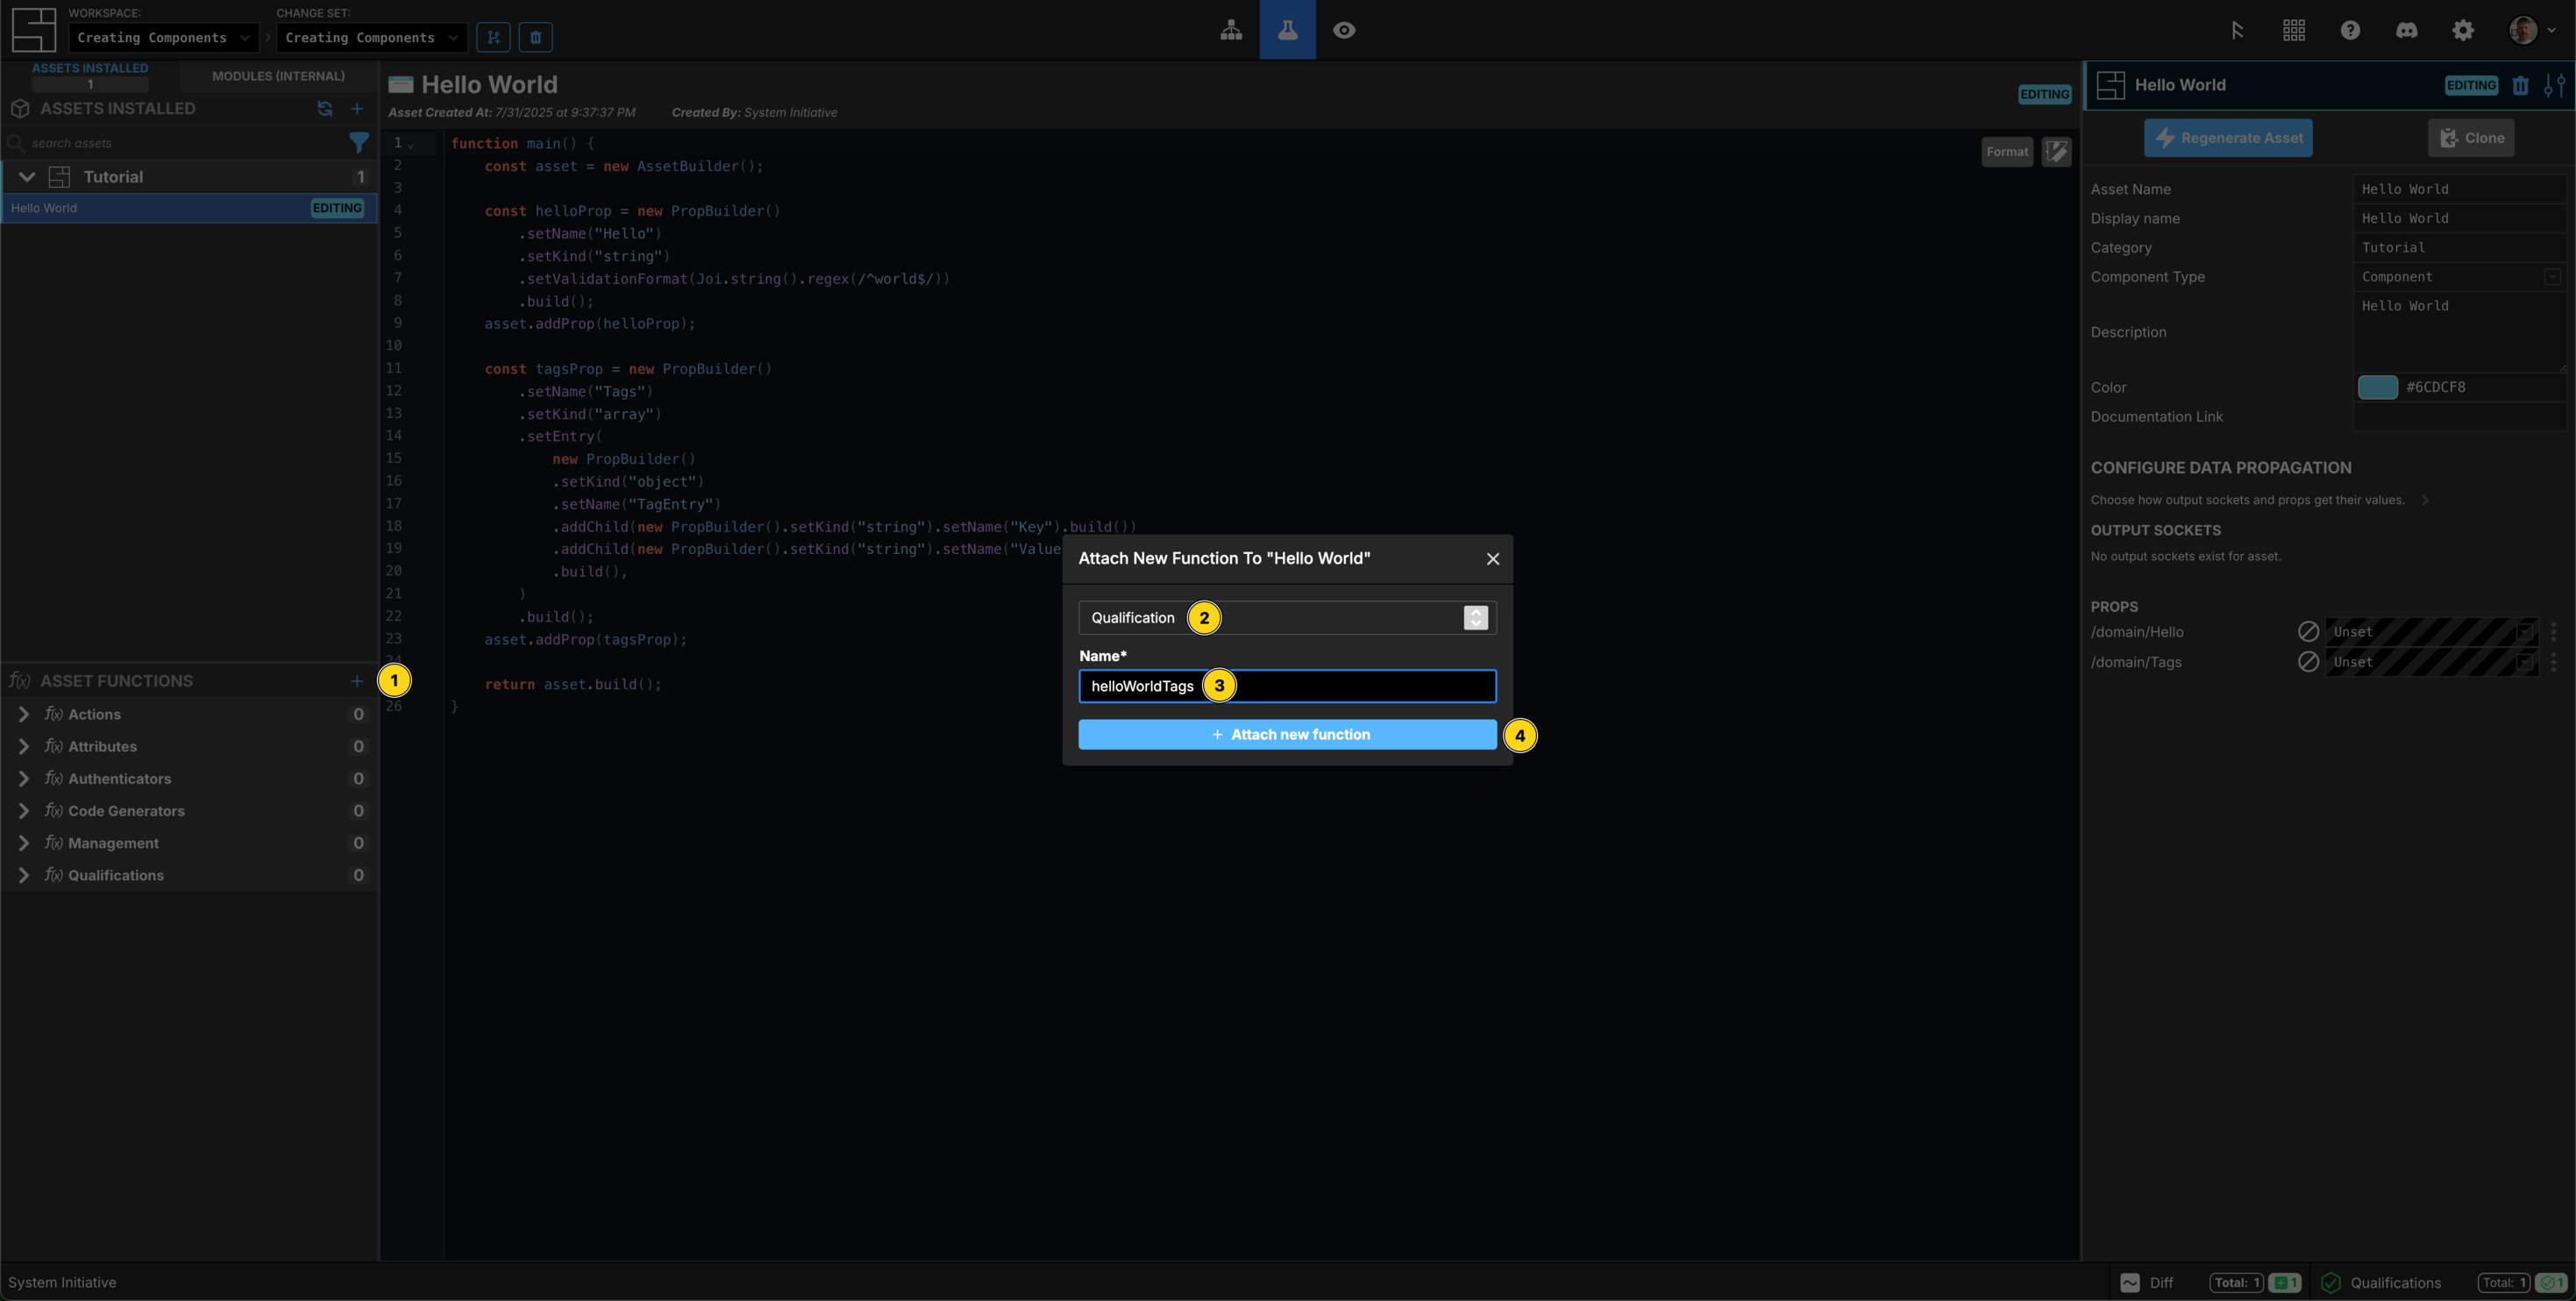
Click the Beaker icon to switch back to the Customize screen. Ensure your Hello World Asset is selected.
In the Asset Functions panel in the left pane, click the Add Function button, represented by the blue + icon, and select + New Function.
Select Qualification from the drop-down, indicating you want to create a new Qualification function.
Name your Qualification helloWorldTags and click + Attach new function.
Set the Qualifications meta-data
In the Asset Functions panel on the bottom left, click Qualifications, this is where your Qualification functions can be selected for editing.
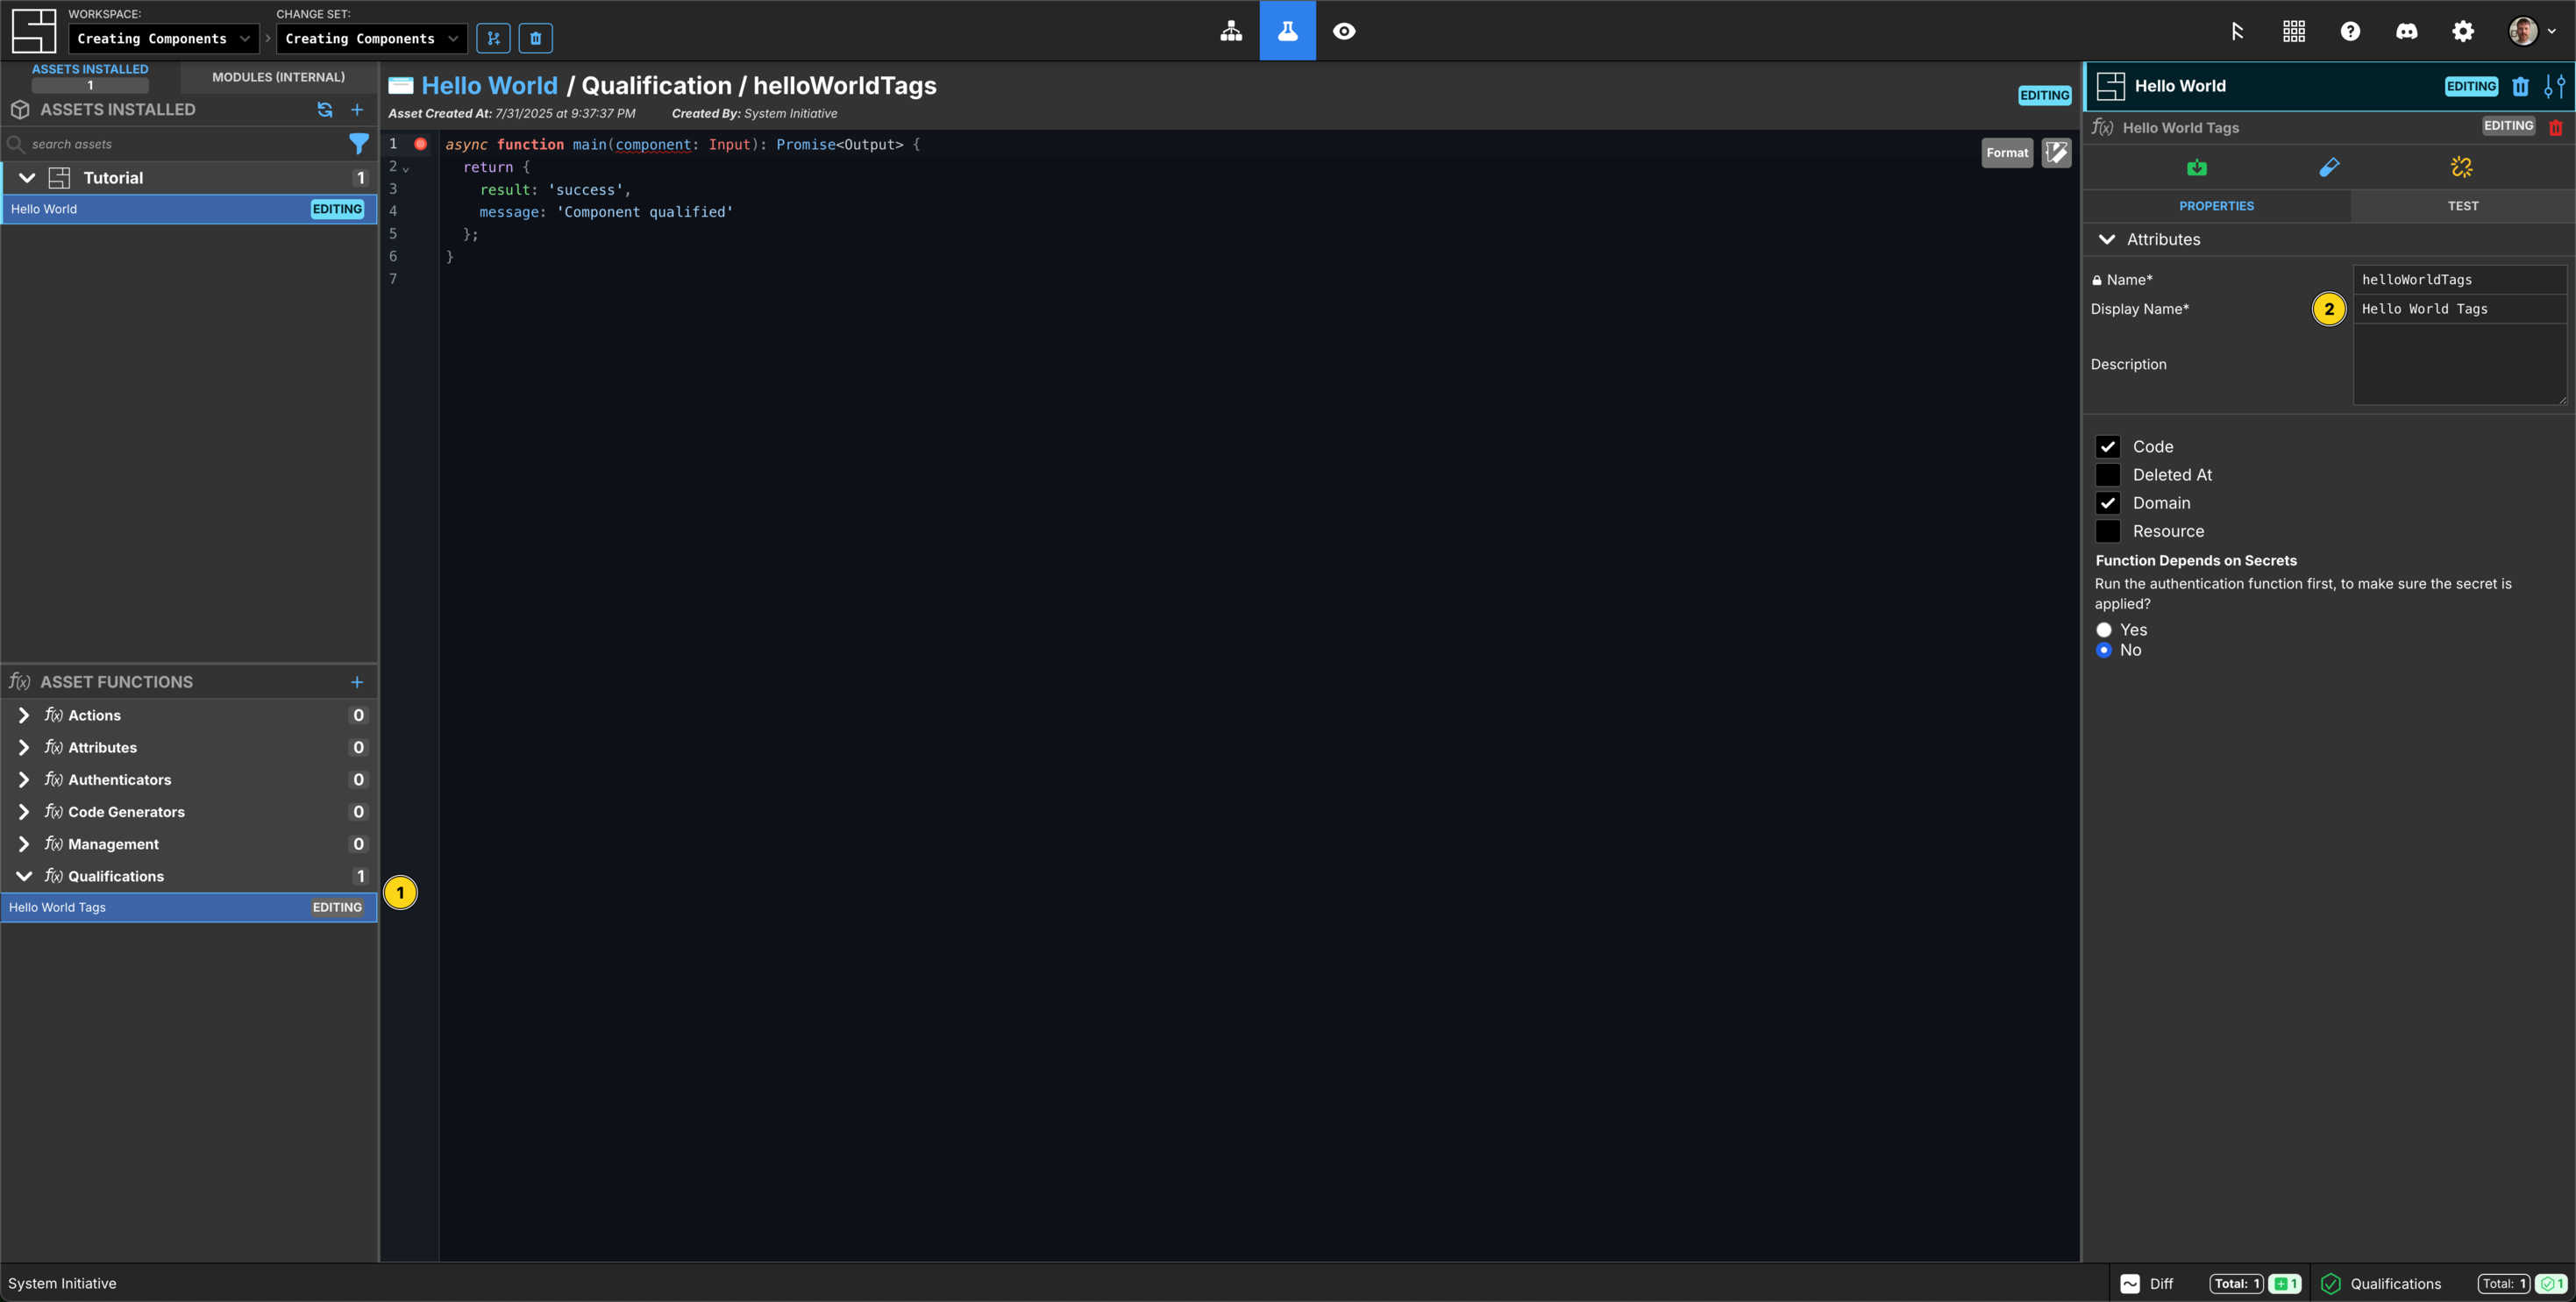
Set the Display Name to Hello World Tags
Write the Qualification function
Ensure that any Hello World Components have a tag with the key Super and value is Duper.
The code will look like this when you are finished:
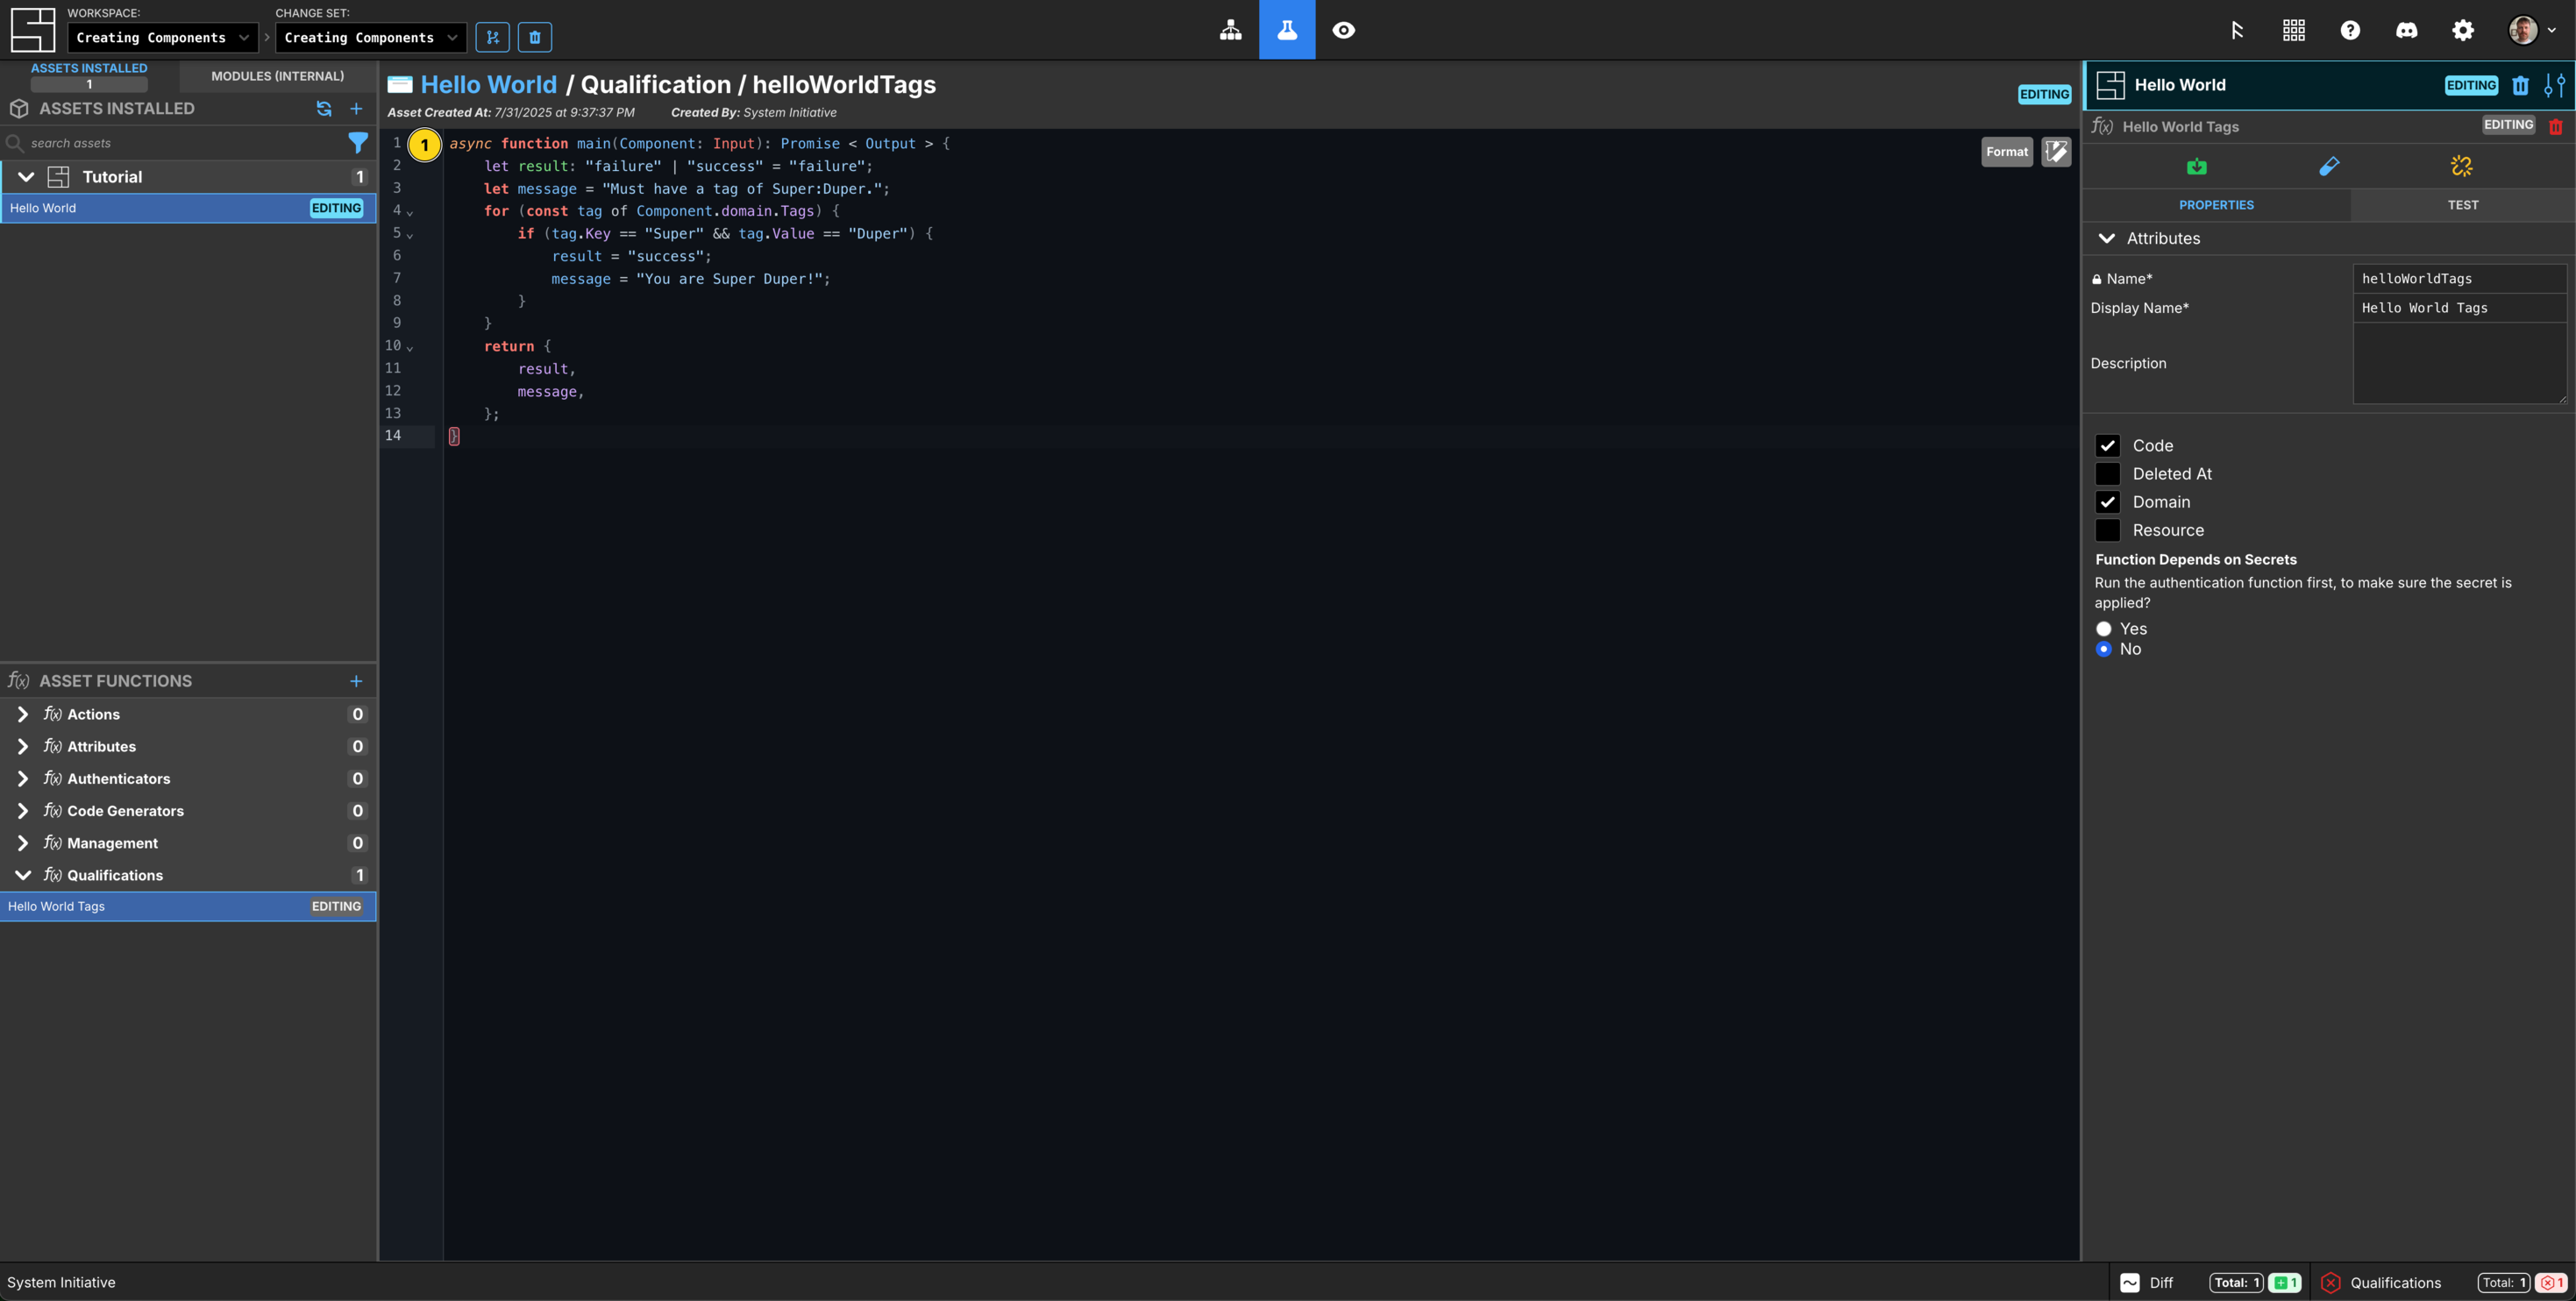
async function main(Component: Input): Promise<Output> {
  let result: "failure" | "success" = "failure";
  let message = "Must have a tag of Super:Duper.";
  for (const tag of Component.domain.Tags) {
    if (tag.Key == "Super" && tag.Value == "Duper") {
      result = "success";
      message = "You are Super Duper!";
    }
  }
  return {
    result,
    message,
  };
}
Here is how you would write it, step by step:
1. Make a result and message variable
Start by declaring two variables, result and message. These will be used in your functions return value.
The result variable has a TypeScript type annotation, reflecting the two valid values for our function: failure or success, and defaults to failure.
2. Iterate over the Tags and check for the proper values
For each tag in our Tags array, check if it has a key named Super and a value of Duper. If it does, set the result to success and provide a helpful message.
3. Return the result and message
Finally, return the result and message.
Here is what the function should look like once written:
Check your new Qualification function
Click the Grid icon to switch to the Grid.
You can see your Hello World Component on the Grid, and it has 1 Failed Qualification.
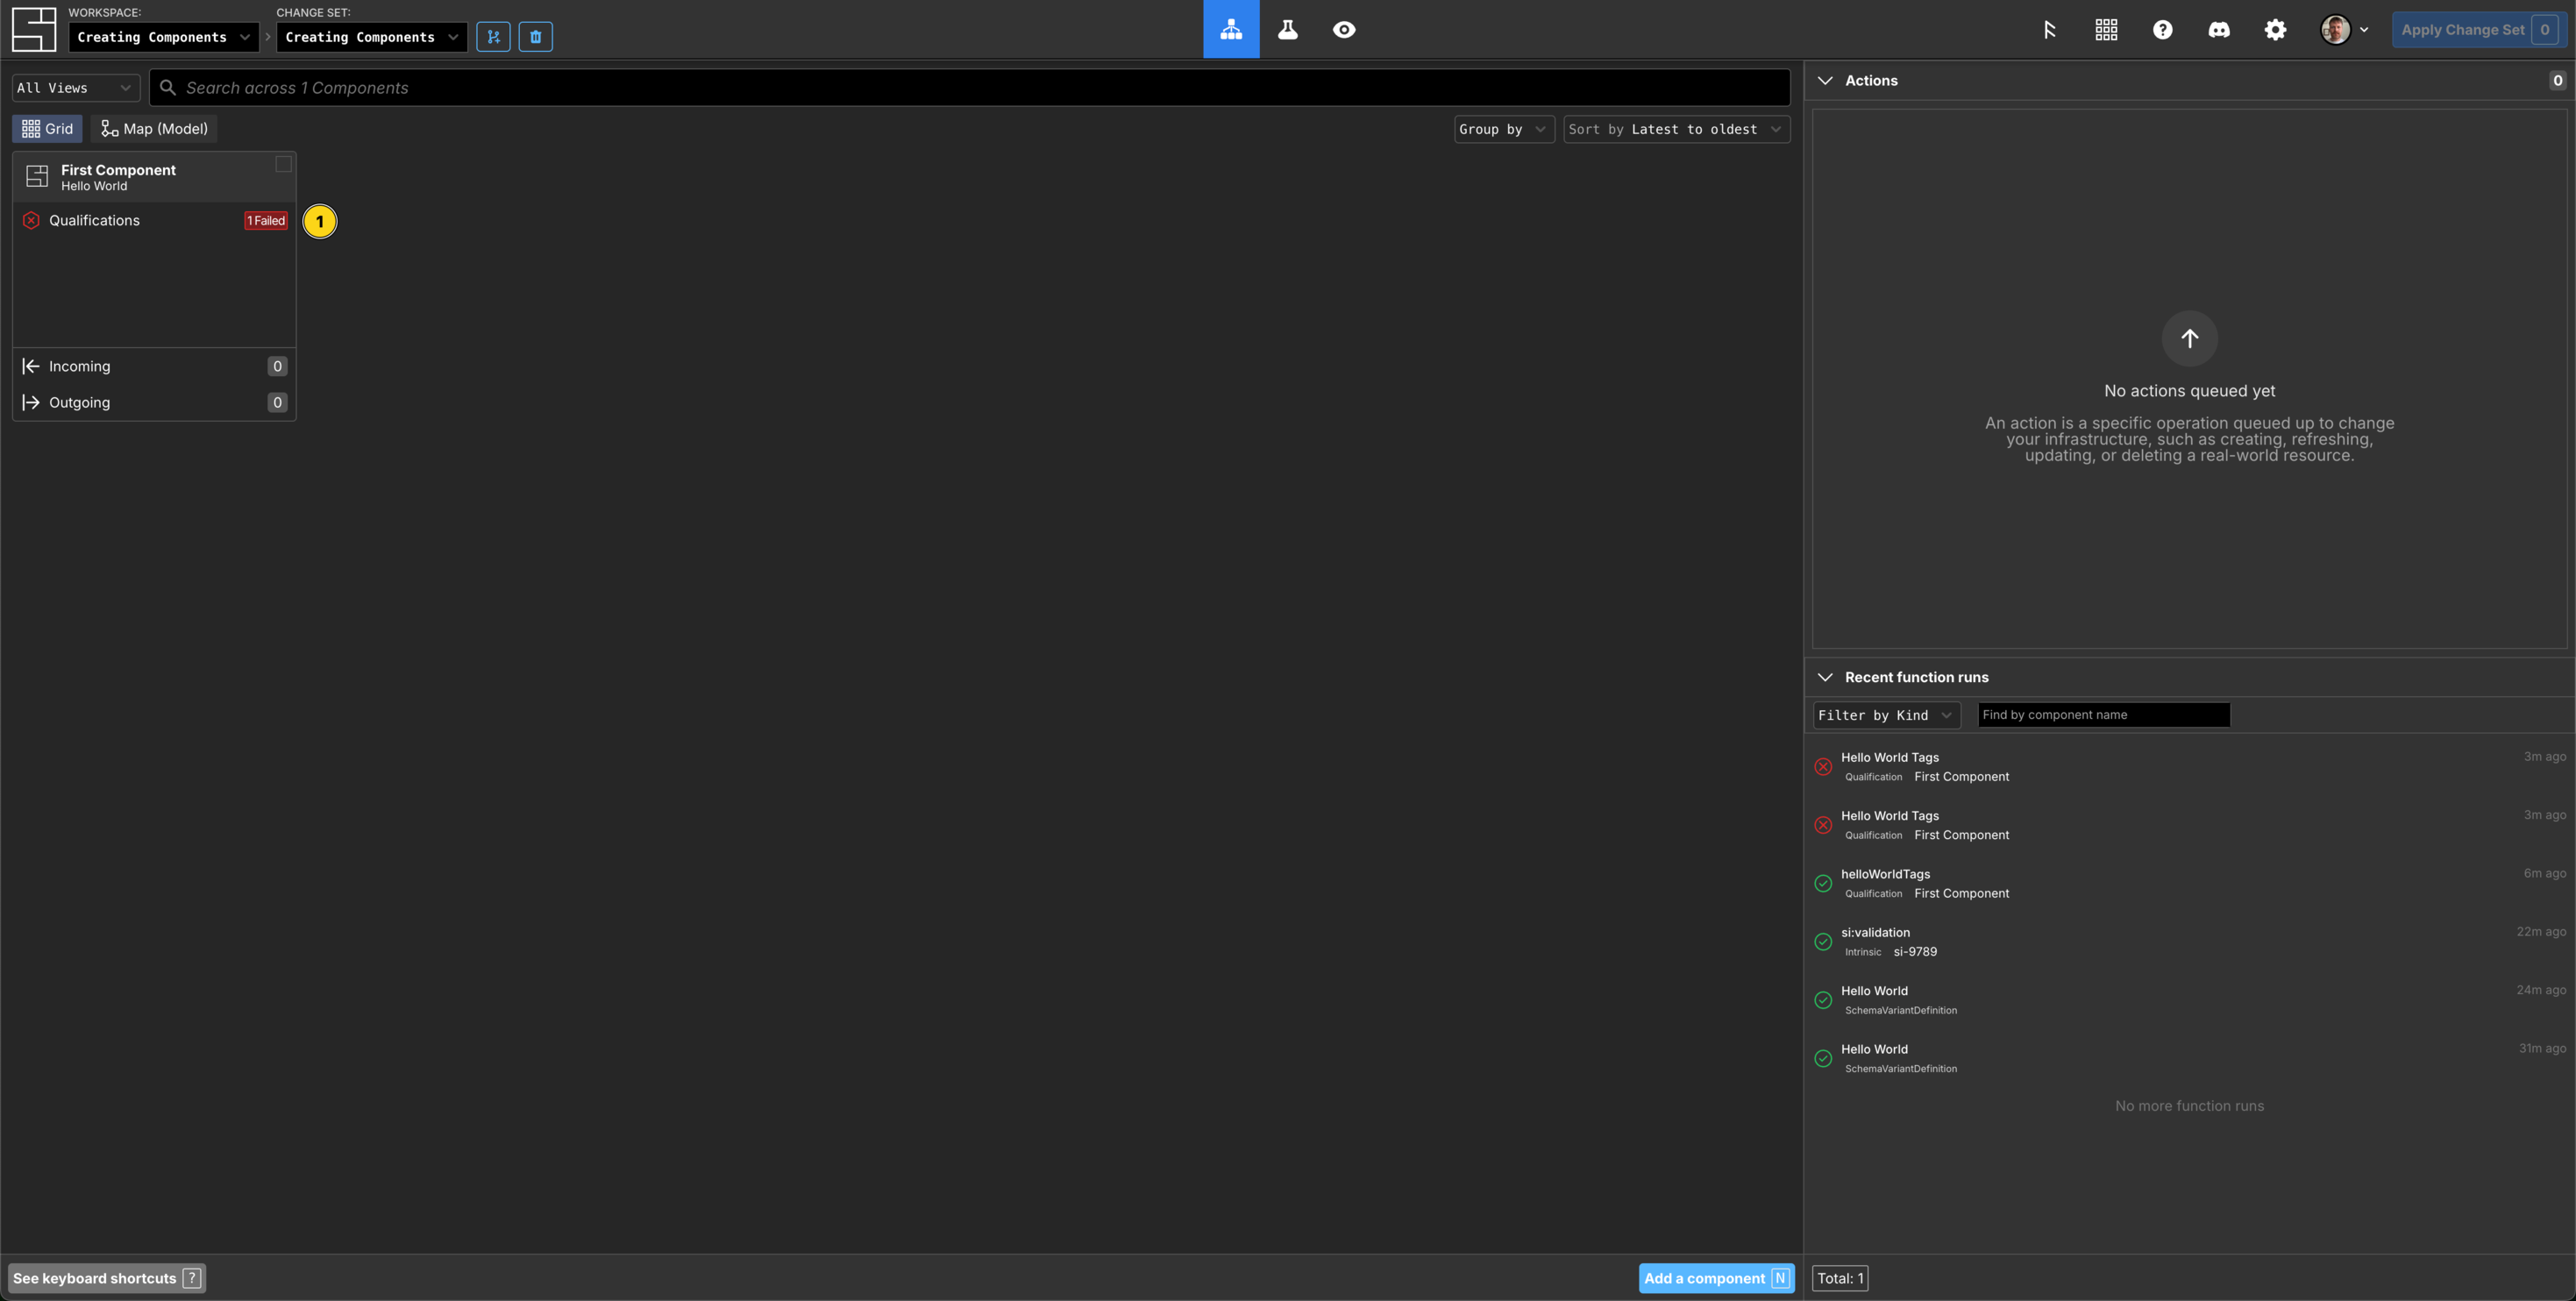
To view the result, you can click the failed Qualification in the Recent function runs panel, or click into the Component, then click Qualifications on the right-side panel.
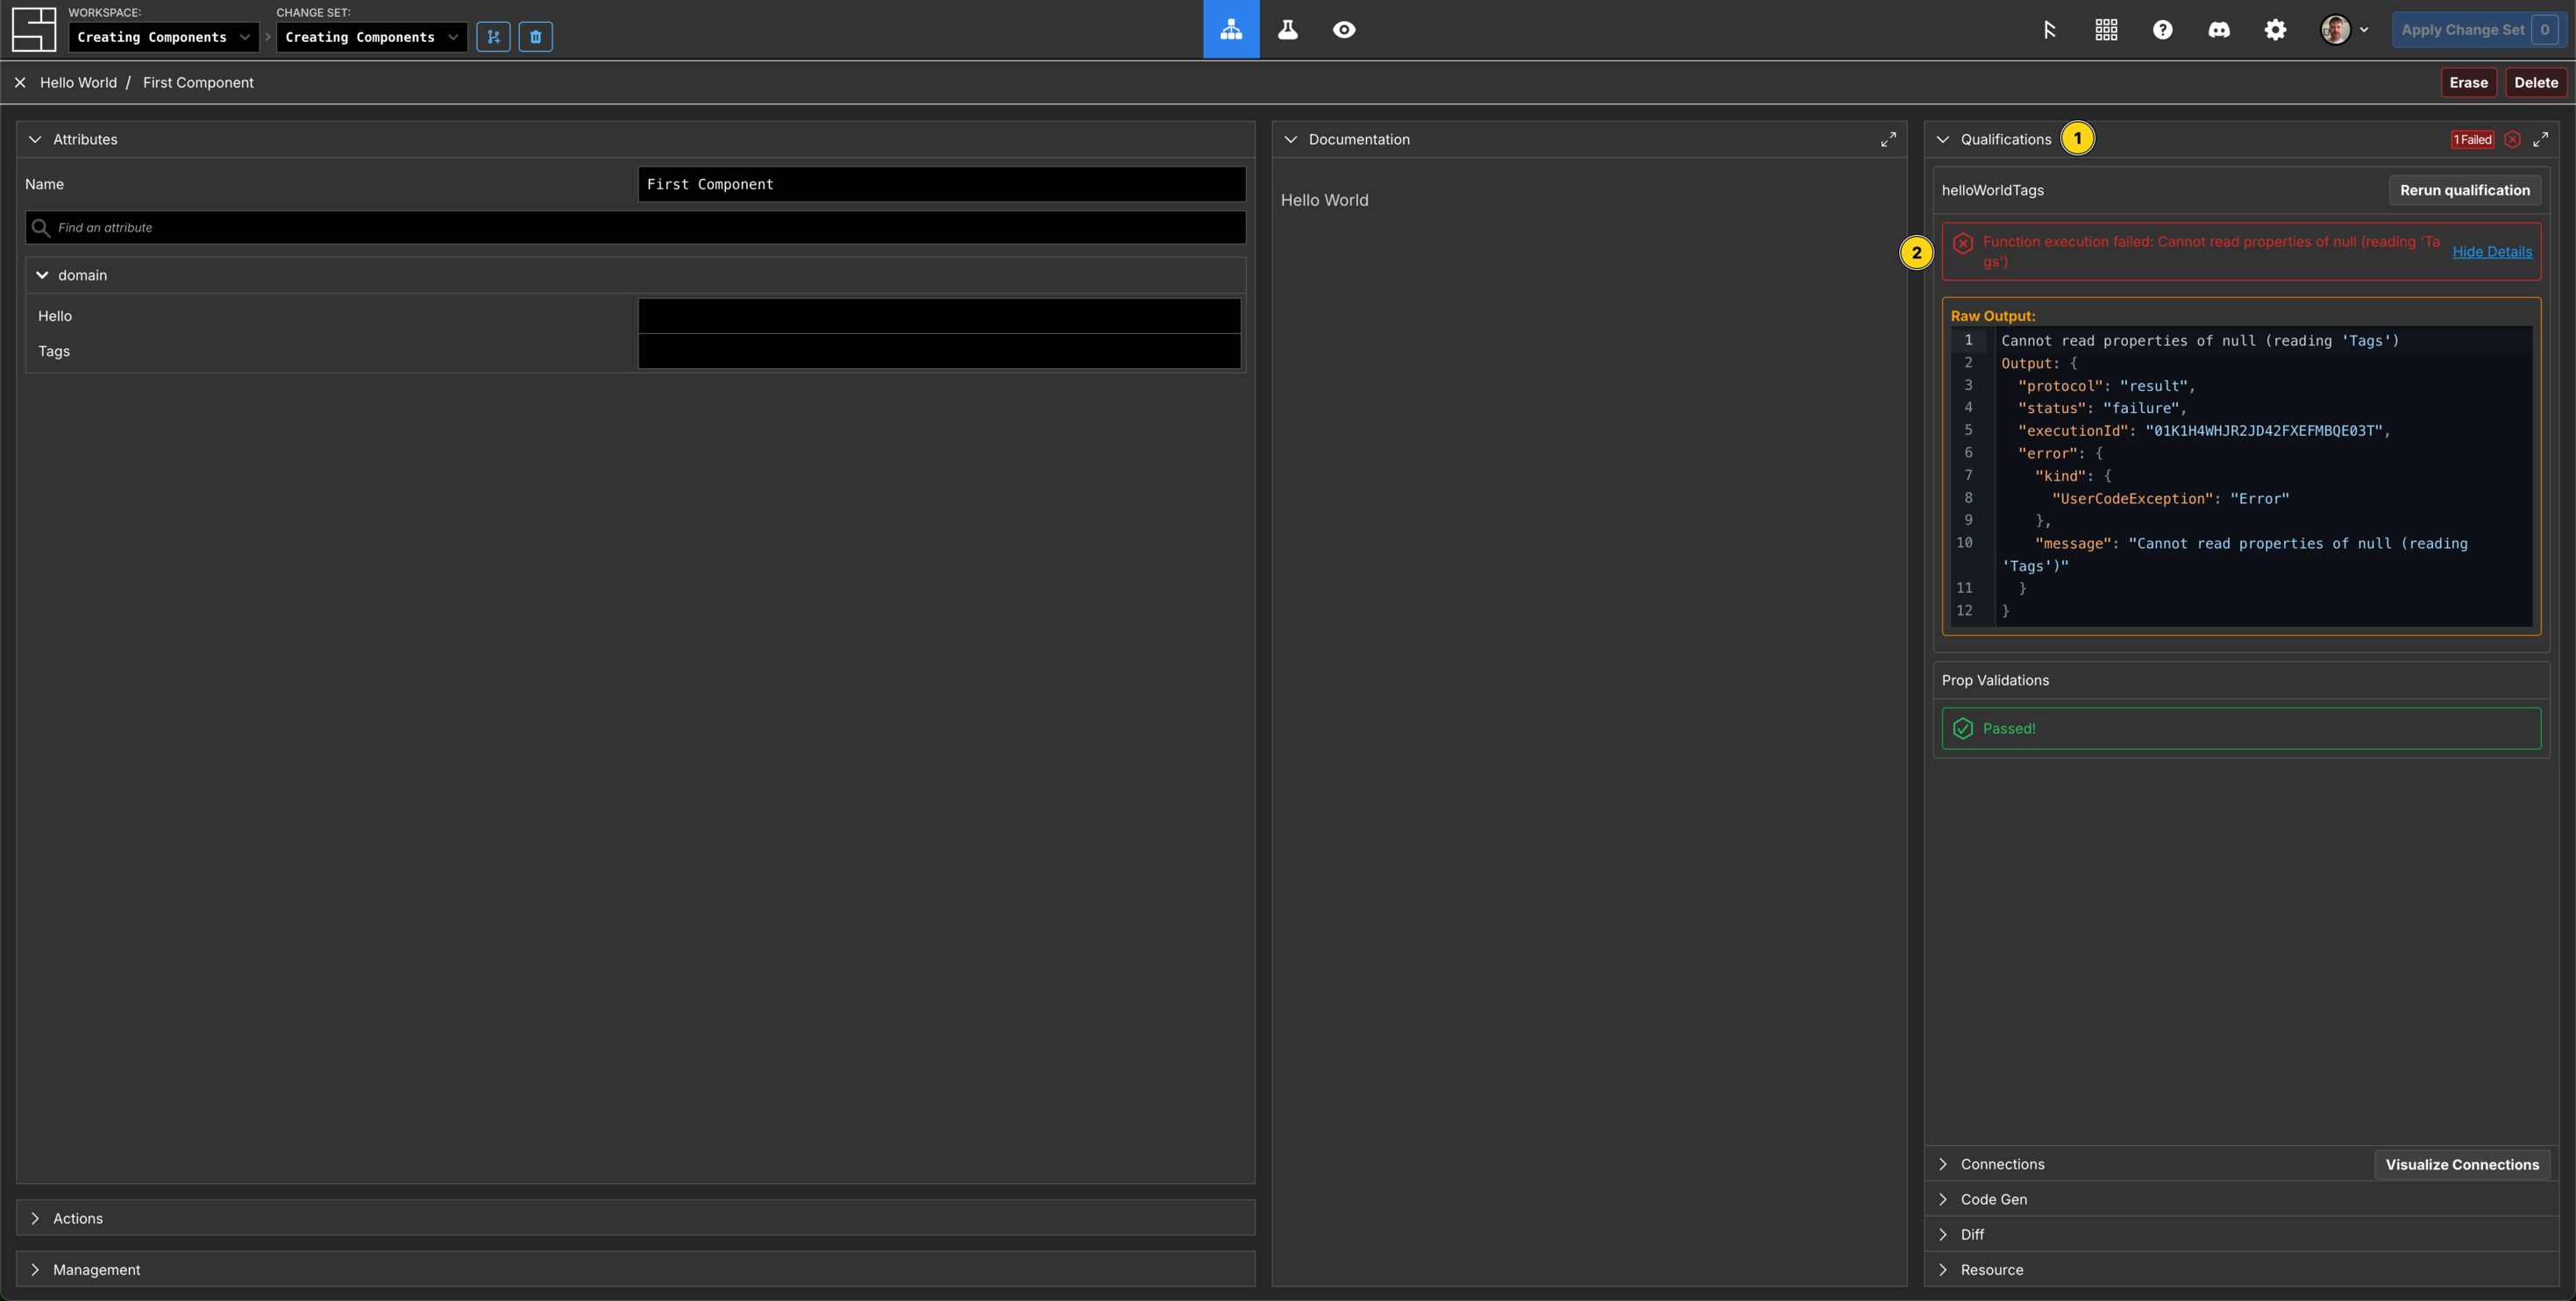
This tells you that the Qualification failed because no tag has a key named Super and a value of Duper. So in the Tags property field, click + Add "Tags" item, then enter value for Key Super and Value Duper. Your Qualification function has now automatically re-run and passed!
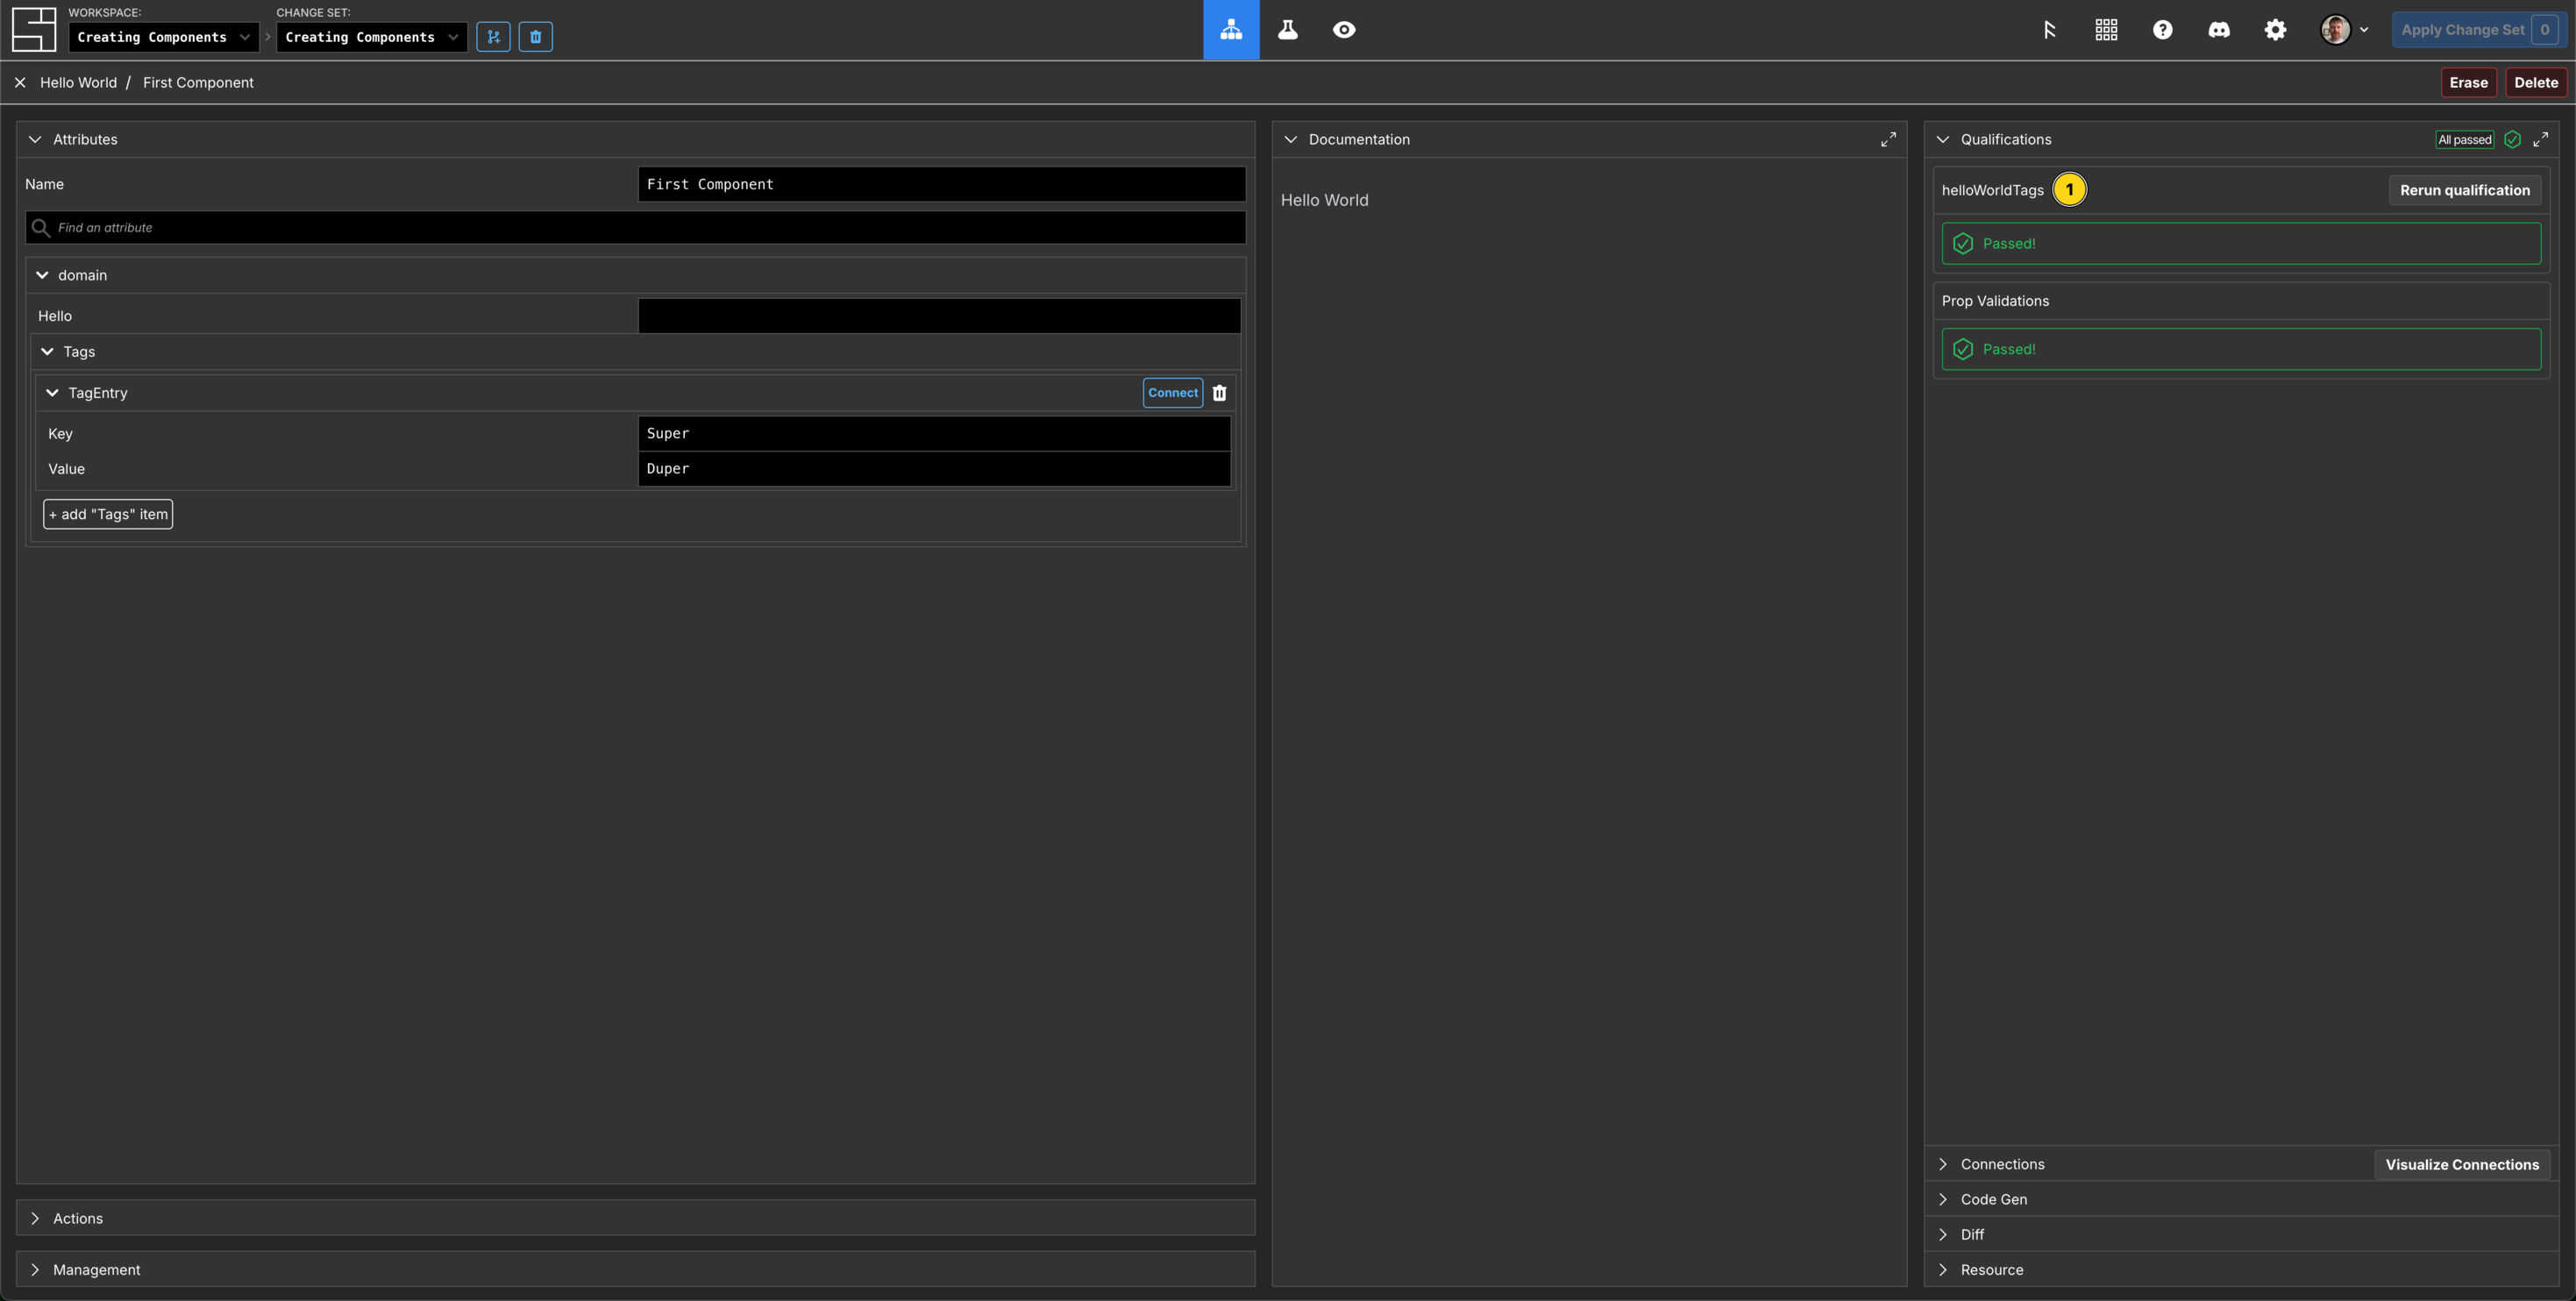
Now click the Apply Change Set button in the header, and then Apply Change Set. Your Component is now ready to be used from HEAD.
Create a new Change Set
Create a new Change set by clicking the Create Change Set button, and call it Editing Components.
Edit your Hello World Component
Switch to the Customize screen by clicking the Beaker icon in the header.
In the Asset panel on the left, click your Hello World Asset, then on the top right, click Edit. This unlocks and creates an editable version of your Asset.
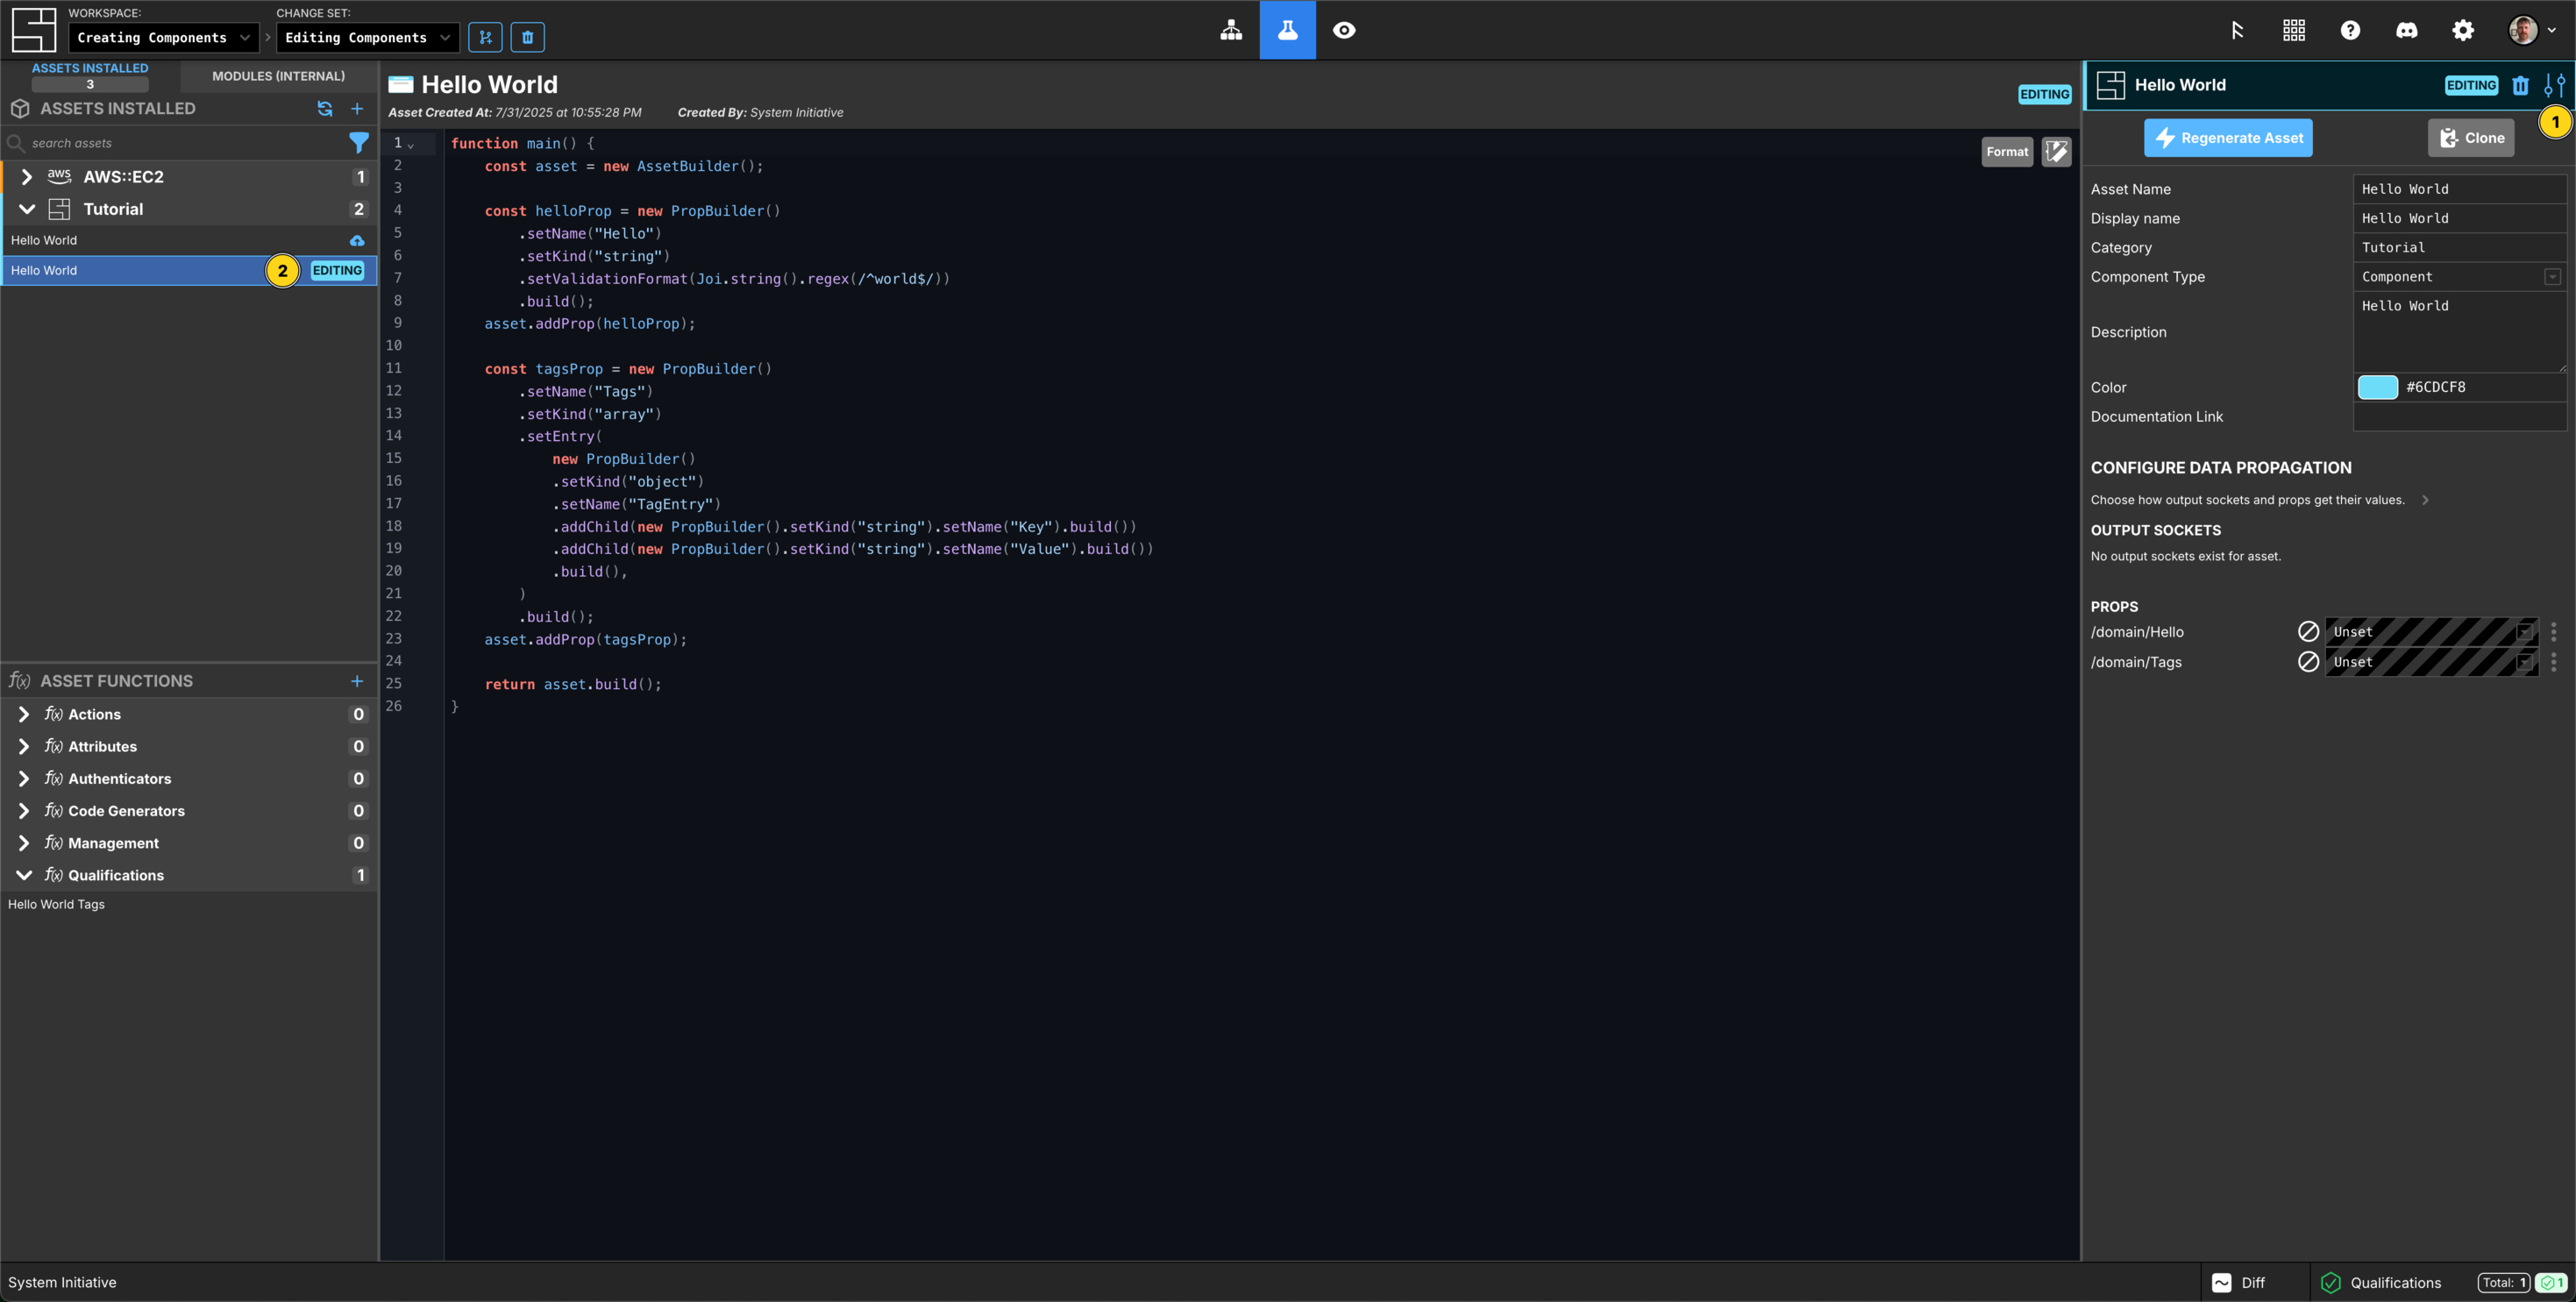
Add a new property to Hello World
Add a new Awesome boolean property to the Hello World schema below the tagsProp.
The code looks like this:
const awesomeProp = new PropBuilder()
  .setName("Awesome")
  .setKind("boolean")
  .build();
asset.addProp(awesomeProp);
Click Regenerate Asset when you are done.
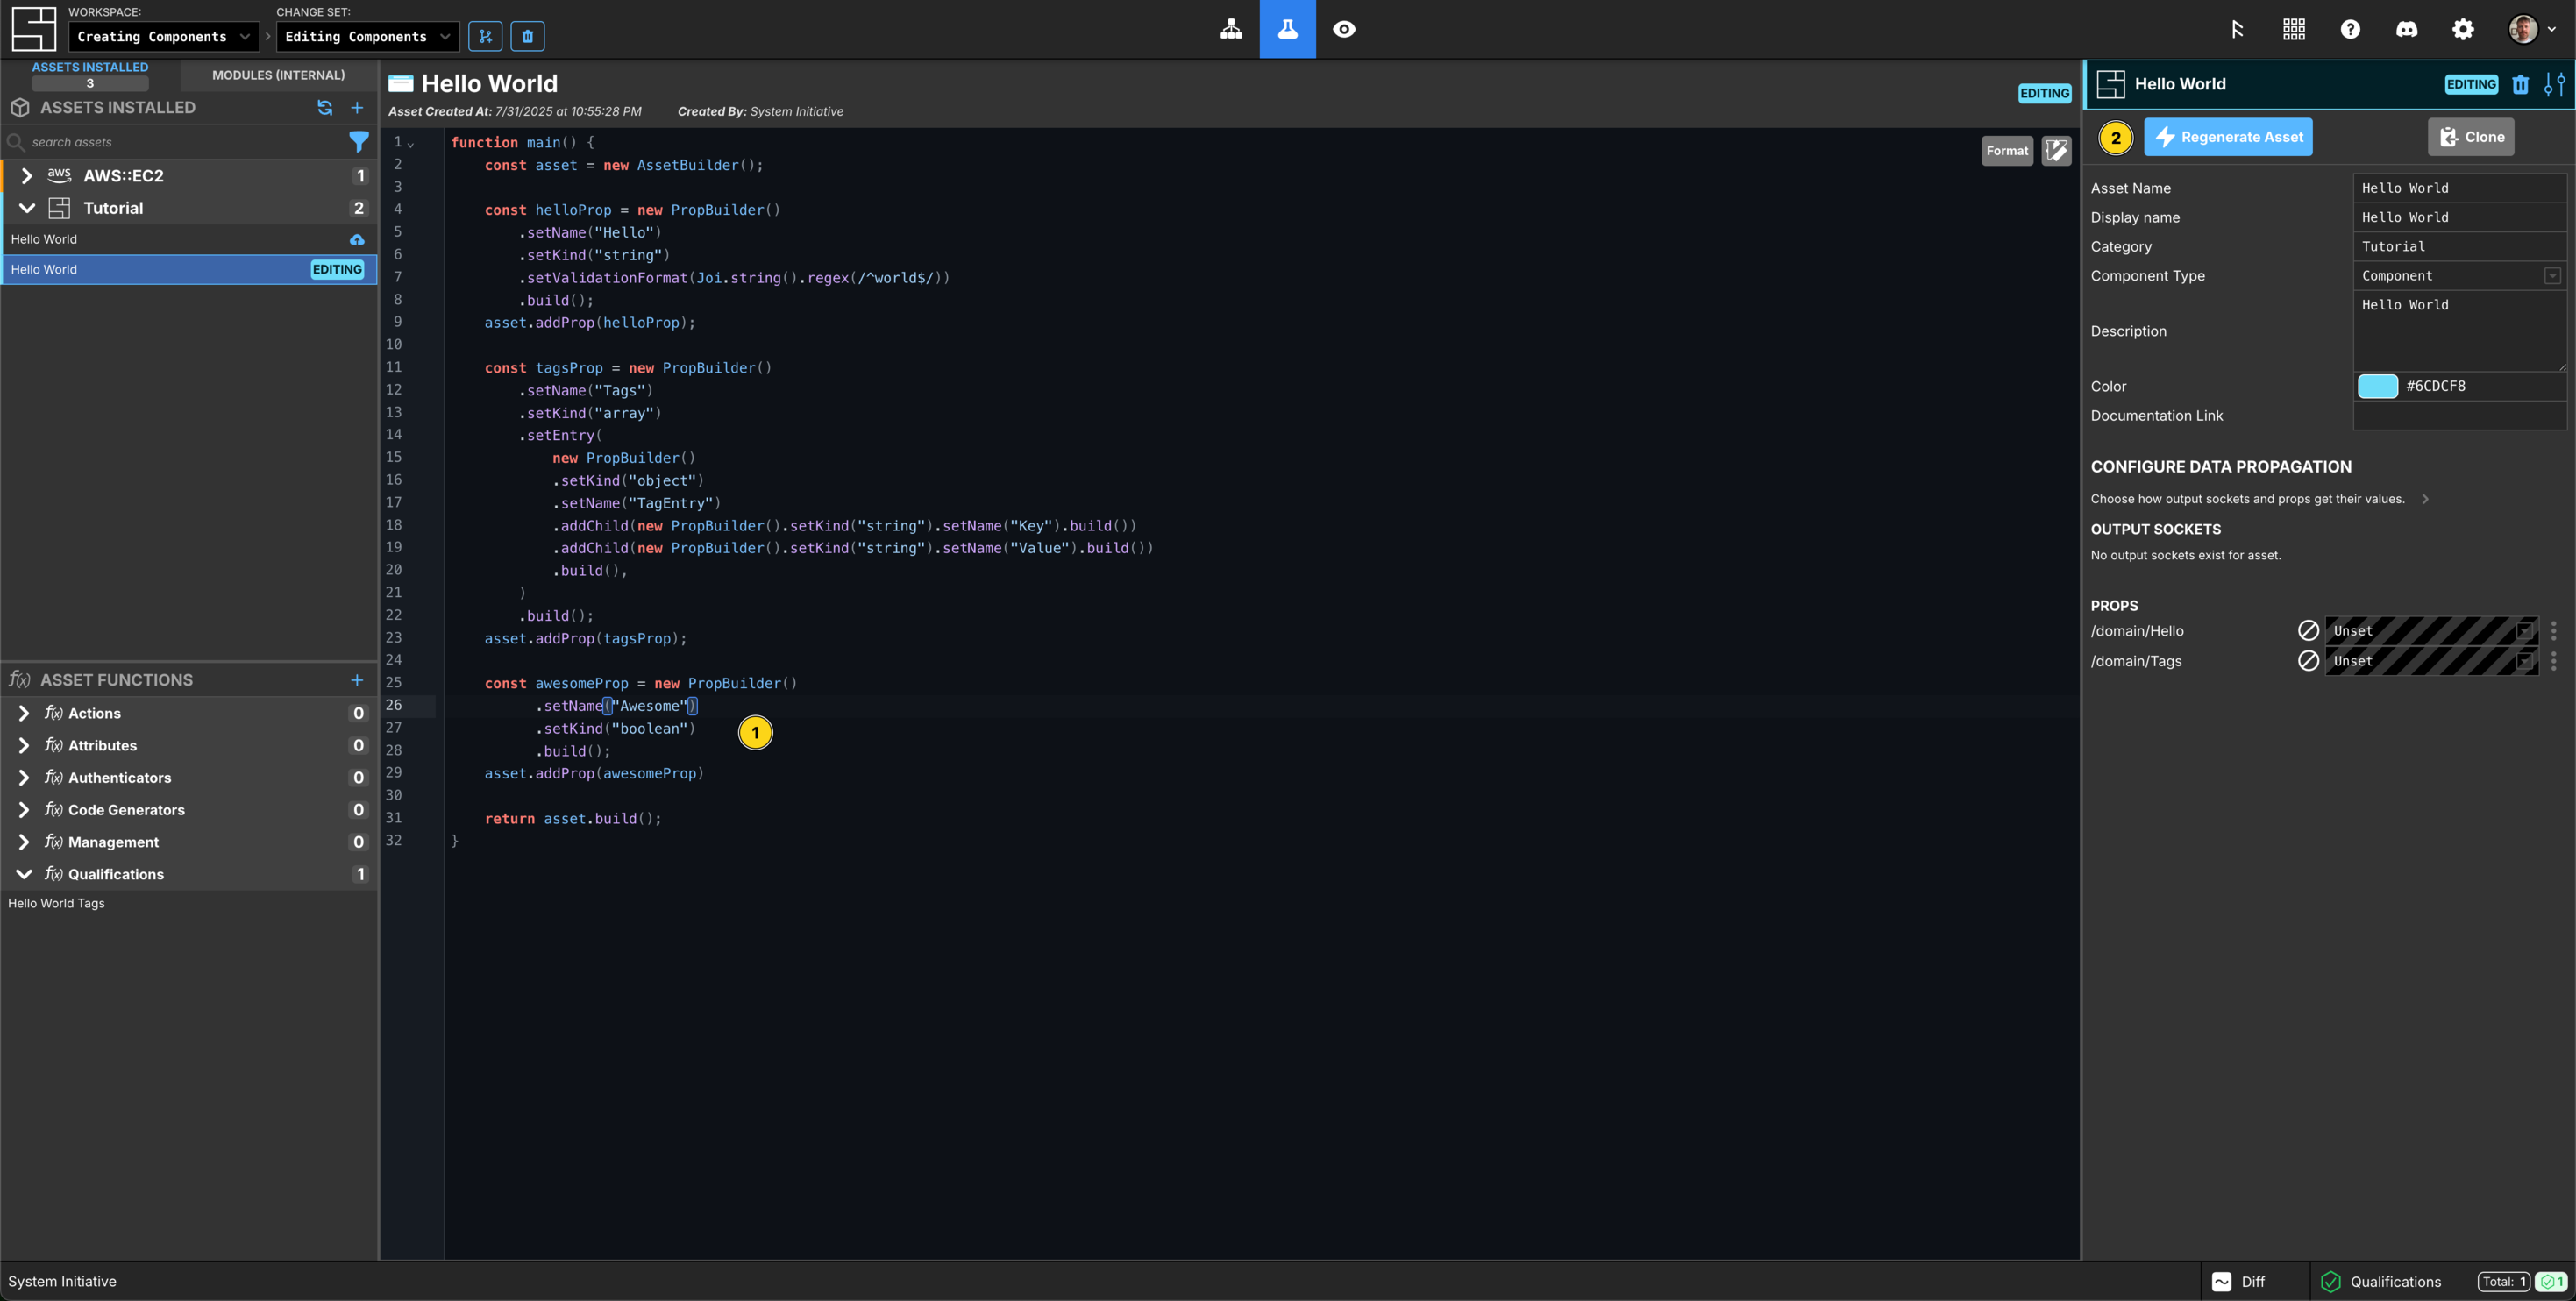
Upgrade to your new Hello World Component
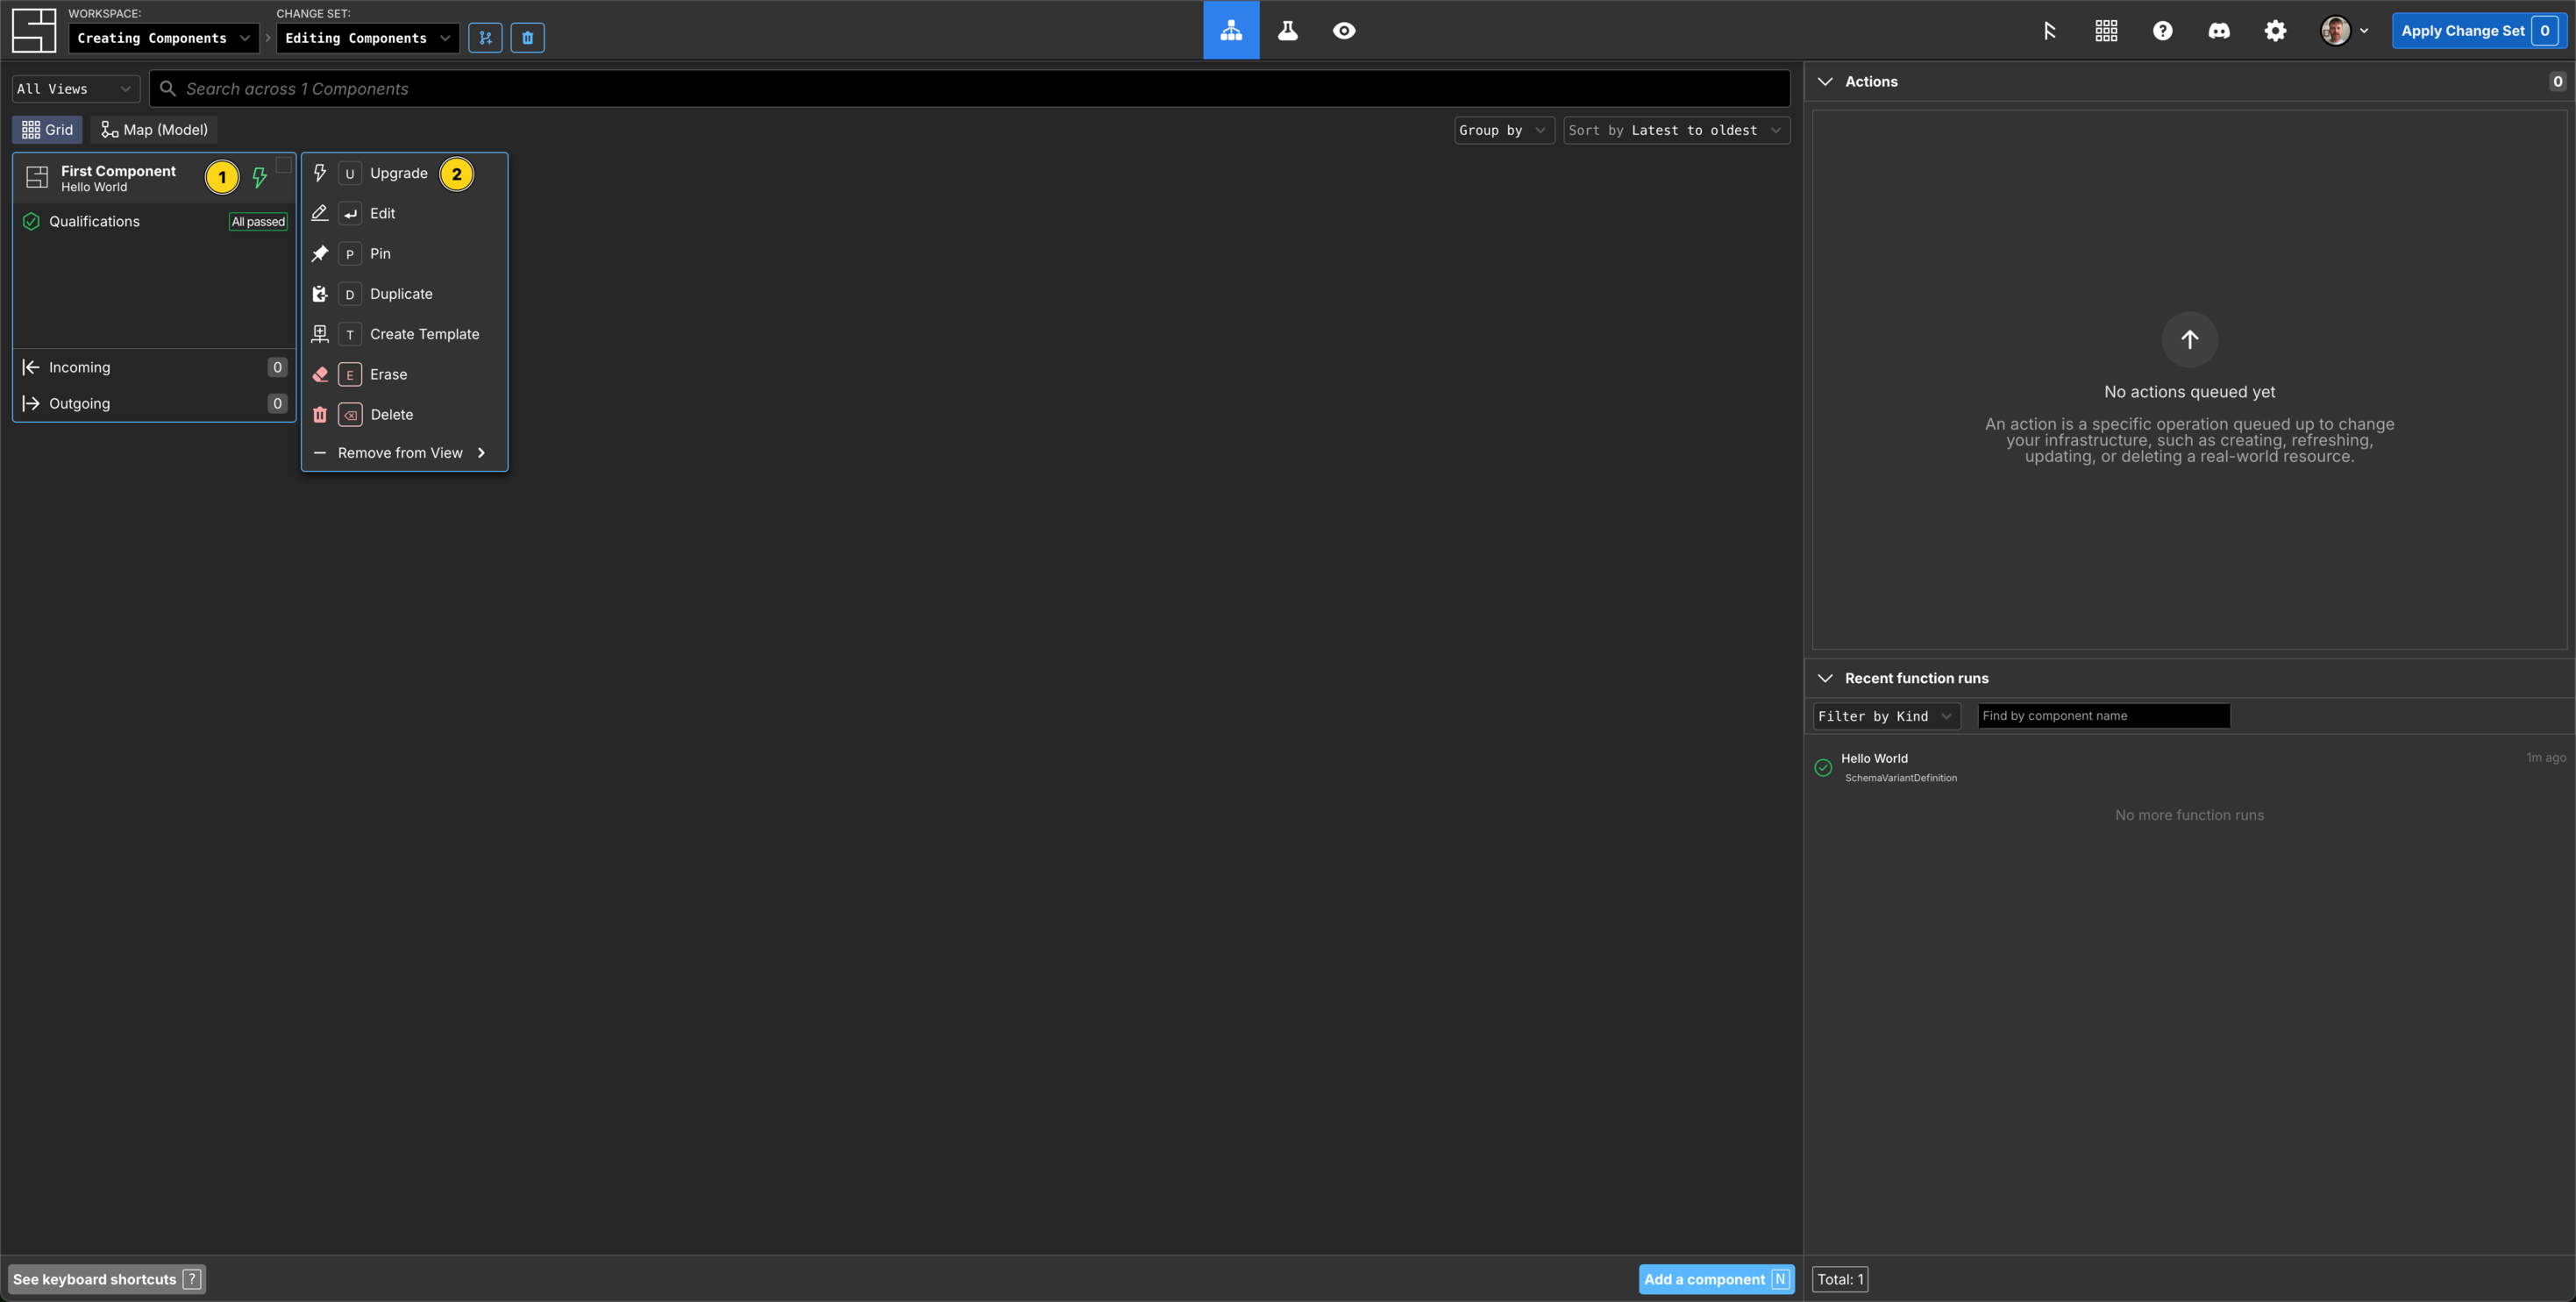
Click the Grid icon to view your Hello World Component. You can see it now has a lightning bolt icon in the top right corner, this means that the Component is Upgradeable. Right click the Component, and select Upgrade (or press U), to upgrade to the new 'version'.
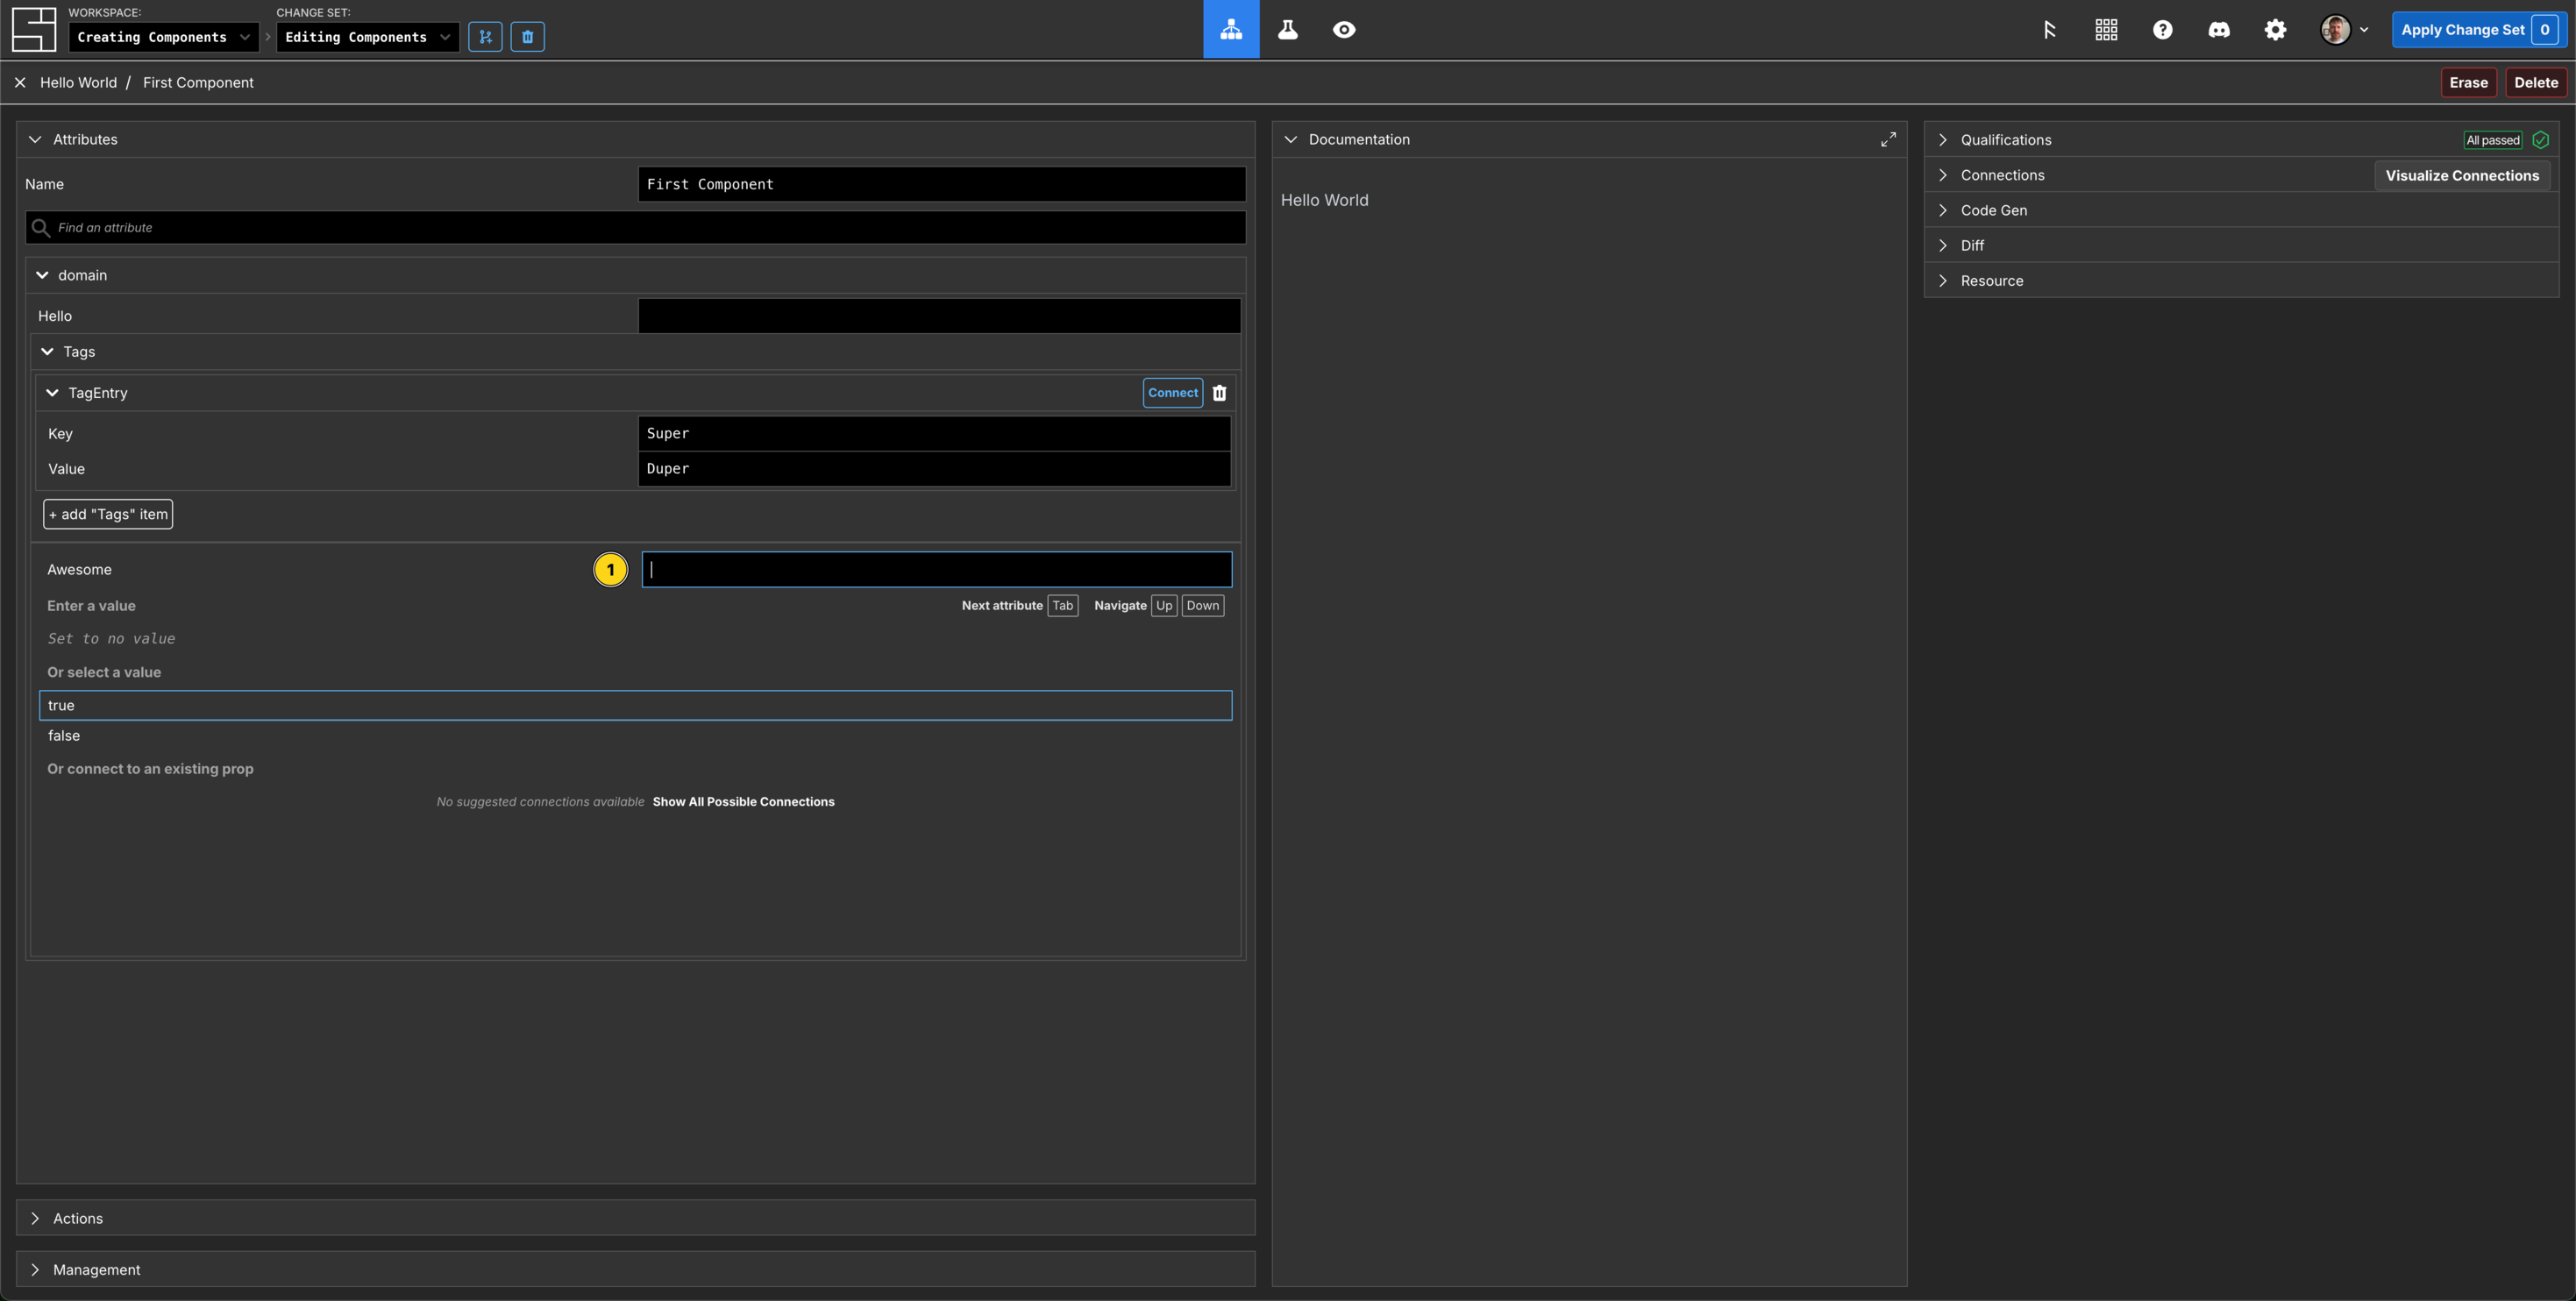
Now click the Hello World Component. You can see the new Awesome property in the Attributes panel, and if you click into it, you have an option to select true or false.
Edit a function
Click the Beaker icon to switch to the Customize screen.
In the Asset Functions panel, click the Hello World Tags Qualification function. You can see this that is not currently editable, so click the Edit button in the top right in line with the Function name.
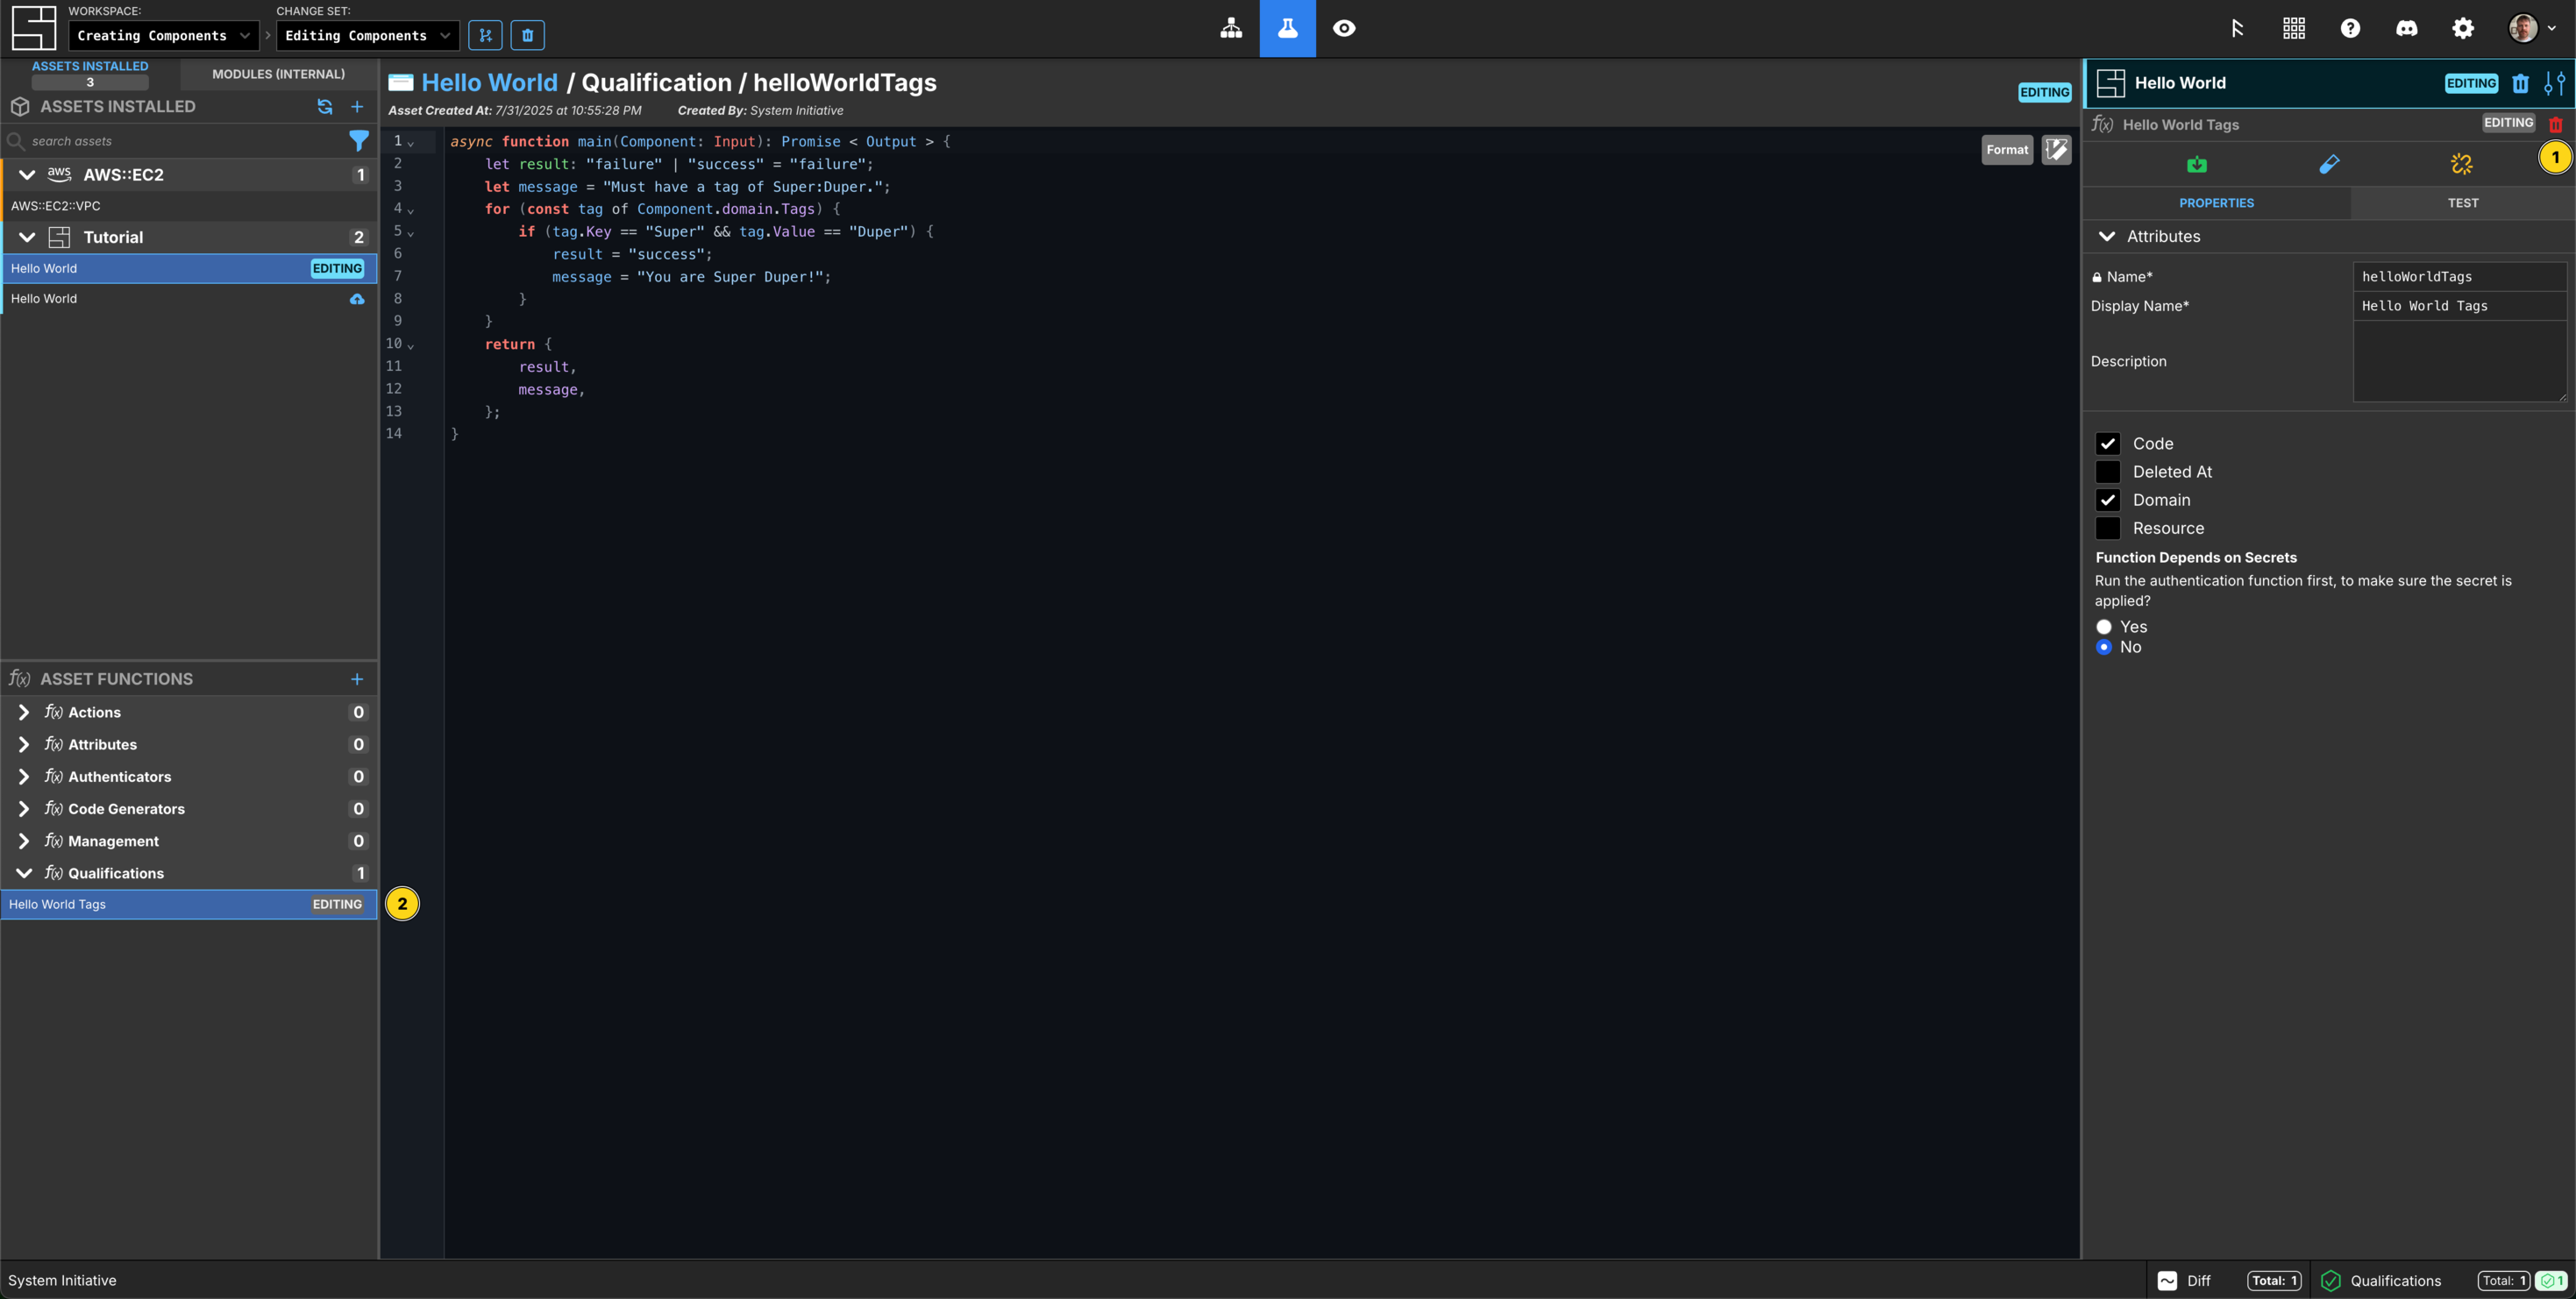
Now you have an editing version of the function, lets add a console.log("Hello there!) to the function on line 2. To ensure that this change to your function remains, you would need to Apply the Change set.
Updating Assets from System Initiative
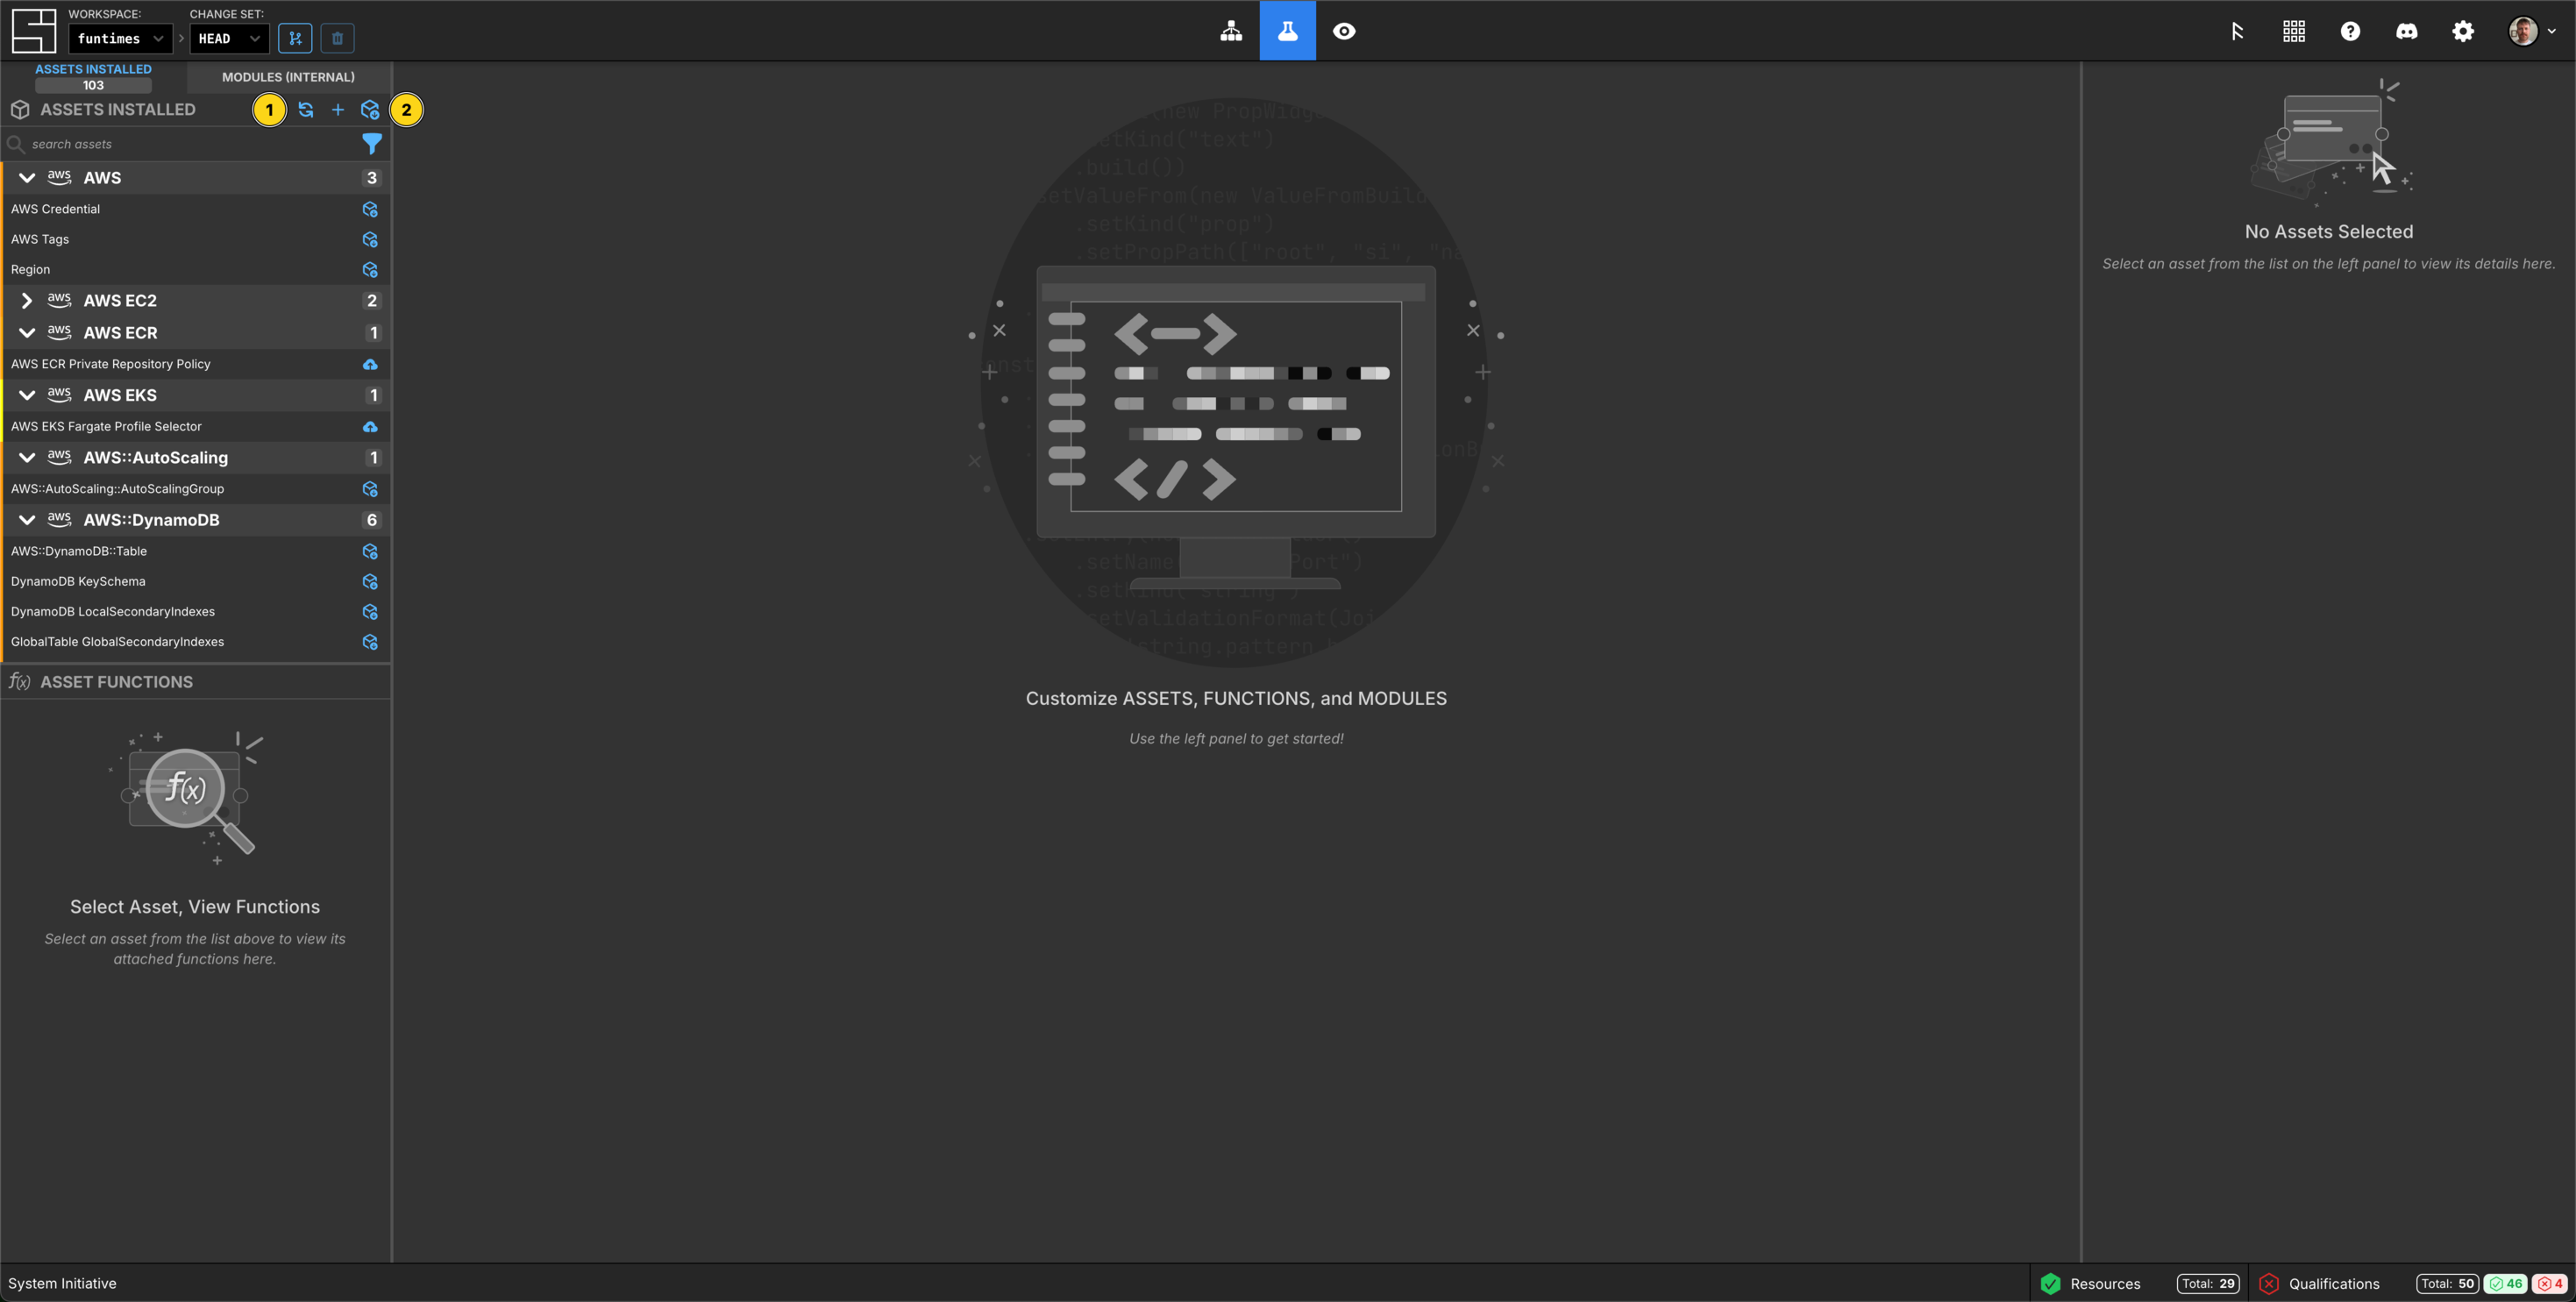
You can update assets as new versions are published from System Initiative from the customize screen. You can click the Check for Asset Updtes button (two arrows), then if an Asset can be updated, you will see an Update All button above the Asset list, and specific assets will have the same icon next to their entry in the list, and next to their title in the right side panel, if they have an update available.
Contributing Assets to System Initiative
If you have created or edited an Asset that you want to contribute to the community, you can do so once you've applied it to your workspace.
The Asset will appear with a Contribute button (a cloud with an up arrow). Select the Asset from the list, and click the icon next to the assets name in the right side panel.
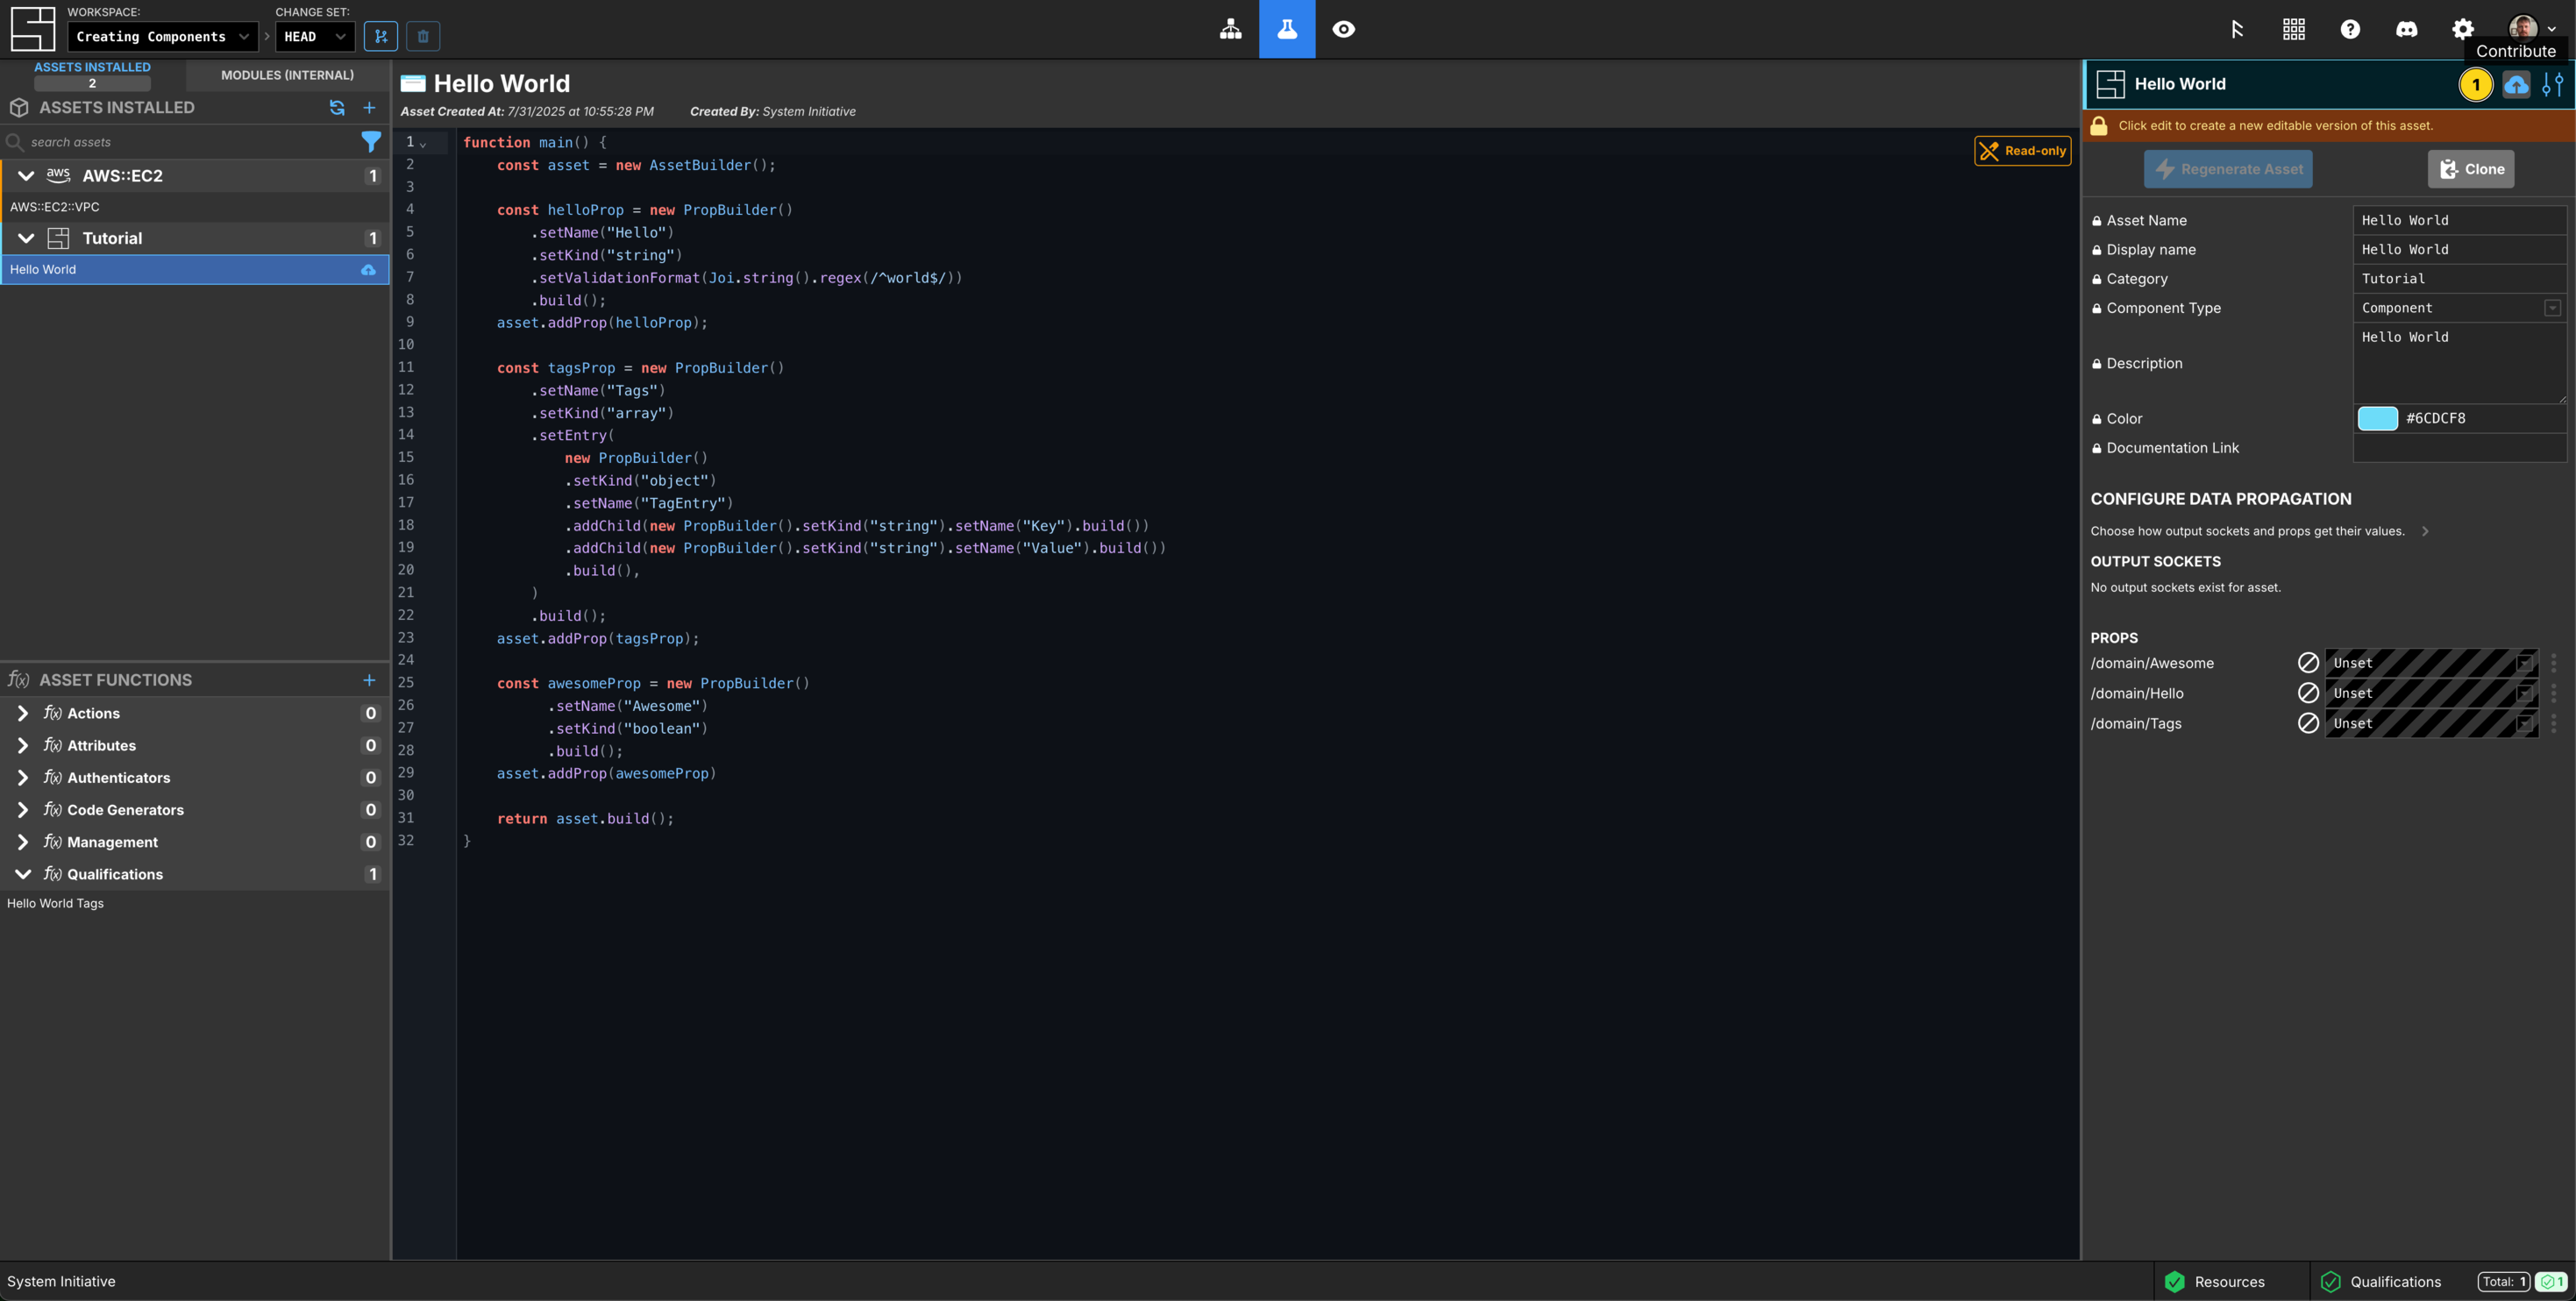
You'll be notified that the code will be reviewed, and agree that by clicking the contribute button the code will be contributed under the Apache License.
If you do, we'll be in touch with some awesome swag for you. 😃
Clean Up
To clean up your workspace, right click the Hello World Component, delete, and then Apply the Change set.
Congratulations
In this tutorial you learned:
- How to add a new Asset
- Configure its meta-data
- Define its Schema
- Regenerate the Asset to update its Schema
- Inspect your new Asset
- Add a Qualification function
- Write Qualification function in TypeScript
- Troubleshoot your Qualification function
- Edit your Asset
- Edit an Asset function
- Update your Assets
- Contribute your Assets
Next Steps
To learn more, explore the reference documentation:
- Asset Schema Reference for more information on how to author Asset Schemas.
- Asset Function Reference for more information on how to write functions
Vocabulary
In this tutorial bits of System Initiative Vocabulary will be shown with a capital letter. All definitions for these can be found here: System Initative - Vocabulary