How to manage AWS IAM Policy
This how-to assumes:
- Basic familiarity with System Initiative
- Are familiar with AWS IAM
It will teach you how to create an AWS IAM policy and manage it with System Initiative.
We will cover:
- Creating a customer managed identity policy
- Adding complex statements to the policy
- Attaching our policy to a user
- Using the AWS ARN Component to manipulate ARNs
We will be creating a policy to restrict EC2 access to a specific region.
Setup
All activities in this how-to happen within a configured AWS Region and AWS Credential.
Start in a Change Set named IAM How-to. See the AWS VPC How To for instructions on how to set this up.
Walkthrough
What it will look like
When you are through with this guide, you should have Components that look like this in your Diagram:
Create an AWS IAM Customer Managed Identity Policy Component
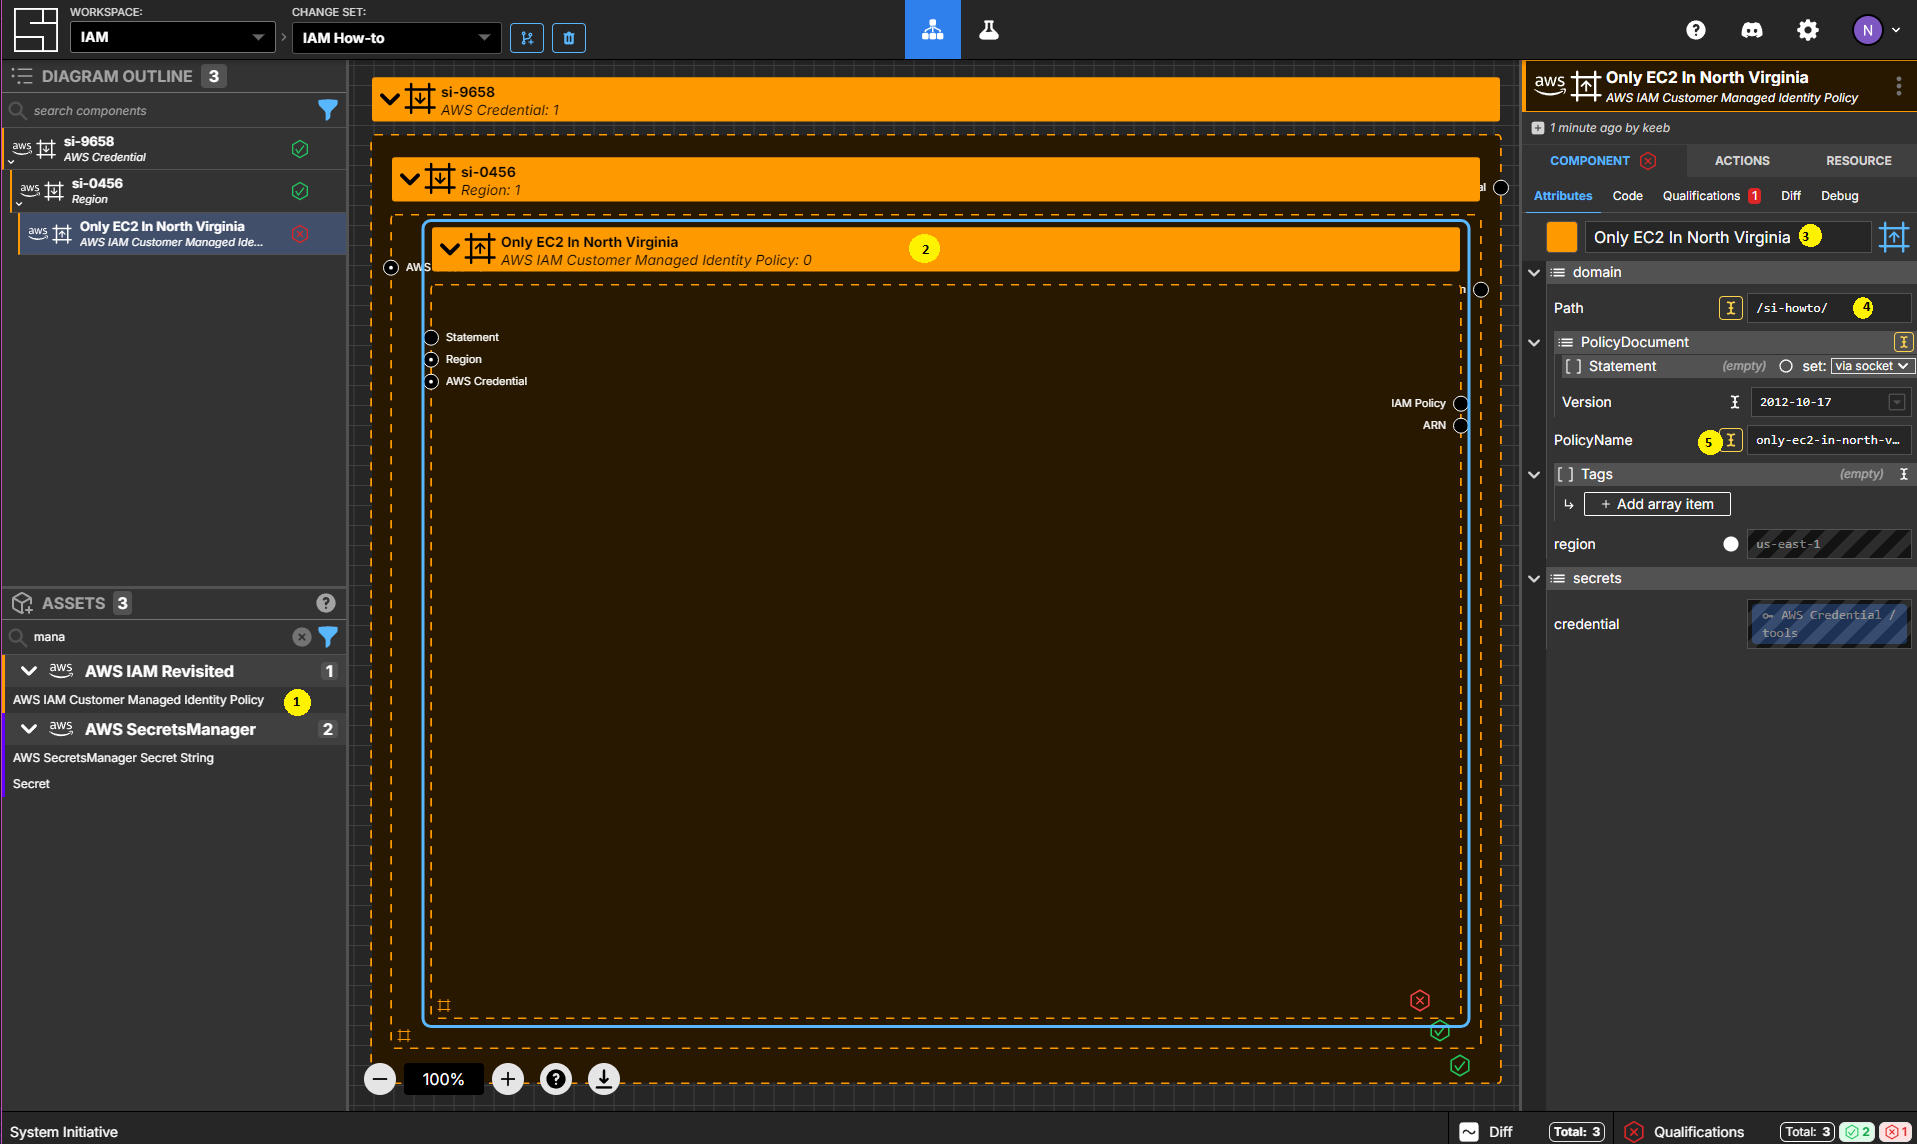
You can learn more about Customer Managed Identity Policies in the AWS documentation.
Add an AWS IAM Customer Managed Identity Policy to your Region frame.
Set the Components name to Only EC2 In North Virginia.
Set the Path to /si-howto/.
Set the PolicyName to only-ec2-in-north-virginia
Create an AWS IAM Policy Statement Component
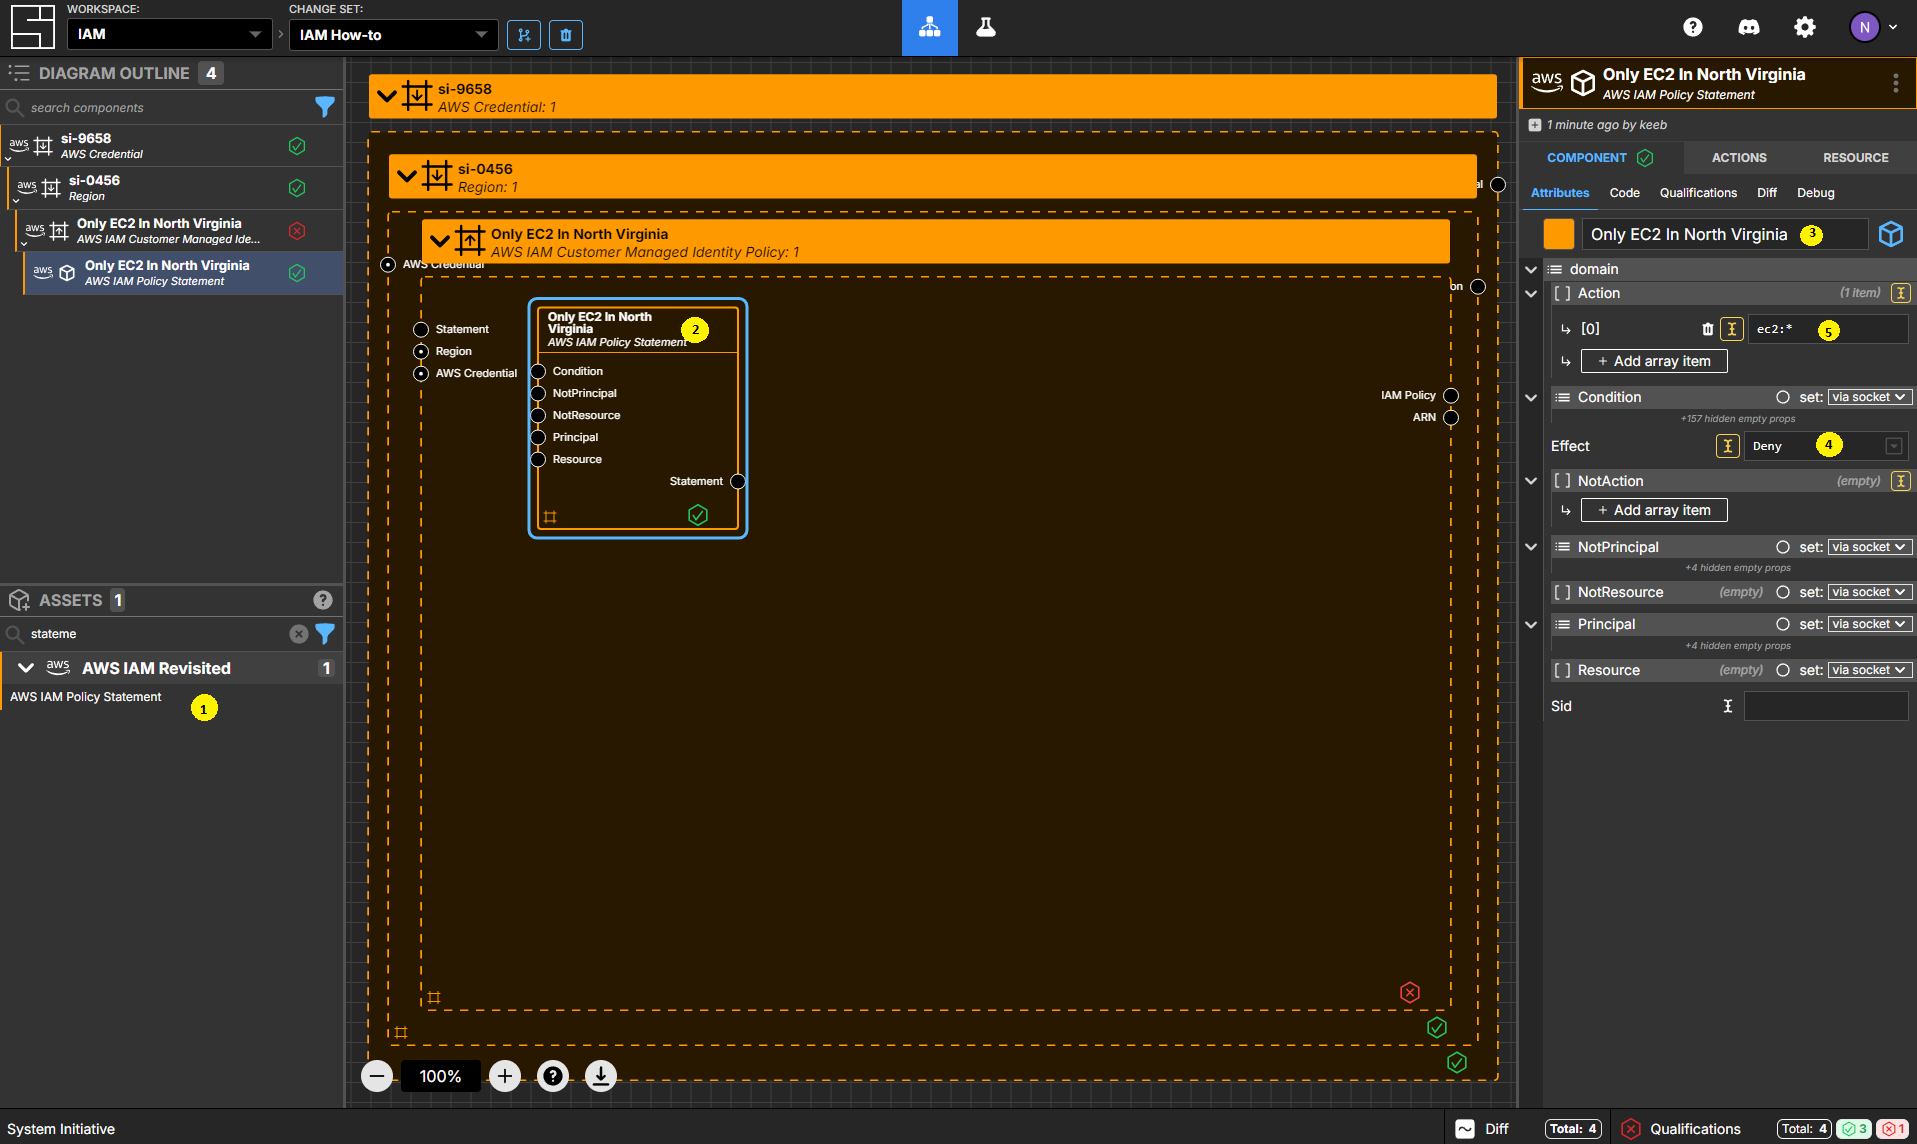
Add an AWS IAM Policy Statement to your Only EC2 In North Virginia policy frame.
Set the name to Only EC2 In North Virginia.
Set the Effect to Deny.
Add an item to the Action array, and set the value ec2:*.
Create an AWS IAM Any Component
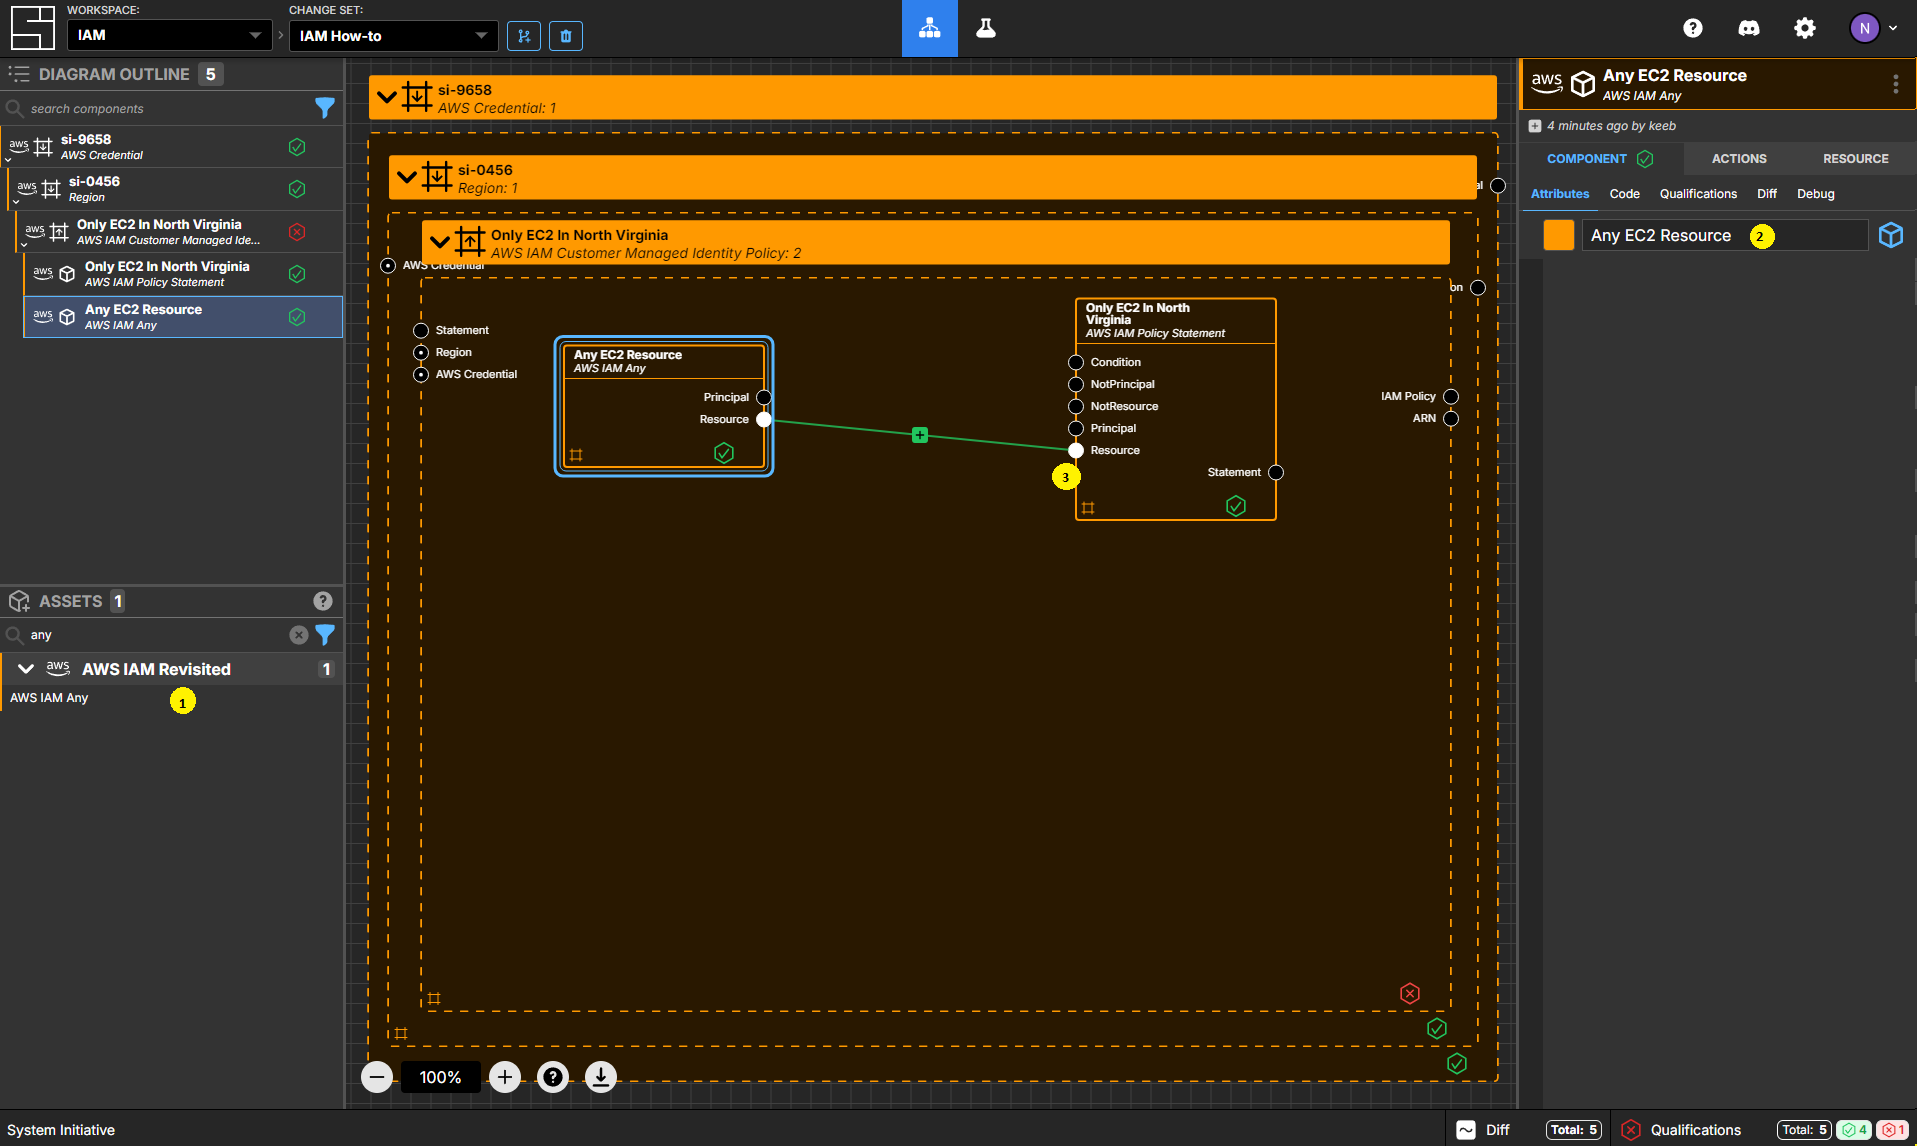
Add an AWS IAM Any Component inside your Only EC2 In North Virginia policy frame.
Set the name to Any EC2 Resource.
Connect the Resource Output Socket to the Resource Input Socket of your Only EC2 In North Virginia statement.
Create an AWS IAM Condition Operator Component
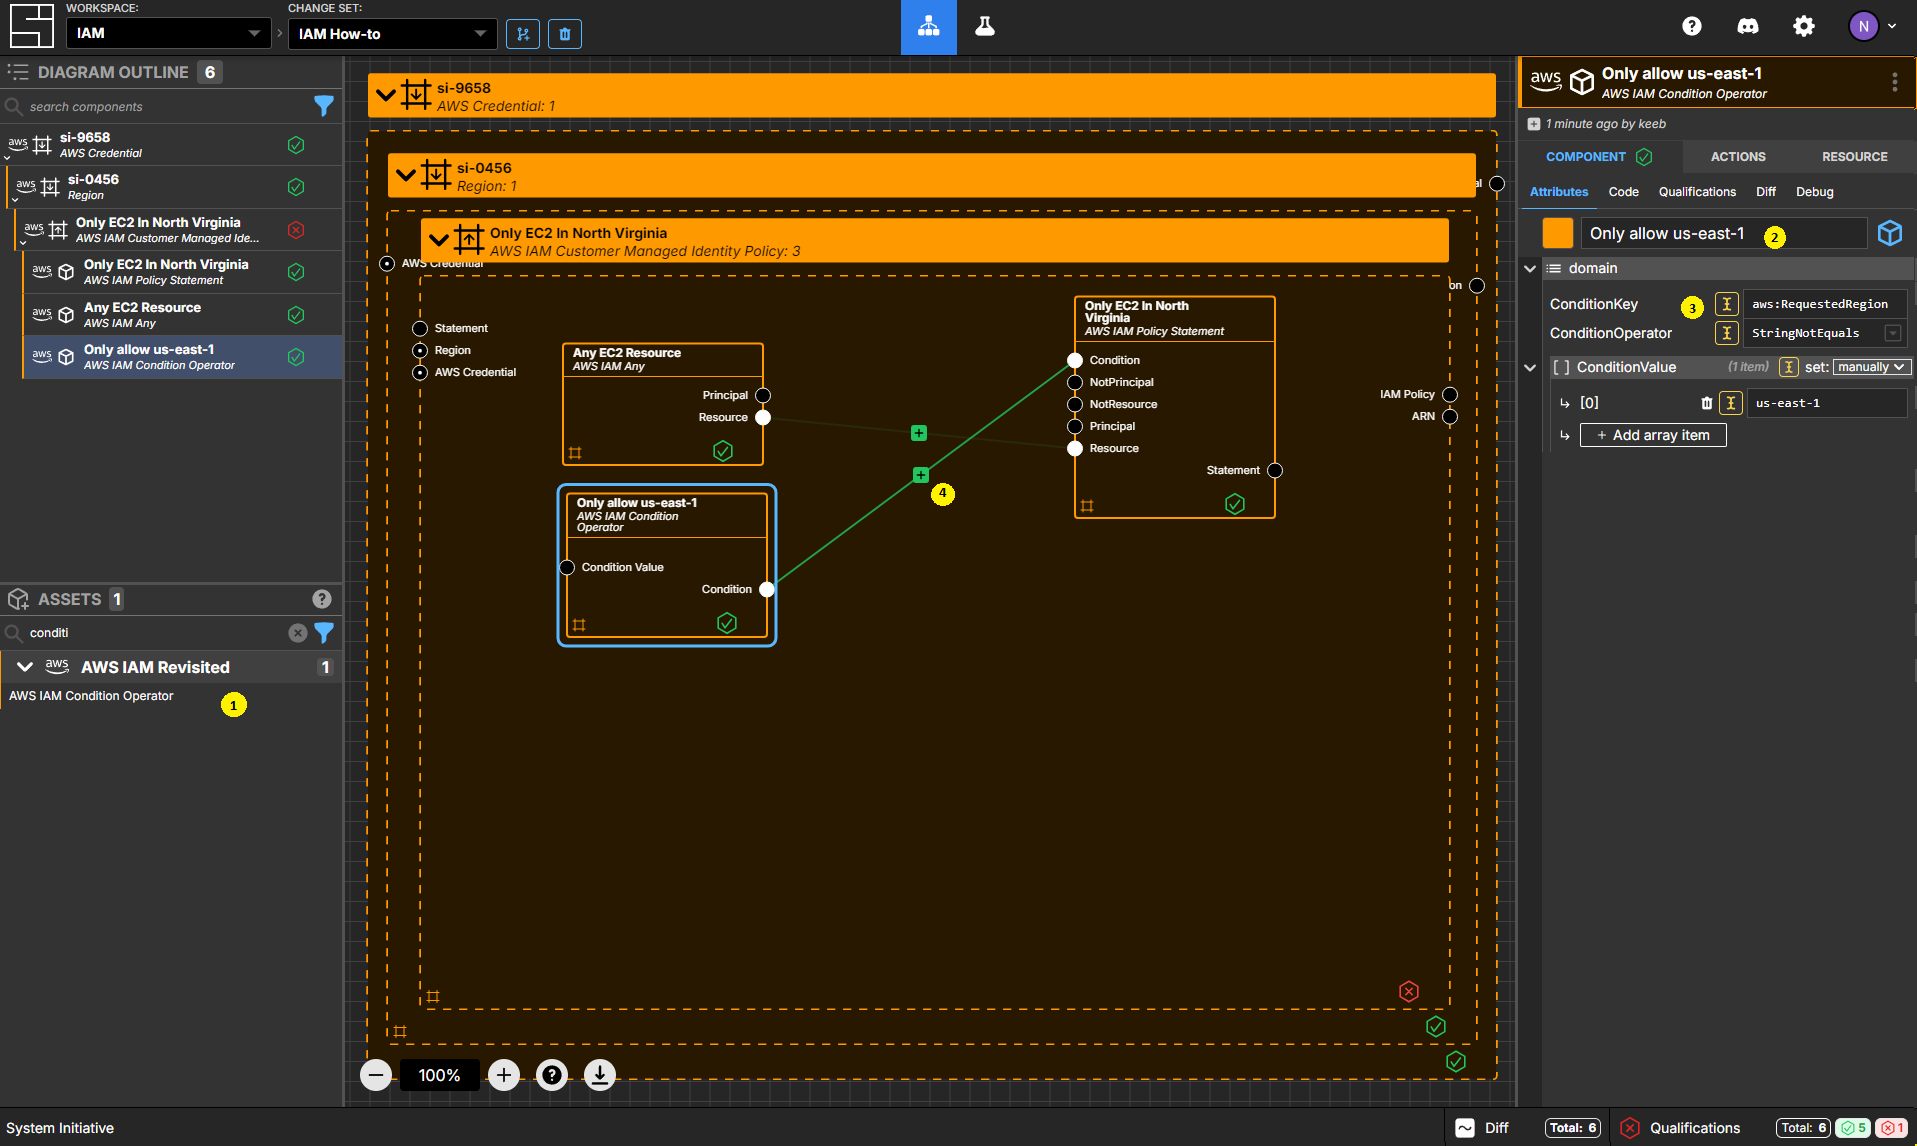
Add an AWS IAM Condition Operator Component inside your Only EC2 In North Virginia policy frame.
Set the name to Only allow us-east-1.
Set the ConditionOperator to StringNotEquals.
Set the ConditionKey to aws:RequestedRegion.
Change the ConditionValue from being set via socket to being set manually.
Add an item to the ConditionValue array, and set the value to us-east-1.
Connect the Condition Output Socket to the Condition Input Socket of your Only EC2 In North Virginia statement.
Review your policy
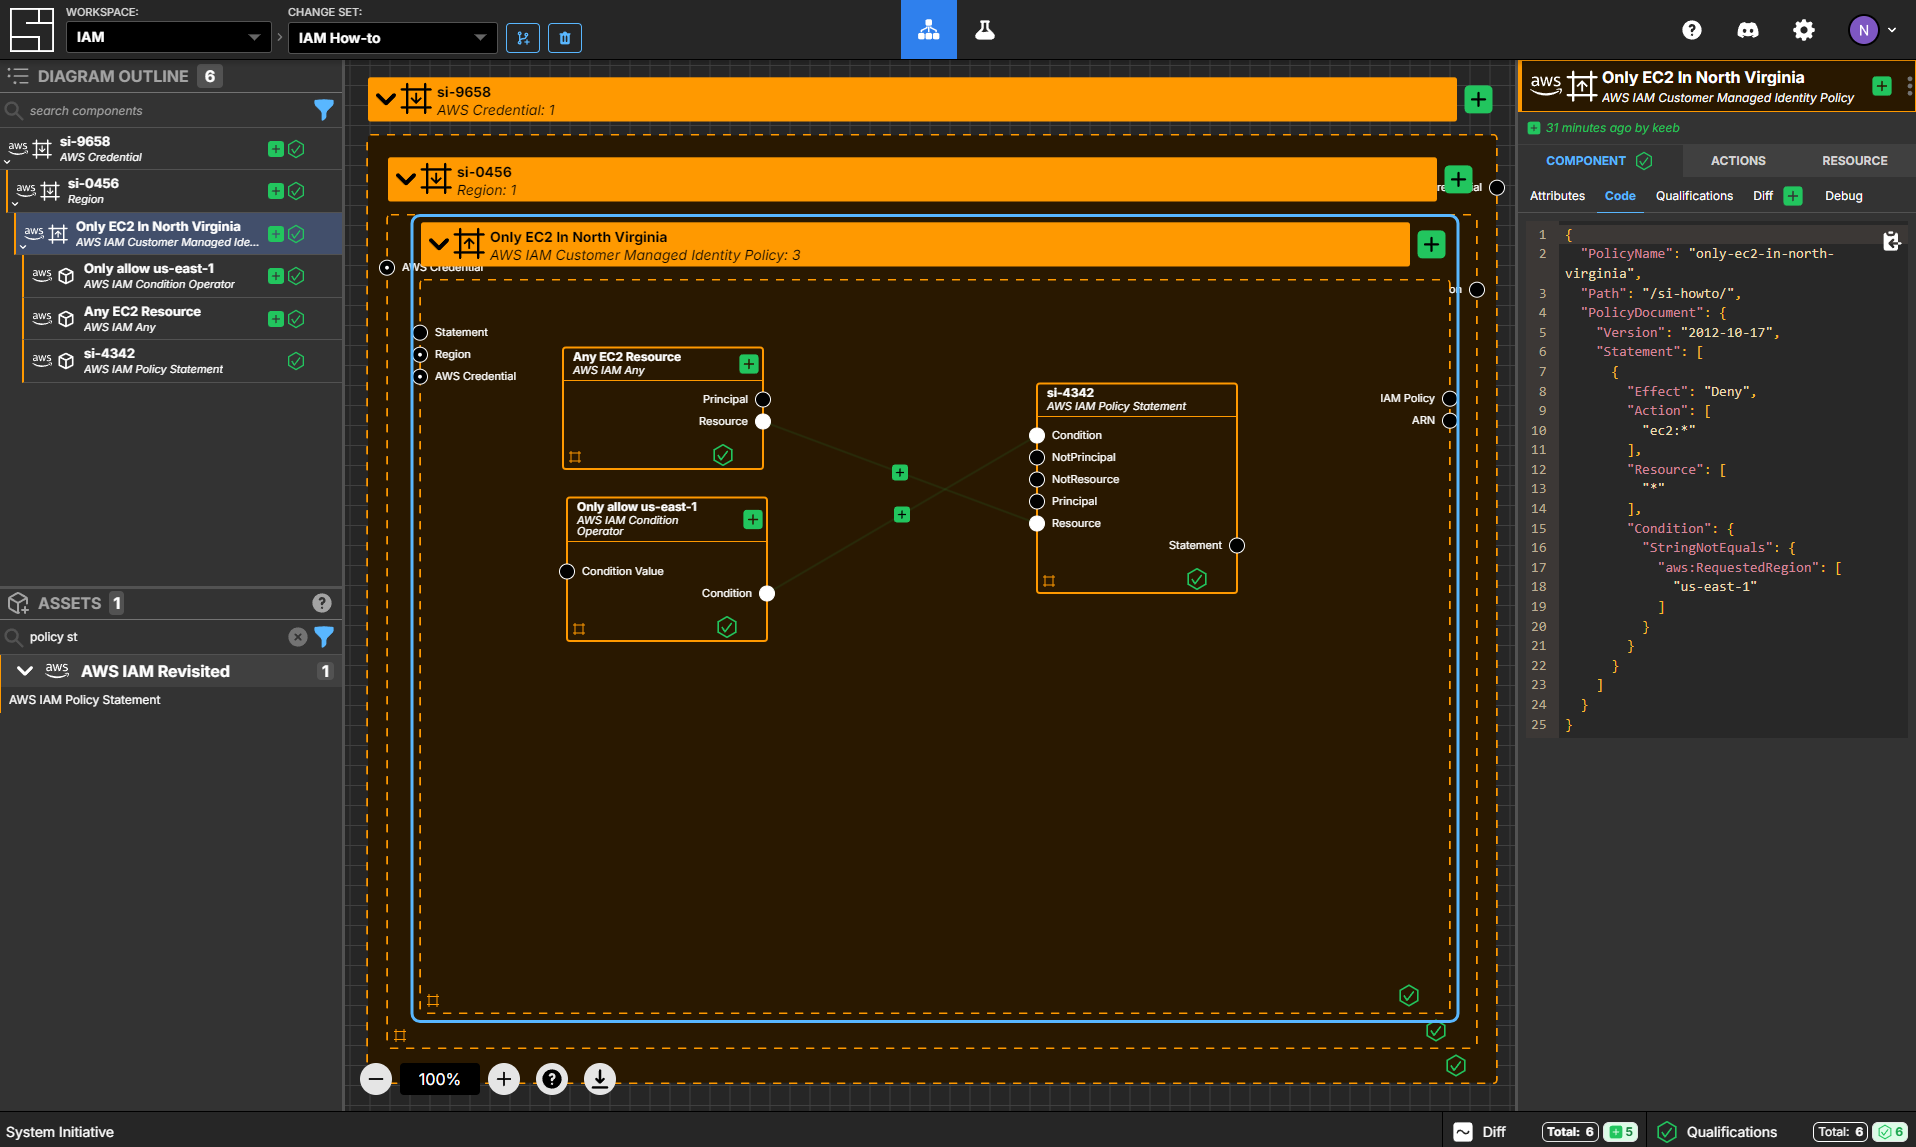
Select your Only EC2 In North Virginia policy frame.
Navigate to the Code sub-panel. You should see JSON that looks like the following:
{
  "PolicyName": "Only EC2 In North Virginia",
  "Path": "/si-howto/",
  "PolicyDocument": {
    "Version": "2012-10-17",
    "Statement": [
      {
        "Effect": "Deny",
        "Action": ["ec2:*"],
        "Resource": ["*"],
        "Condition": {
          "StringNotEquals": {
            "aws:RequestedRegion": ["us-east-1"]
          }
        }
      }
    ]
  }
}
Your Components should be passing all their qualifications.
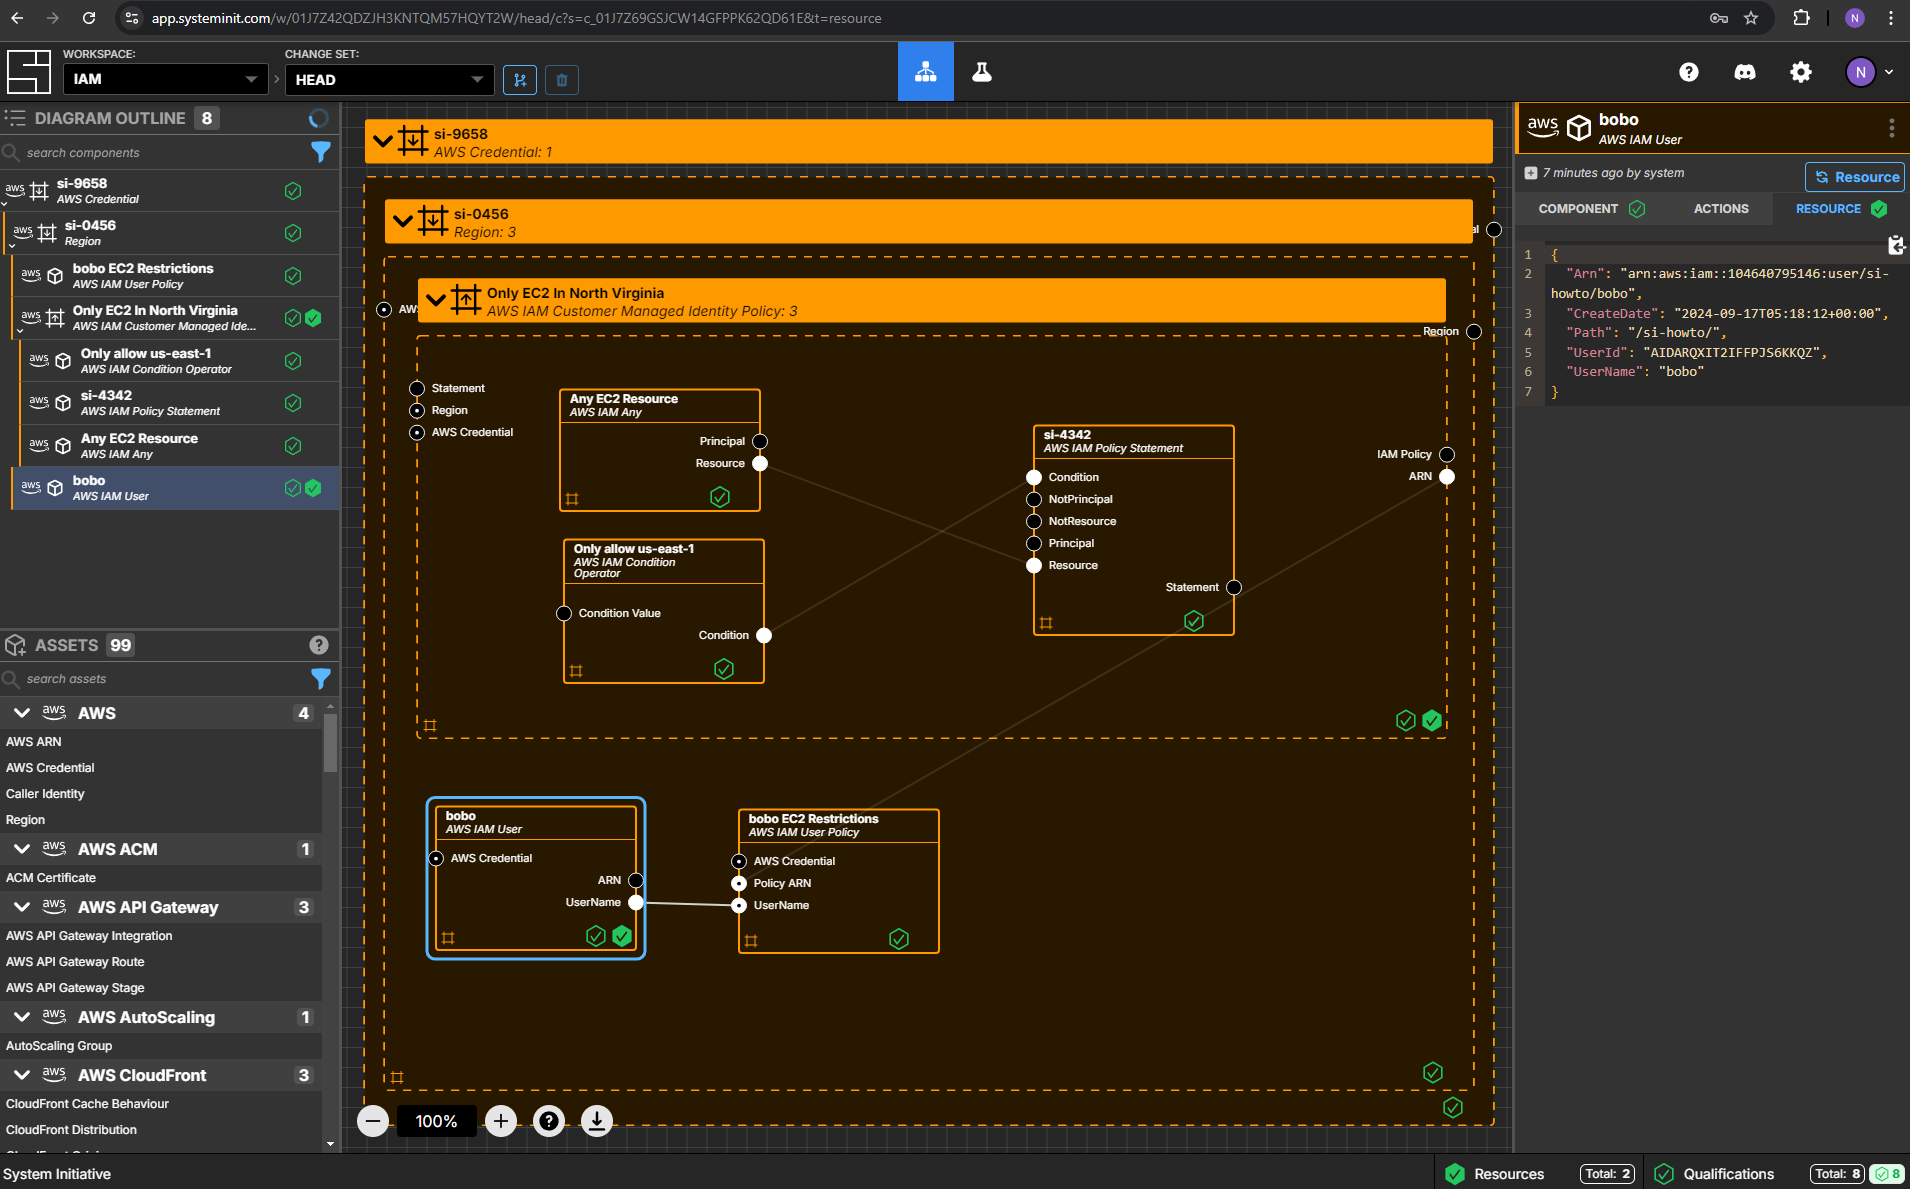
Create an AWS IAM User Component
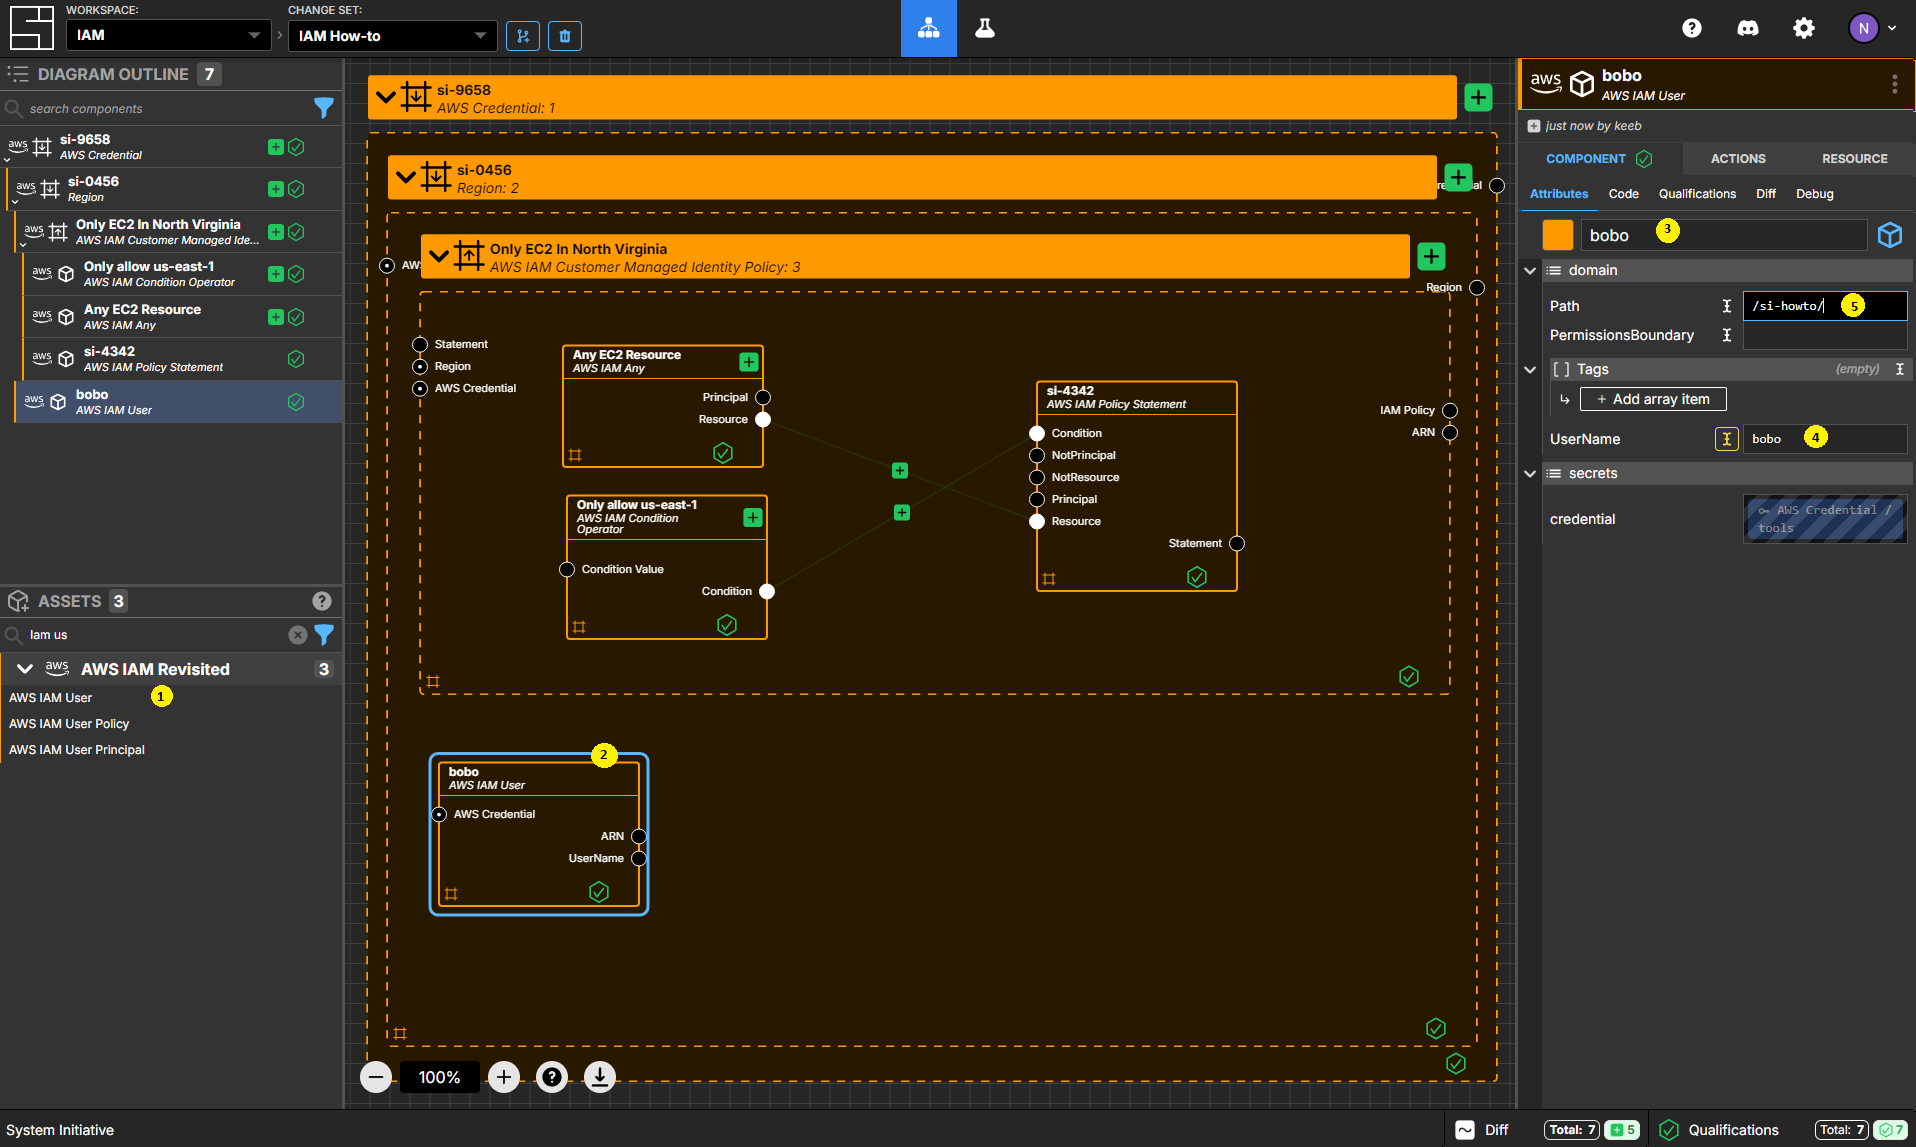
Add an AWS IAM User to your Region frame. (It should be a peer of your Only EC2 In North Virginia policy.
Set the name to bobo.
Set the UserName to bobo.
Set the Path to /si-howto/.
Create an AWS IAM User Policy Component
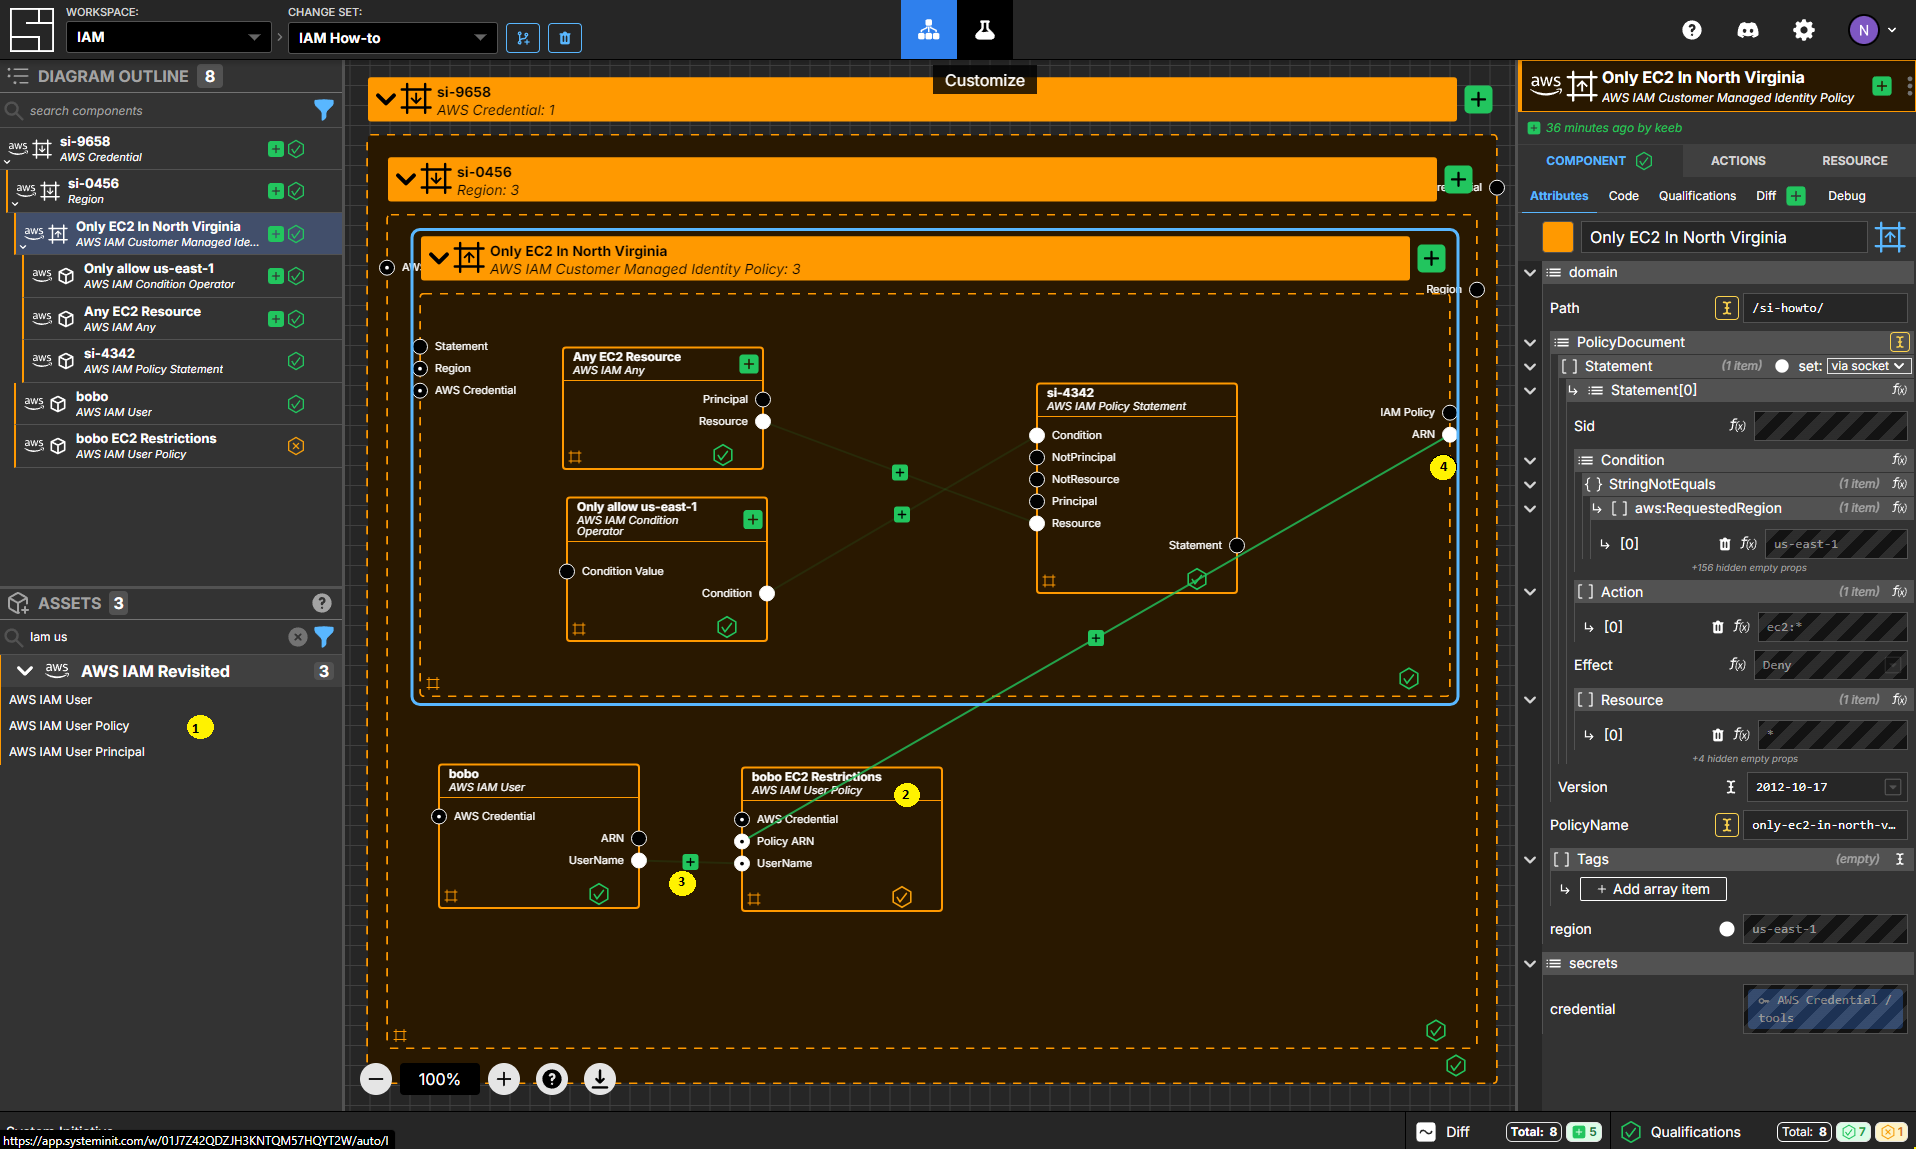
Add an AWS IAM User Policy Component to your Region frame.
Set the name to bobo EC2 Restrictions.
Connect the UserName Output Socket of your bobo AWS IAM User to the UserName Input Socket of your bobo EC2 Restrictions AWS IAM User Policy.
Connect the ARN Output Socket of the Only EC2 In North Virginia AWS IAM Customer Managed Identity Policy to the Policy ARN Input Socket of your bobo EC2 Restrictions AWS IAM User Policy.
Apply your Change Set
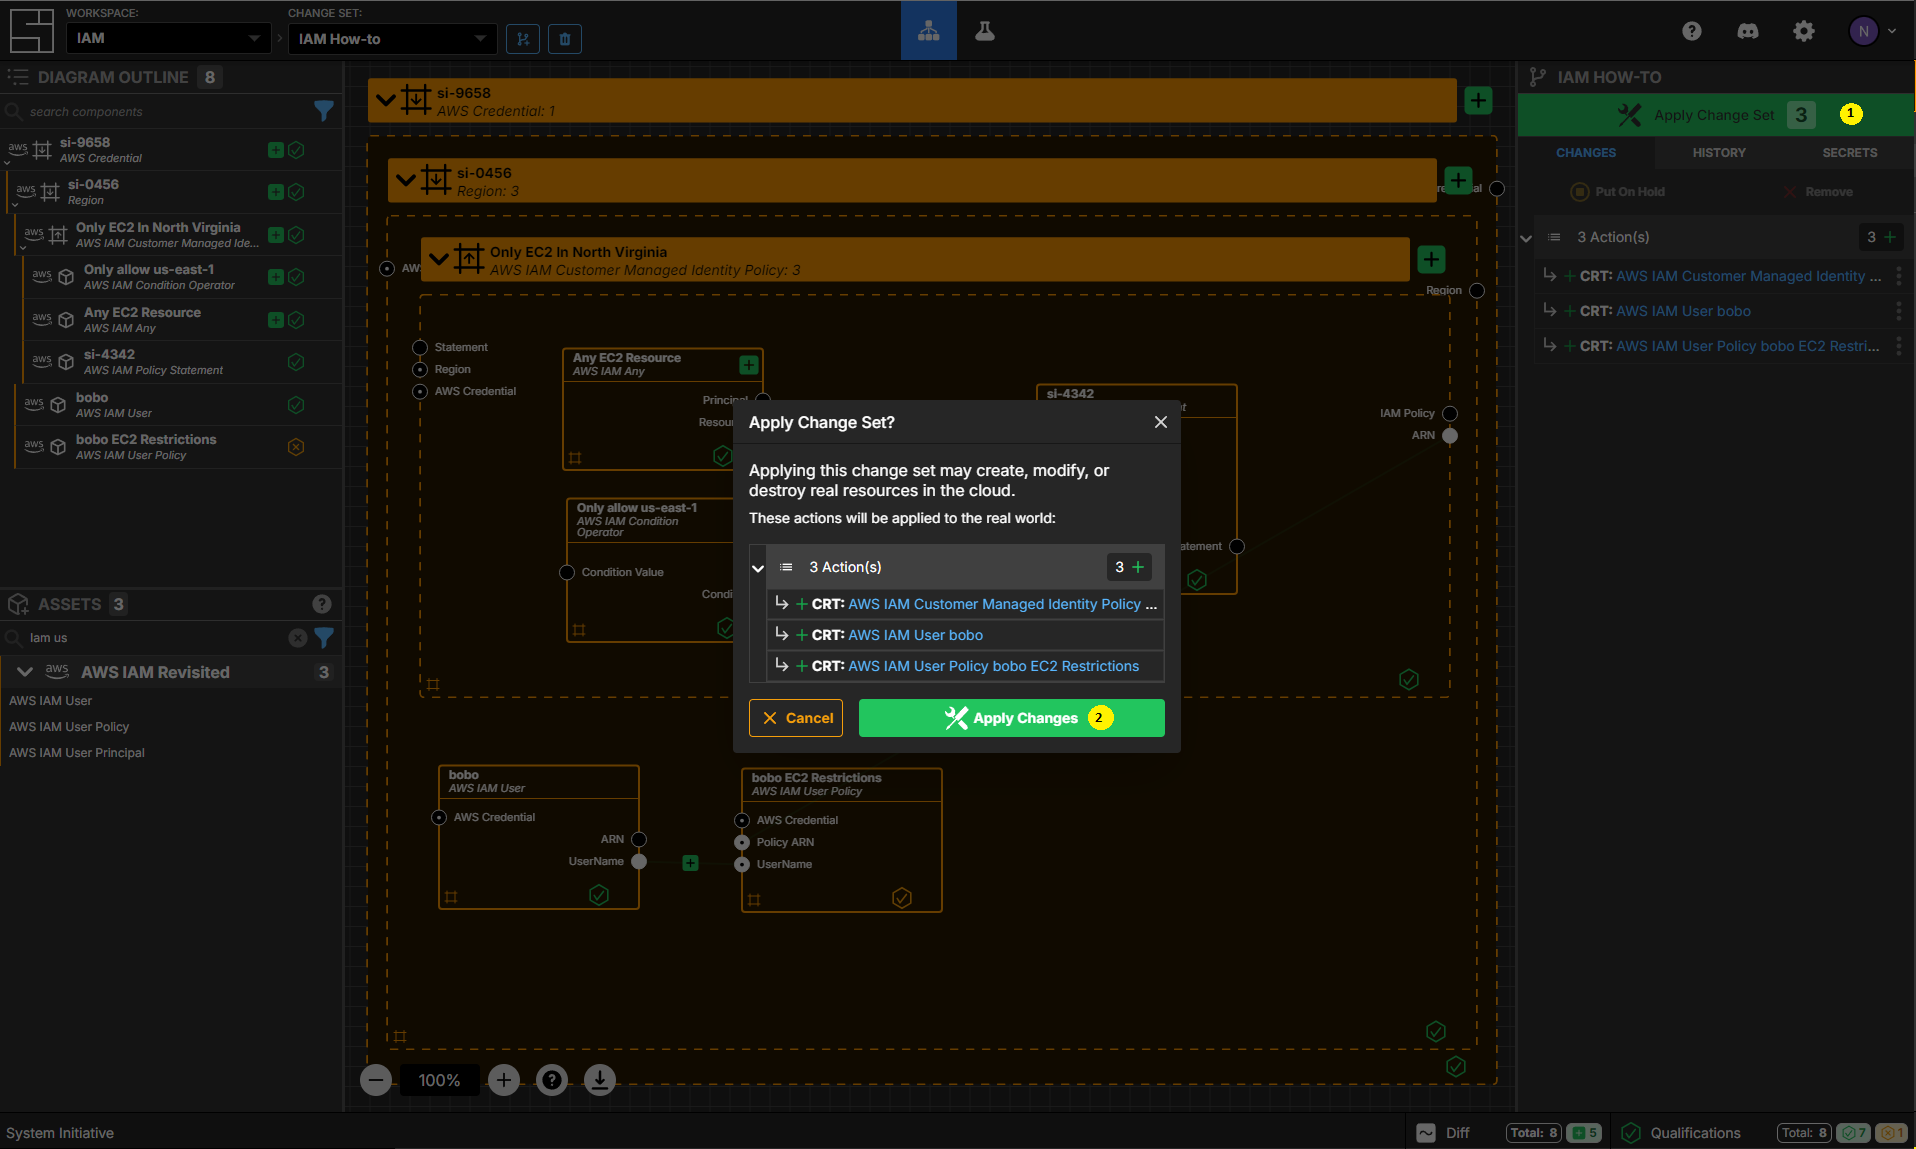
Press Escape or click anywhere on the canvas background to select the Workspace.
Click the Apply Change Set button to:
- Create your new Identity Policy
- Create the bobo user
- Attach your policy to your policy
Explore your resources

Review the completed AWS resources by clicking the Resource sub-panel for each of your new resources.
Clean Up
Create a new Change Set called Clean up IAM How-to
Delete your Only EC2 In North Virginia policy frame.
Delete your bobo AWS IAM User.
Delete your bobo EC2 Restrictions AWS IAM Policy.
Click Apply Change Set.
All your new resources should be deleted from your AWS account.
Advanced Topics
Complex Resource ARNs
You may need to create more complex array's of Resource ARNs for a given policy statement. For example, to allow a policy to apply to an S3 Bucket and any contents of the bucket.
Create an S3 Bucket Component
Create a new Change Set called Complex ARN Example.
Add an S3 Bucket in your region frame.
Set the name to bobo-logs.
Create an IAM Policy Statement Component
Add an AWS IAM Policy Statement Component within your Region.
Set the name to Example Policy.
Connect the ARN Output Socket of bobo-logs to the Resource Input Socket of Example Policy.
Create an AWS ARN Component
Add an AWS ARN Component within your Region.
Set the name to bobo-logs/*.
Connect the ARN Output Socket of bobo-logs to the ARN Input Socket of bobo-logs/*.
Set the resource-postfix to /*.
Connect the ARN Output Socket of bobo-logs/* to the Resource Input Socket of Example Policy.
Examine the Example Policy
Go to the Code sub-panel of the Example Policy. You'll see that there are now two resources - the first is the ARN for the S3 bucket itself, and the second has /* appended to it.
You can use this style to override or extend any ARN.
Clean up
Abandon your Complex ARN Example Change Set.
Vocabulary
In this guide bits of System Initiative Vocabulary will be shown with a capital letter. All definitions for these can be found here: System Initative - Vocabulary