How to create macOS instances on AWS EC2
This how-to assumes:
- Basic familiarity with System Initiative
- Are familiar with AWS EC2
It will teach you how to create a dedicated host in AWS EC2 and deploy a macOS instance on it with System Initiative.
We will cover:
- The AWS dedicated host, EC2 instance and security group needed for the macOS instance
- This guide assumes that you have the AWS default VPC available to deploy into in
us-east-1of your AWS account
The minimum lease on an AWS EC2 Dedicated Host for macOS is 24 hours. So
you will not be able to release the host before the 24 hour period expires.
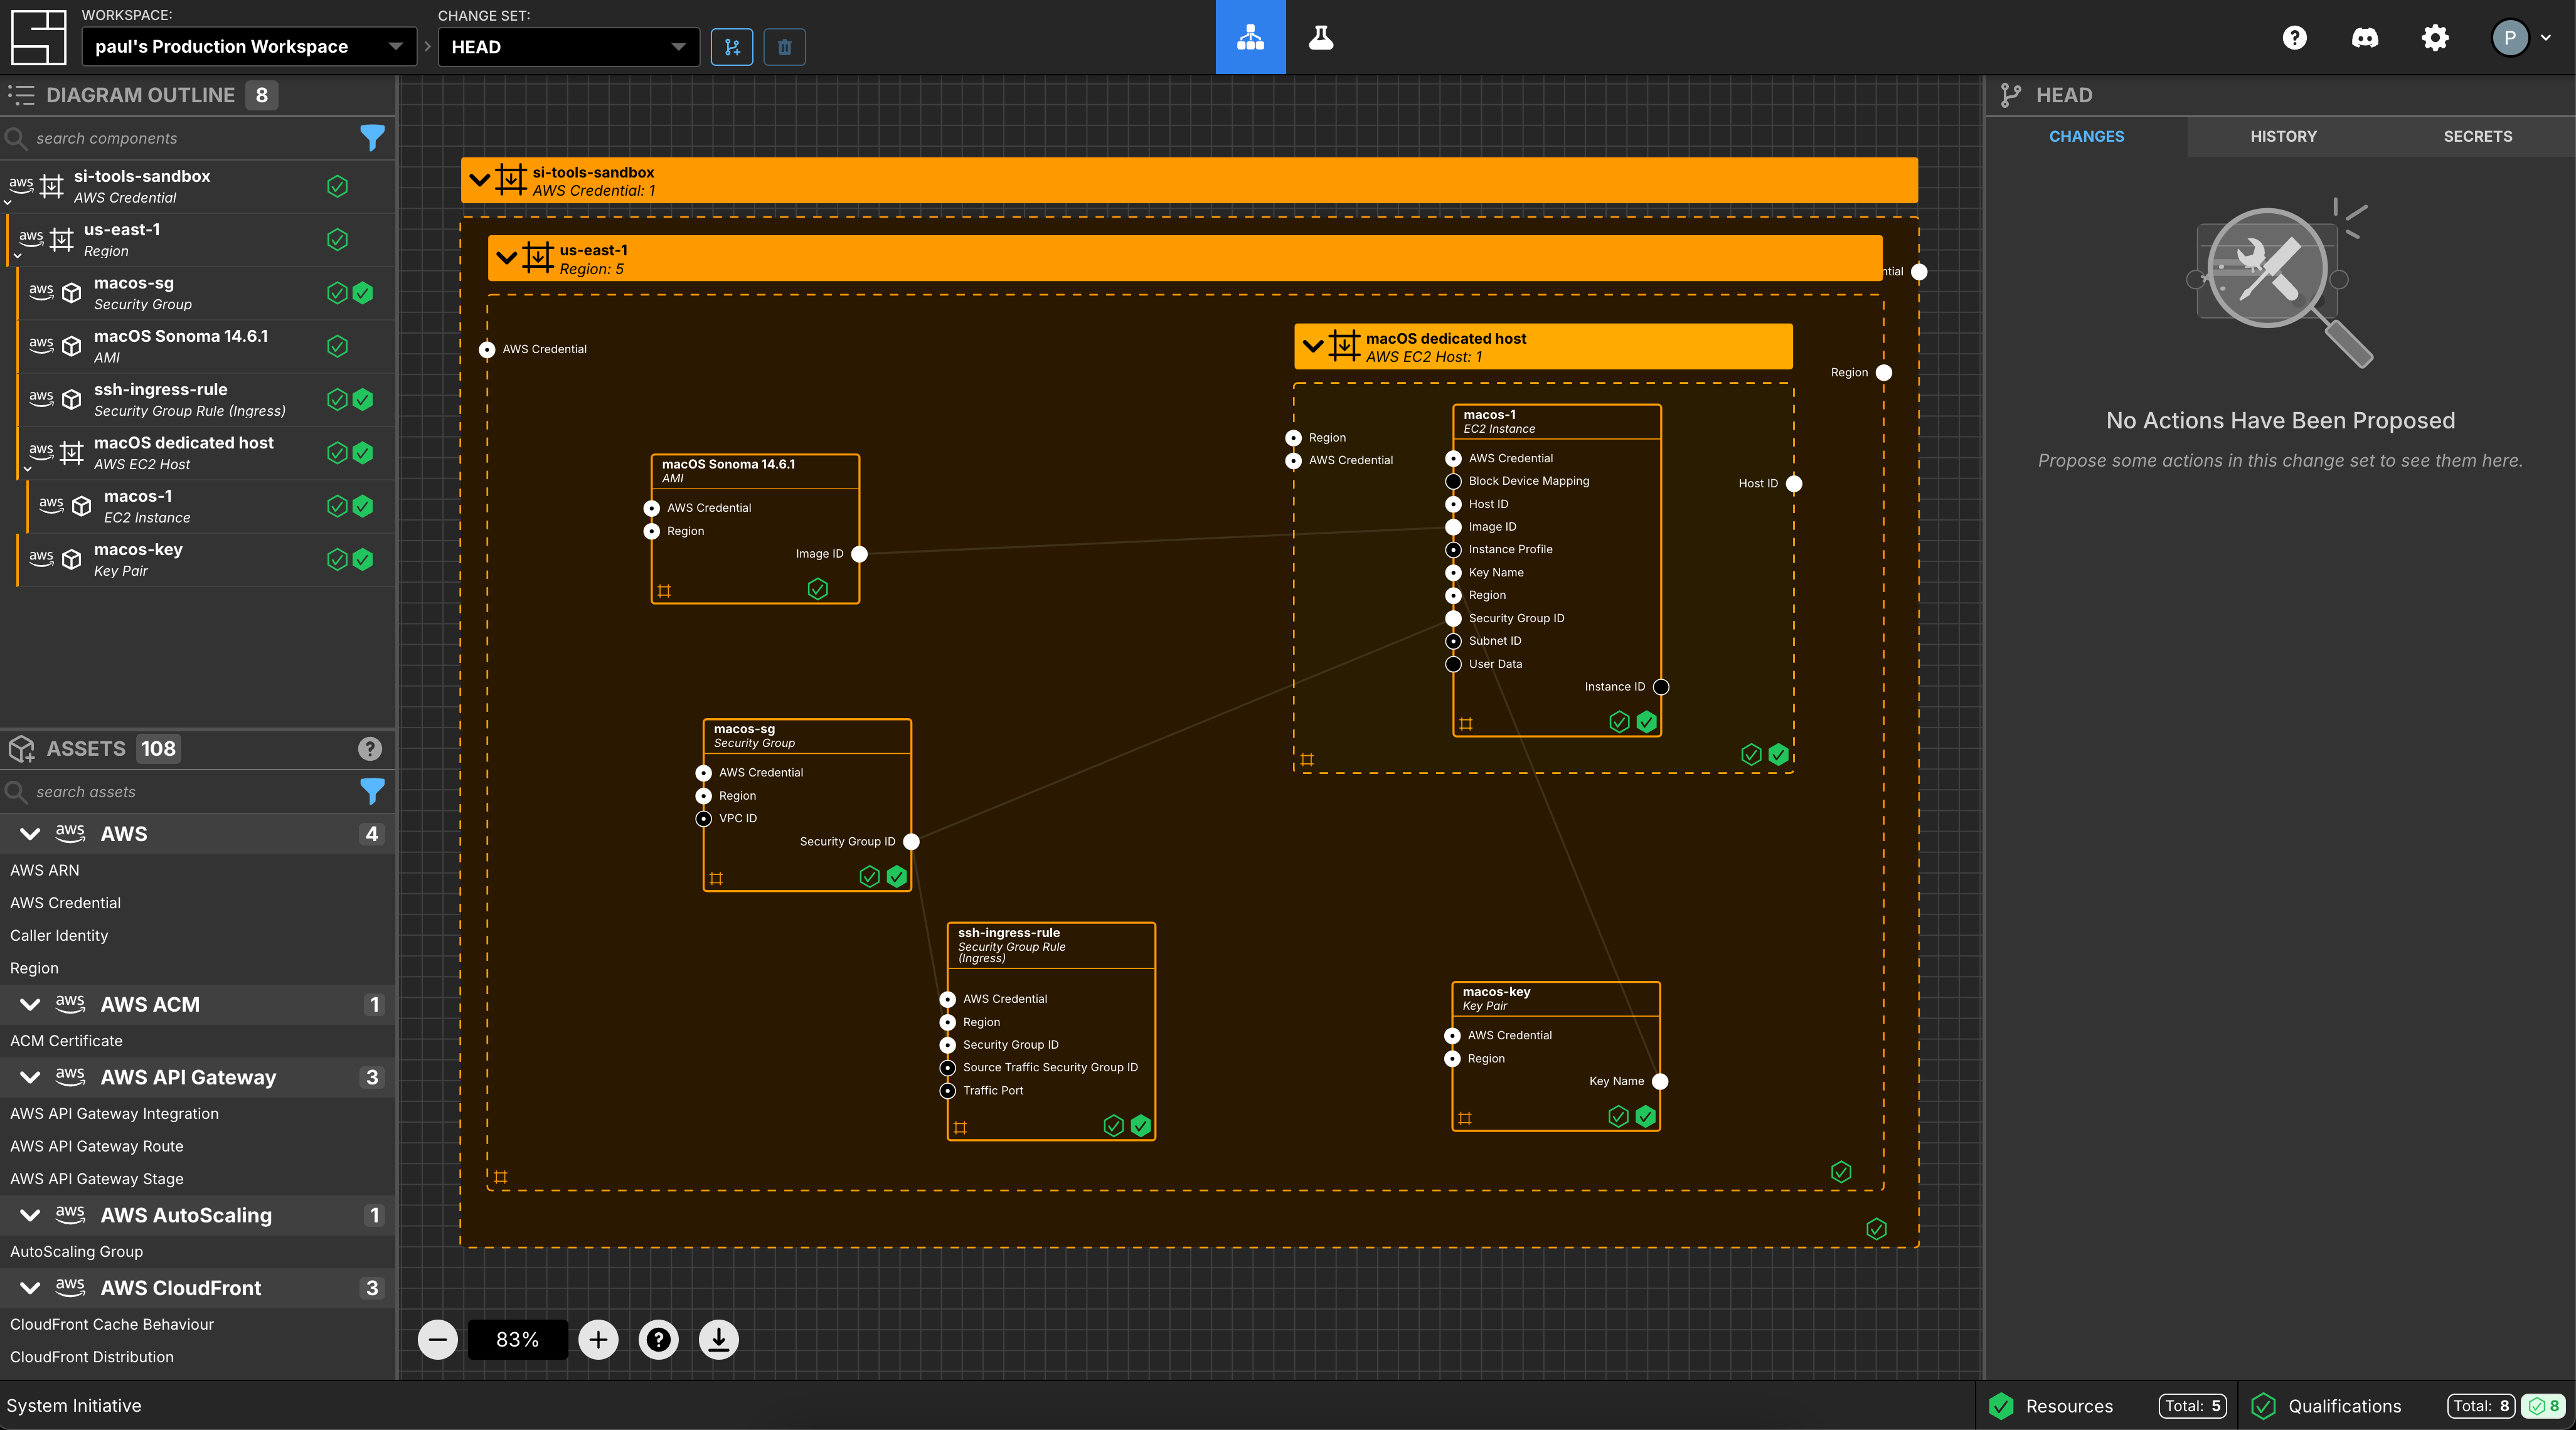
What it will look like when completed
When you have completed this guide, you should have Components that look like this in your Diagram:
Walkthrough
Create a Change Set
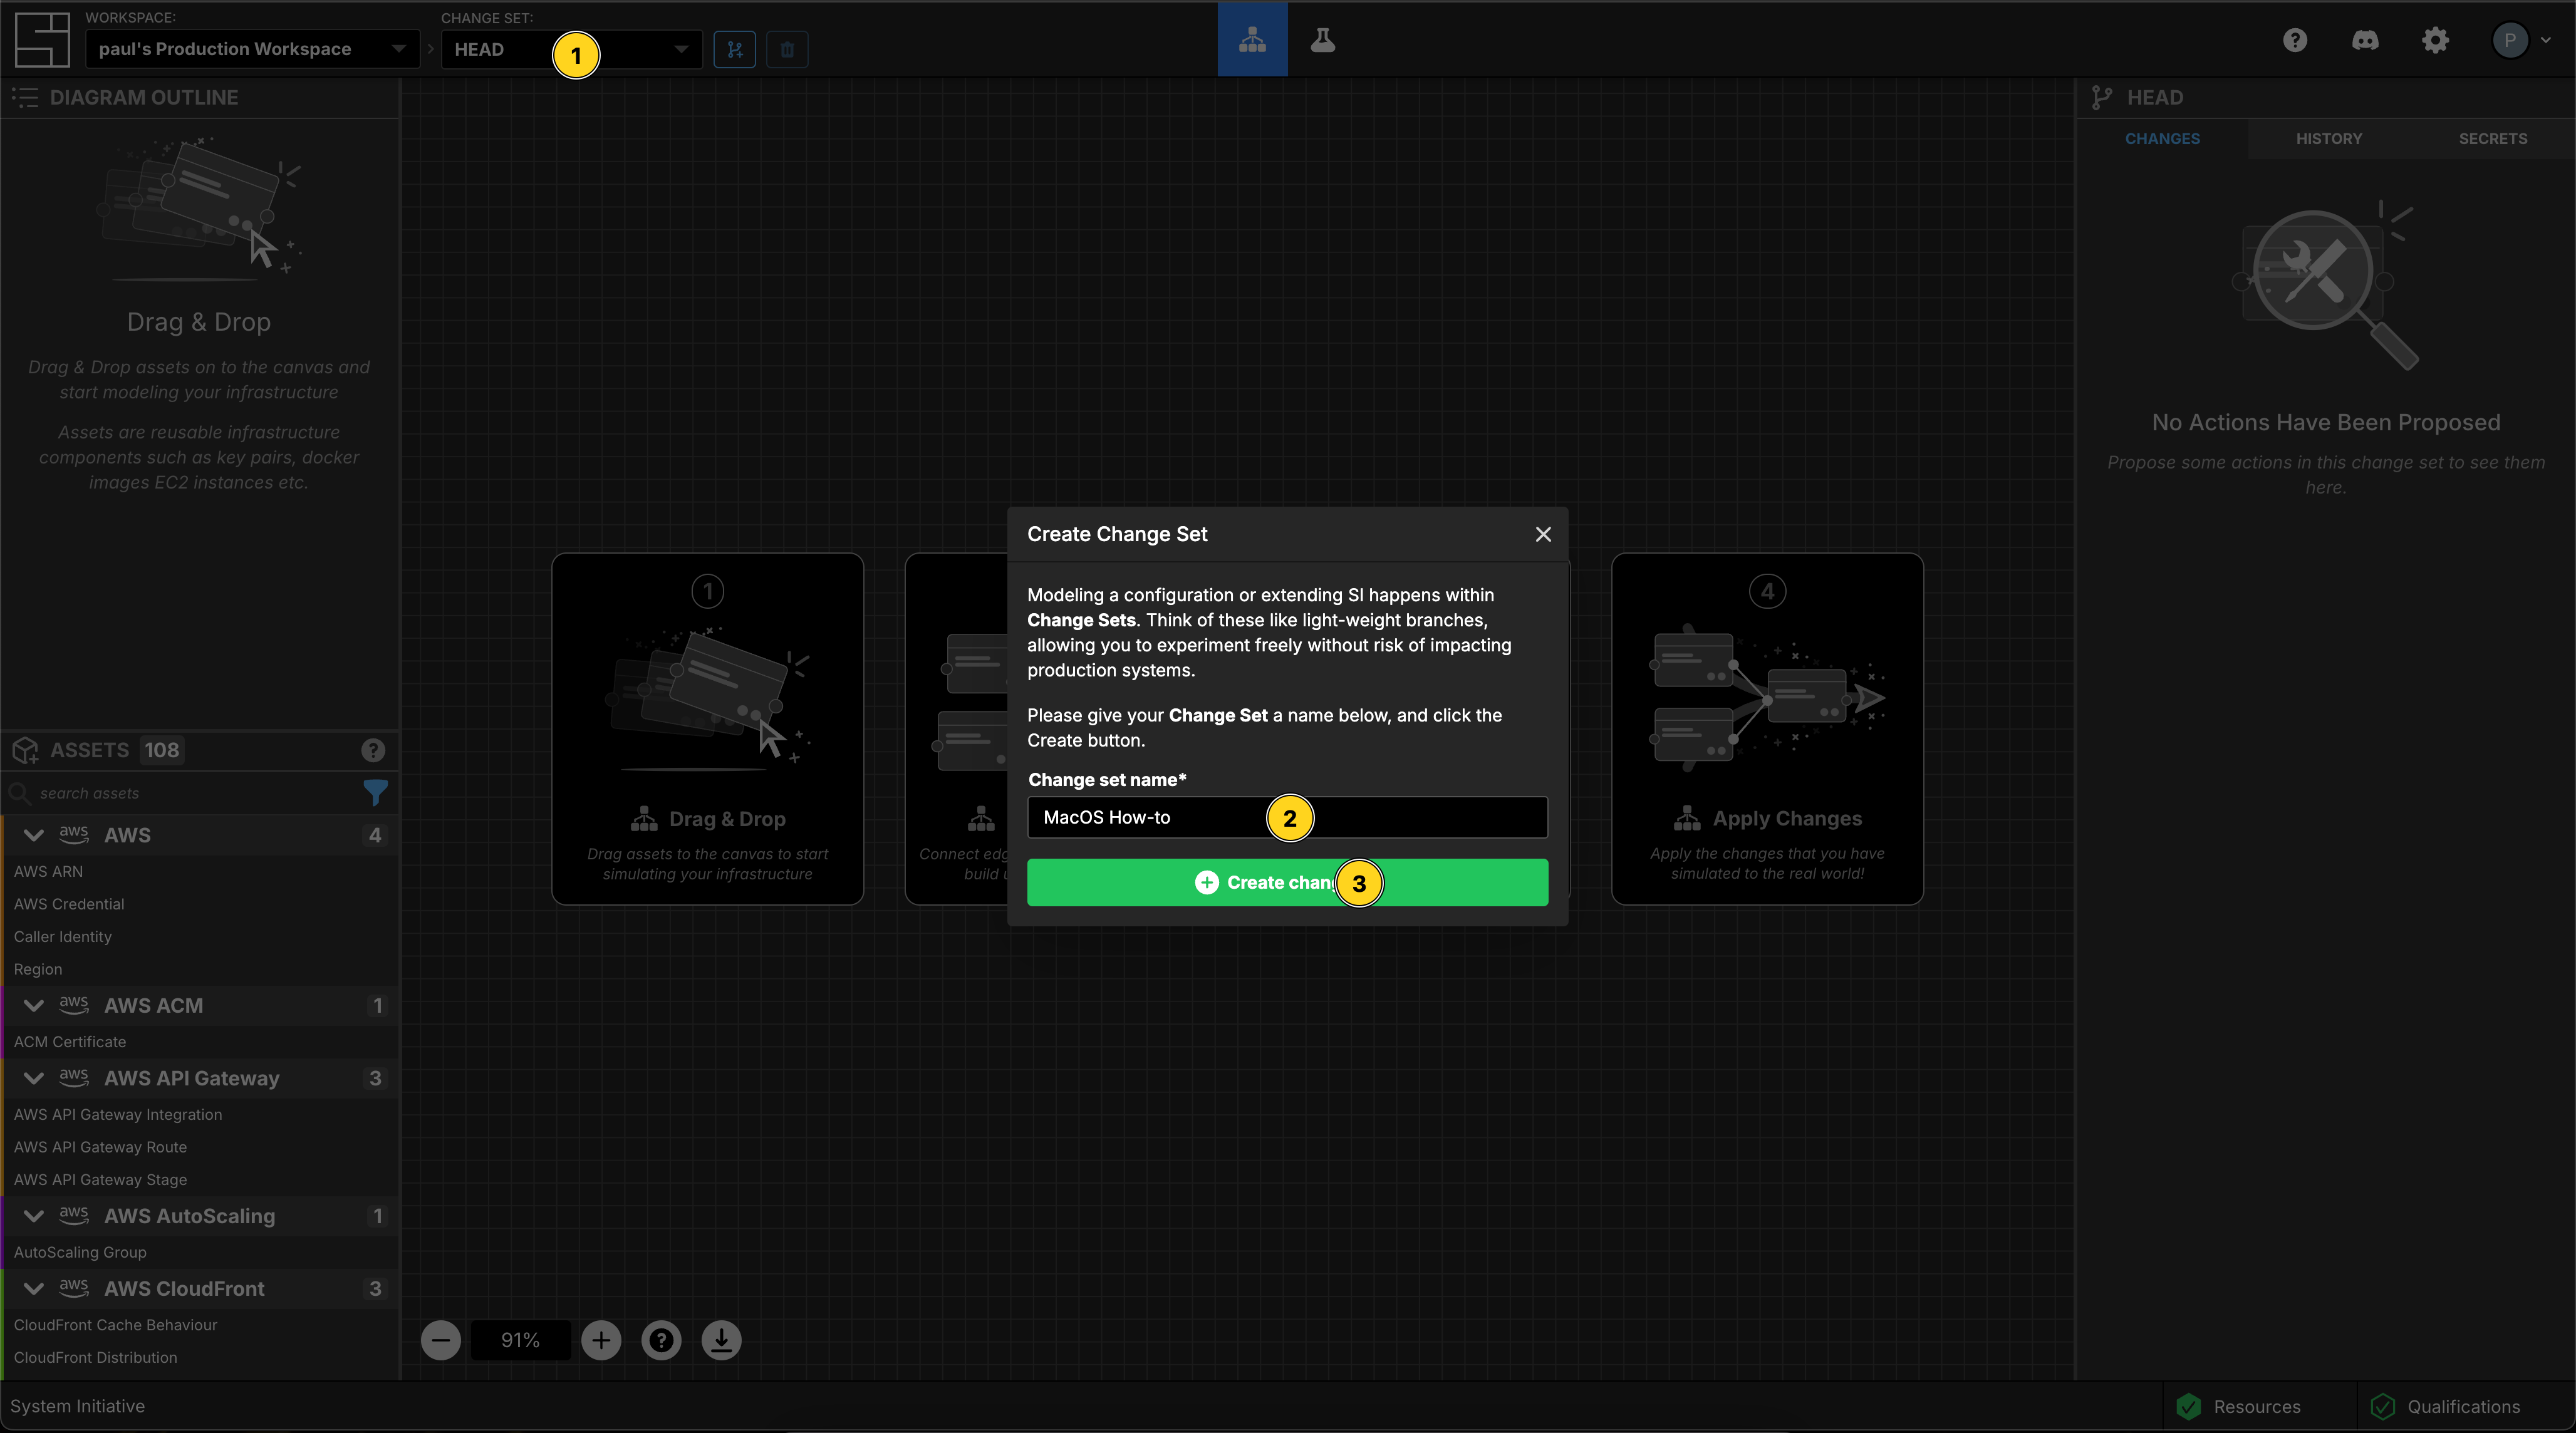
Create a Change Set named MacOS How-to.
Create AWS Credentials
Add a AWS Credential to your Change Set and configure your AWS credentials as per the getting started guide
Select an AWS Region
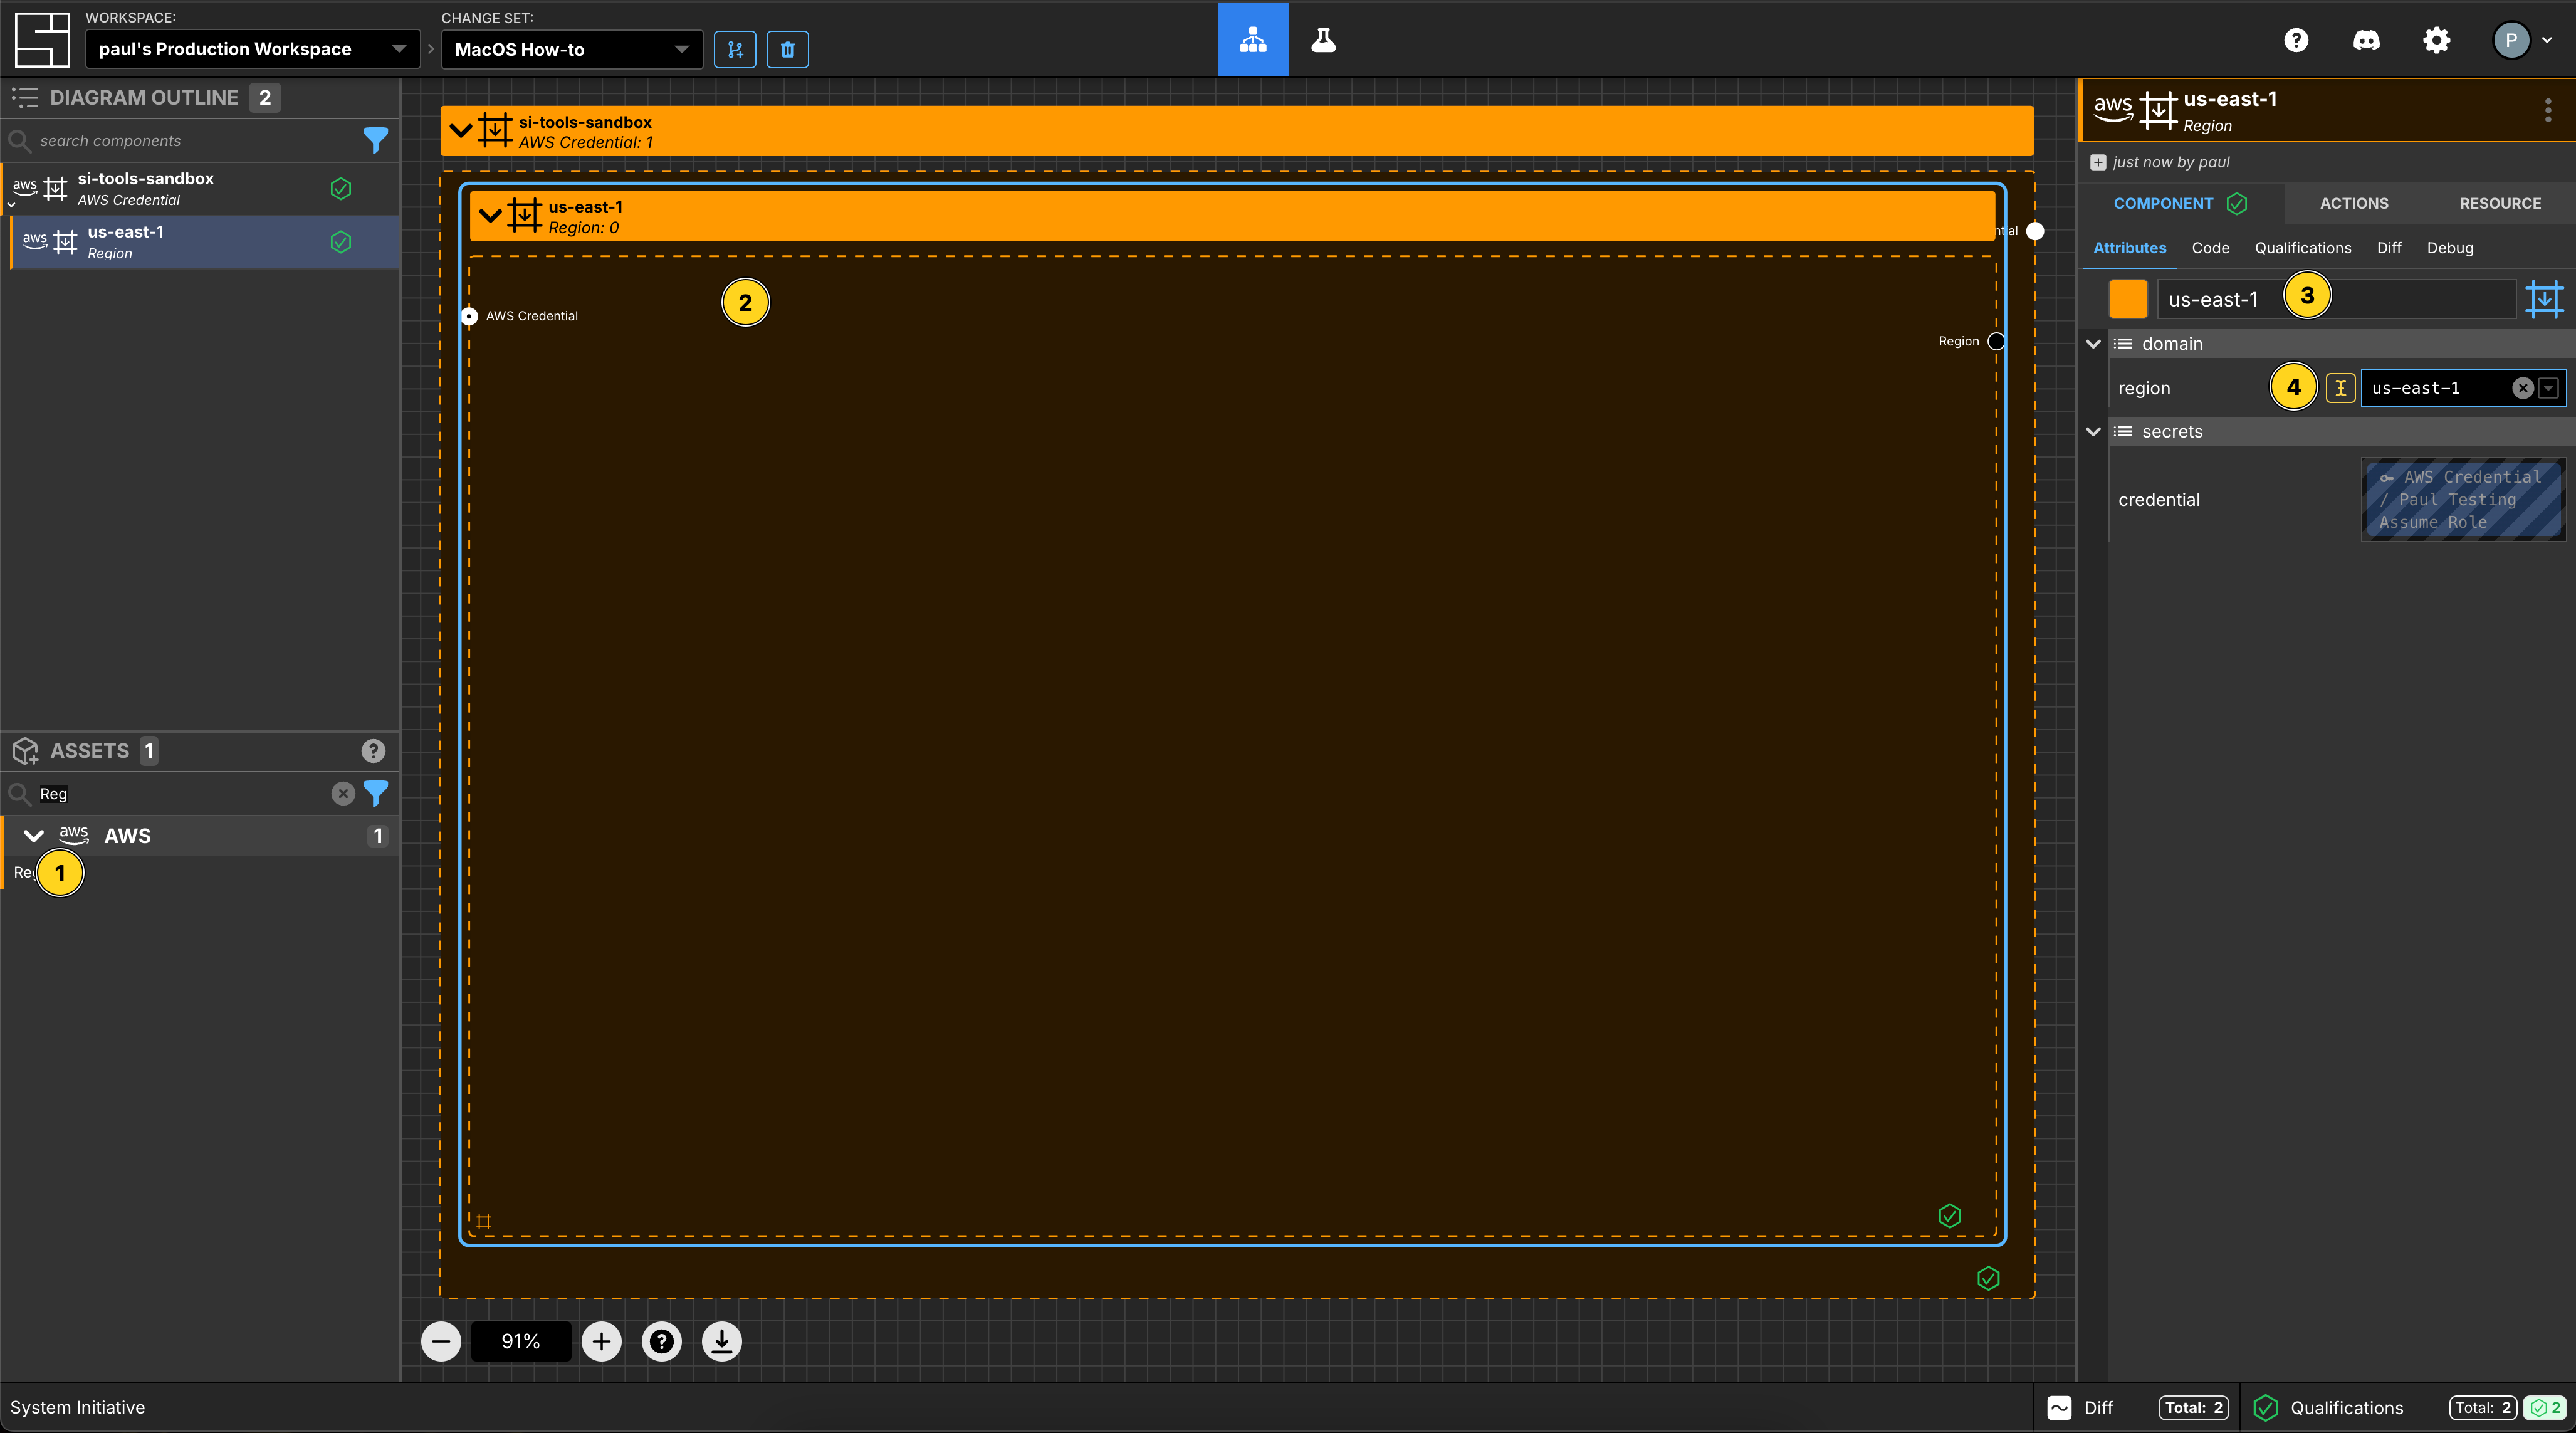
Add a AWS Region to your Change Set.
Set the Component name to be us-east-1.
Set the region property to us-east-1.
Select an EC2 Host Component
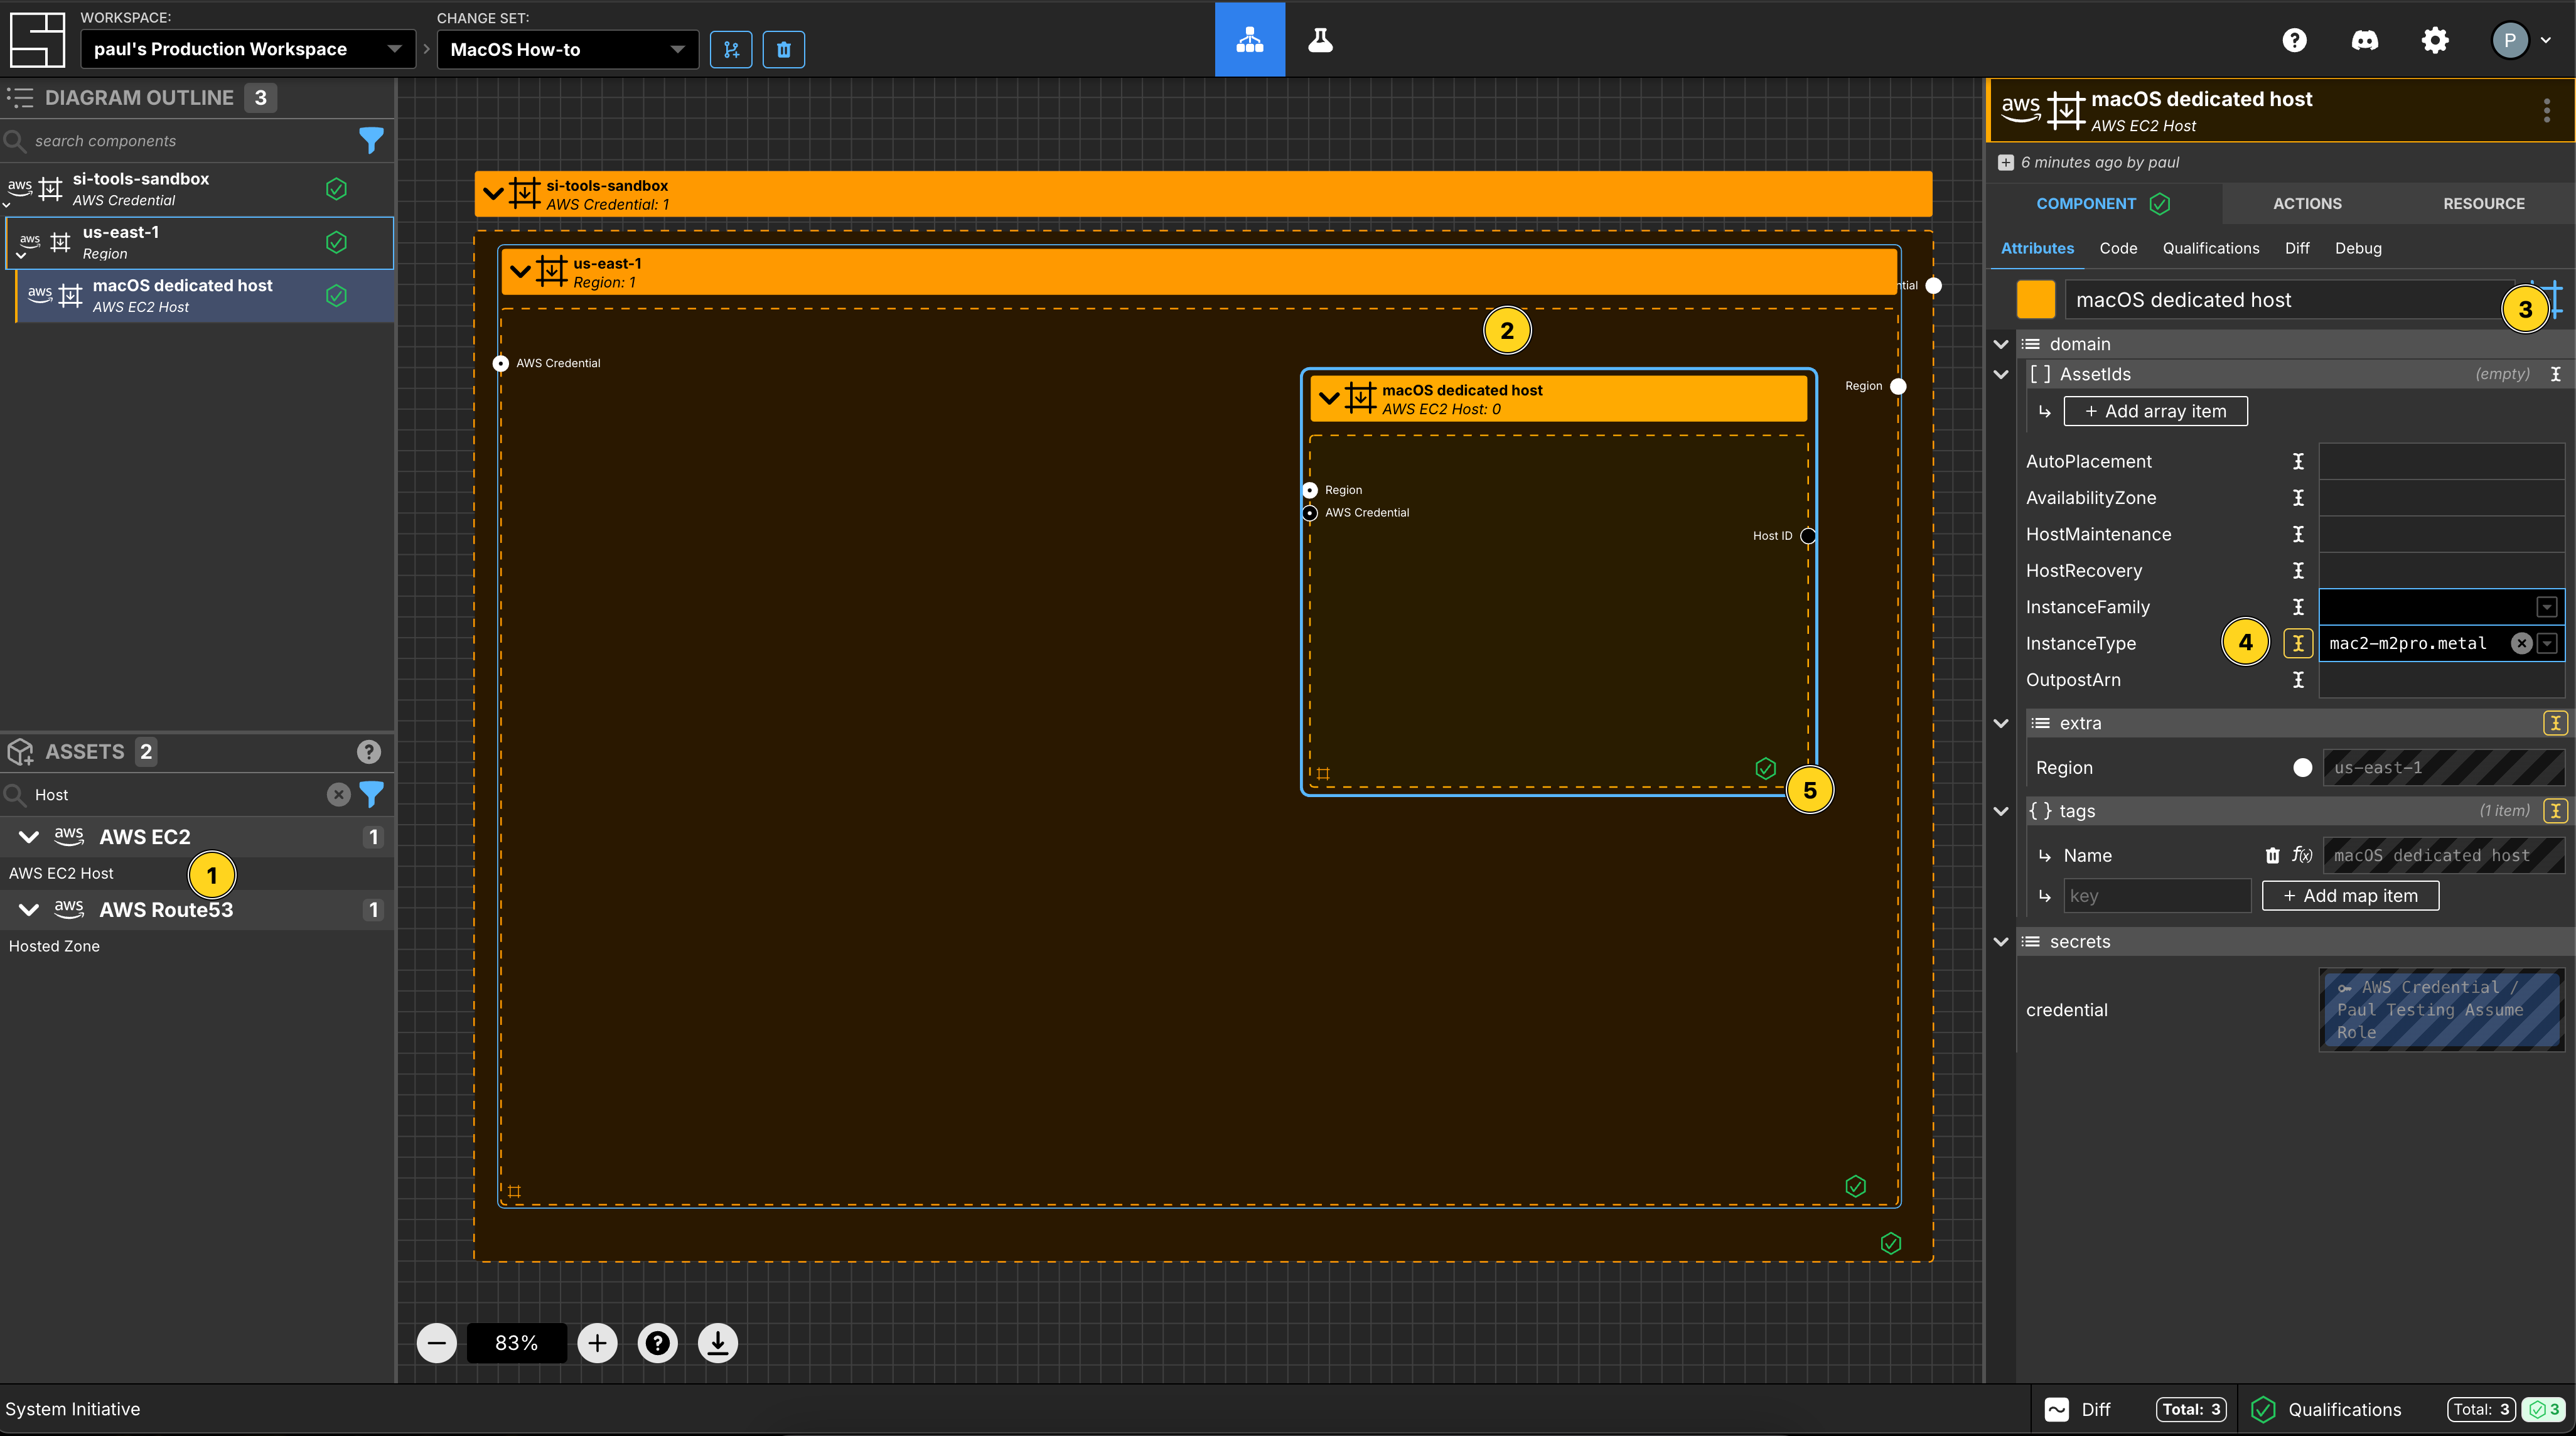
Add an EC2 Host Component to the us-east-1 frame.
Change the Component type to be Down Frame.
Set the Component name to be macOS dedicated host
Set the InstanceType to be mac2-m2pro.metal.
Set the AvailabilityZone to be us-east-1c.
Resize the frame to allow space for a child Component to be inside it.
Select an EC2 Instance Component
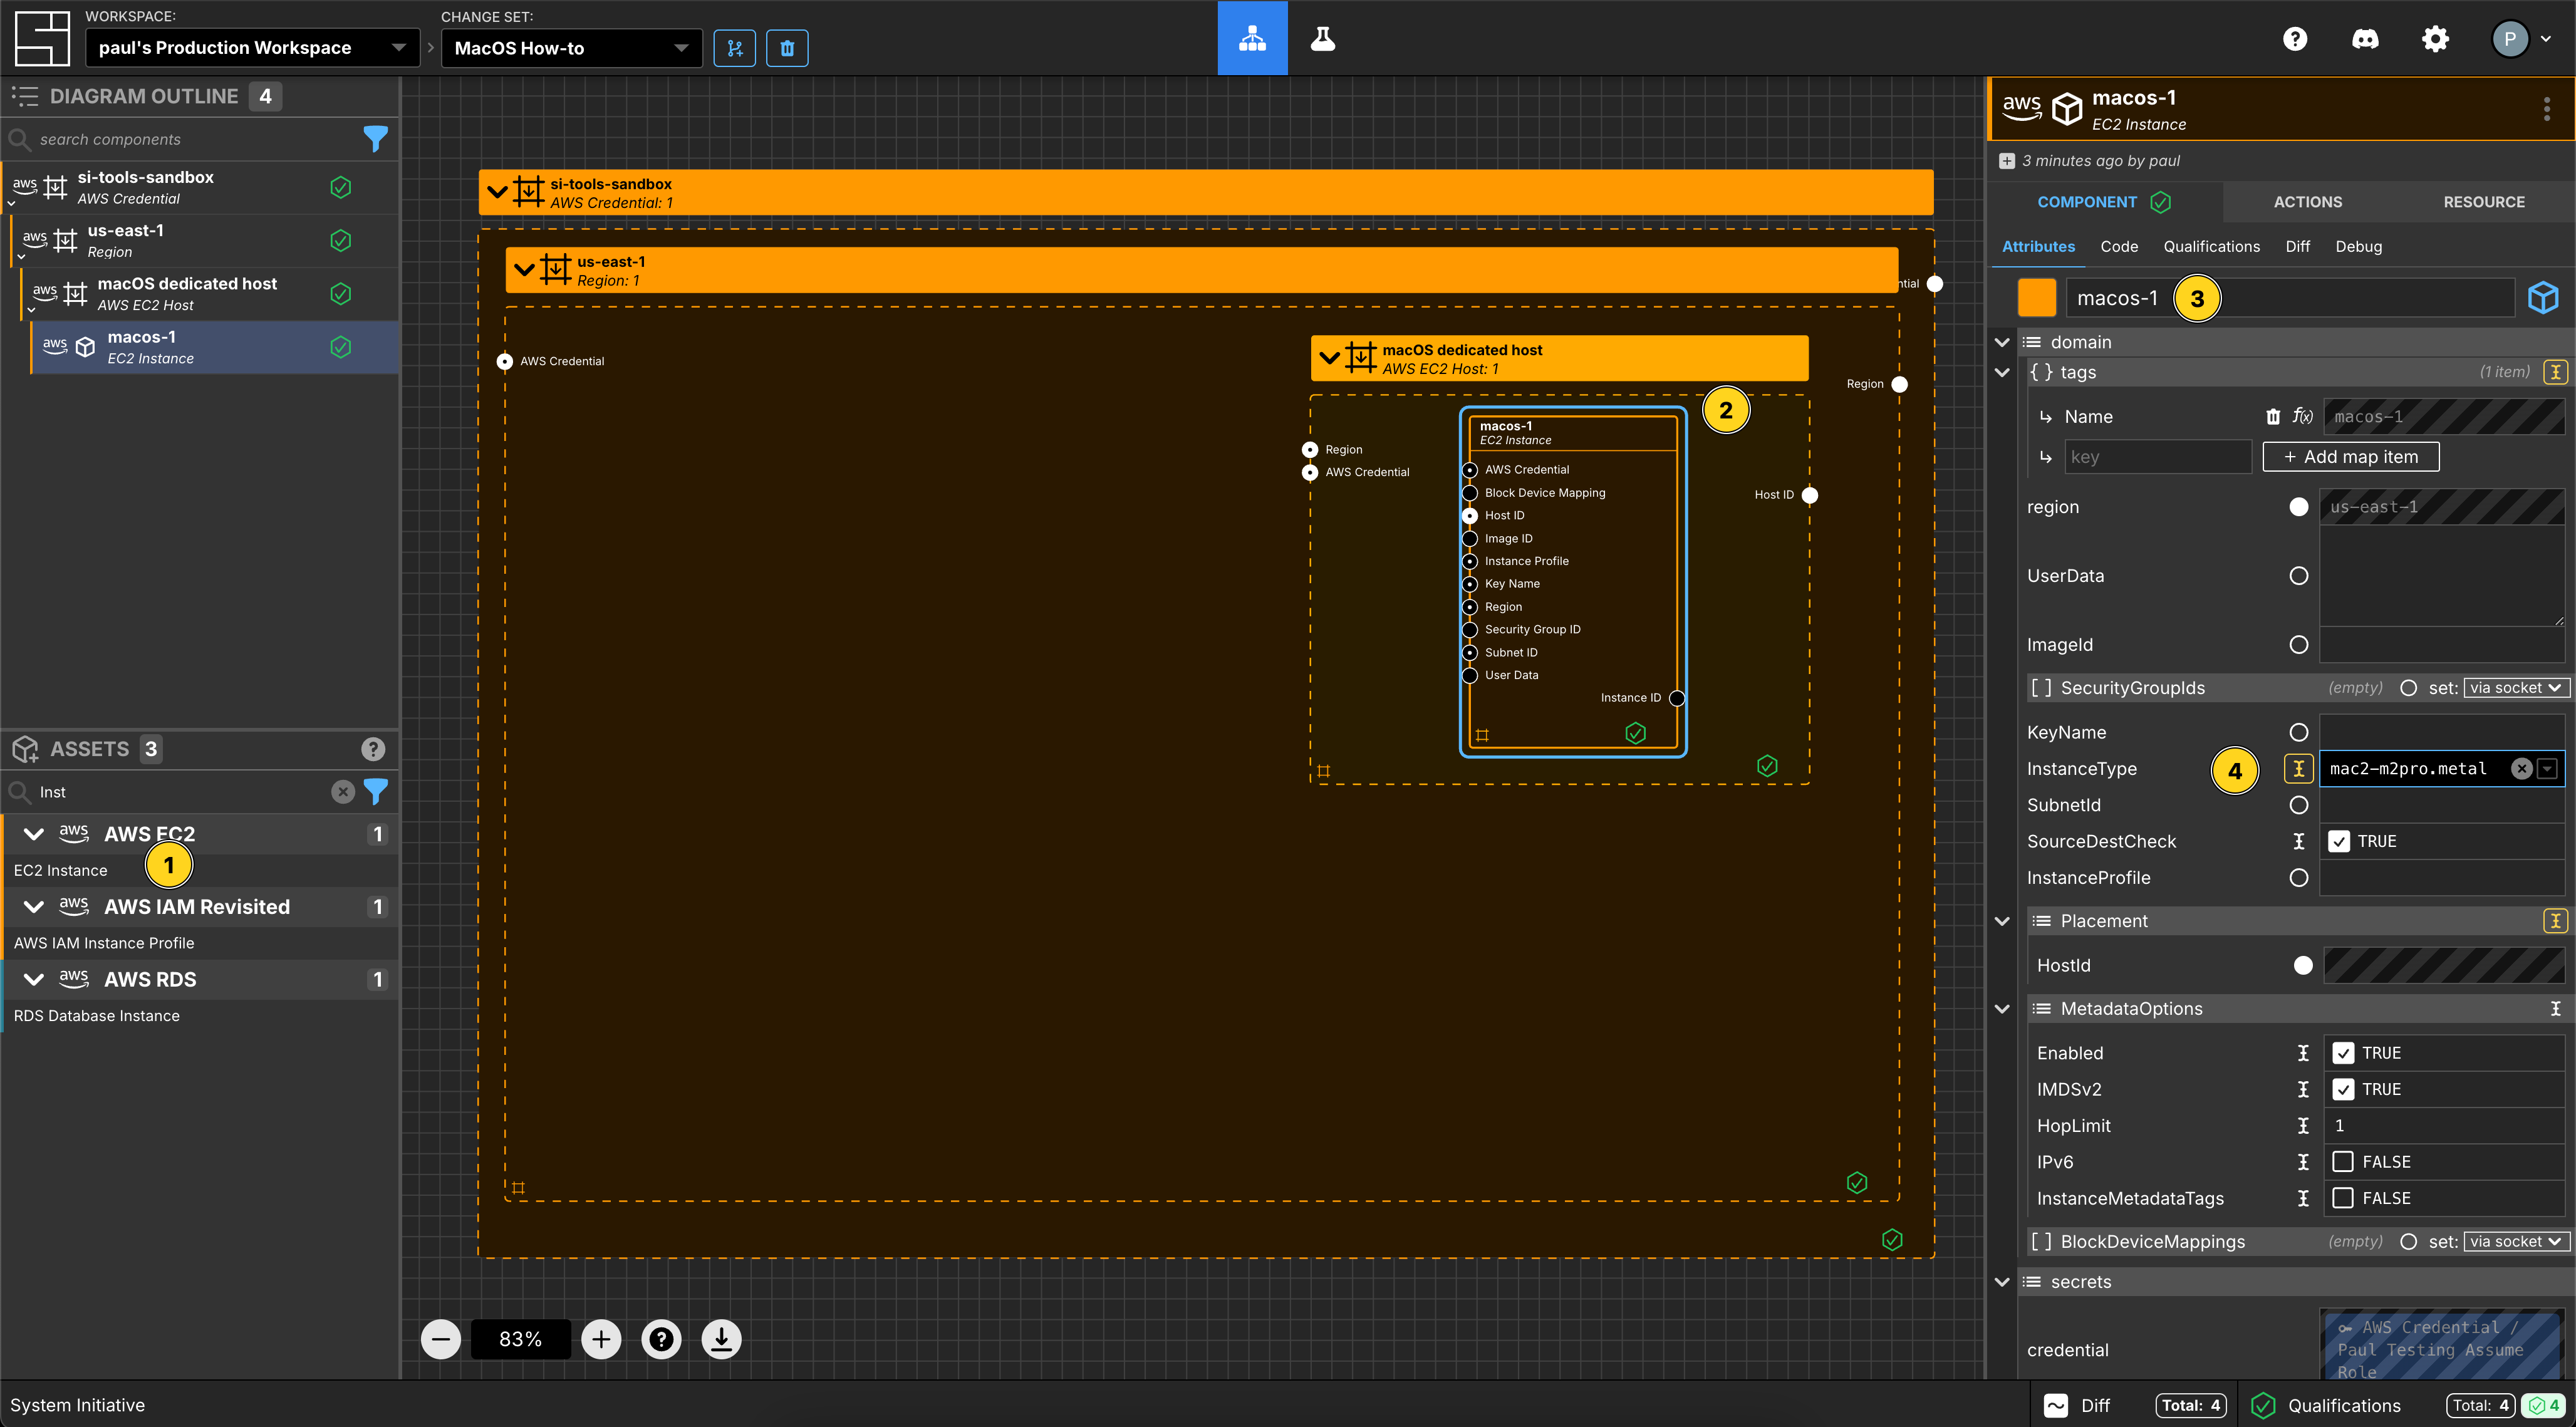
Add an EC2 Instance Component to the macOS dedicated host frame.
Set the Component name to be macos-1.
Set the InstanceType to be mac2-m2pro.metal
Create an AMI Component
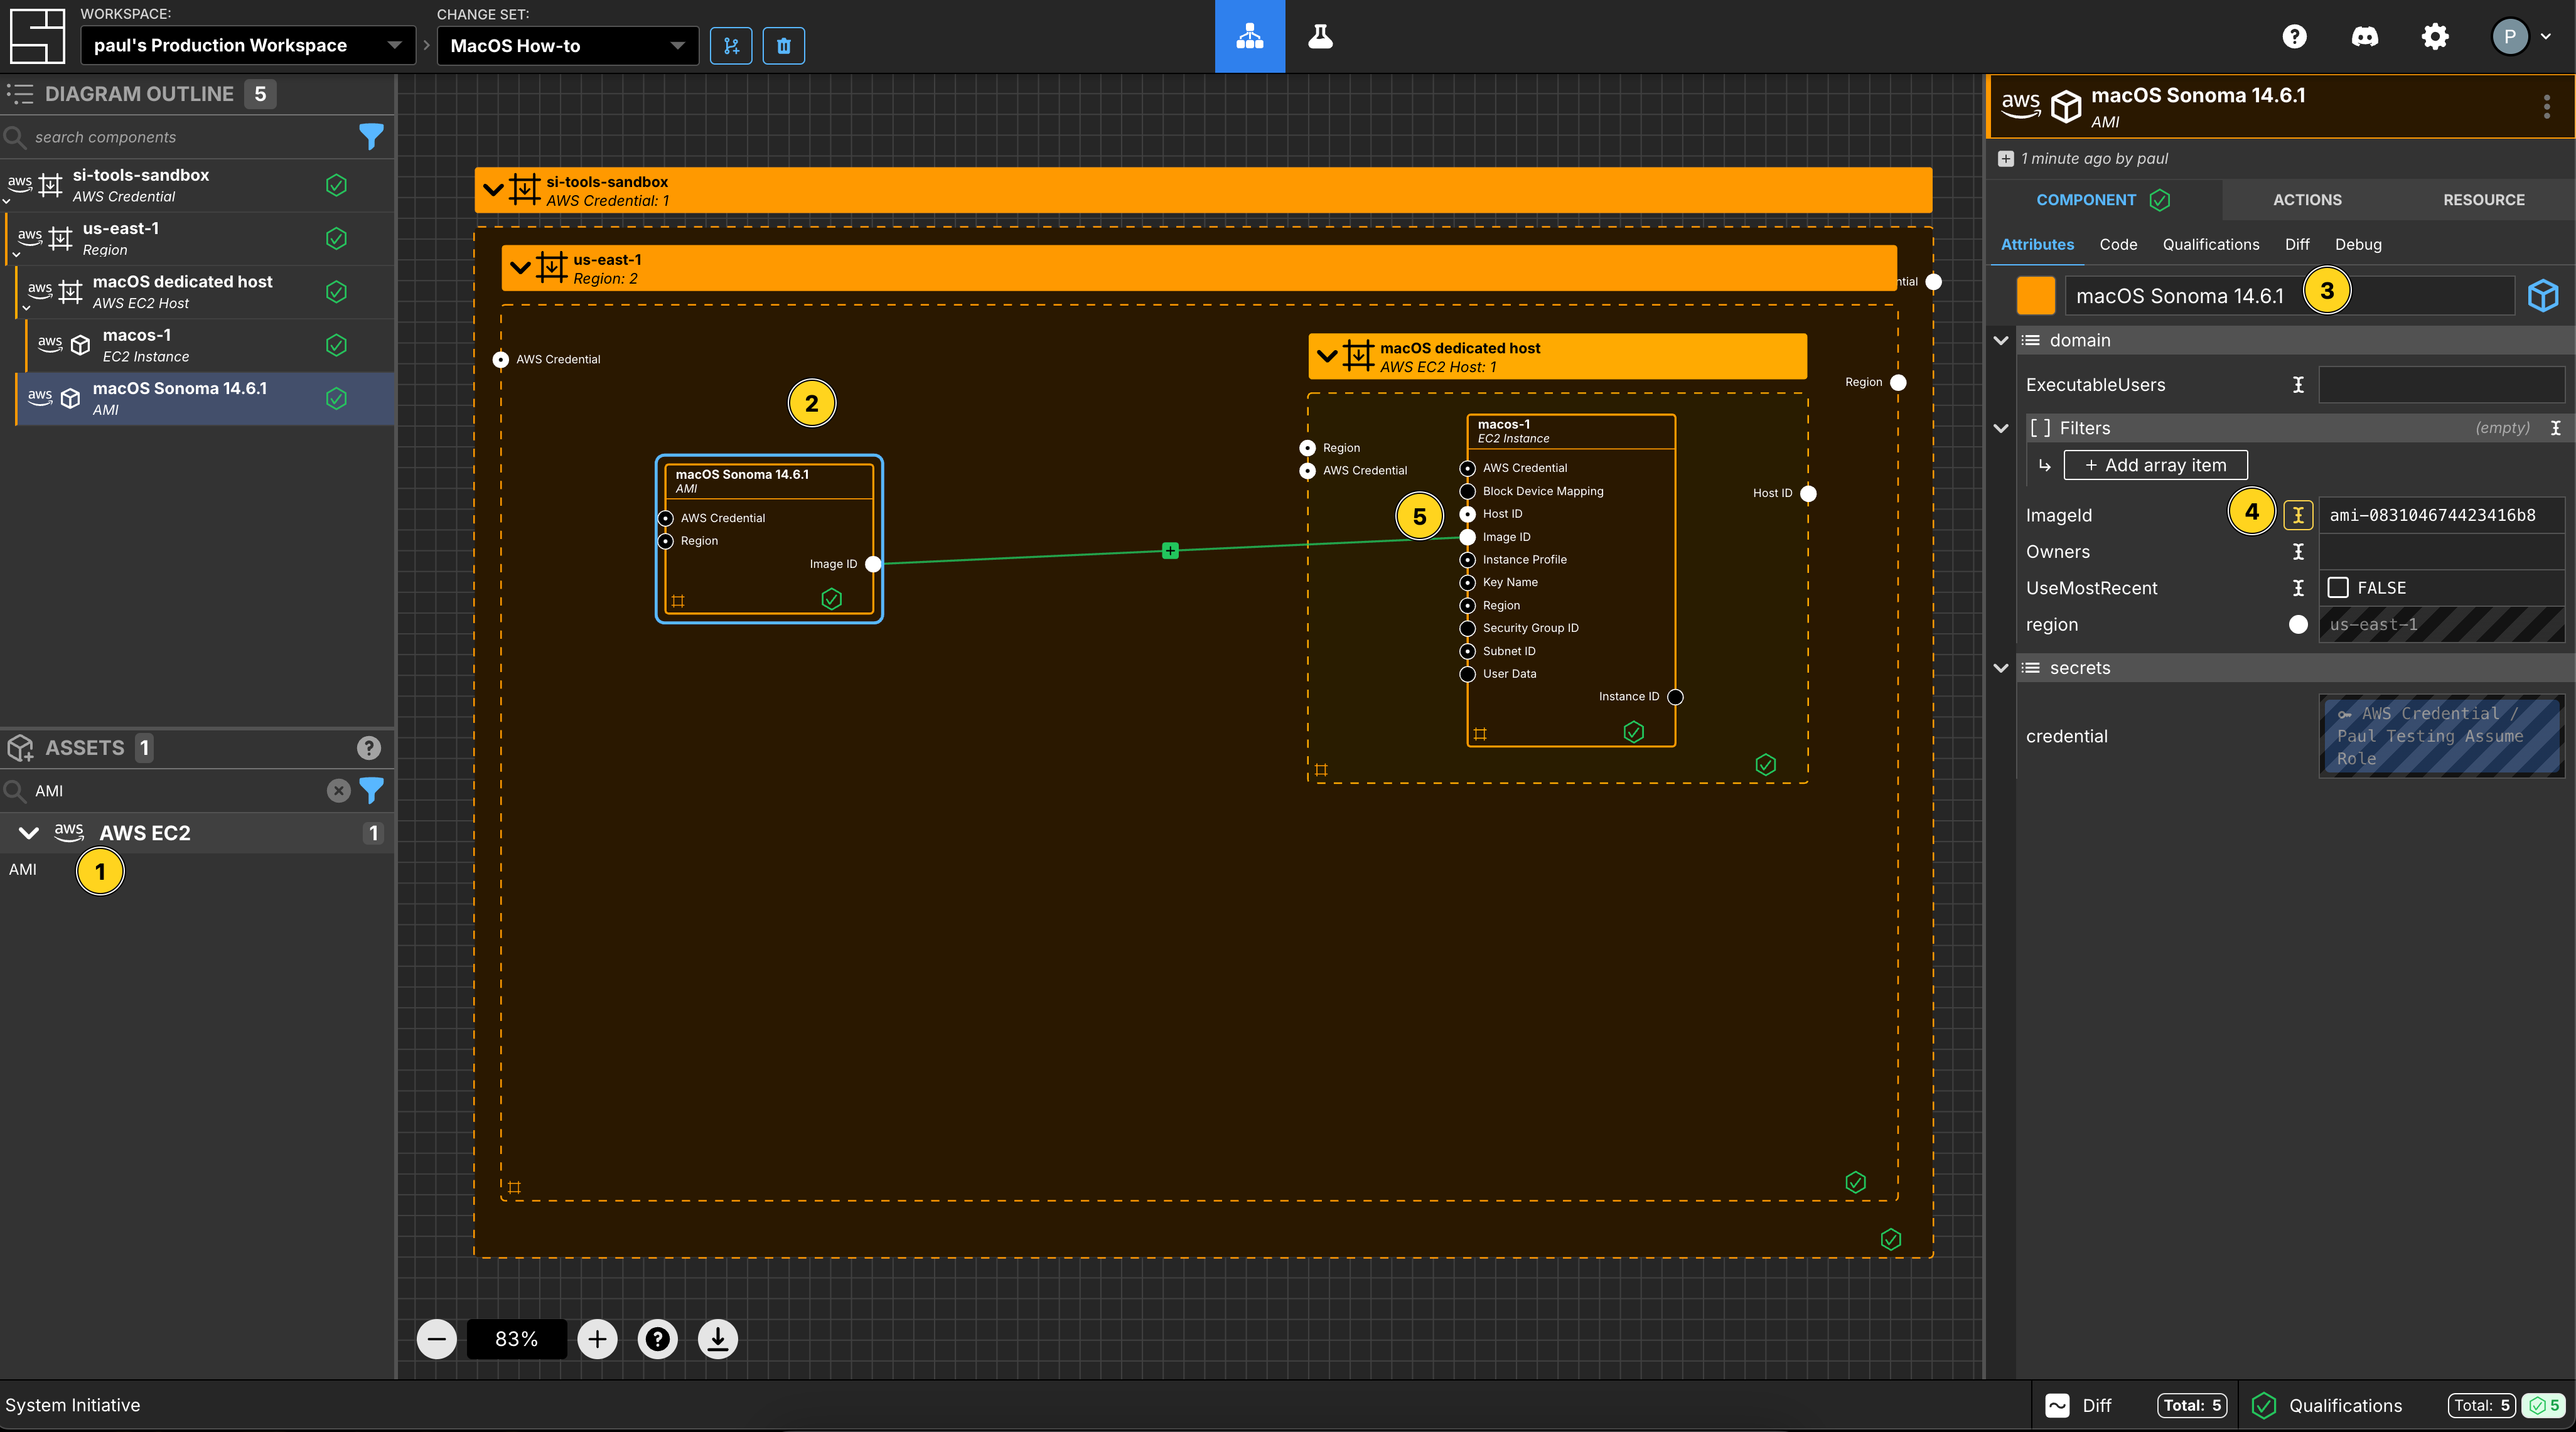
Add an AMI Component to the us-east-1 frame.
Set the Component name to be macOS Sonoma 14.6.1
Set the ImageId to be ami-083104674423416b8.
Connect the Image ID Output Socket to the Image ID Input Socket of the macos-1 Component.
Create a Security Group Component
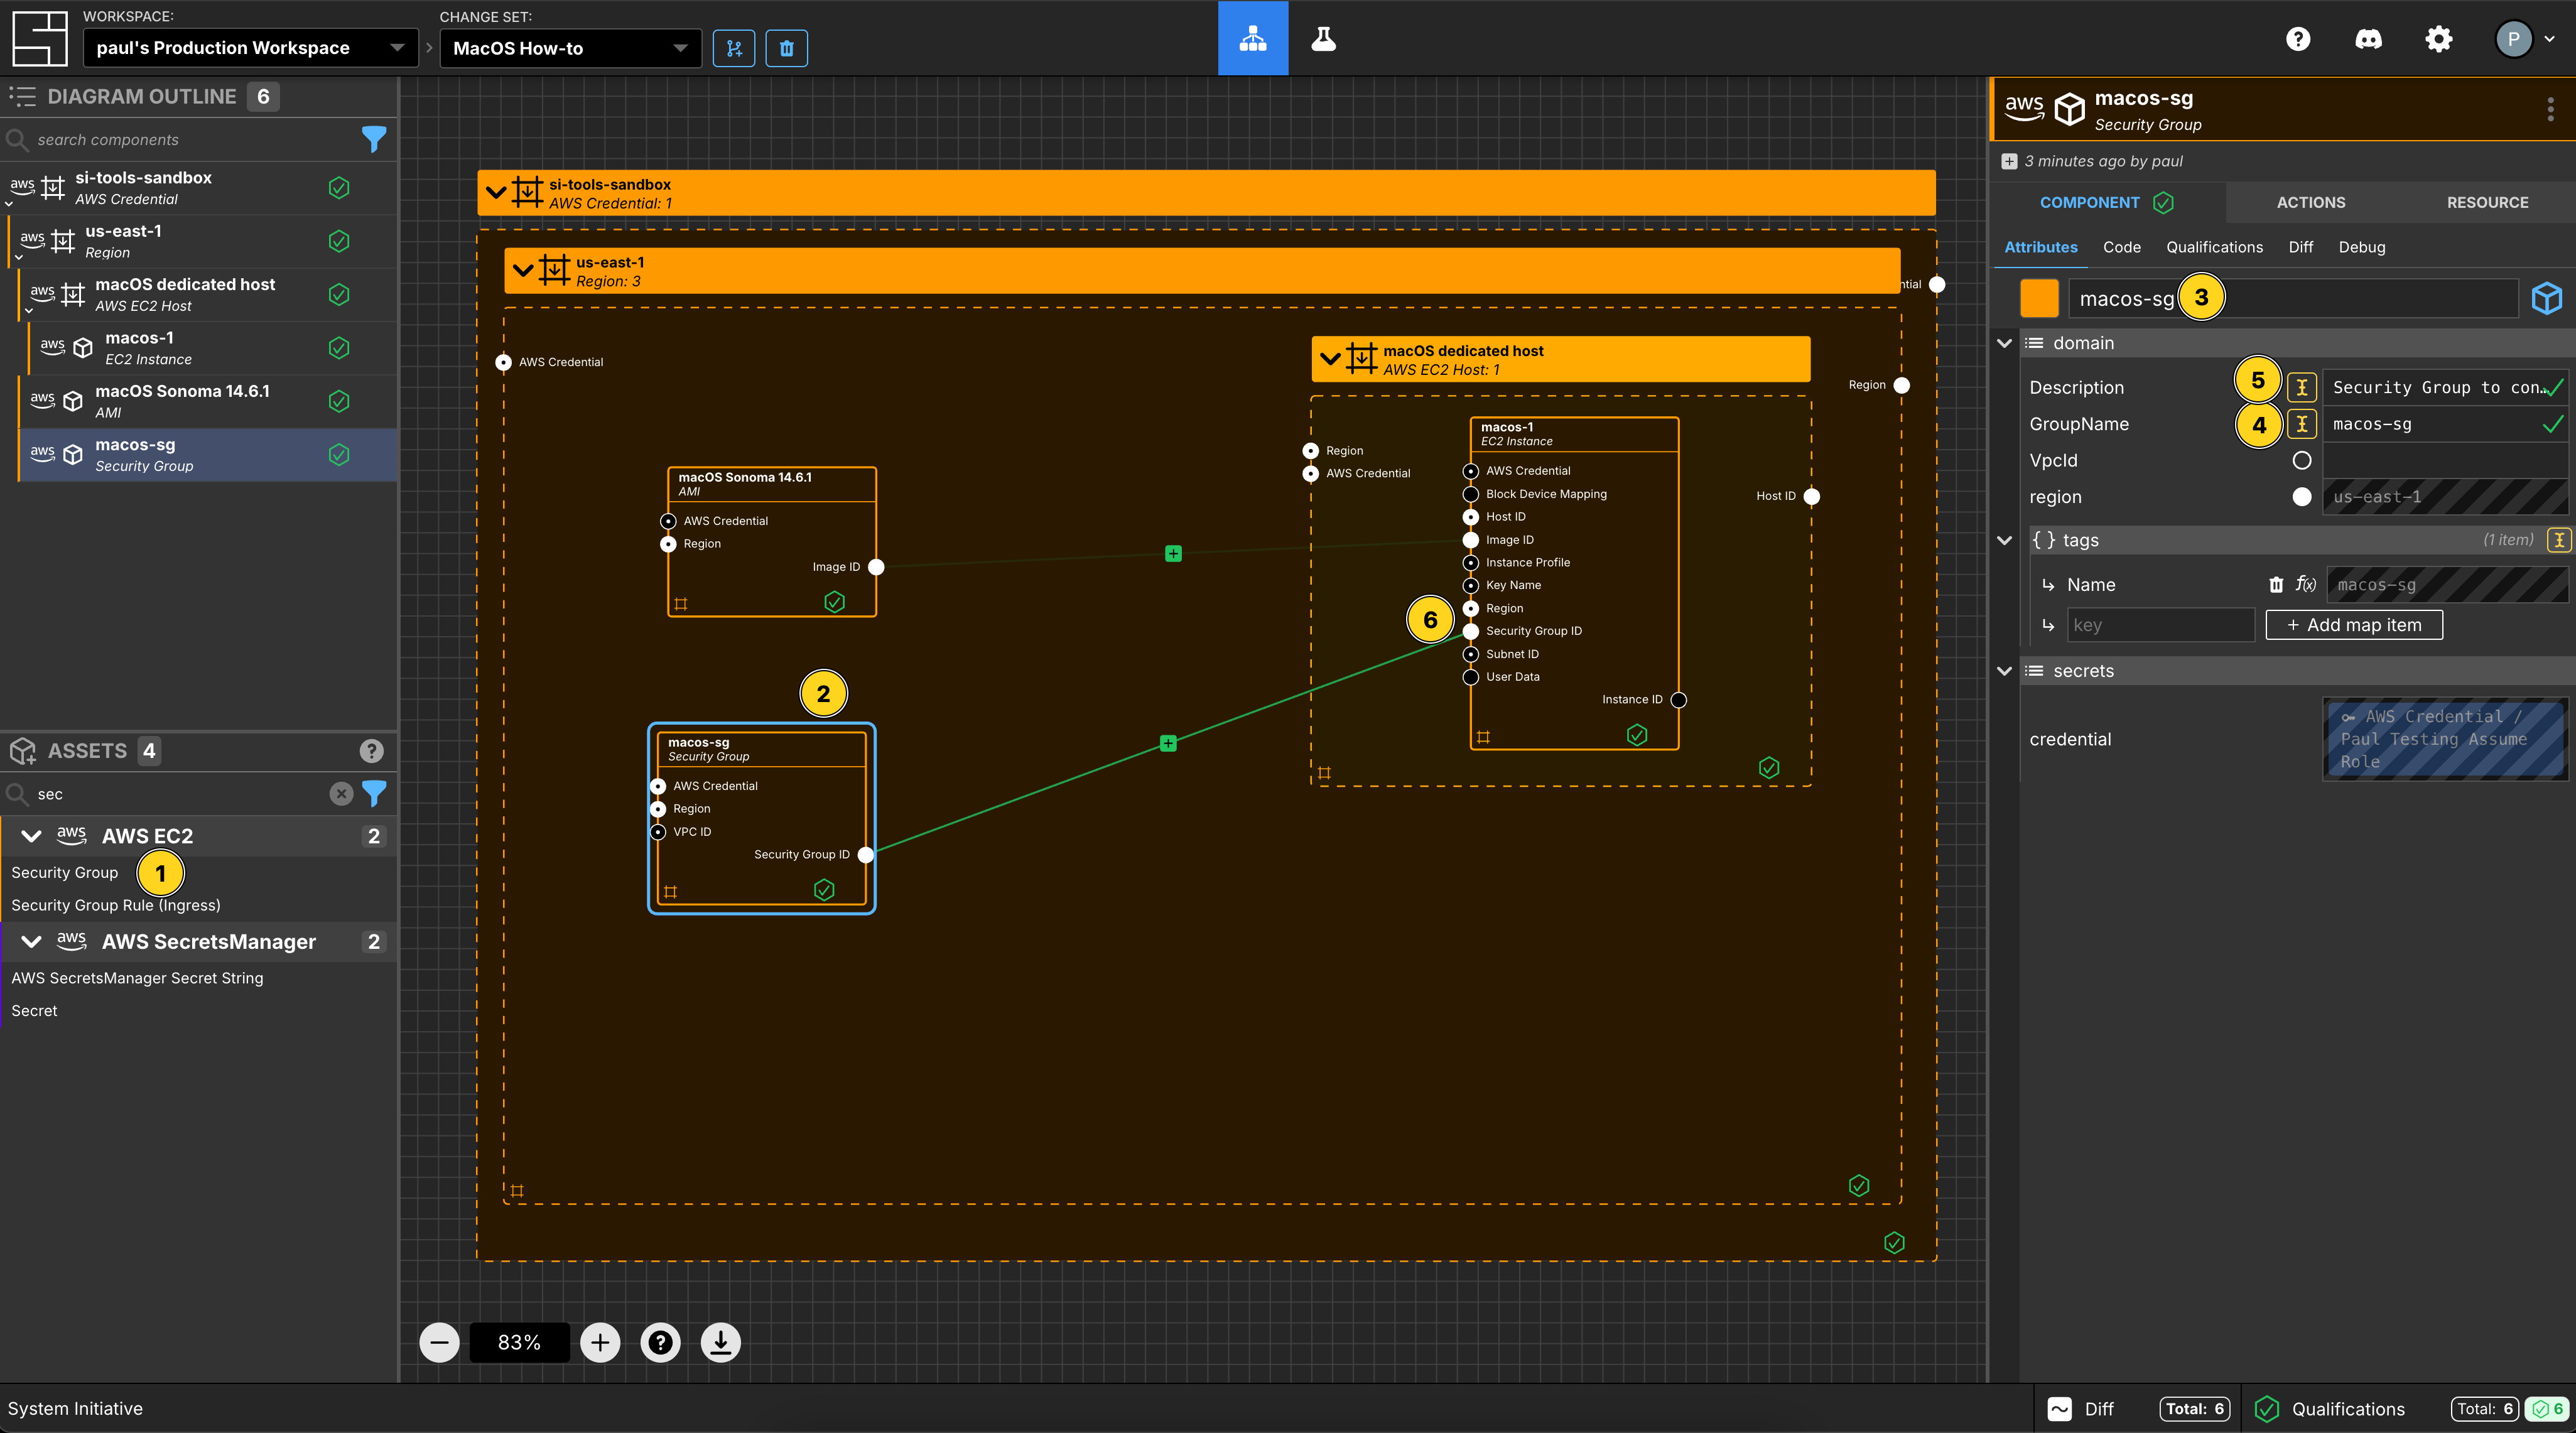
Add a Security Group Component to the us-east-1 frame.
Set the Component name to be macos-sg.
Set the GroupName to be macos-sg.
Set the Description to be Security Group to control access to my macOS instance.
Connect the Security Group ID Output Socket to the Security Group ID input socket of the macos-1 Component.
Create a Security Group Ingress Rule Component
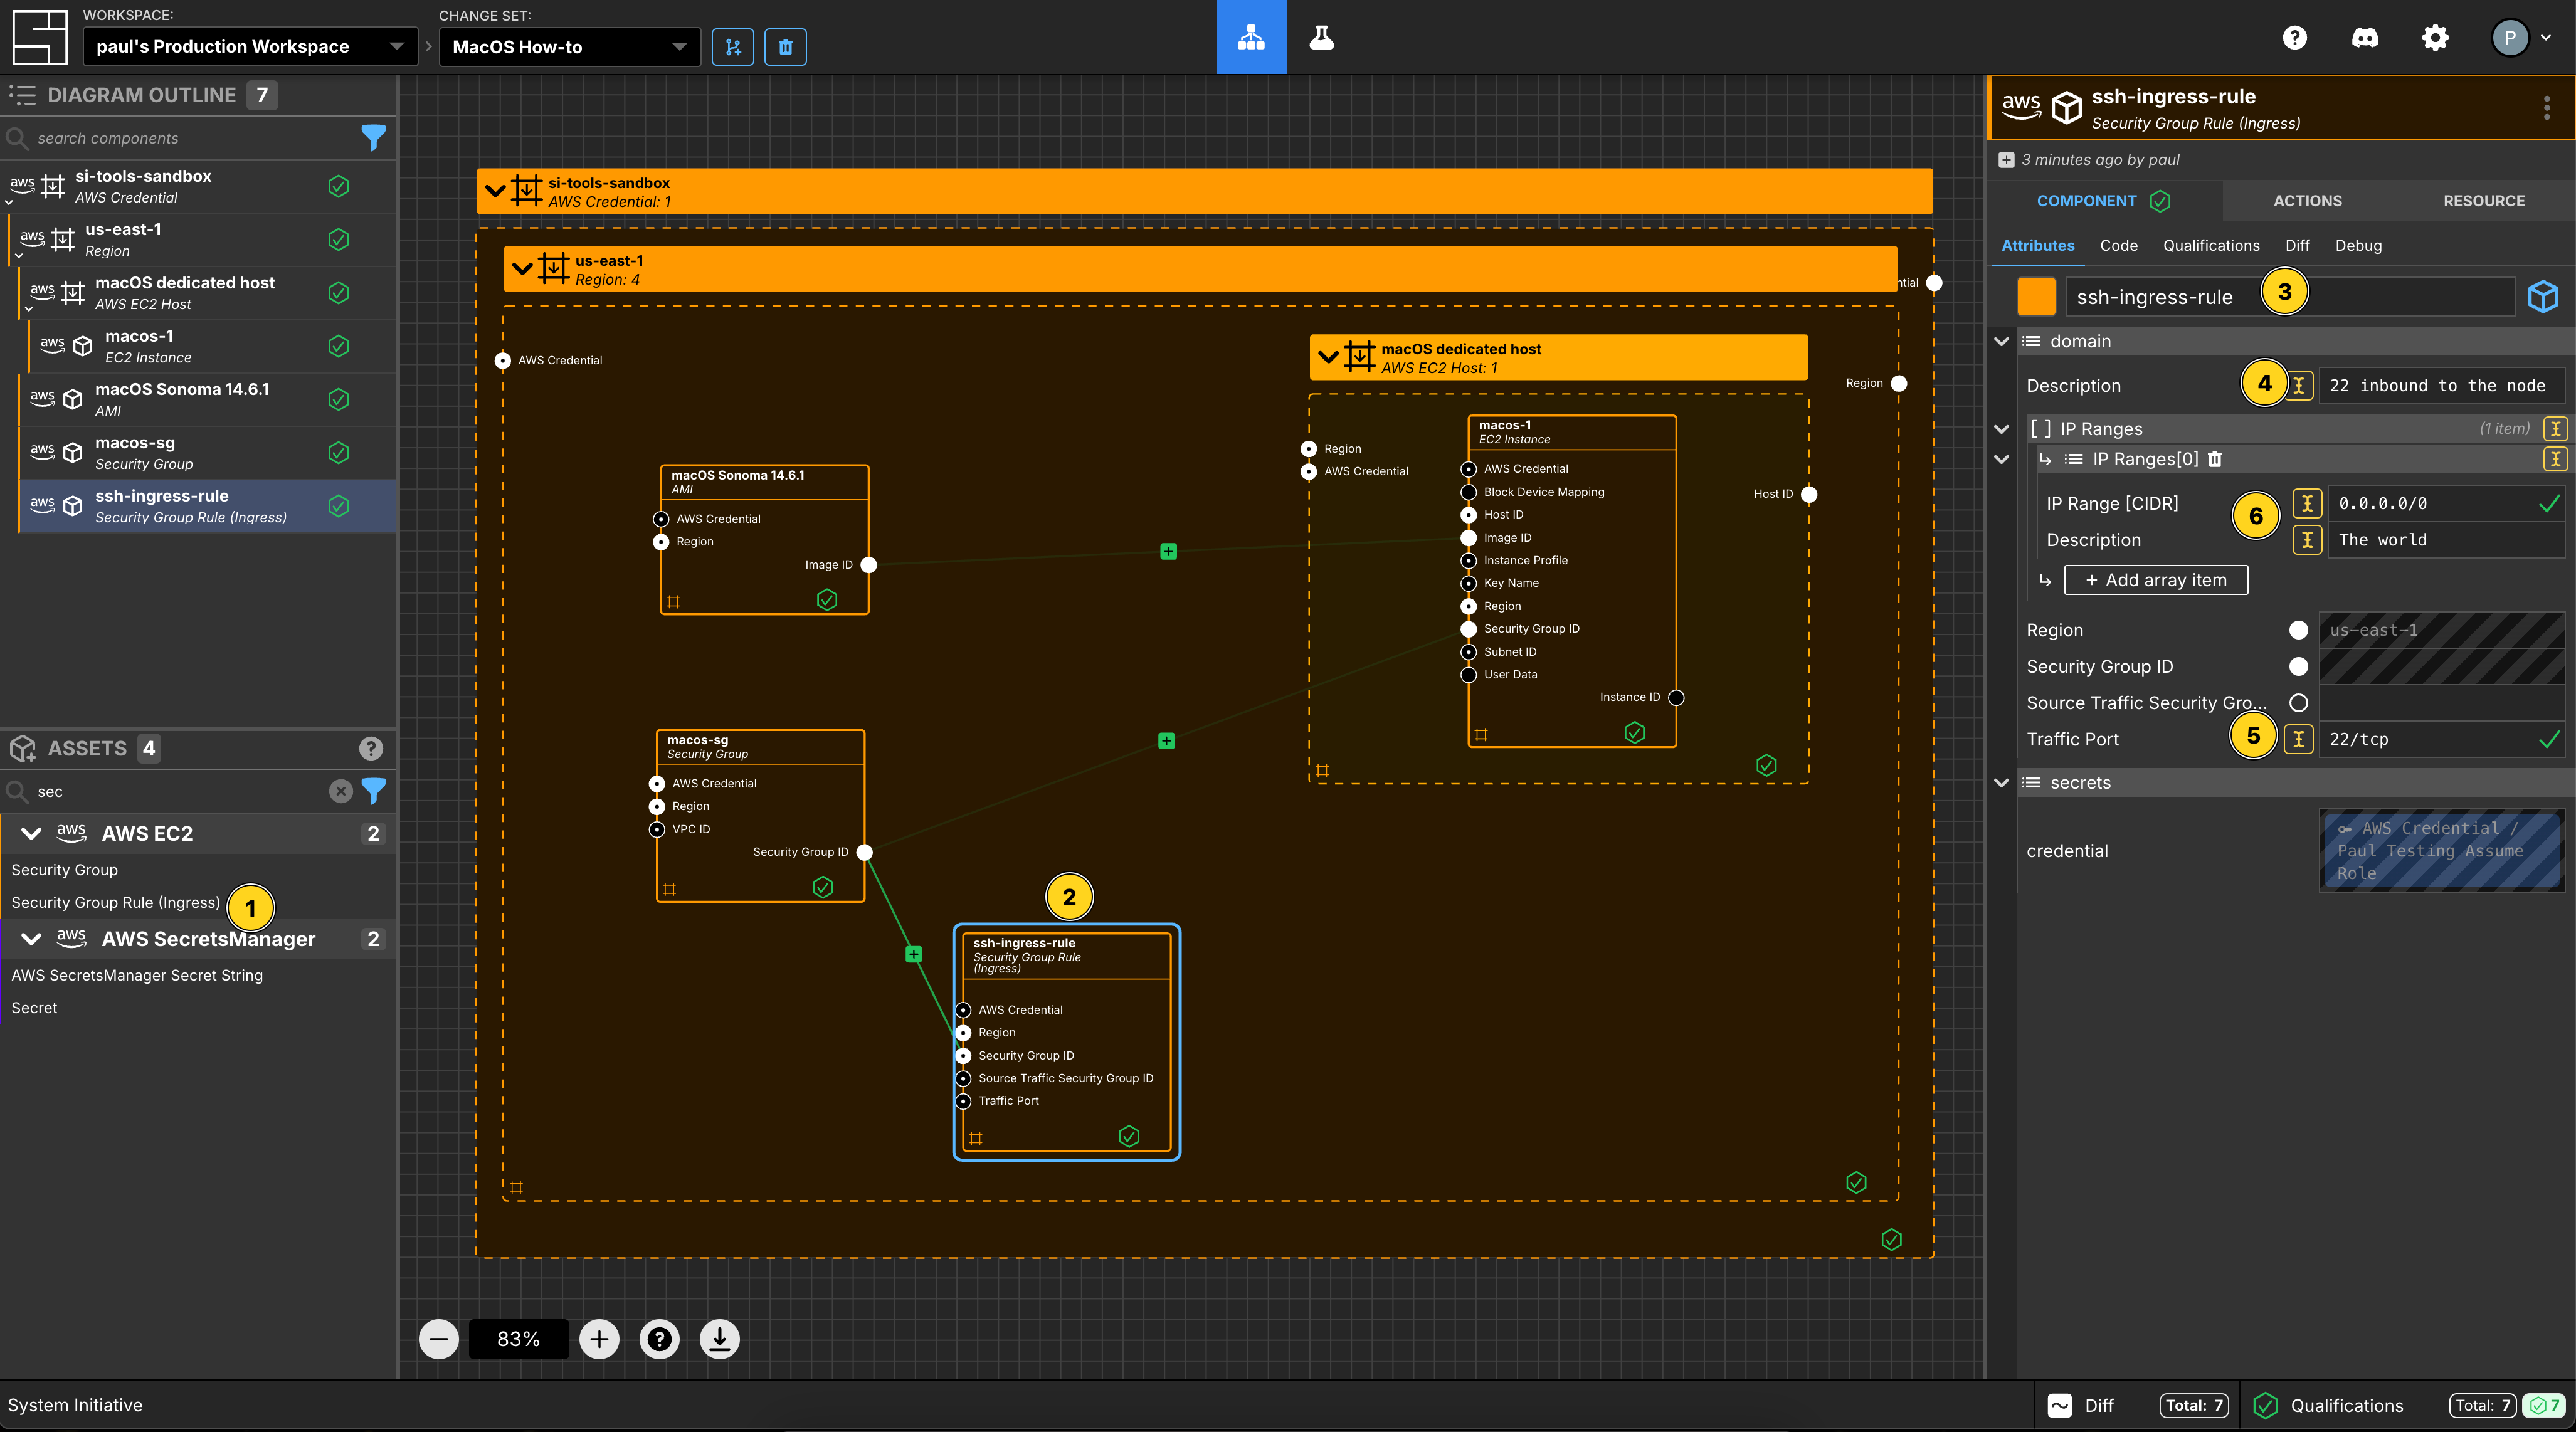
Add a Security Group Rule (Ingress) Component to the us-east-1 frame.
Set the Component name to be ssh ingress rule
Set the Description to be 22 inbound to the node.
Set the TrafficPort to be 22/tcp.
Add an IpRange array item.
Set the IP Range [CIDR] to be 0.0.0.0/0 and the Description to be The world.
Connect the Security Group ID Output Socket of macos-sg Component to the Security Group ID Input Socket of this ssh-ingress-rule Component.
Create a KeyPair Component
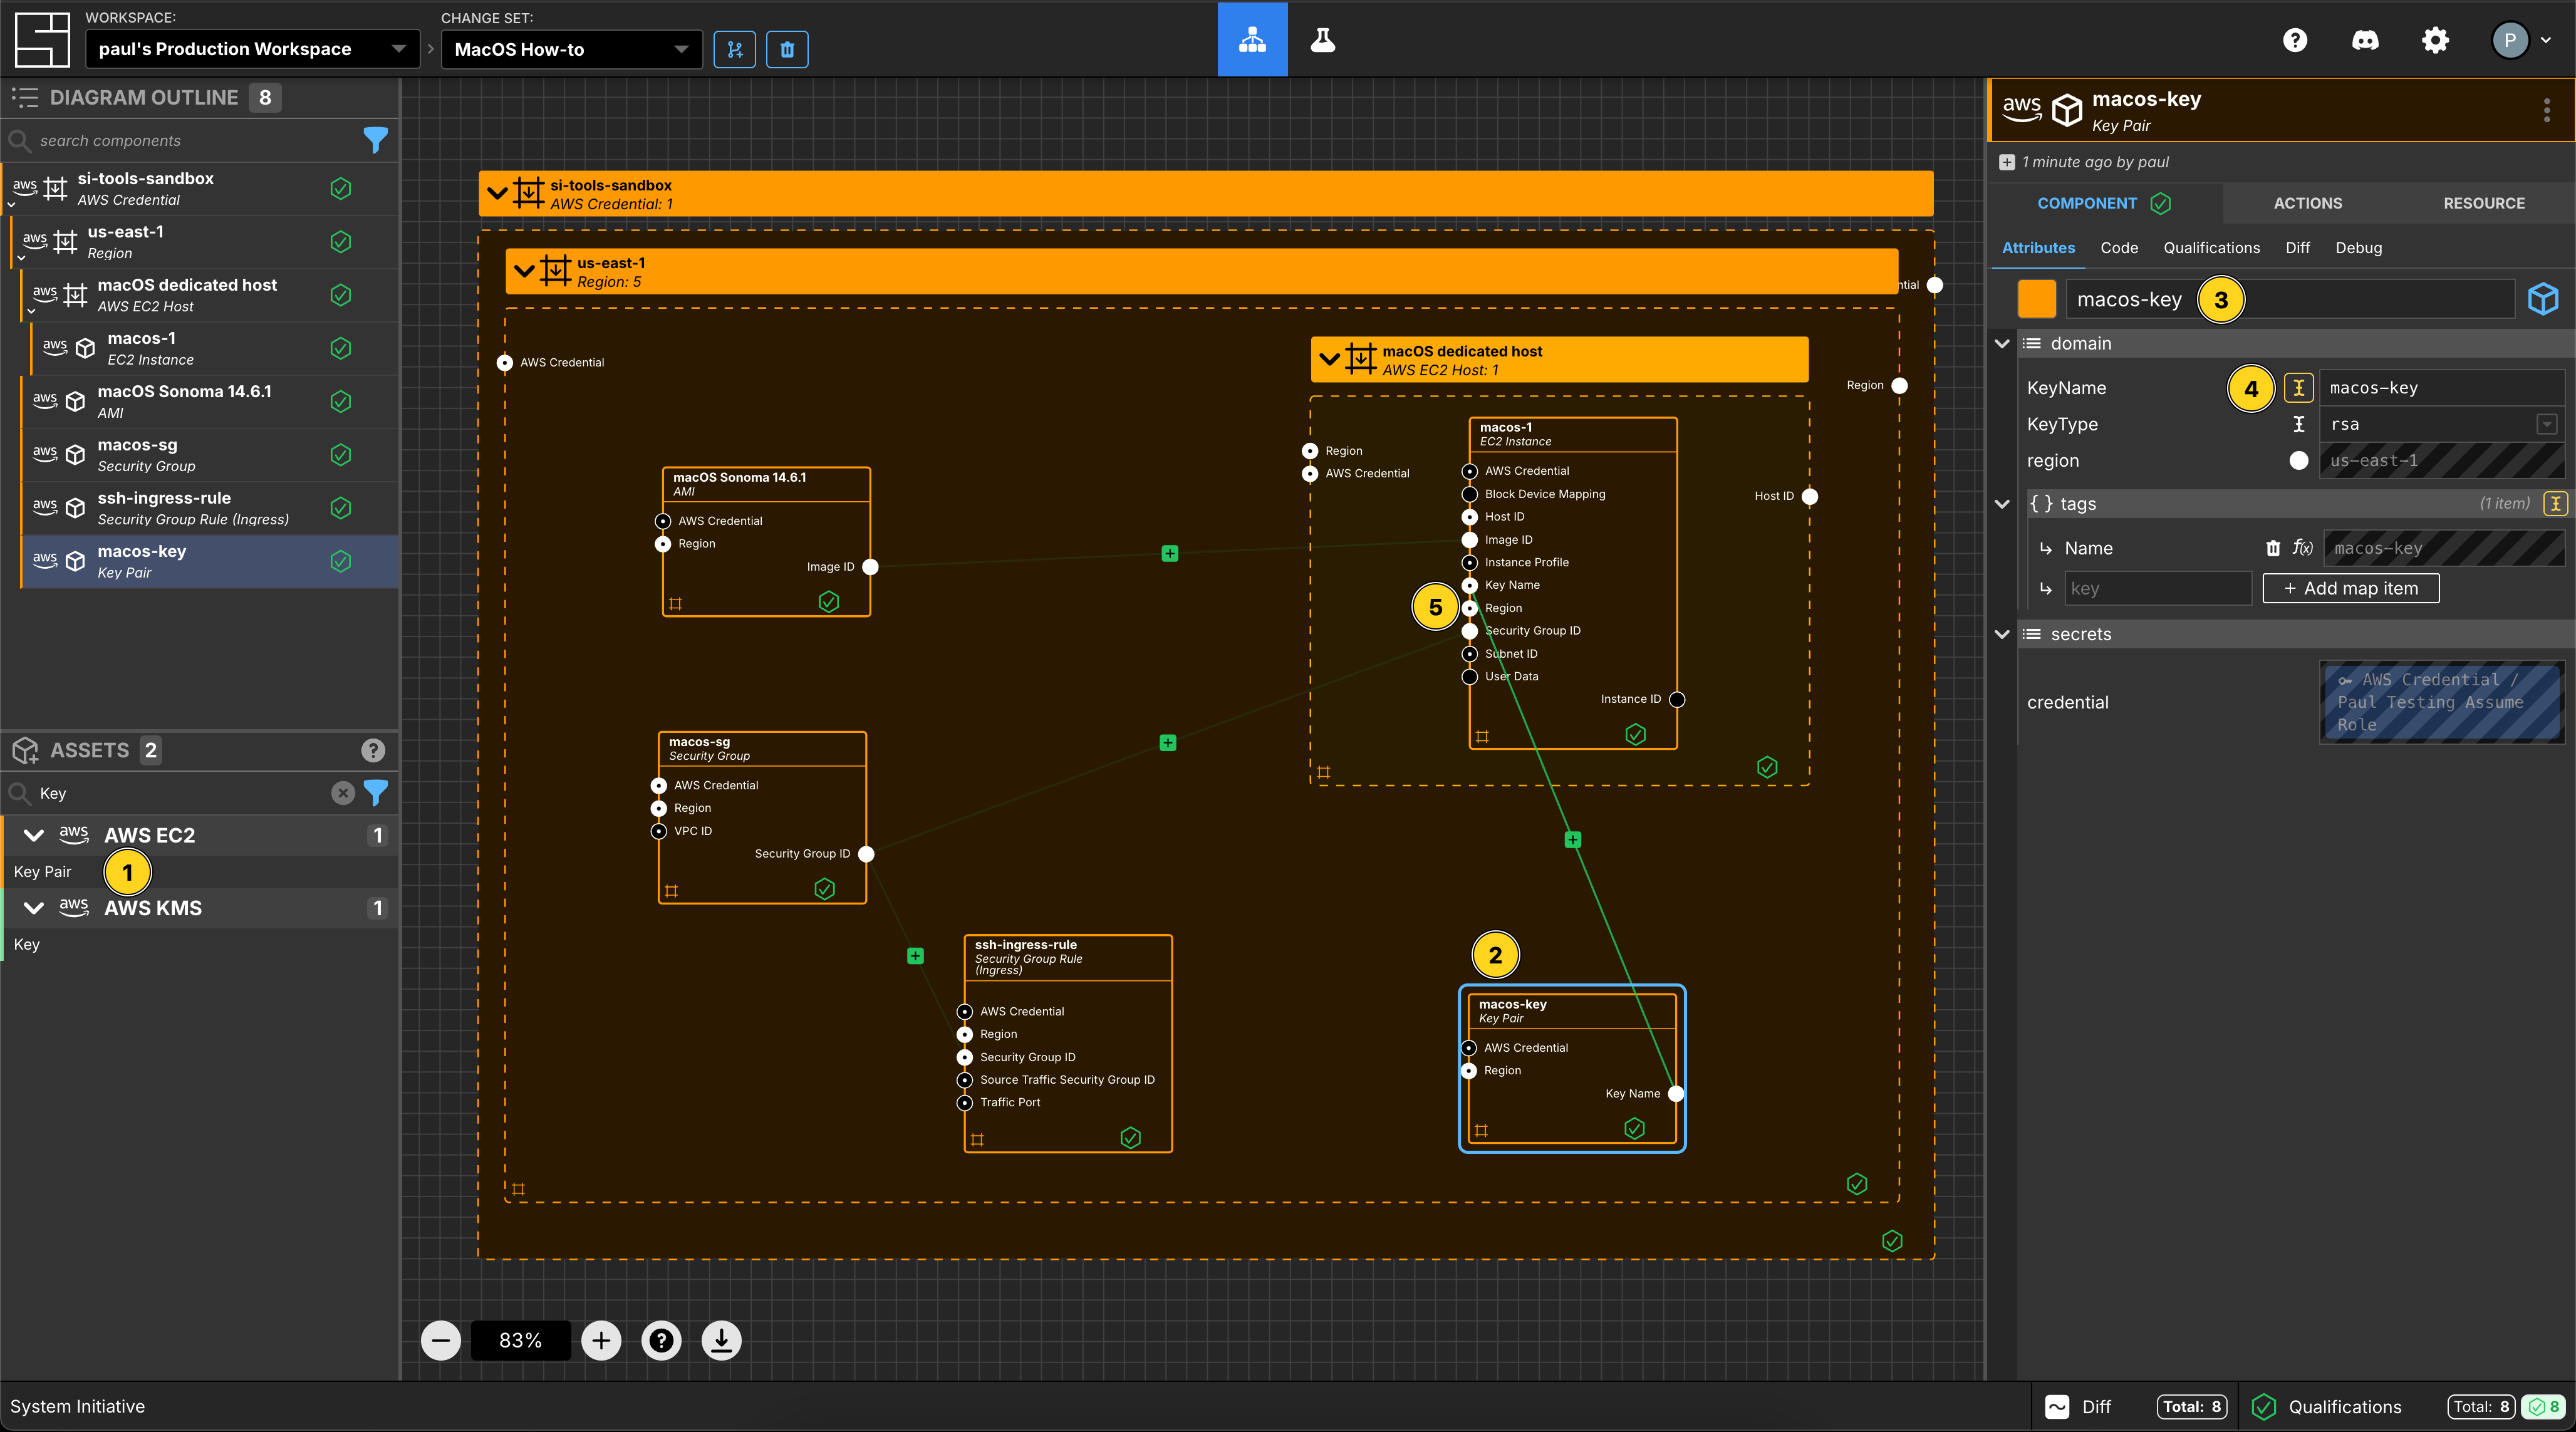
Add a Key Pair Component to the us-east-1 frame.
Set the Component name to be macos-key.
Set the KeyName to be macos-key.
Connect the Key Name Output Socket to the Key Name Input Socket of the macos-1 Component.
Apply your Change Set
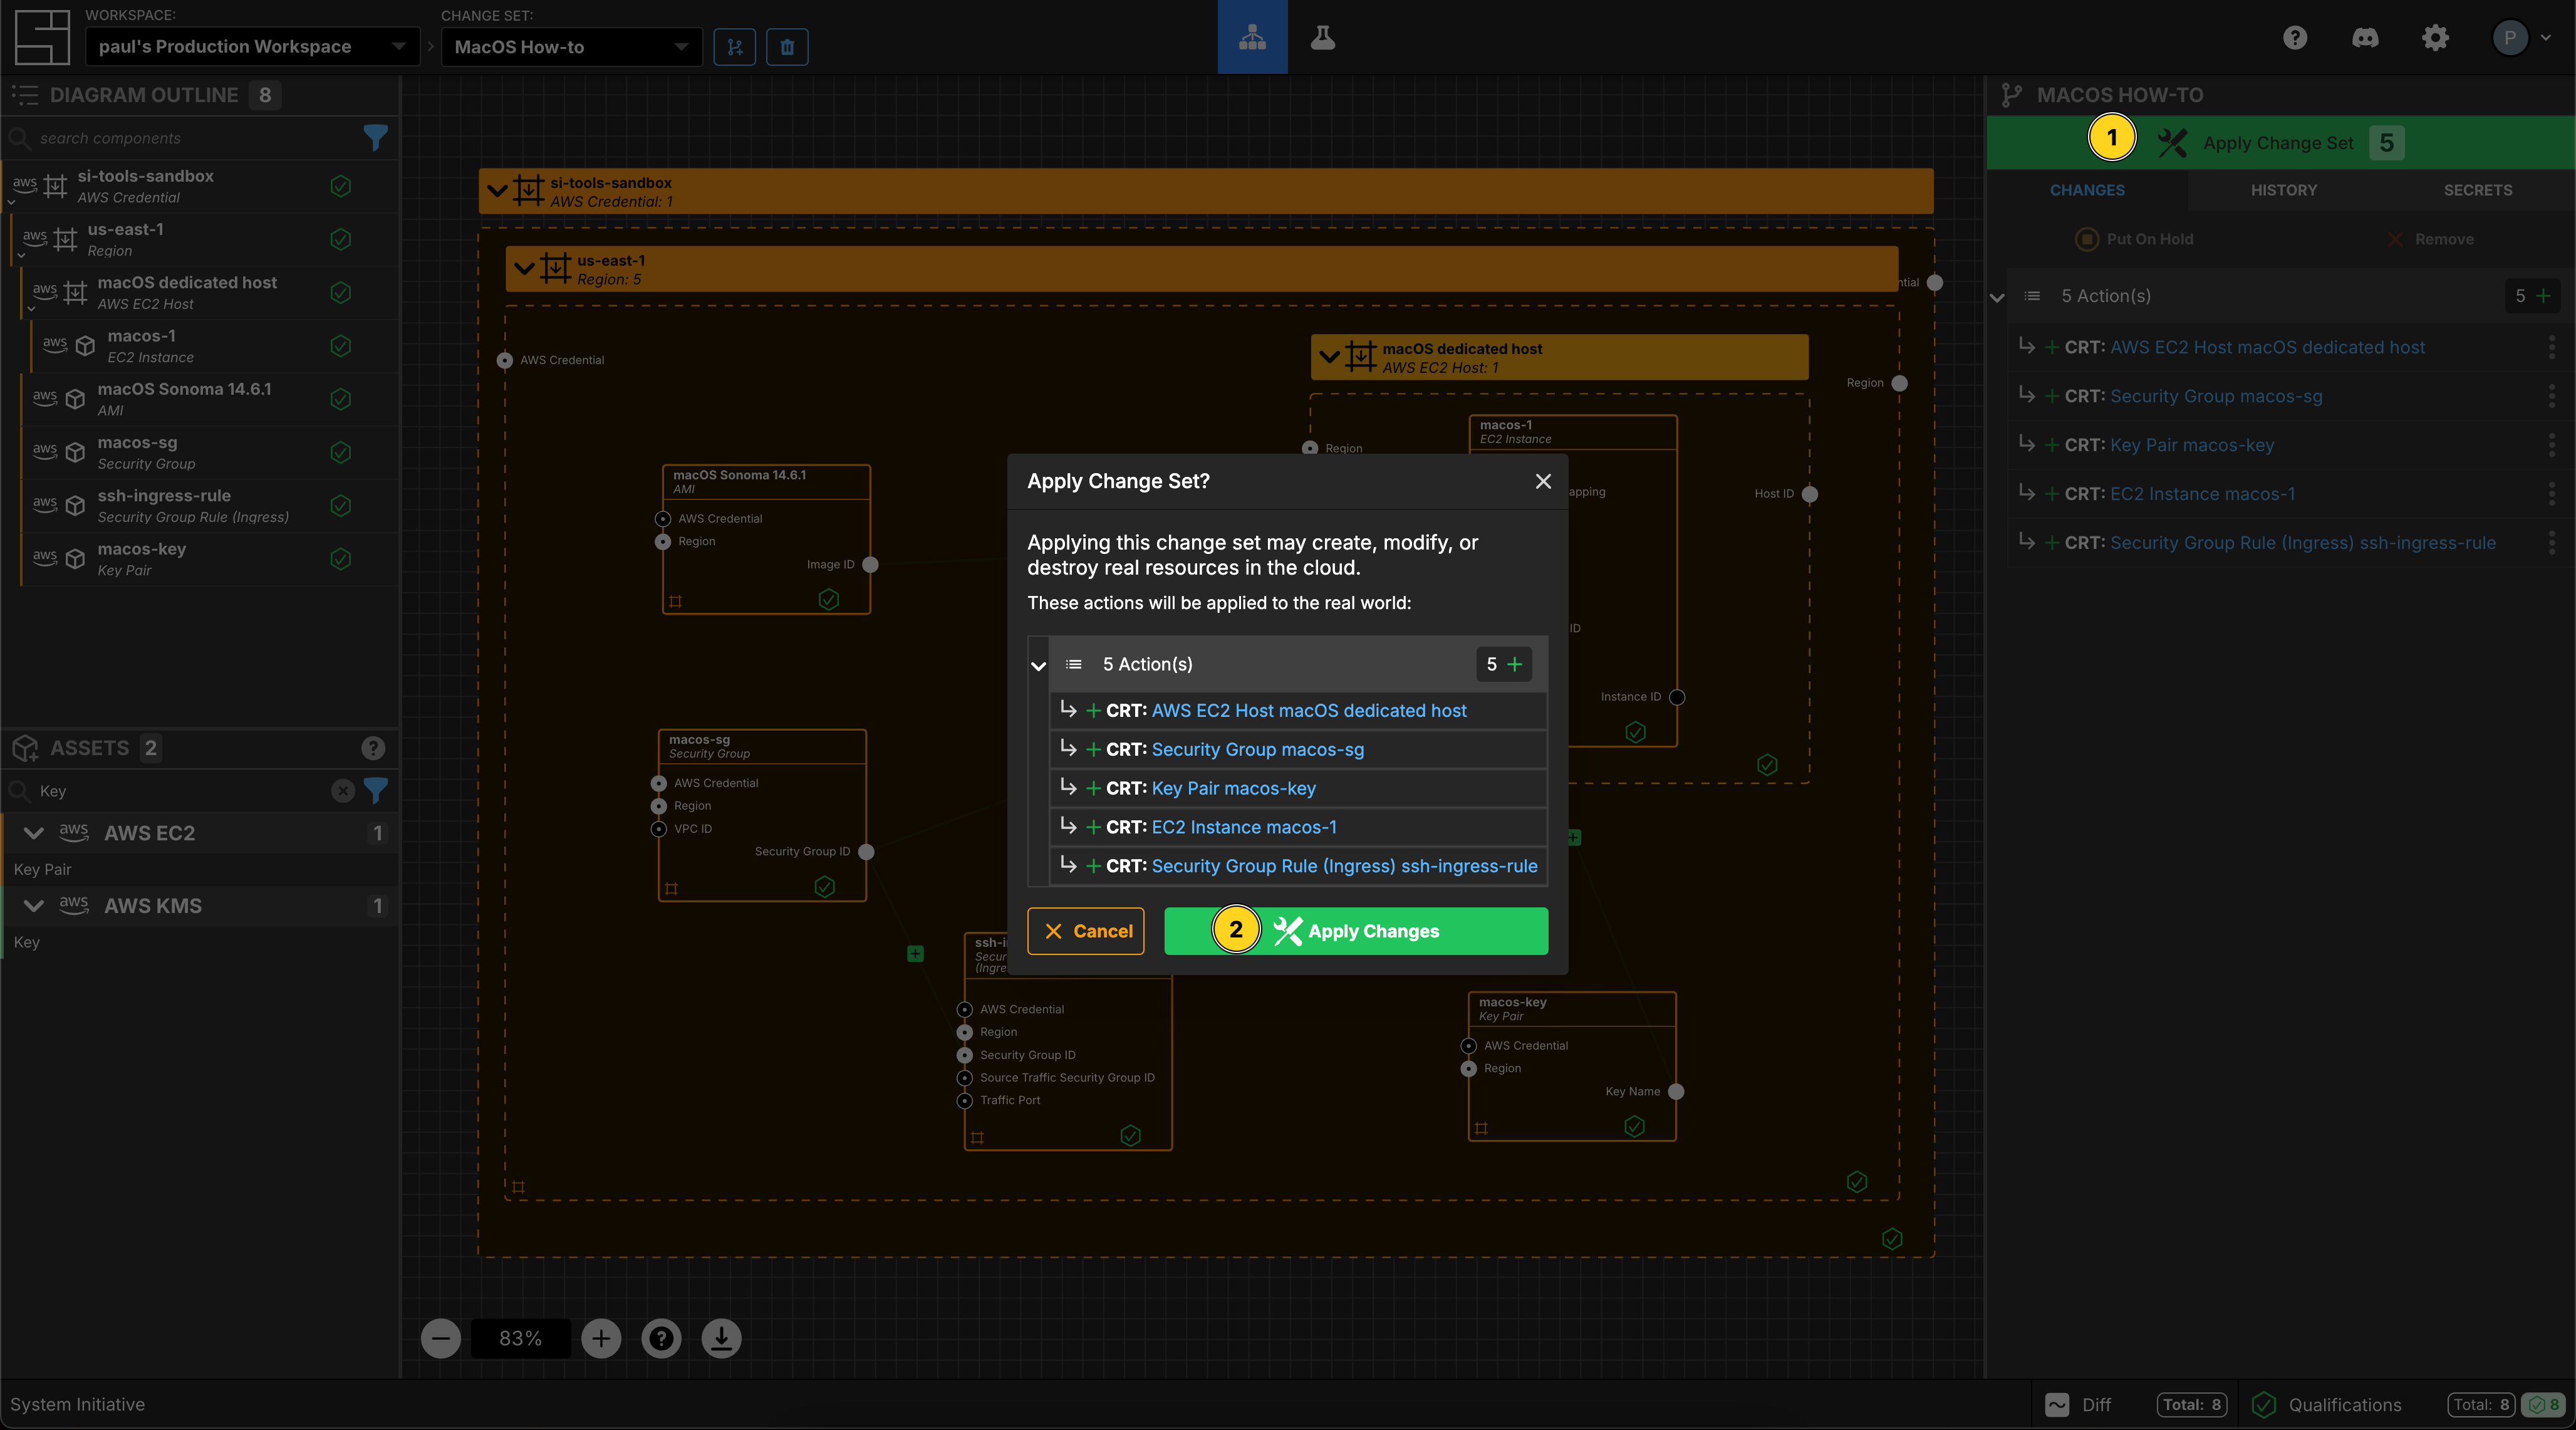
Press Escape or click anywhere on the canvas background to select the Workspace.
Click the Apply Change Set button to:
- Create a Security Group Rule and an Ingress Rule
- Create an Ec2 Dedicated Host and associated Instance
- Create a Key Pair
Explore your resources
Review the completed AWS resources by clicking the Resource sub-panel for each of your new resources.
Clean Up
Create a new Change Set called Clean up How-to
Delete your us-east-1 Region frame. All of the Components inside will be marked for deletion.
Click Apply Change Set.
All your new resources should be deleted from your AWS account.
Vocabulary
In this guide bits of System Initiative Vocabulary will be shown with a capital letter. All definitions for these can be found here: System Initative - Vocabulary