Workspaces
A workspace in System Initiative is the isolation boundary for a set of models. They are a hard boundary between data. Workspaces have multiple 'members' that map to users in System Initiative.
Interacting with Workspaces
Creating New Workspaces
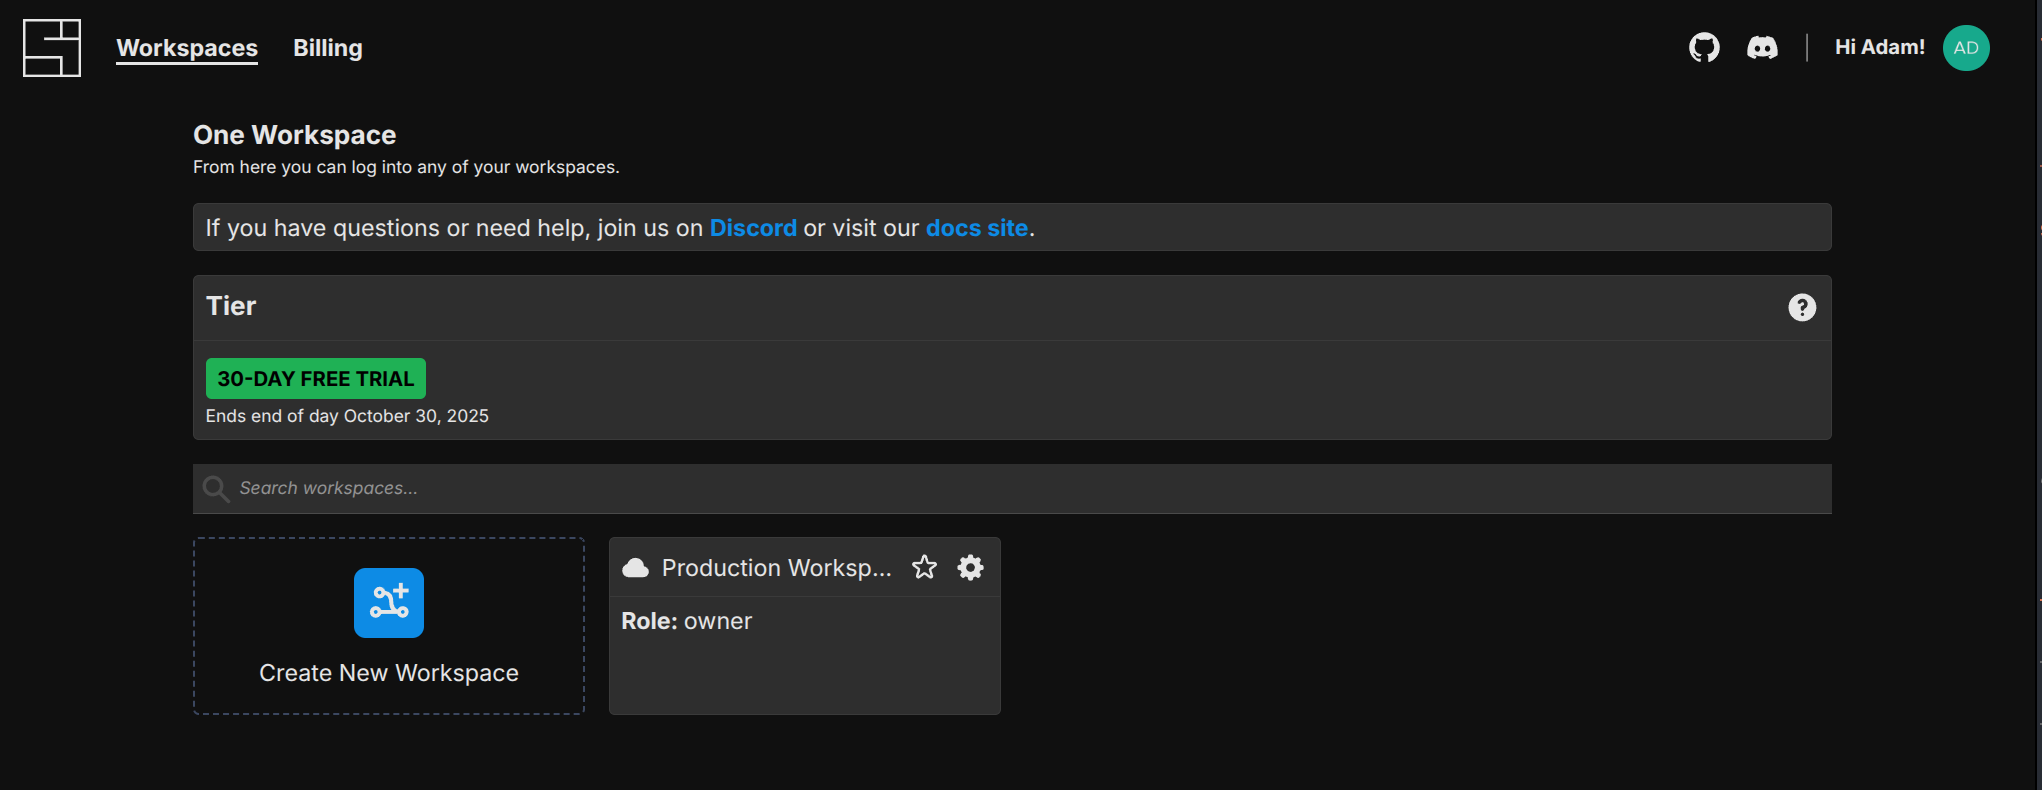
Click the 'Create New Workspace' button:
You'll be asked to provide a Display Name for your workspace, an optional description, and to choose one of 3 workspace types:
- Managed By System Initiative: The default. The workspace will be managed by the System Initiative SaaS platform.
- Local Dev Instance: The workspace will be created in your local development environment.
- Remote URL: The workspace will be created in a publicly available instance of System Initiative at the specified URL. This option is only used in Bring Your Own Cloud or custom deployments.
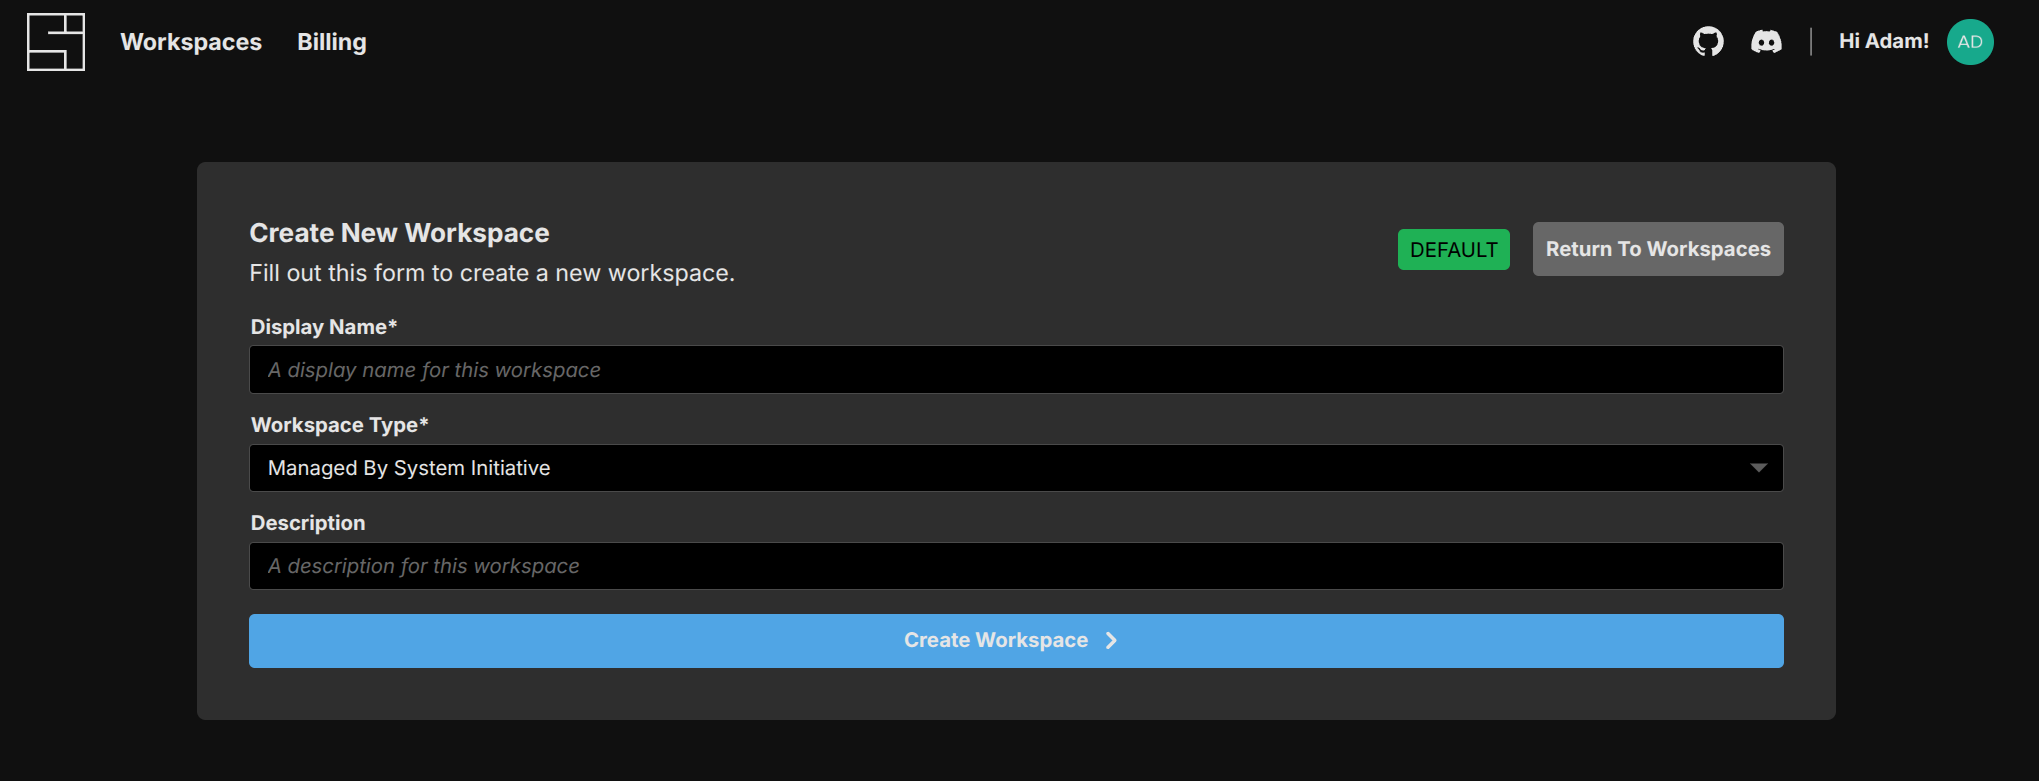
Click 'Create Workspace' to create your new workspace.
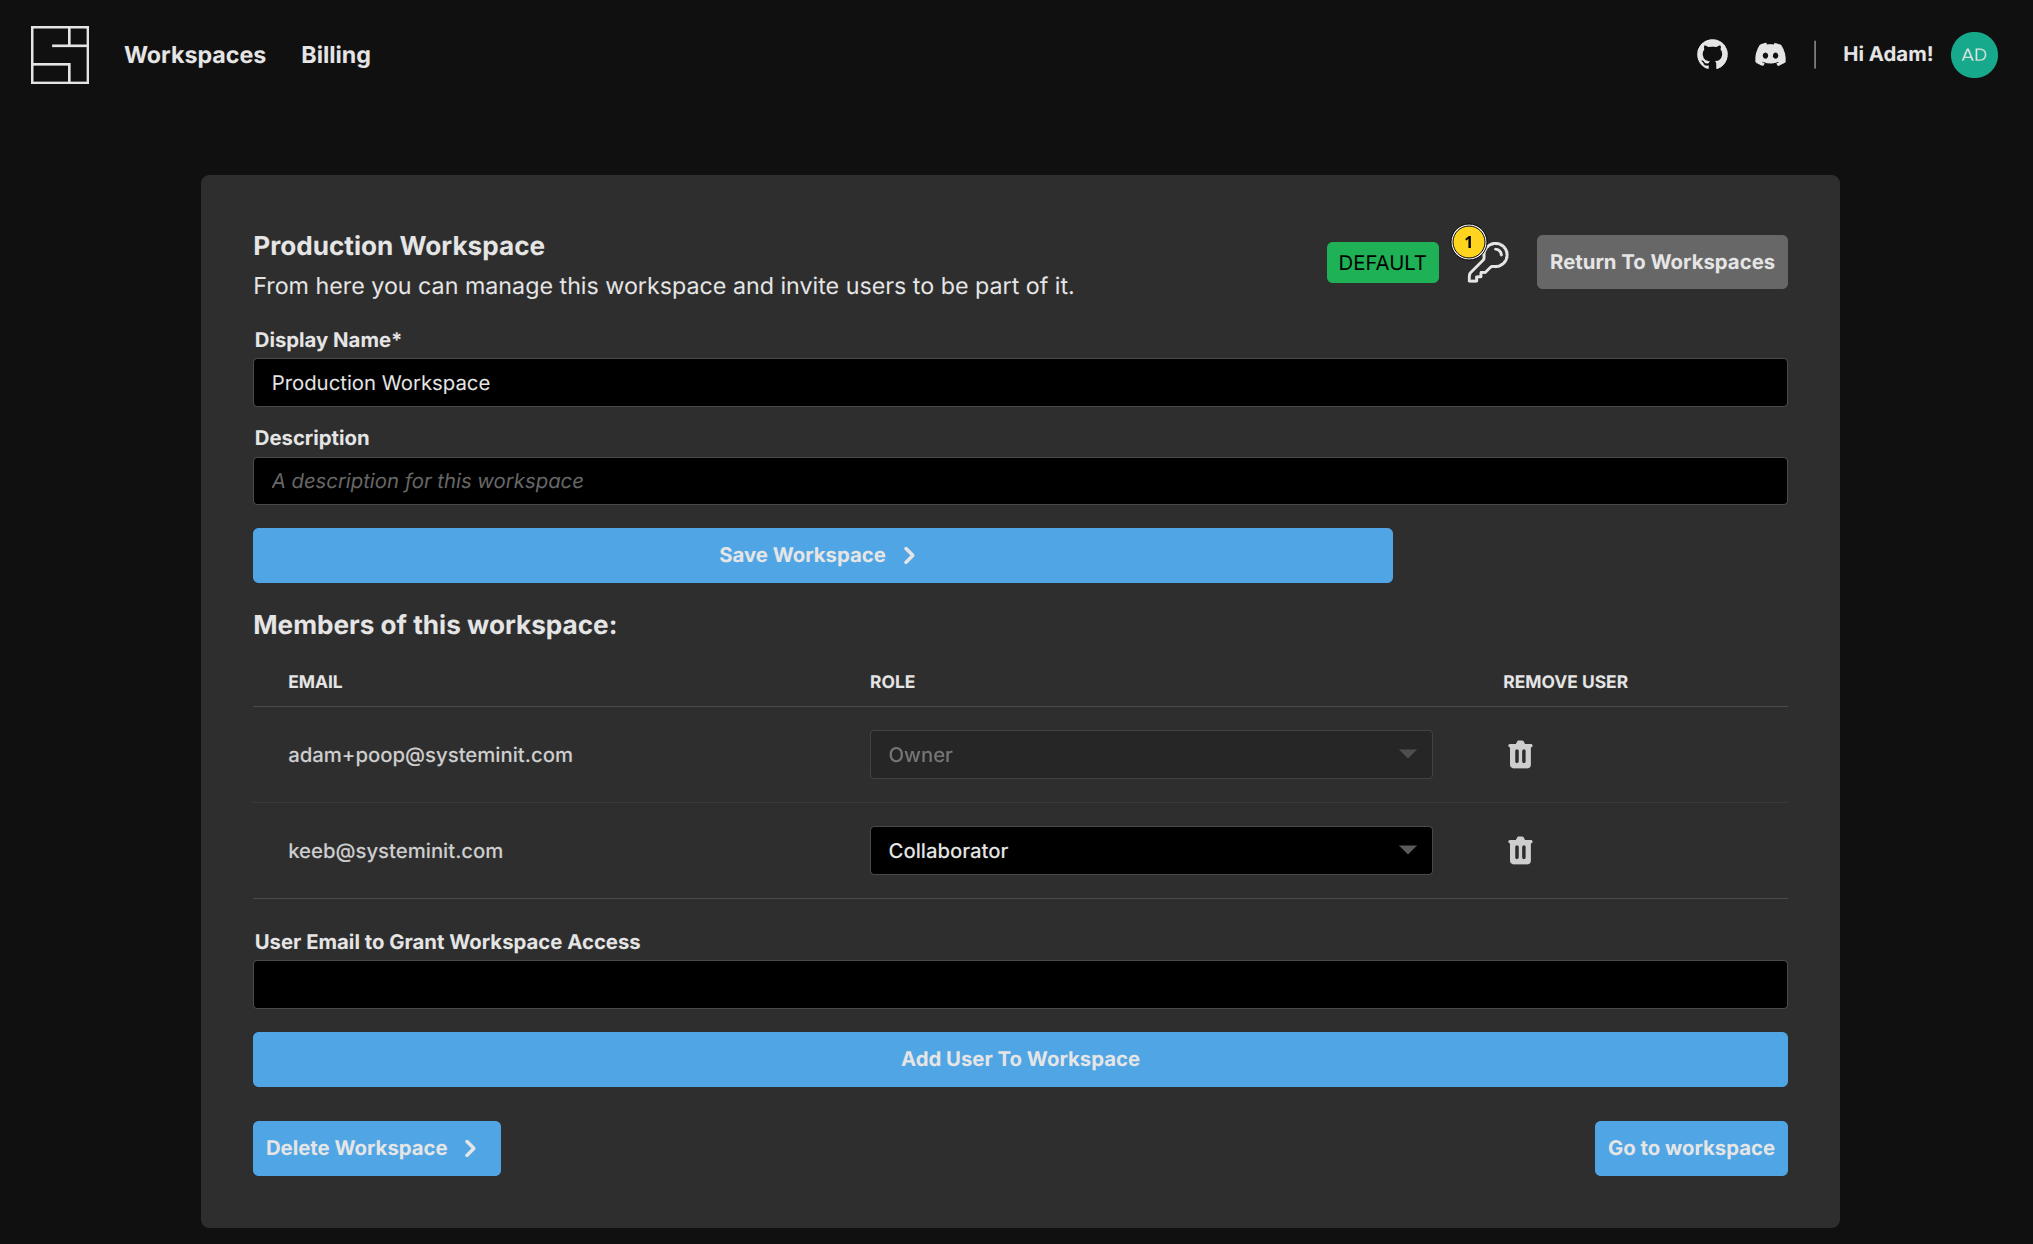
Update Workspace
From here, you can change your workspaces' Display Name or Description, access the API tokens screen, invite users to the workspace, and configure the role of a user within your workspace.
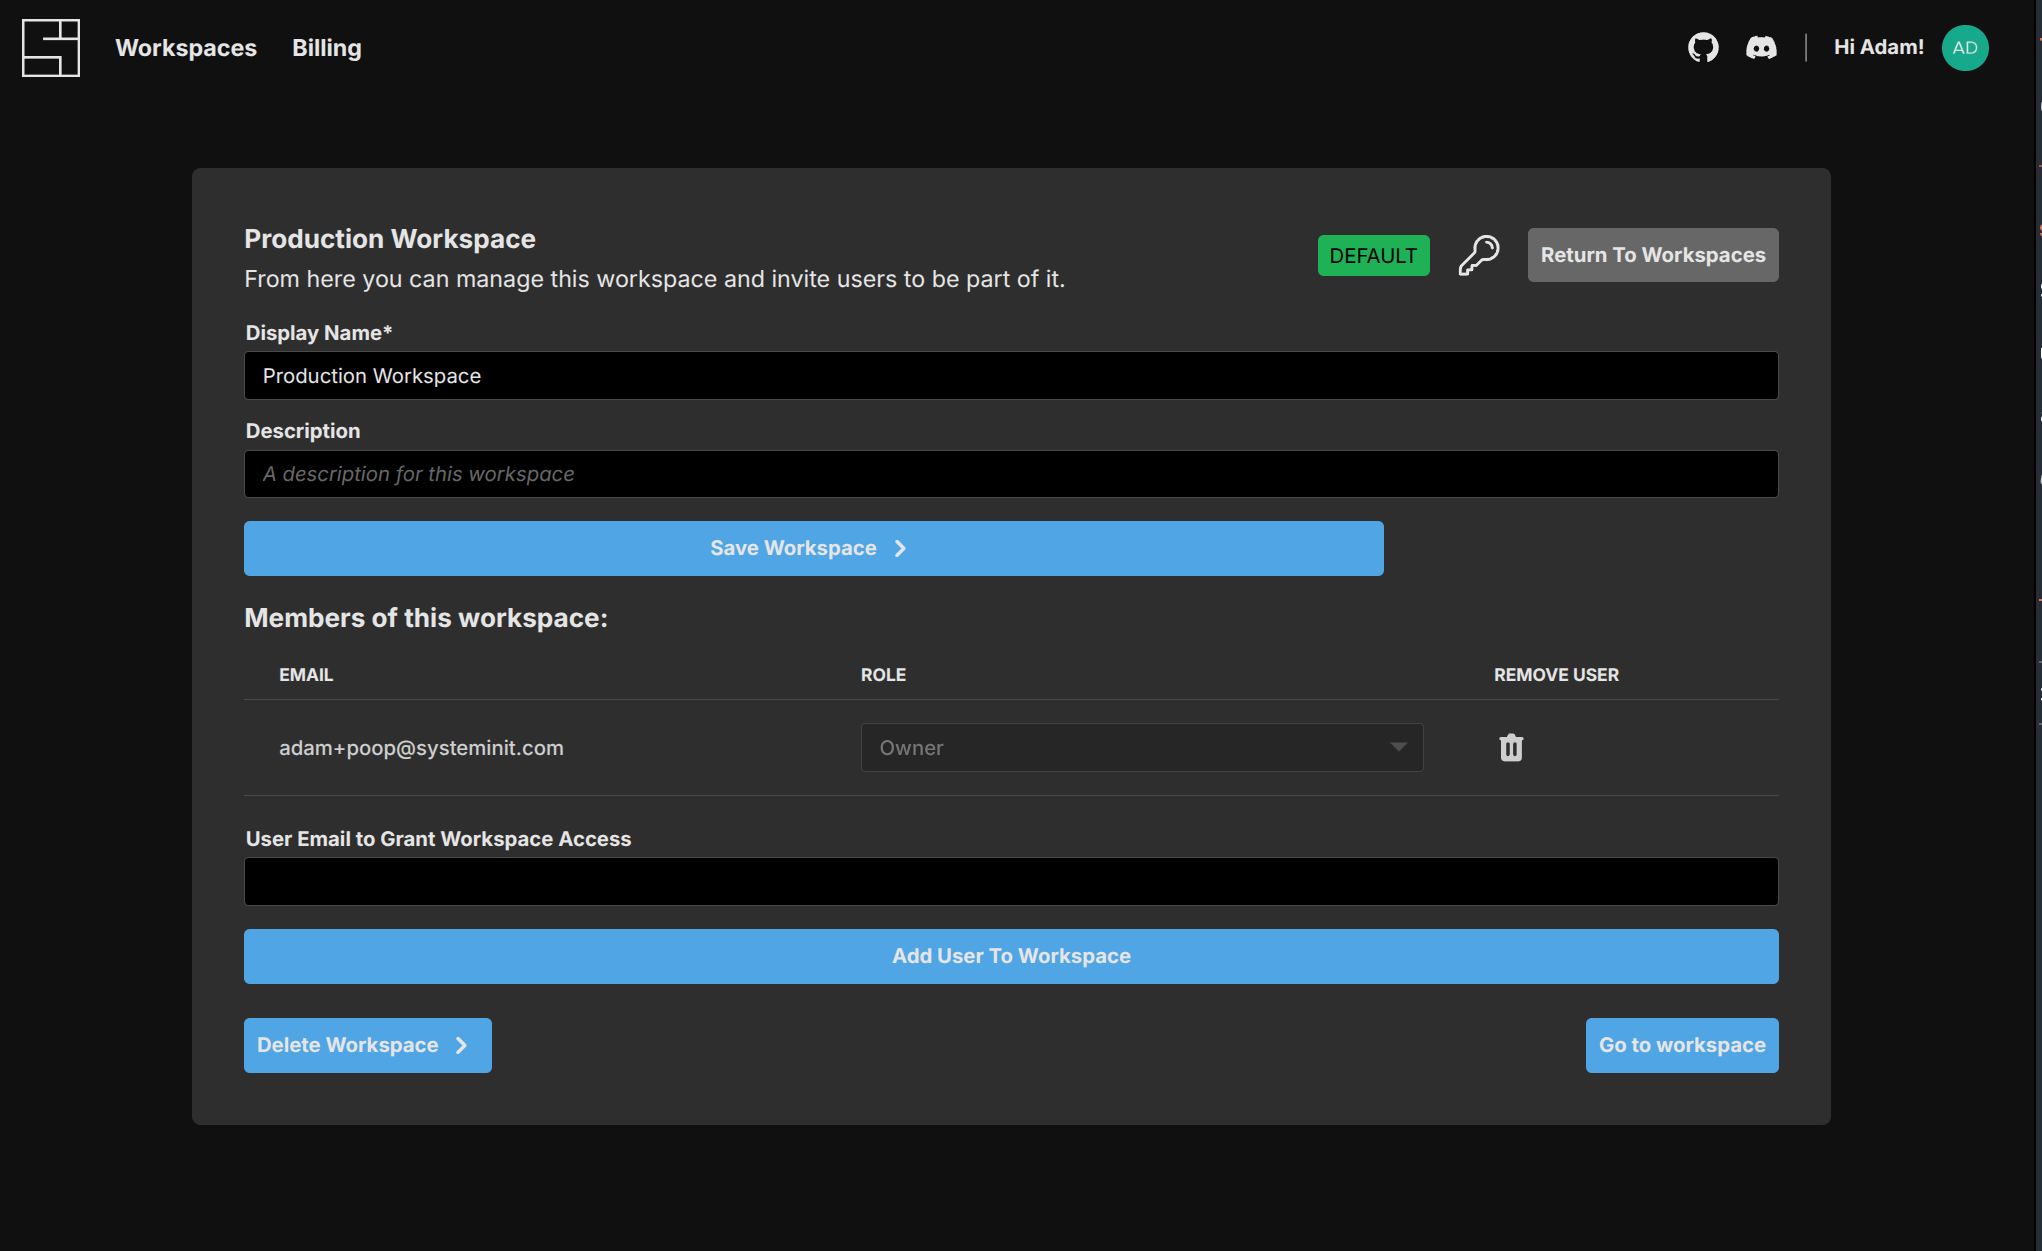
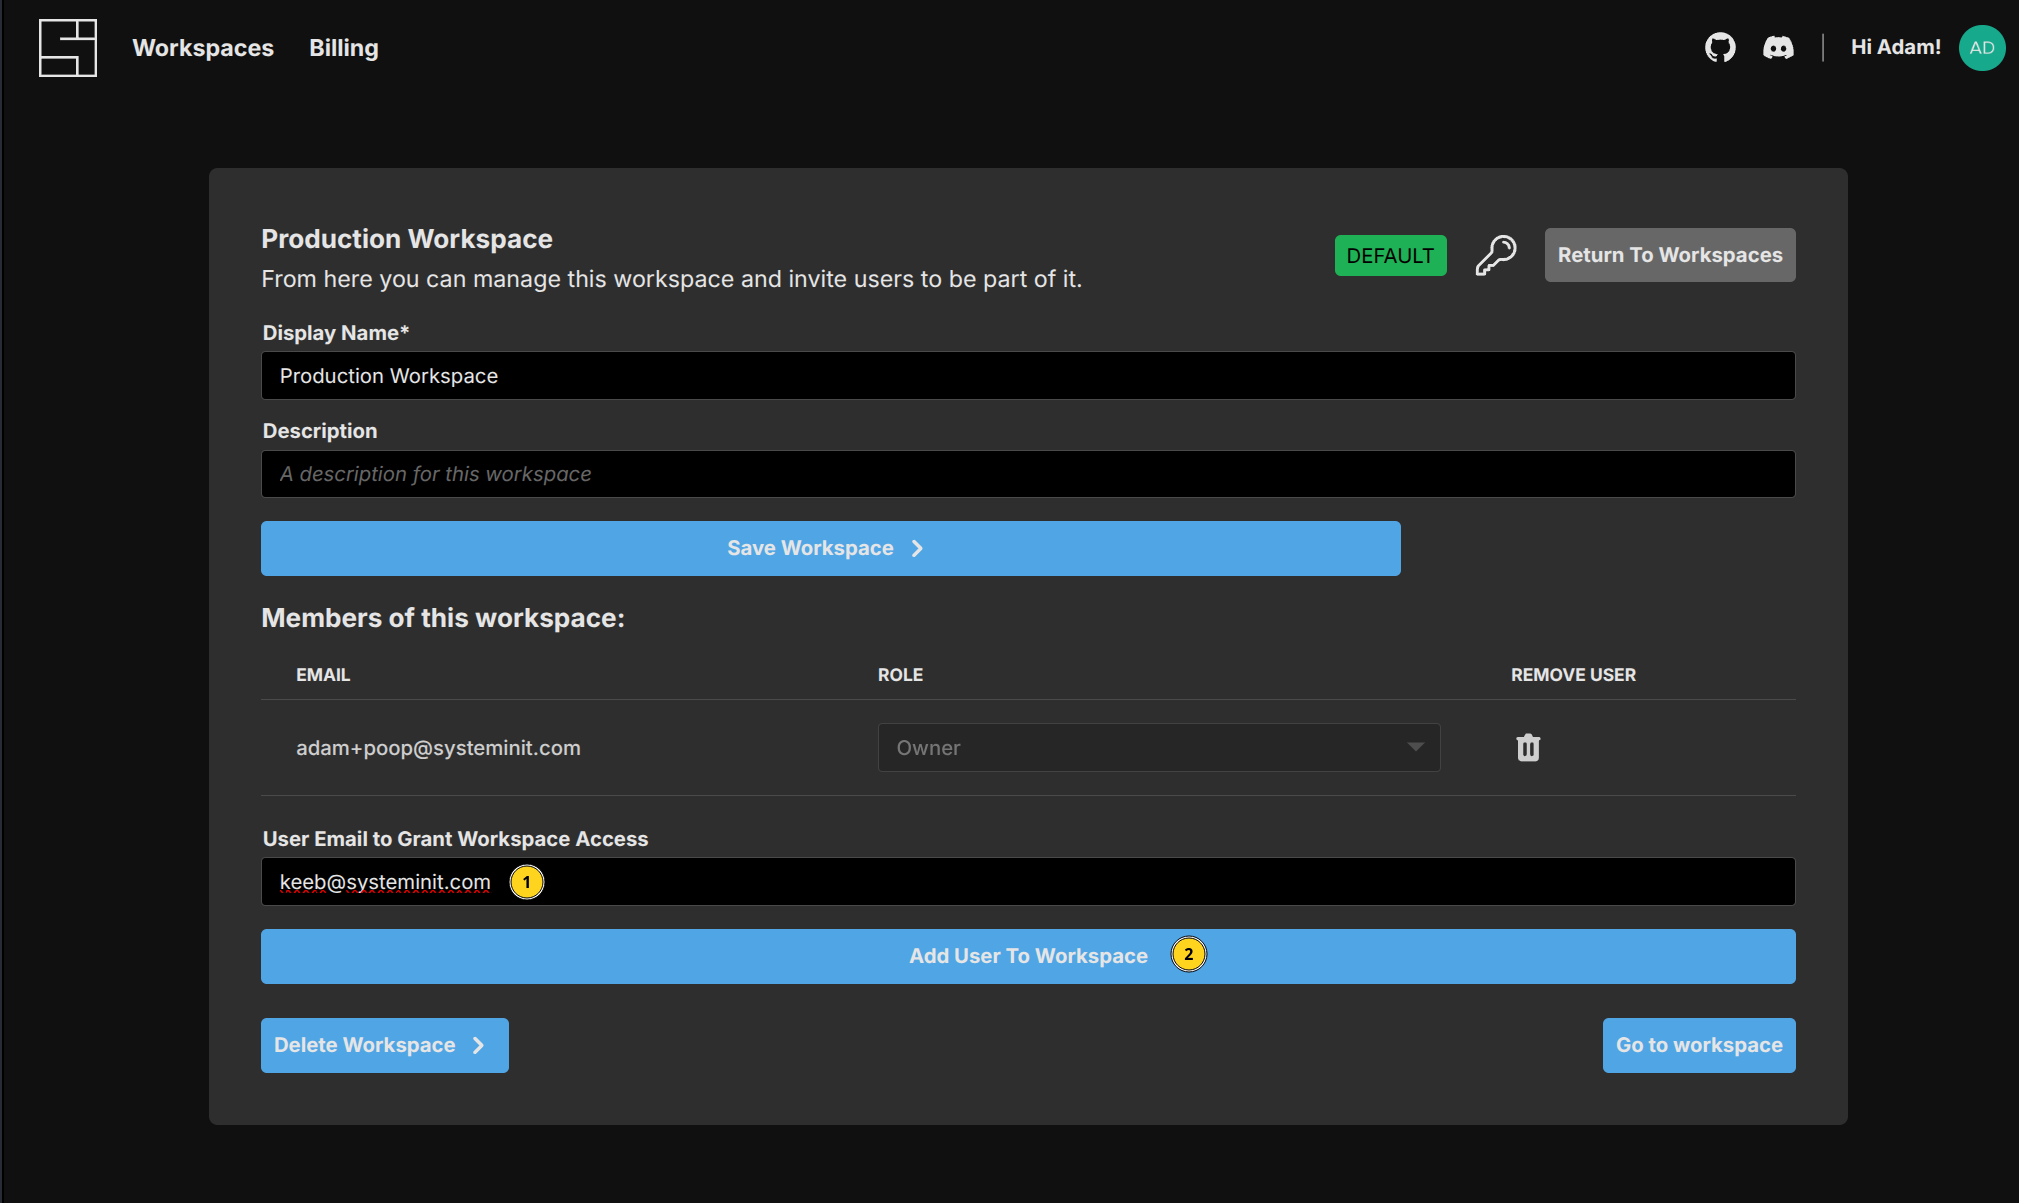
Add a User to a Workspace
Set a User's Role in a Workspace
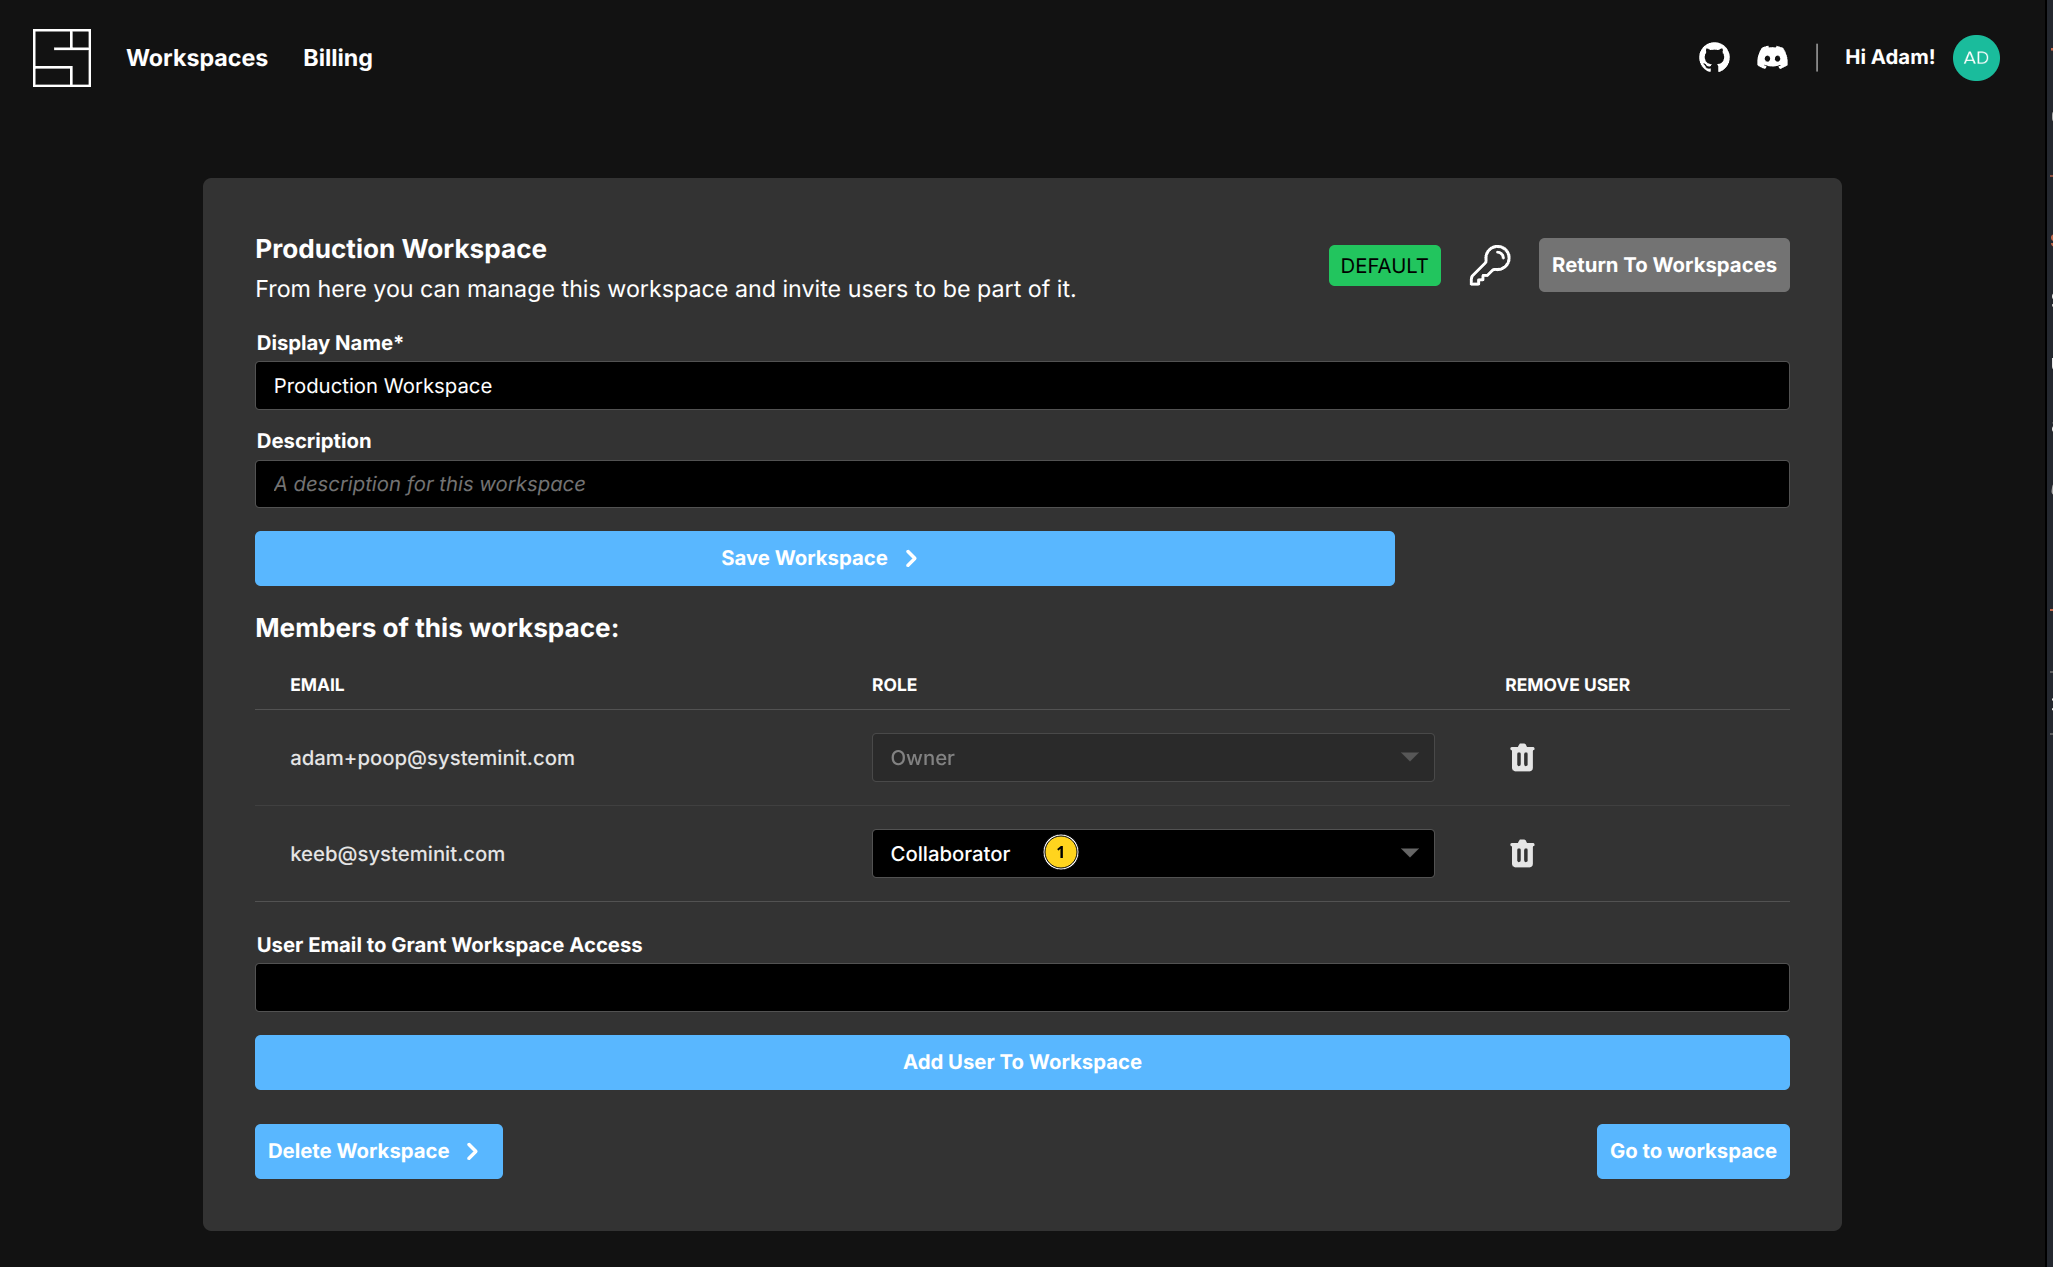
There are two options:
- Collaborator: the user will be able to propose changes to a workspace, but will not be able to apply or approve change sets.
- Approver: the user will be able to approve changes to the workspace and apply change sets.
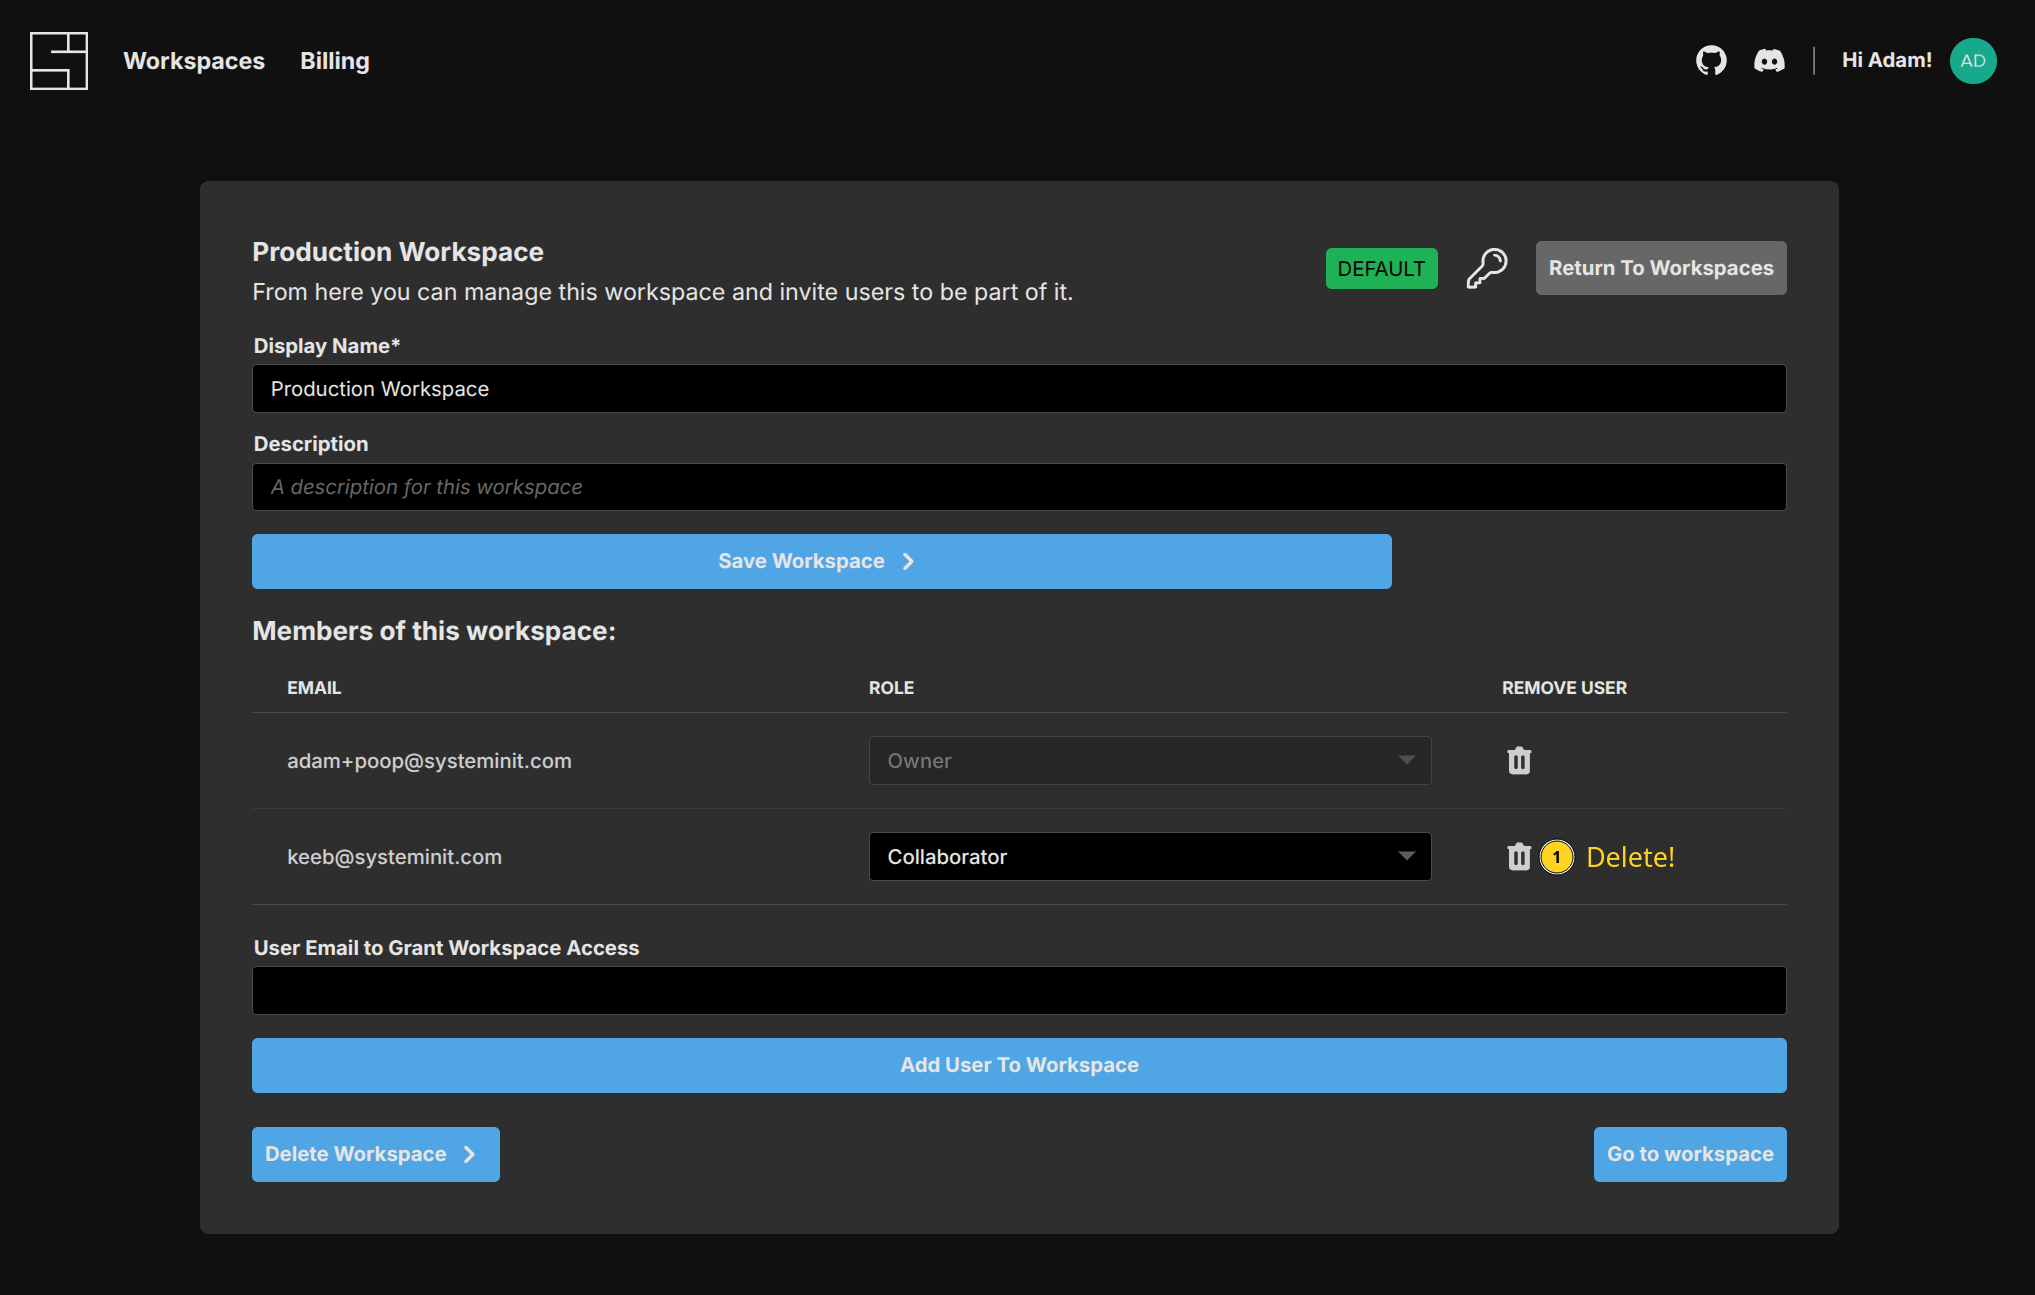
Remove a User from a Workspace
To remove a user from the workspace, click the 'Trash' icon next to their email in the members list:
Leaving a Workspace
To leave a workspace with the CLI:
si workspace leave "Production Workspace"
? Are you sure you want to leave workspace "Production Workspace"? (y/N) › Yes
✨ info    si              Leaving workspace "Production Workspace"...
✨ info si Successfully left workspace: Production WorkspaceDeleting a Workspace
To delete a workspace with the CLI:
si workspace delete "Production Workspace"
? Are you sure you want to delete workspace "Production Workspace"? To recover this operation, you need to contact customer service at support@systeminit.com. This operation will leave any existing resources running. (y/N) › Yes
✨ info    si              Deleting workspace "Production Workspace"...
✨ info si Successfully deleted workspace: Production WorkspaceAPI Token Management
API Tokens in System Initiative are used by the Public API and AI Agent to access a System Initiative workspace on a users behalf.
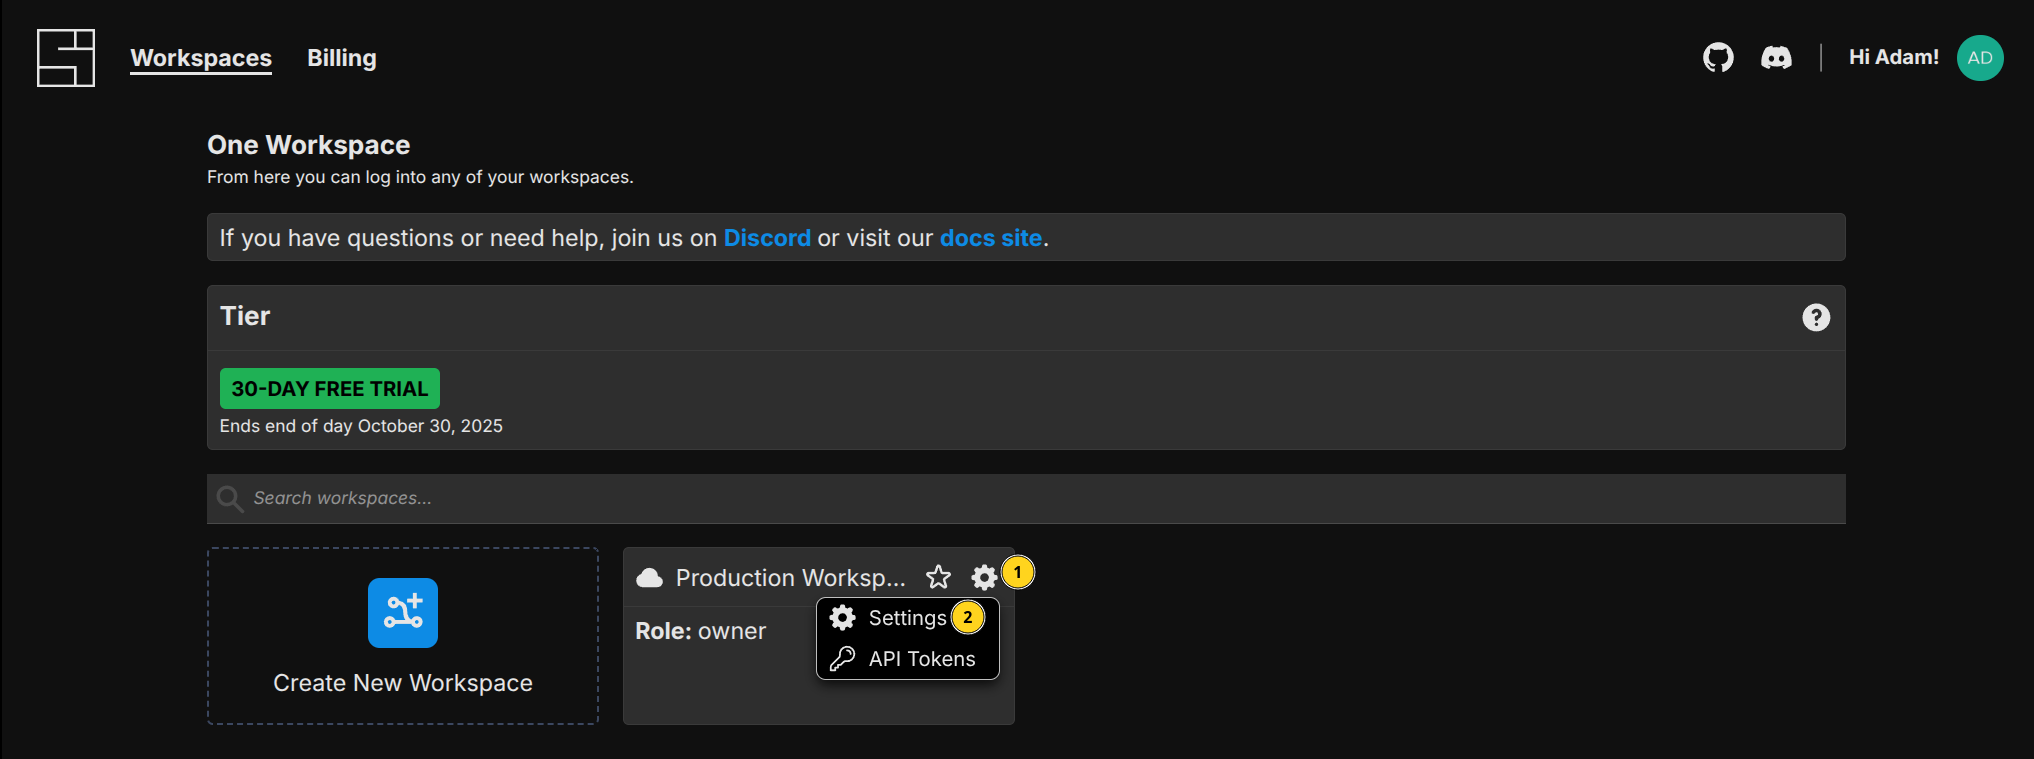
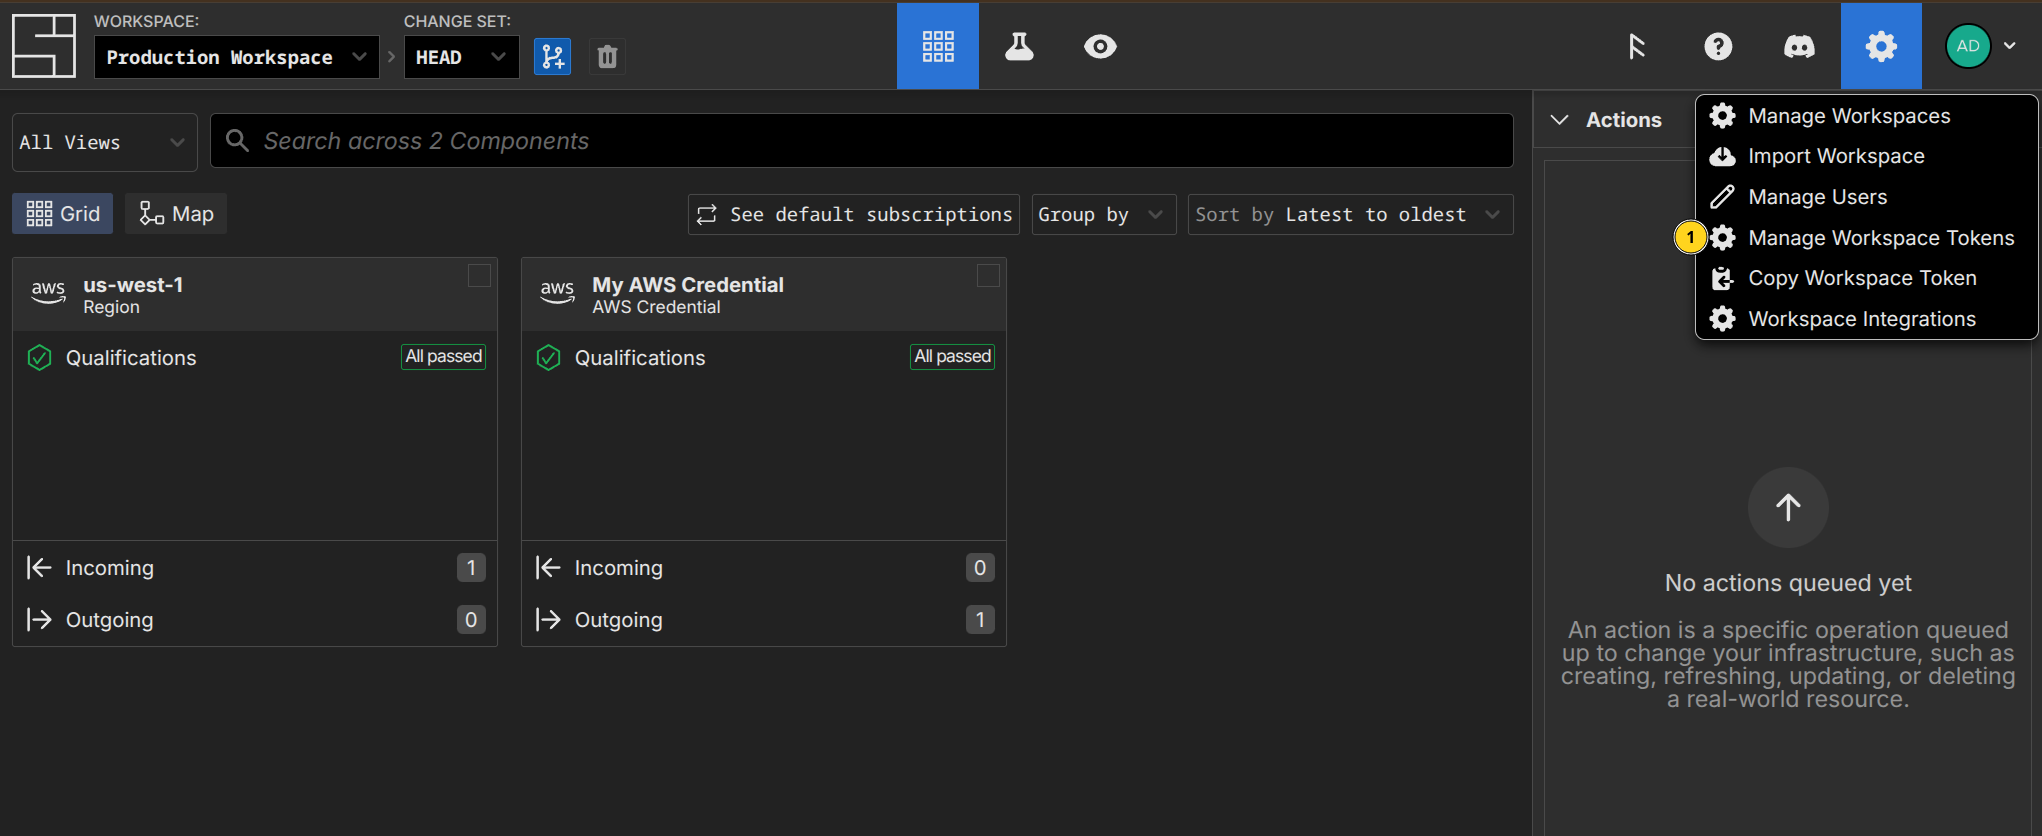
You can manage API tokens by either selecting the 'Manage Workspace Tokens' option from the workspace in the Web Application:
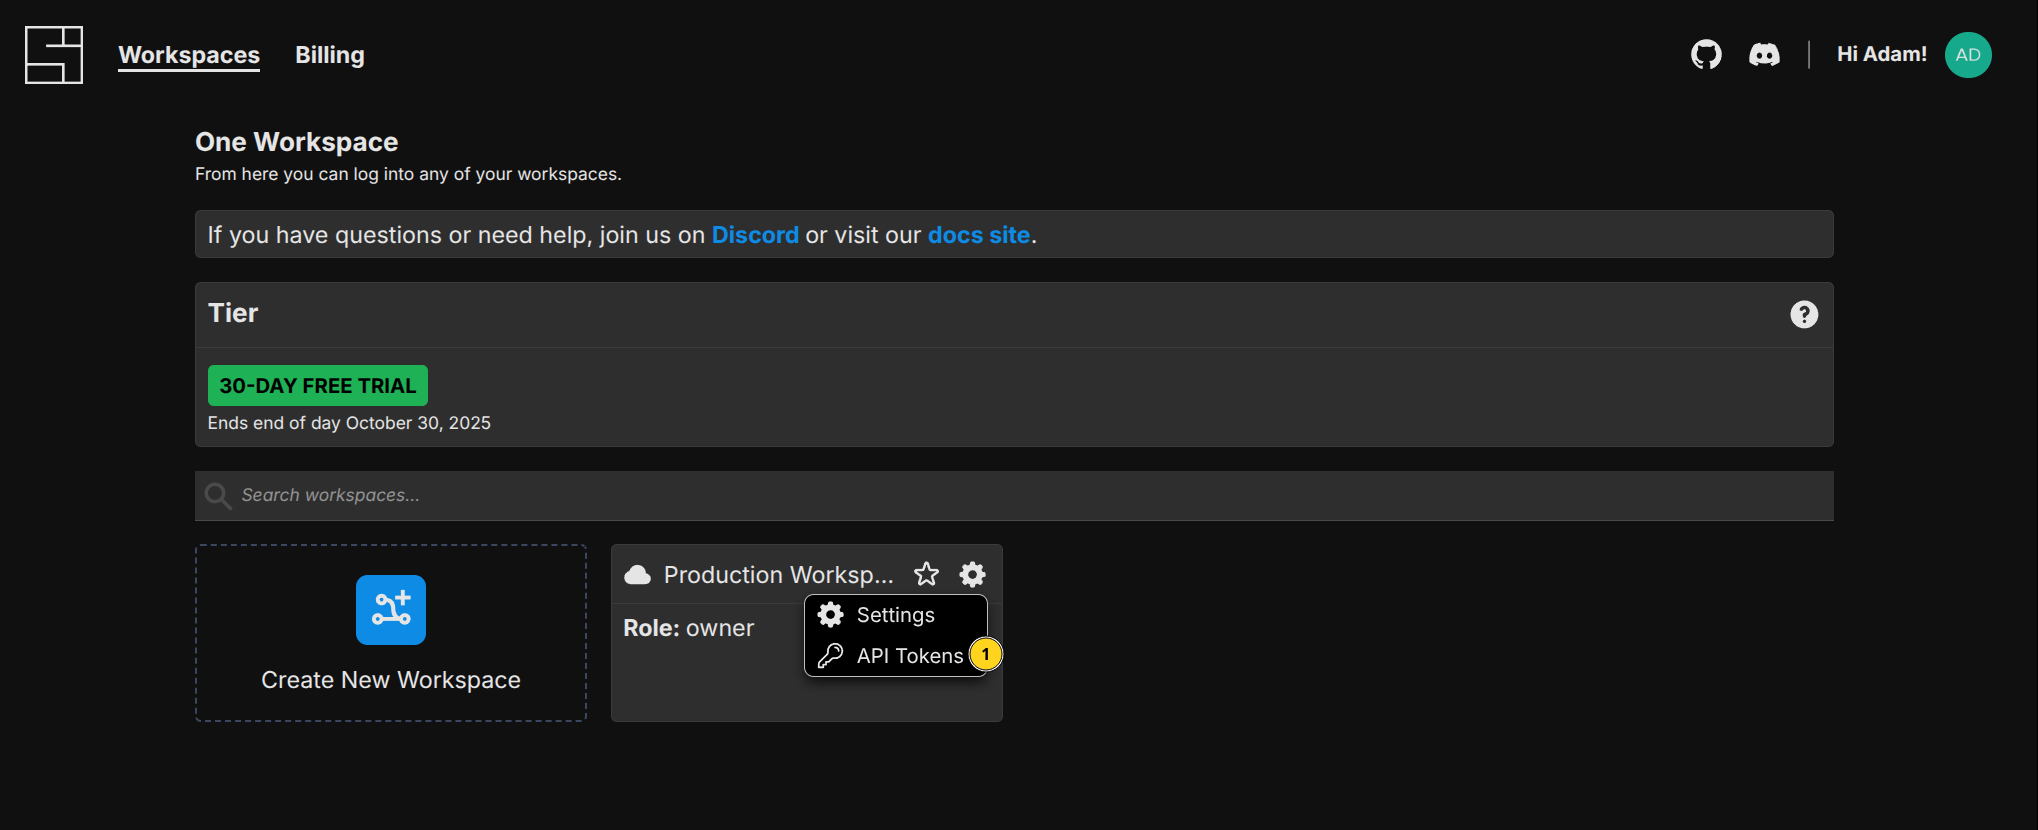
From the Workspace Management screen, through the 'Gear' icon and selecting 'API Tokens':
Or from the Workspace Settings screen by clicking the 'Key' icon:
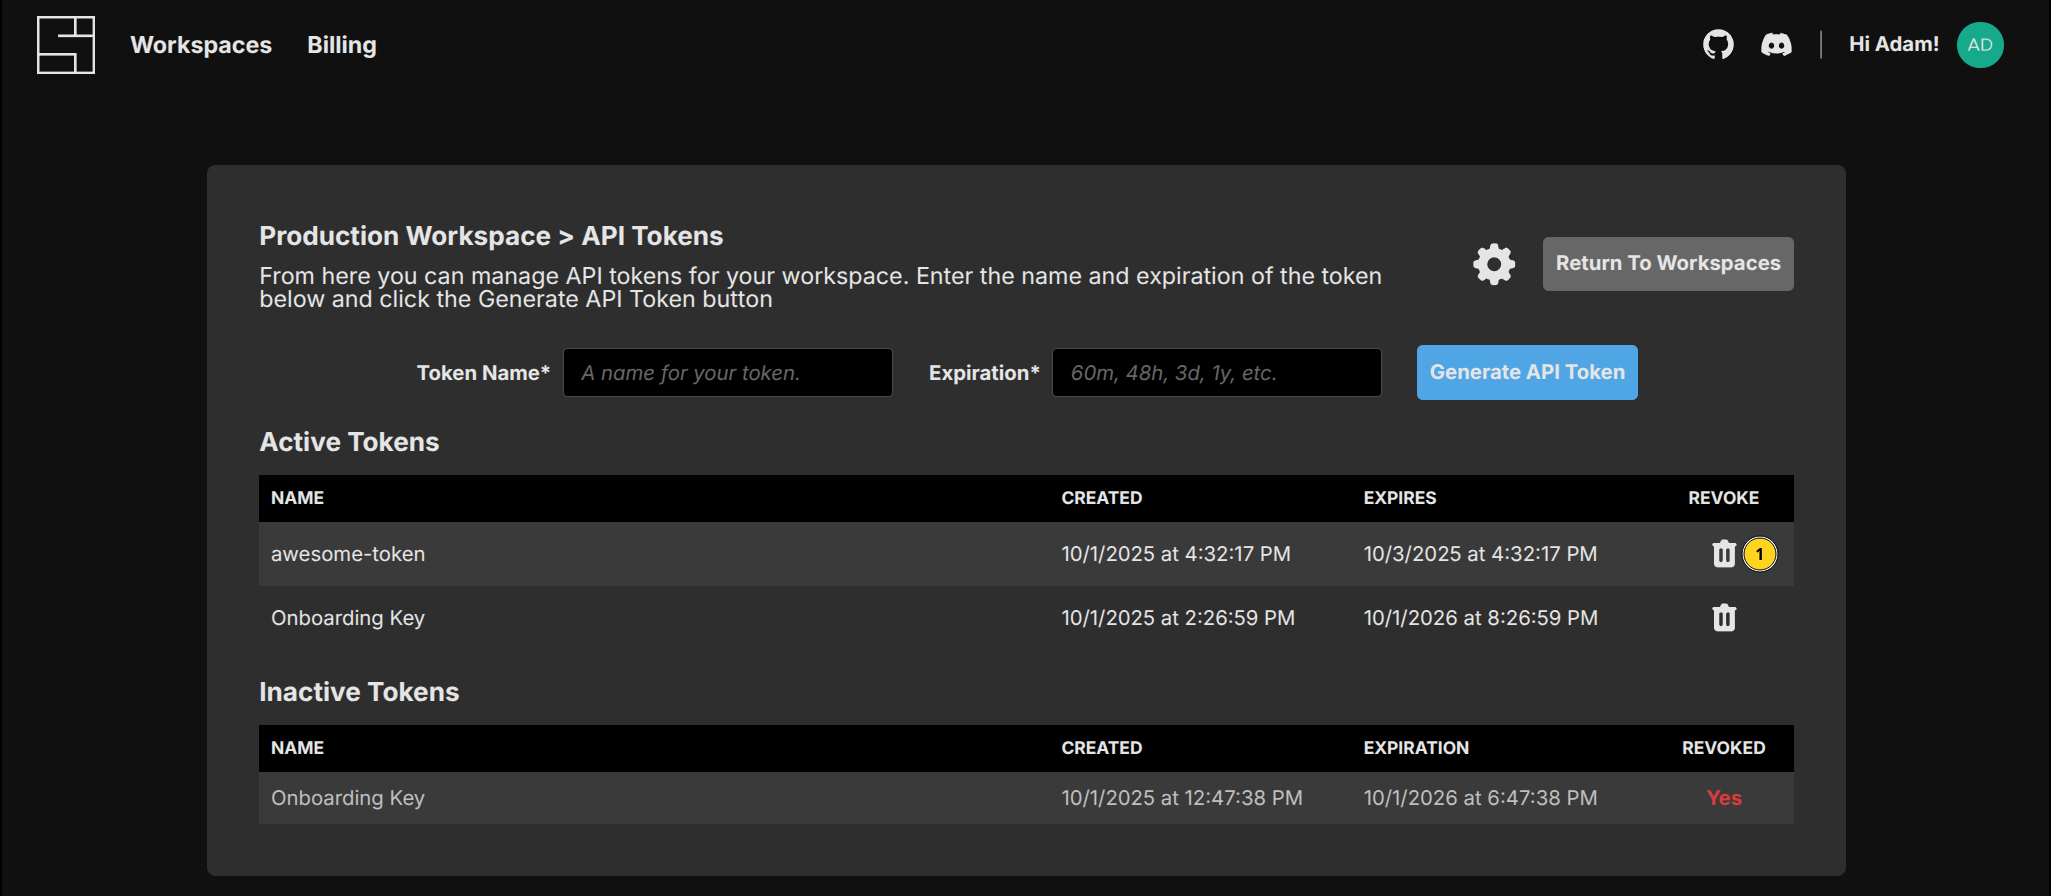
Each option will lead you to the API Tokens management screen:
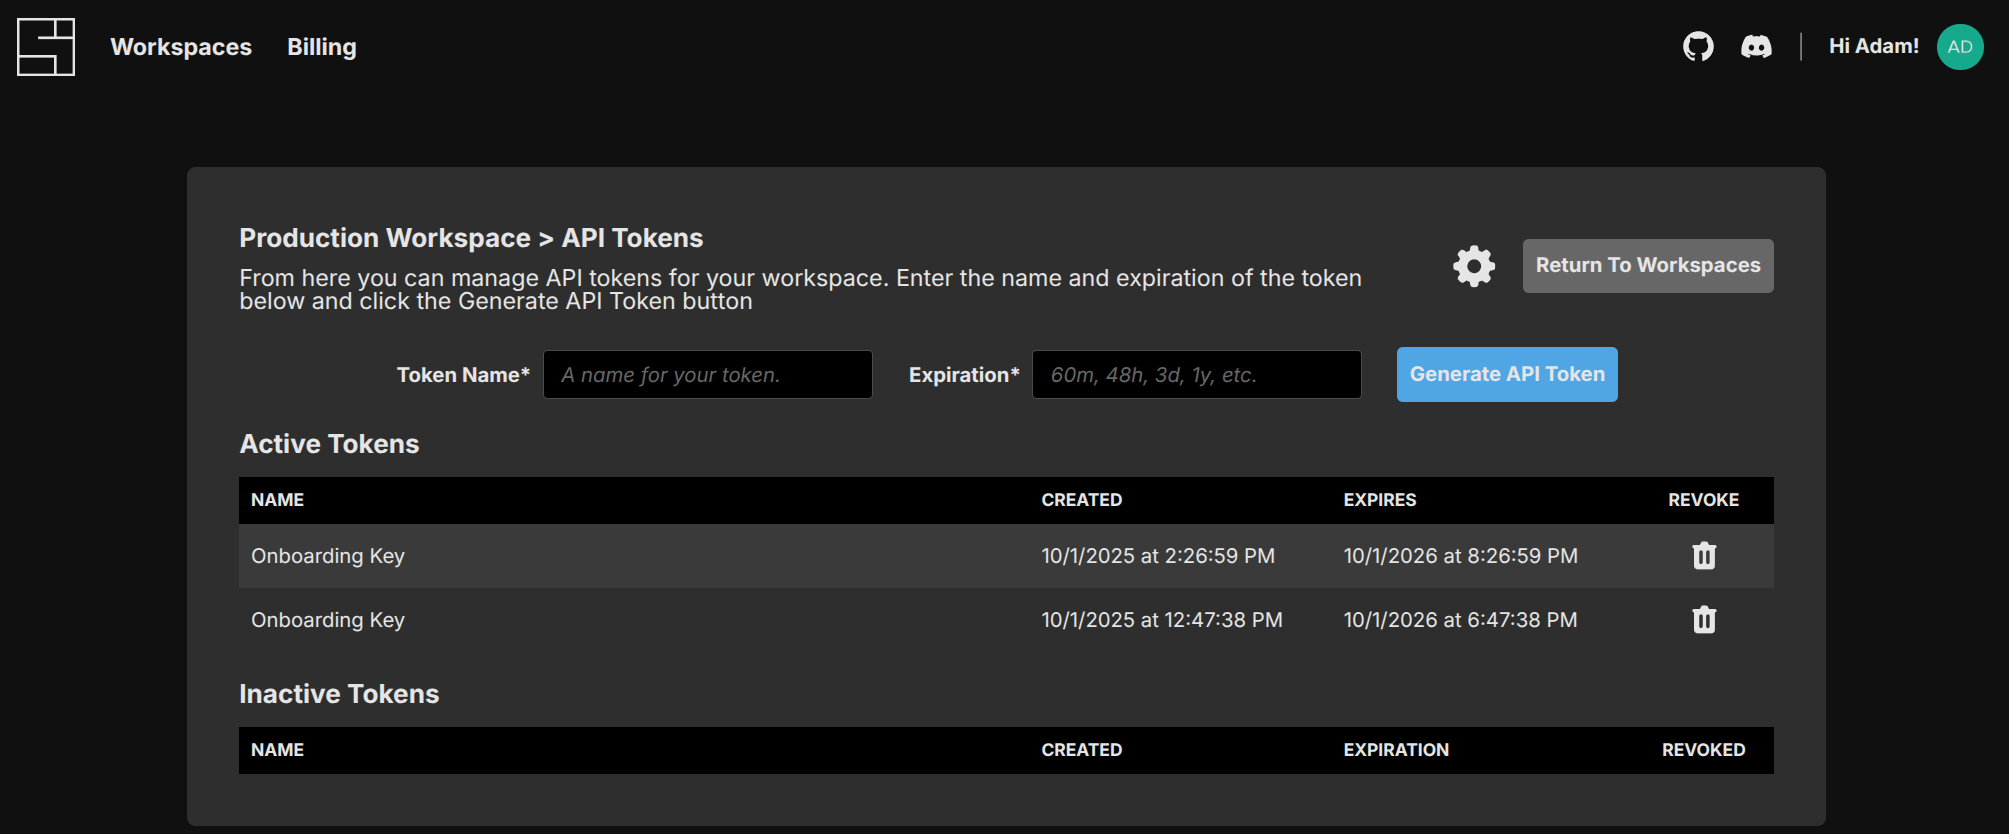
Generate API Token
To generate a new API token, provide a token name and a suitable expiration, such as '1y' or '48h'.
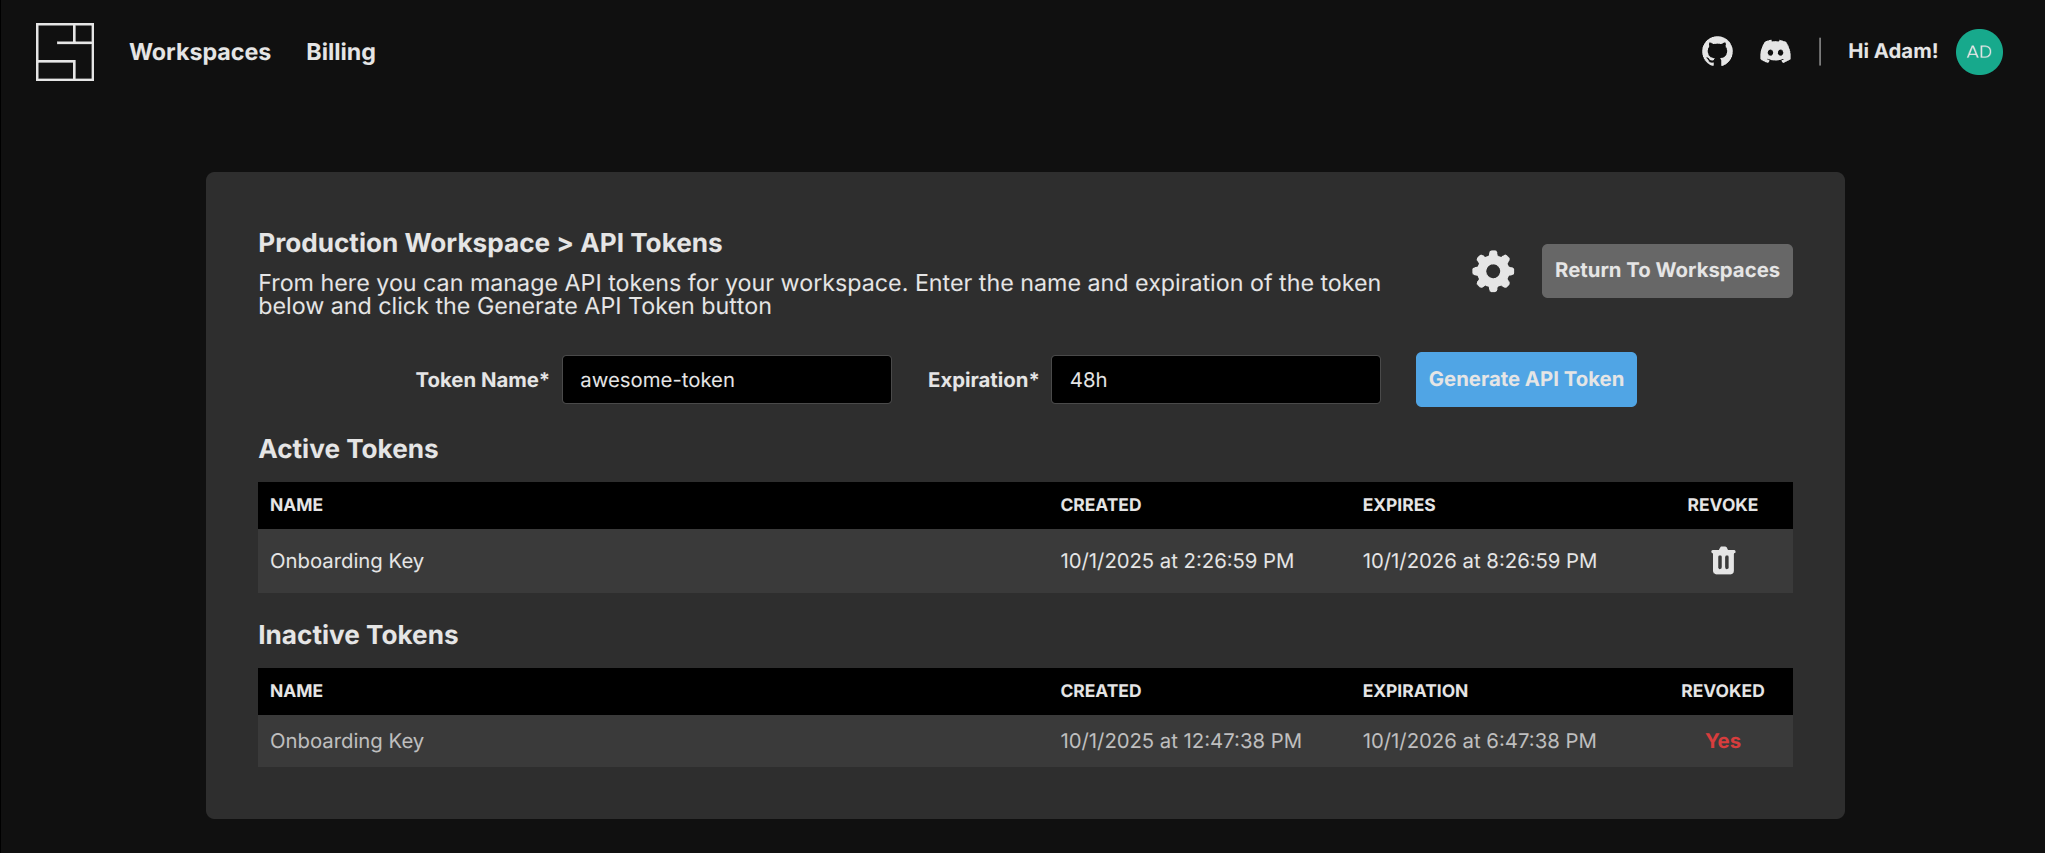
Then click the 'Generate API Token' button. The token will then be shown only one time in a modal. Copy the token and store it somewhere safe - it gives you access to your System Initiative workspace!
It will then appear in the 'Active Tokens' list.
Revoking an API Token
While API Tokens cannot be retrieved, they can be revoked. To revoke an API token, click the 'Trash' icon next to the token you wish to revoke. It will then be moved to the 'Inactive Tokens' list.